TrueNAS has gained traction in the self-host and homelab communities for several reasons. One primary reason is that it’s free and Open-Source. Another huge reason is that, from the start, it is pretty easy to set up and has an inviting-looking interface. For people just getting into the hobby or wanting something to work on, CLI interfaces can be daunting, and selecting the correct parameters can be confusing. So, to help you get started, we decided to make a quick setup guide to demonstrate how to set up SMB and iSCSI shares with ACLs.
TrueNAS has gained traction in the self-host and homelab communities for several reasons. One primary reason is that it’s free and Open-Source. Another huge reason is that, from the start, it is pretty easy to set up and has an inviting-looking interface. For people just getting into the hobby or wanting something to work on, CLI interfaces can be daunting, and selecting the correct parameters can be confusing. So, to help you get started, we decided to make a quick setup guide to demonstrate how to set up SMB and iSCSI shares with ACLs.
TrueNAS can be run on a lot of hardware, but it’s still important to verify the hardware you select will work. You can check out the TrueNAS Scale Hardware Guide for details on the hardware compatibility. On the storage side, one main thing to ensure is that you have multiple drives of the same capacity to create a pool. Though it may be possible to mix and match drives, it likely will bring a lot more headaches than it is worth. Other than that, this TrueNAS usually isn’t too picky.
Installation
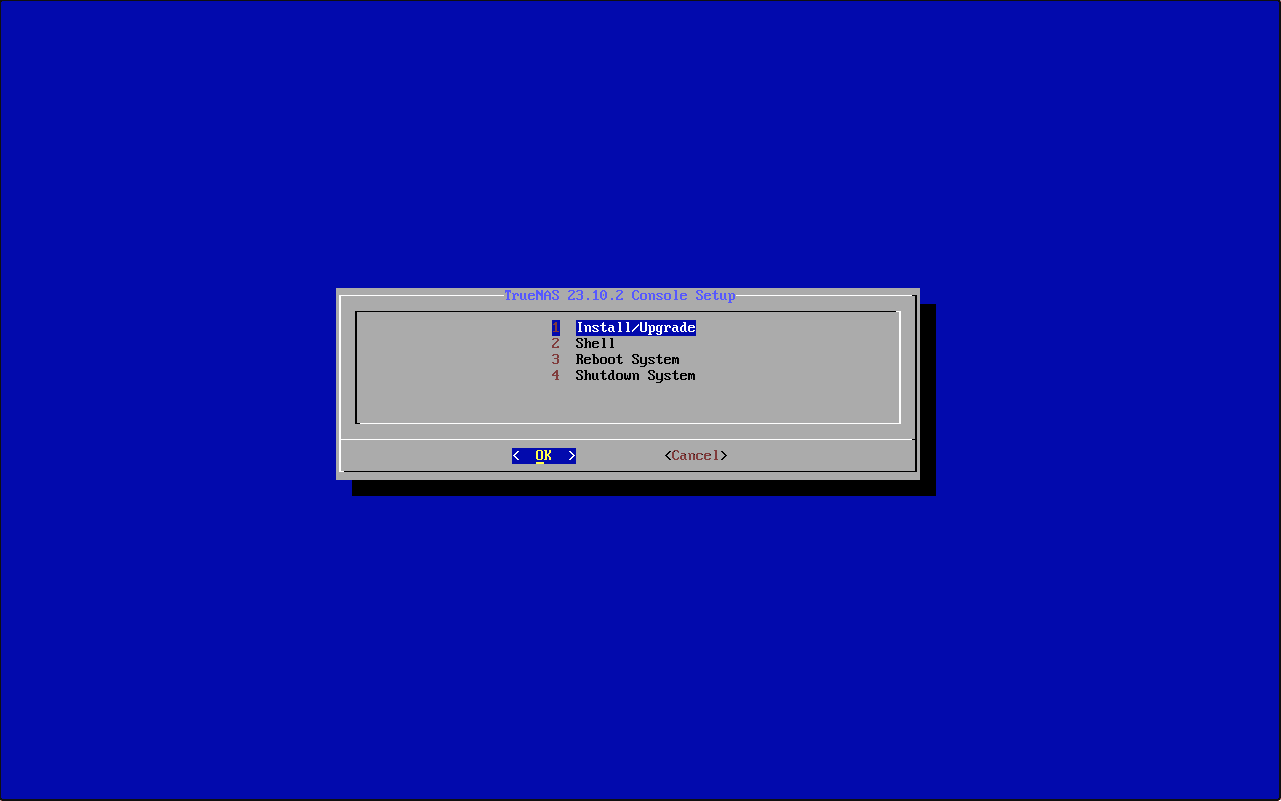
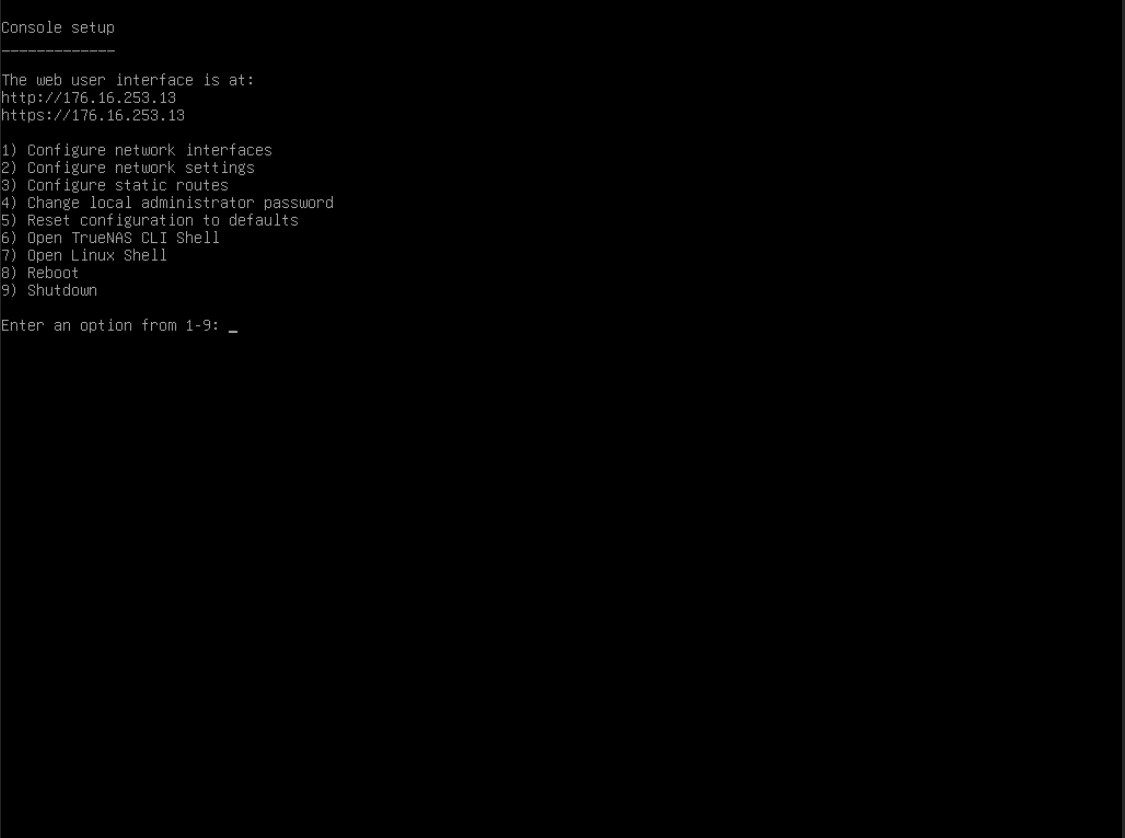
The overall installation for TrueNAS Scale is very straightforward. Most of the actual setup is done through the web interface after installation. Once you boot to your TrueNAS installer, you hit the GRUB bootloader with the option to start the installation, which will automatically advance to the console setup menu.

On the initial menu, select the Install/Upgrade option and click OK.
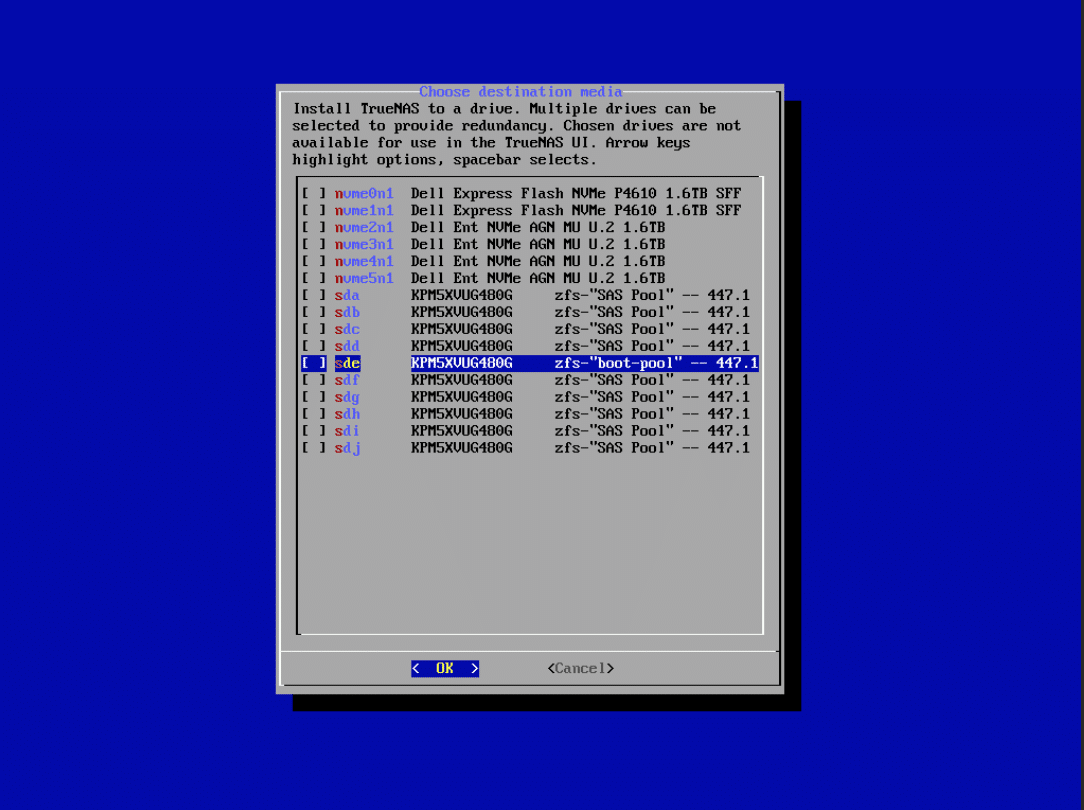
The next screen will vary depending on the actual setup. Select the drive for the TrueNAS installation. Use the arrow keys to scroll to highlight the preferred drive and hit space. Our screenshot looks a little different because these drives were previously used in a TrueNAS setup and assigned to pools. Typically, you will only see the available drive names, addresses, and capacities listed. Select the desired boot drive and click OK.
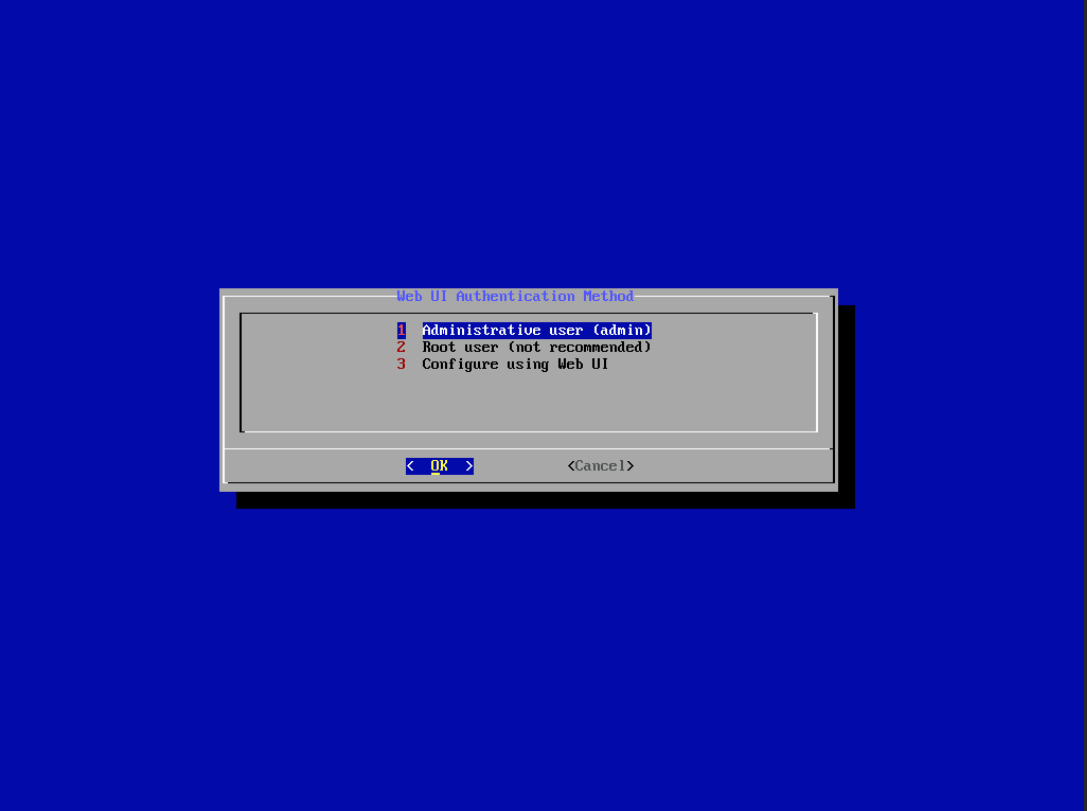
It’s important to set up an Administrative user account, and TrueNAS provides two good options. Selecting option 1 will create an admin password in the console. Choosing option 3 requires the user to create the admin password upon first logging into the web interface. Either option is acceptable here and is up to personal preference. Option 2 is not a good option! After making your choice, click OK.
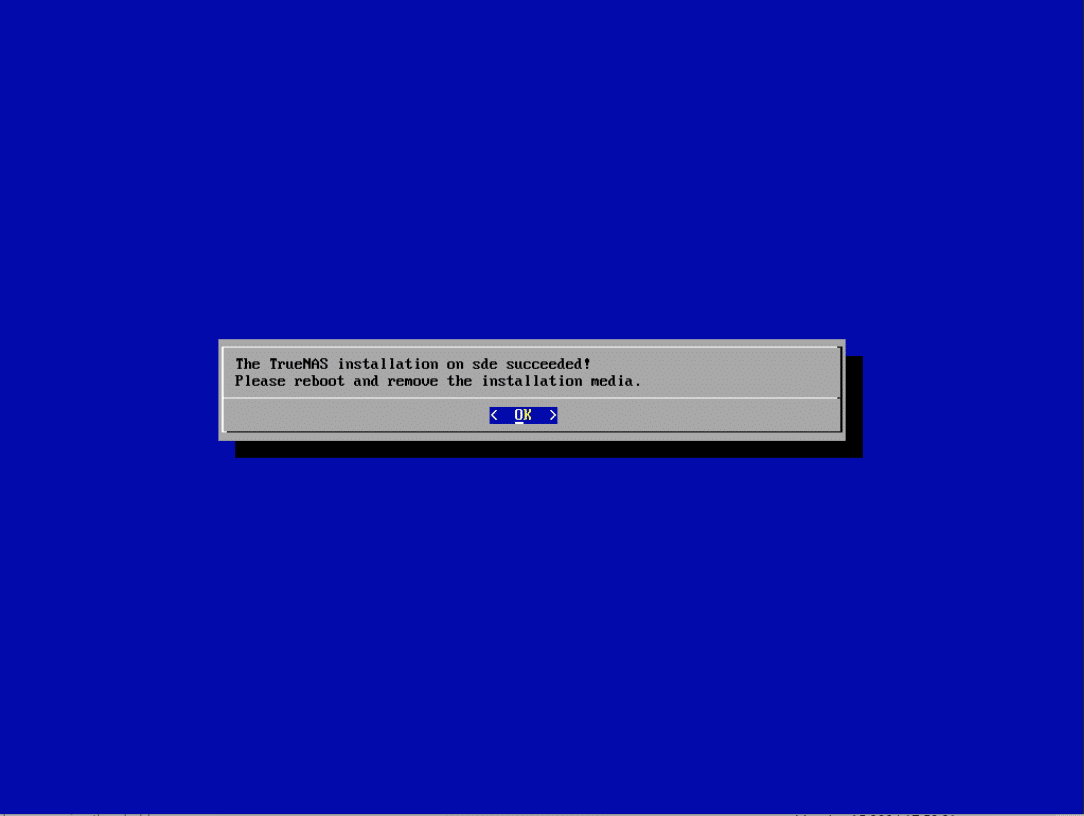
The installer will go through all of its steps, and when completed, you will be presented with the installation successful message. Remove your installation media and click OK to go to the next screen.
Congratulations! If you see this screen, it means TrueNAS has been installed. From here, you will not see much on the local console. Move to a network-attached machine and use the web interface. Typically, unless things go south, it won’t be necessary to view this interface again, and you can run your TrueNAS box completely headless.
TrueNAS Scale Configuration
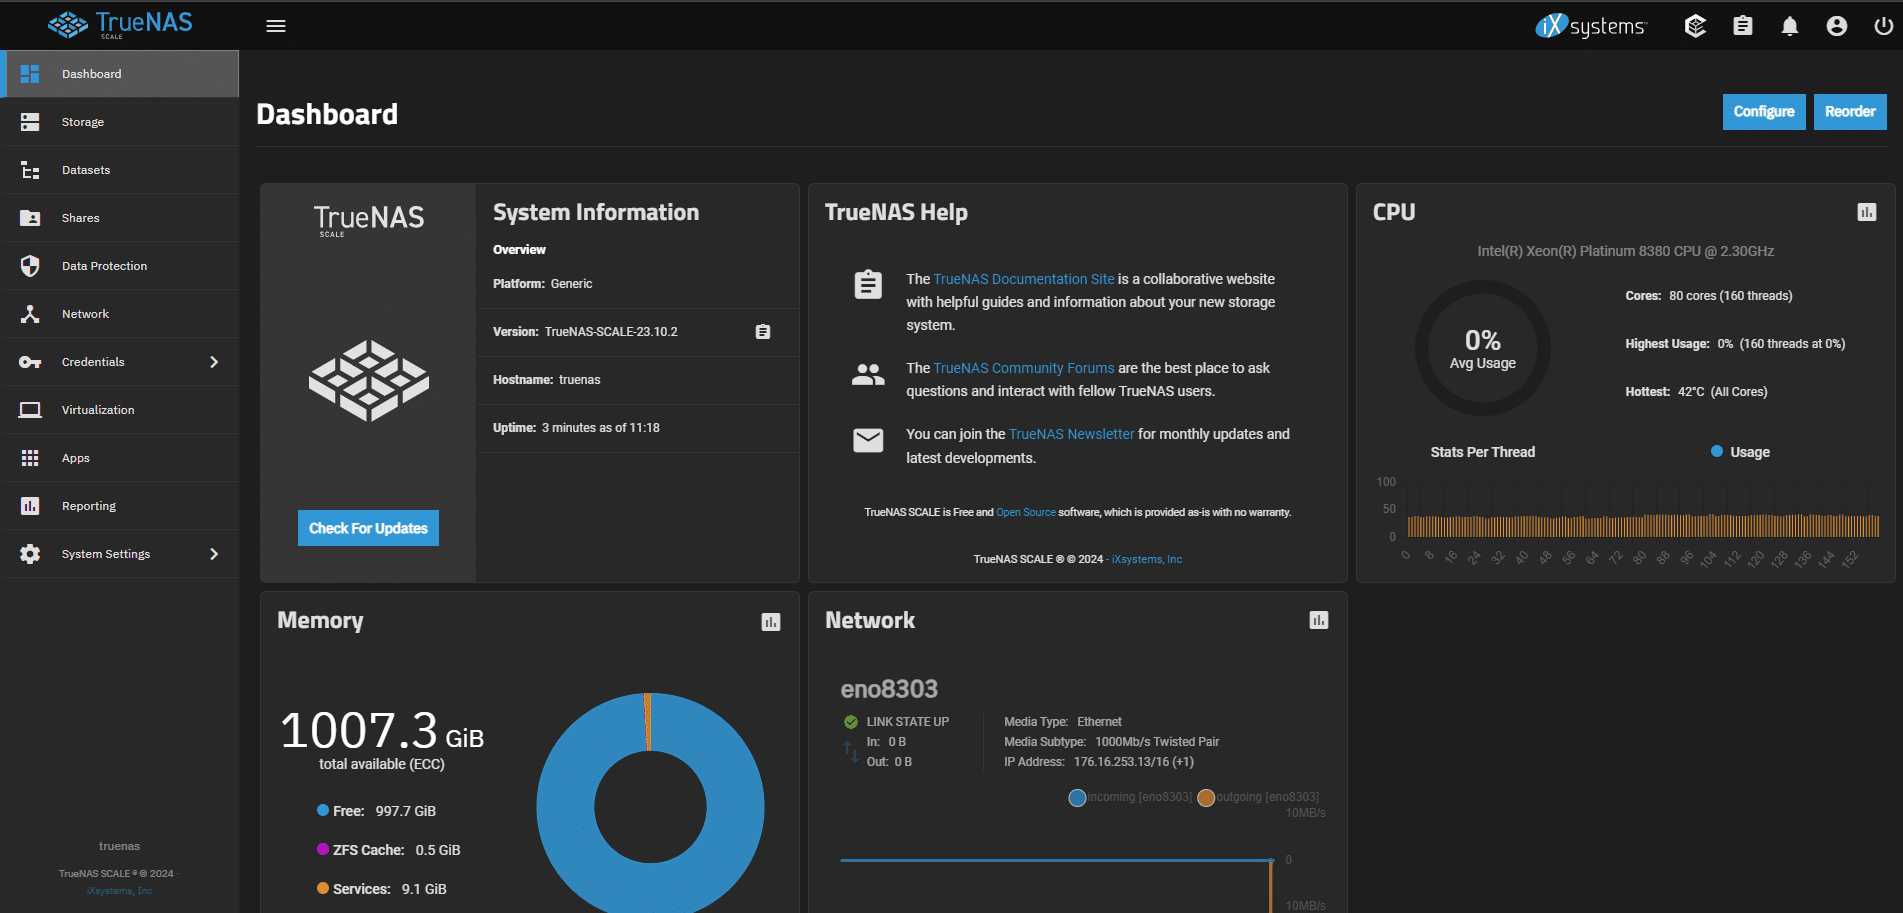
Navigate to the web interface at the IP address listed in the console. Once you enter the IP address on the networked machine, the login screen is displayed. You will either set up the admin password or enter admin and the password you previously configured. Then, you will be met with the landing screen.
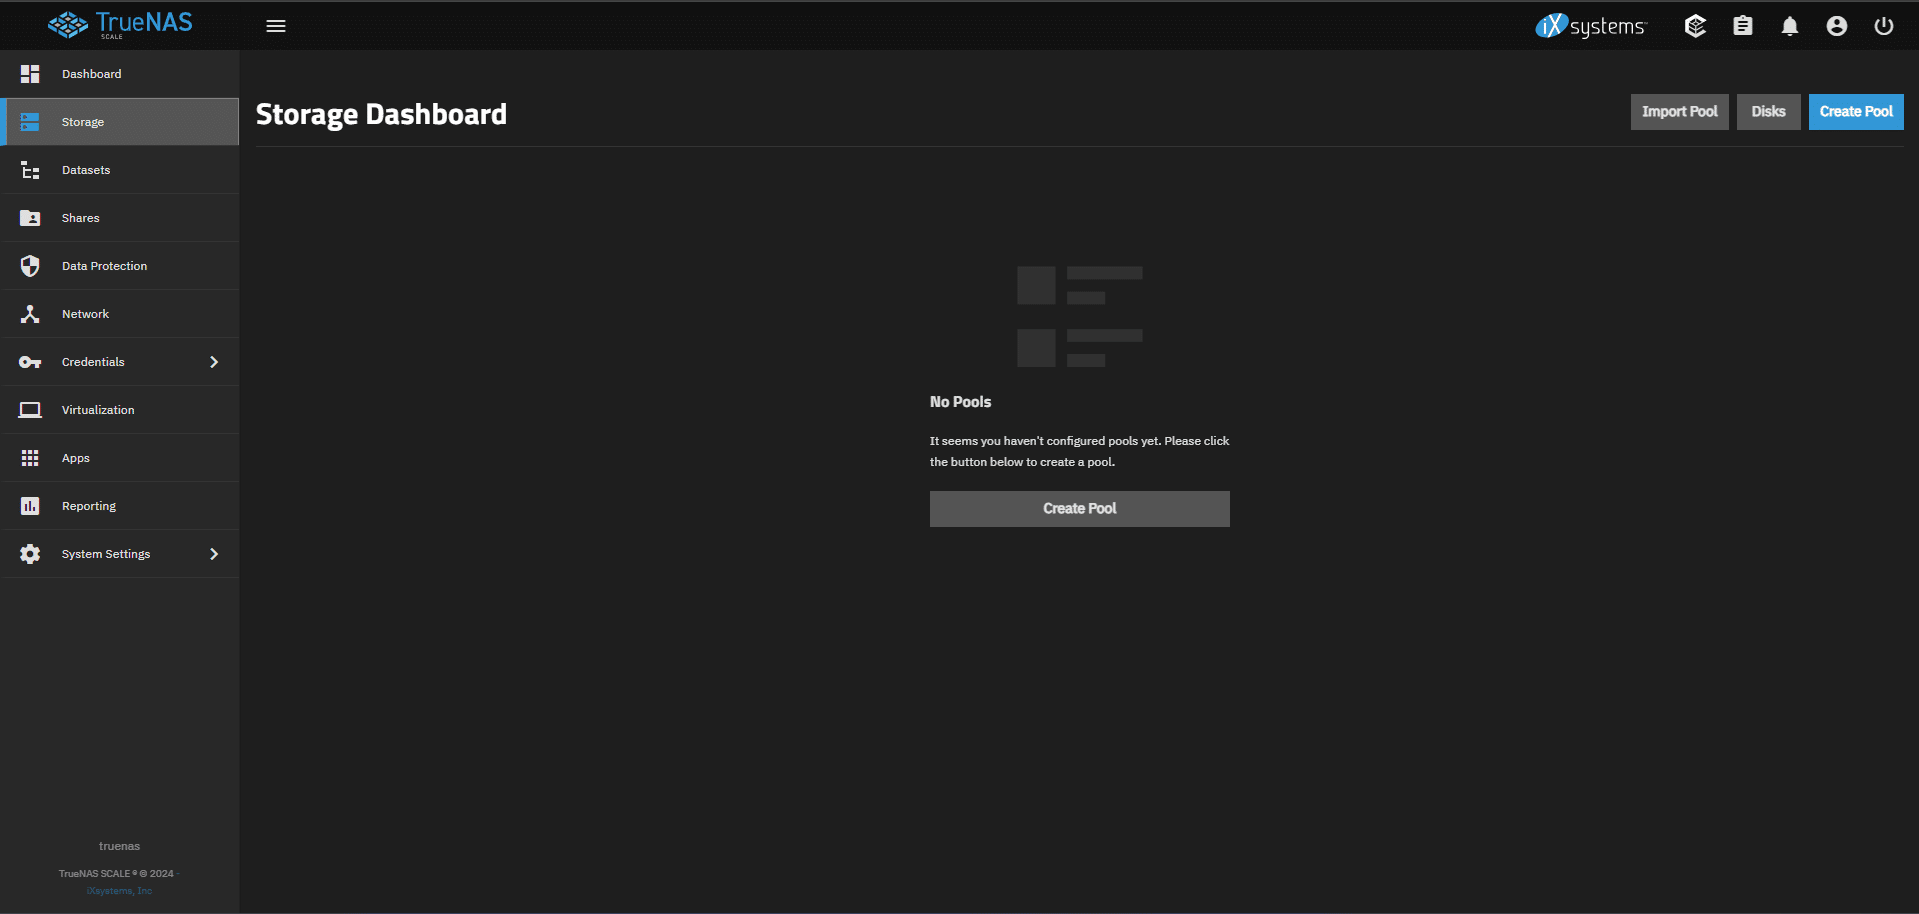
You have TrueNAS installed, but it needs further configuration to function properly as a NAS. To start, navigate to the Storage tab in the sidebar on the left. First, we need to create a pool, so let’s click Create Pool.
TrueNAS Scale Pool Creation
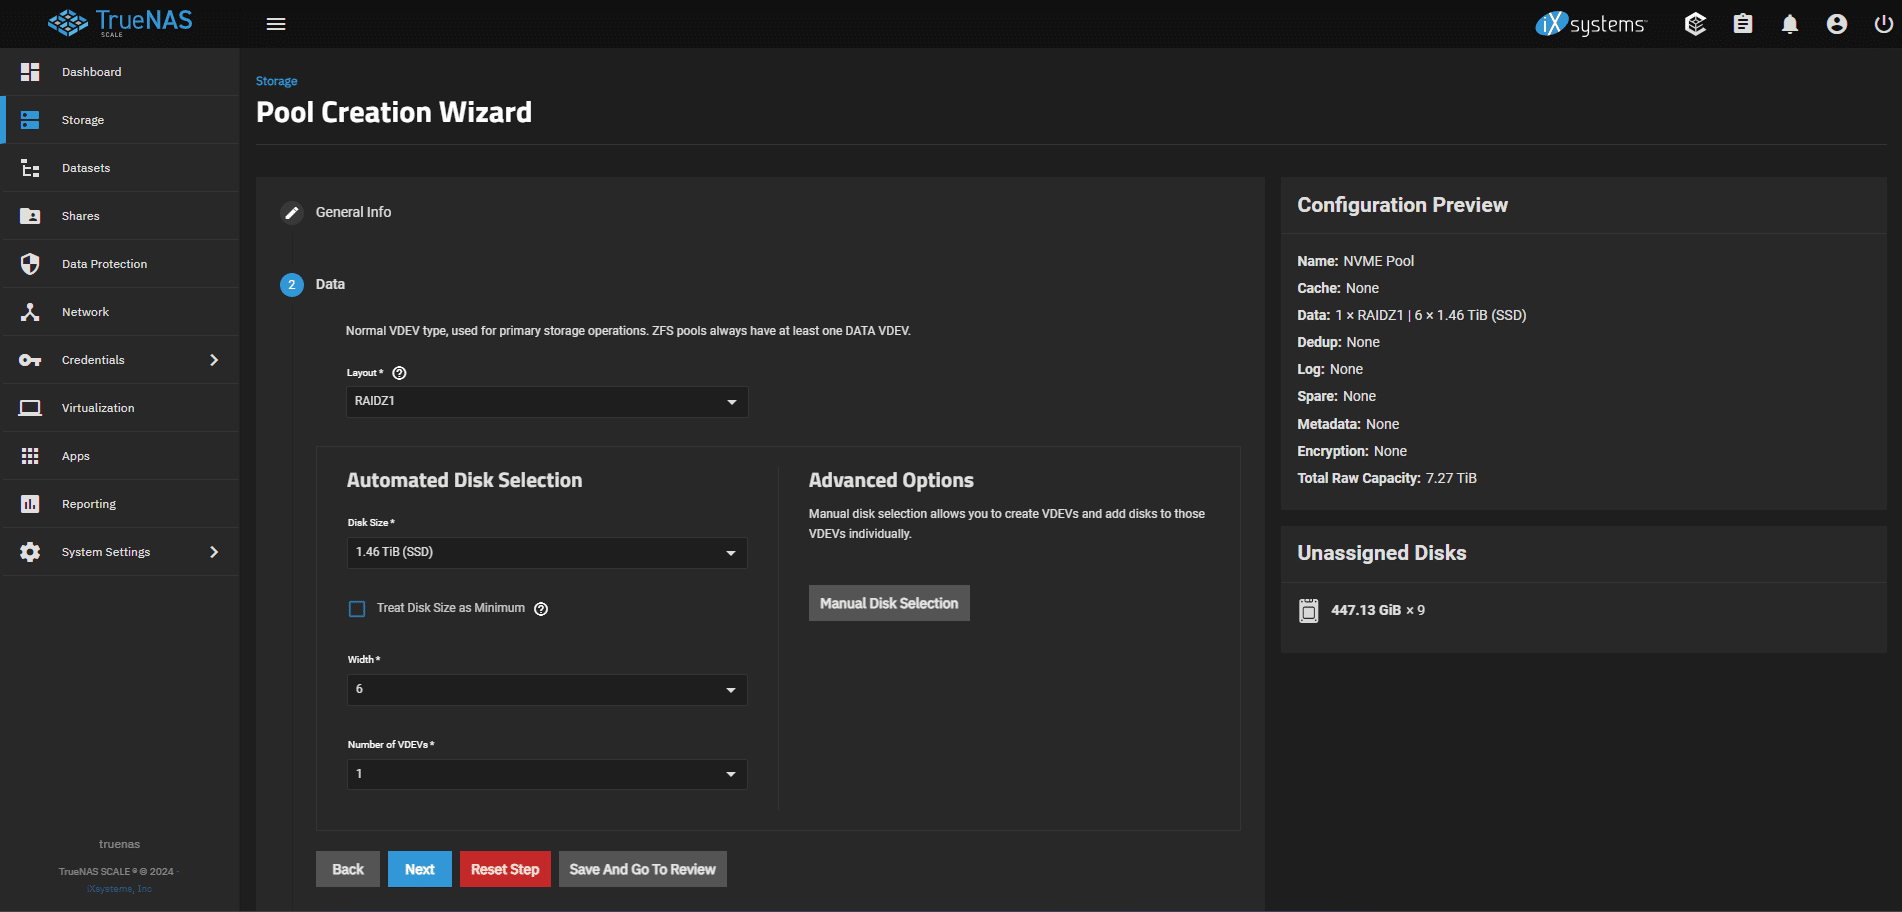
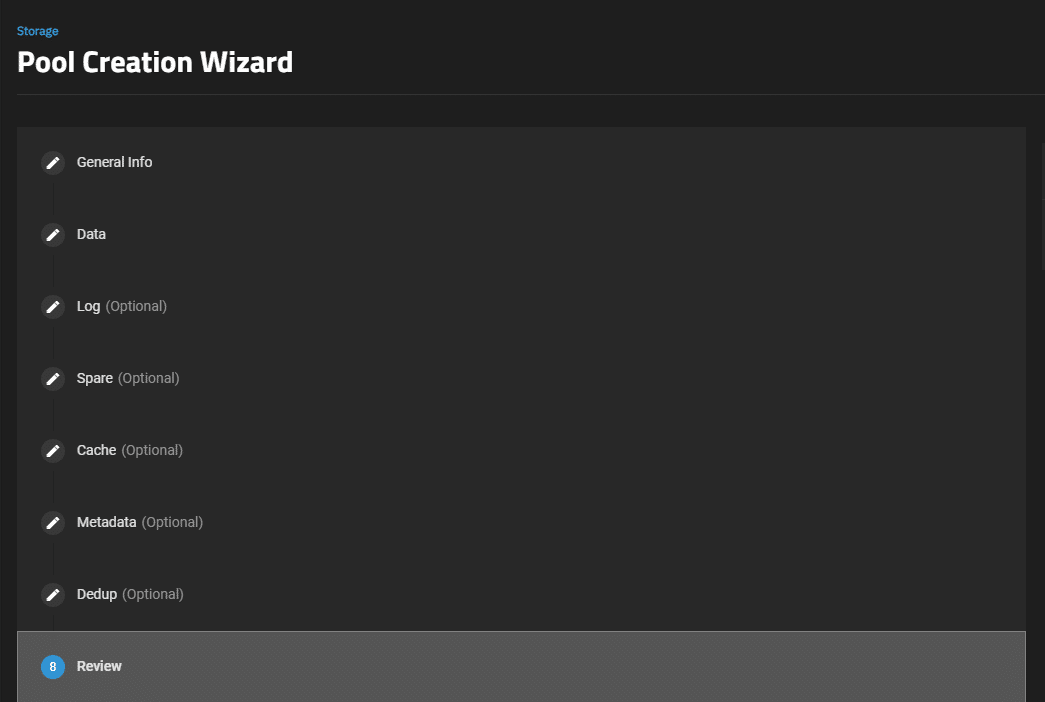
Creating a drive pool is the first thing to make this space usable. Typically, you want several drives with the same capacity for this to avoid headaches. We have six 1.6 TB NVMe SSDs and nine 480GB SAS SSDs so that we will set those up as two separate pools. For simplicity’s sake, we split them into NVMe Pool and SAS Pool and put them in ZFS RAIDZ1, striping with a single spare drive. For setups with more than six drives or larger than 2 TB each, it is probably wise to use RAIDZ2 for the second spare. This helps reduce the risks of data loss if you get another failure while trying to rebuild the pool from the first failure. ZFS RAIDZ is a quick and easy way to get NVMe SSDs grouped together and online.
That’s it for creating your pool unless you want to explore other options like caching and spares. Although not critical to bog-standard NAS setups, you can save your work and go to the review page.
User Creation
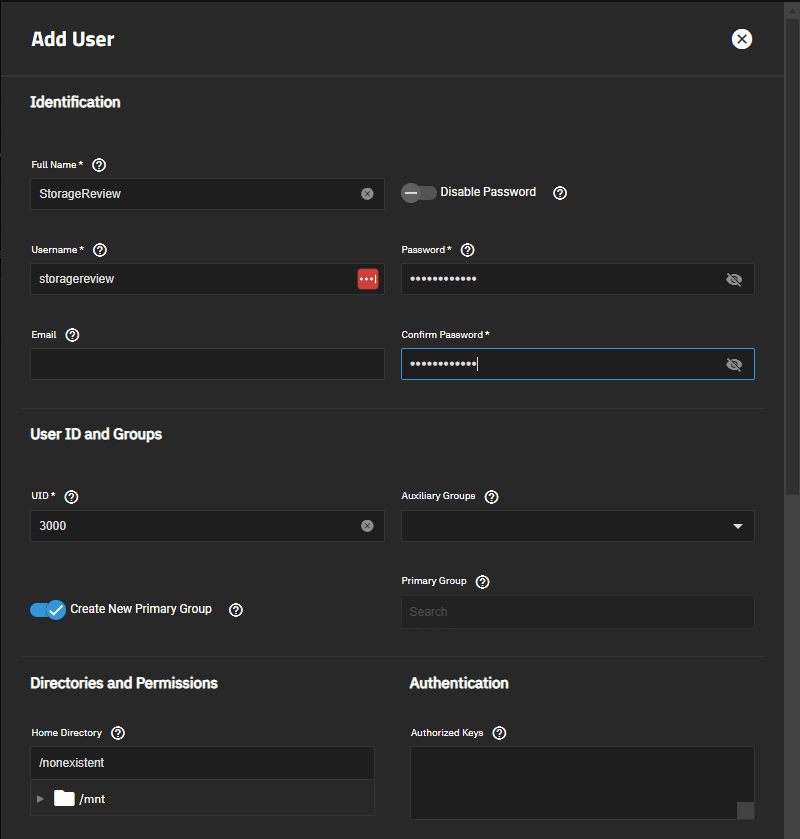
Now, let’s create user accounts so the Admin account is not used to access the storage. This lets us set up permissions for other users and give users shared or separate storage. You can also set up permissions by groups to simplify users’ access to the same storage.
Navigate to the credentials tab on the left and select local users. You can choose Add User at the top right and enter the user information directly. We will not be doing anything with the Home Directory settings in this guide, although there are useful options. The ability to authenticate via LDAP and Active Directory is beyond the scope of this guide, so that will not be addressed here. However, these options allow you to authenticate through existing accounts without requiring users to have a dedicated account to TrueNAS.
For information on Home Shares, you can check out the TrueNAS documentation here.
Datasets and Shares
Once the user accounts and groups are created, you can set up user-accessible storage and utilize your NAS. You can choose between iSCSI and SMB for this, but SMB is your best bet for sharing with multiple users. We will cover the setup of both here.
SMB Setup
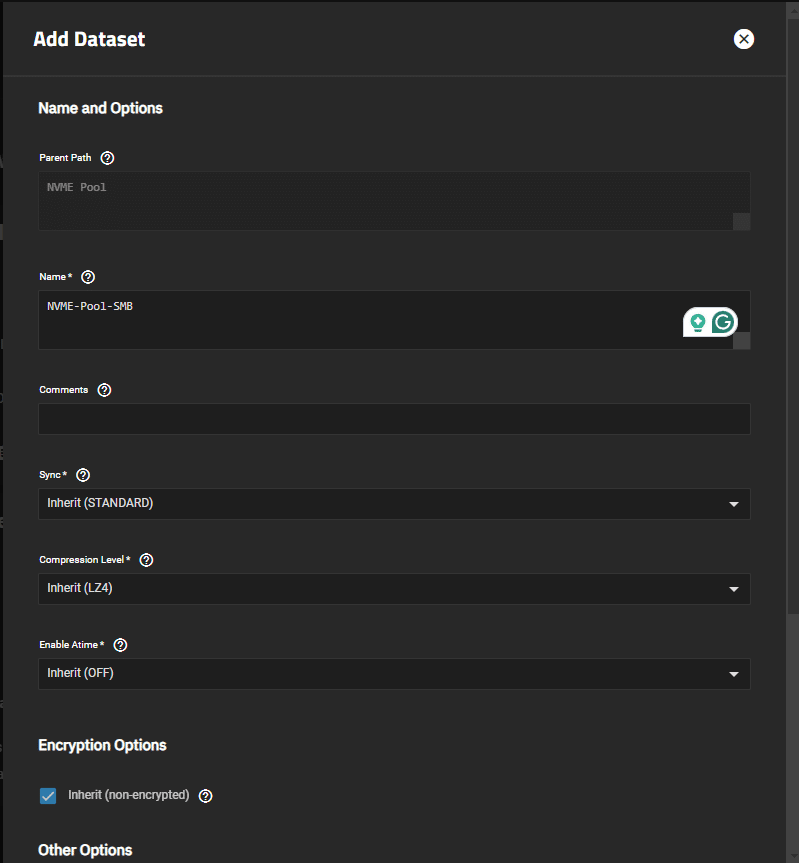
To set up SMB, we need to start by creating a dataset. To do this, navigate to the Datasets tab on the left side, click the pool you want to be the parent, and then hit the Add Dataset button at the top right. Here, you can give it a name, change compression and encryption settings, and set the share type.
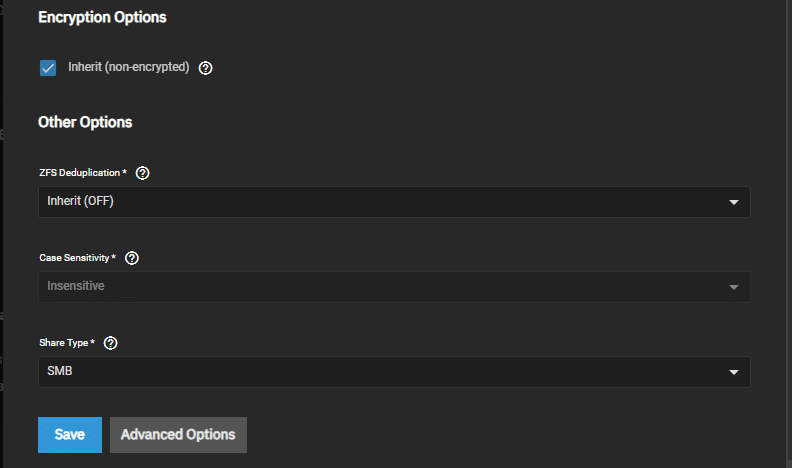
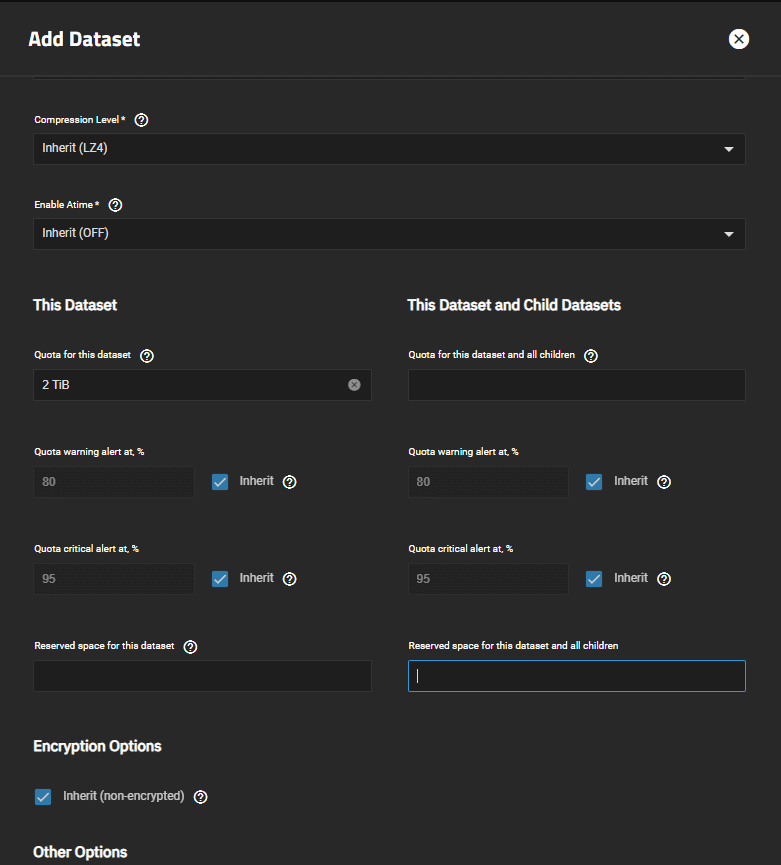
Since we are setting up an SMB share, we want to make sure the dataset is configured properly. Just use the dropdown menu to select SMB in the Share Type field. We can save to allow the SMB share to take up the entire pool, but to split the pool up, we need to move to advanced options.
Now that we are in the advanced options, we can change the dataset size by just entering the desired capacity in the quota field. Unless you need to change some more options, we have created the dataset and can move on.
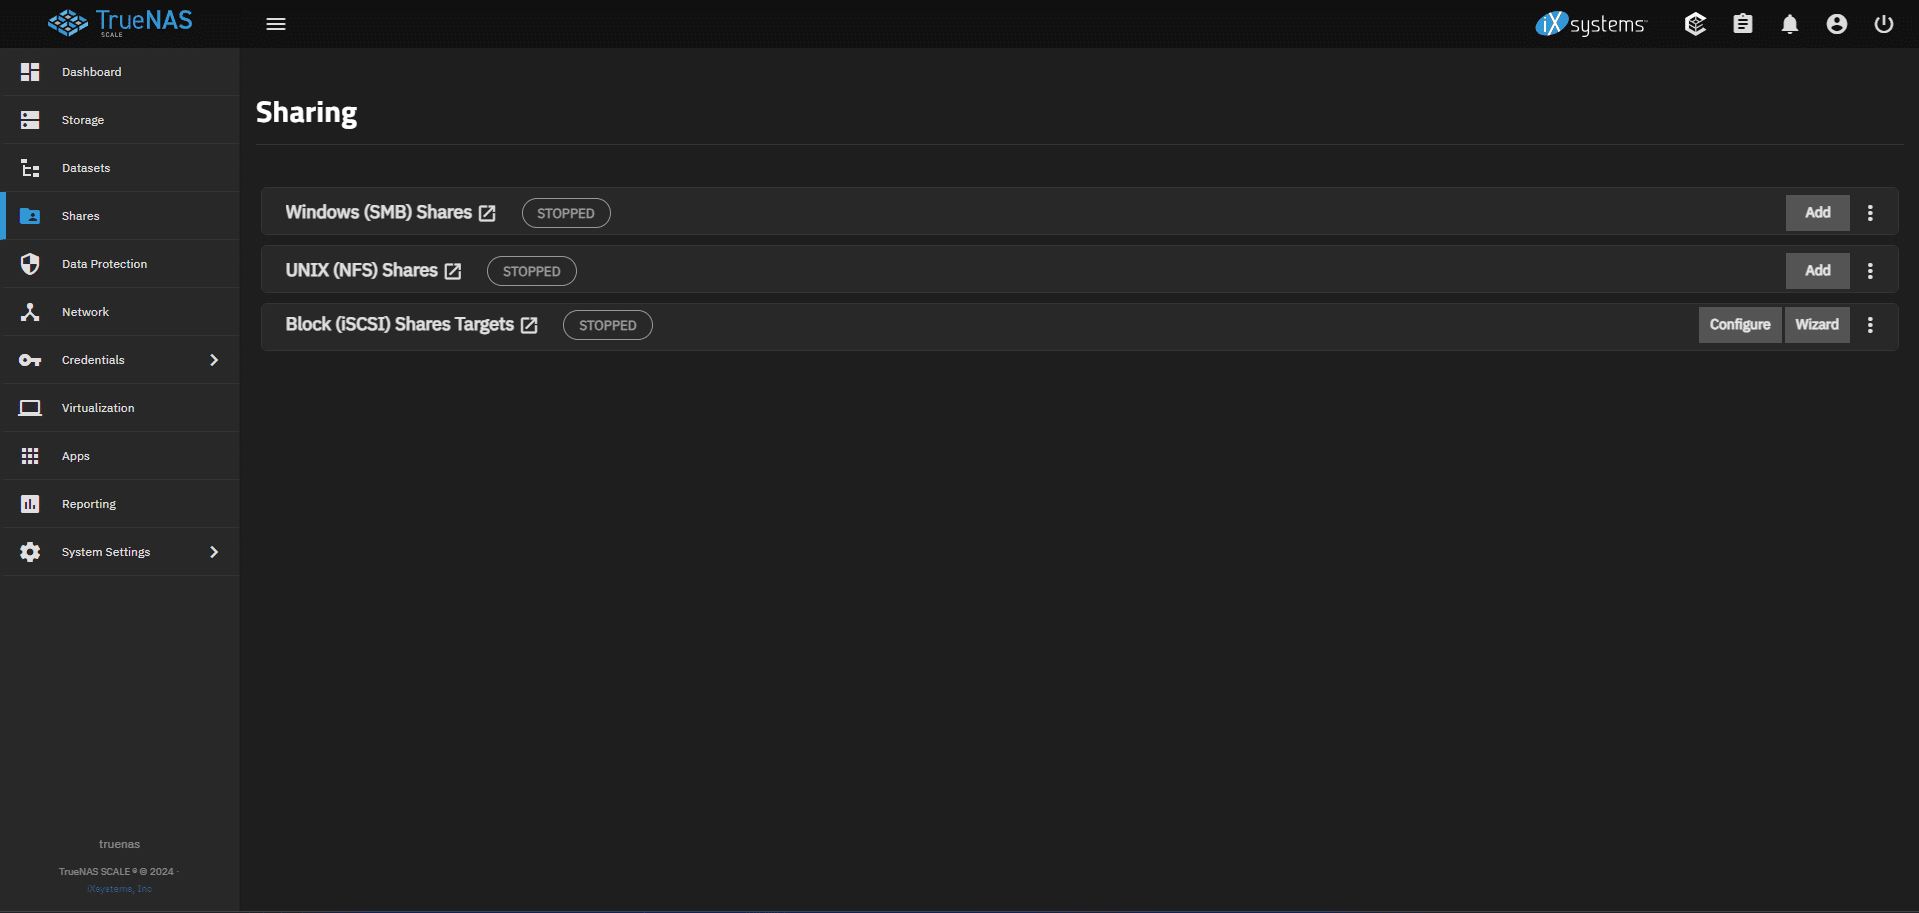
Now that these foundational parts are out of the way, we can set up the actual SMB share for use. Navigate to the Shares tab In the sidebar, find SMB shares, and select add.
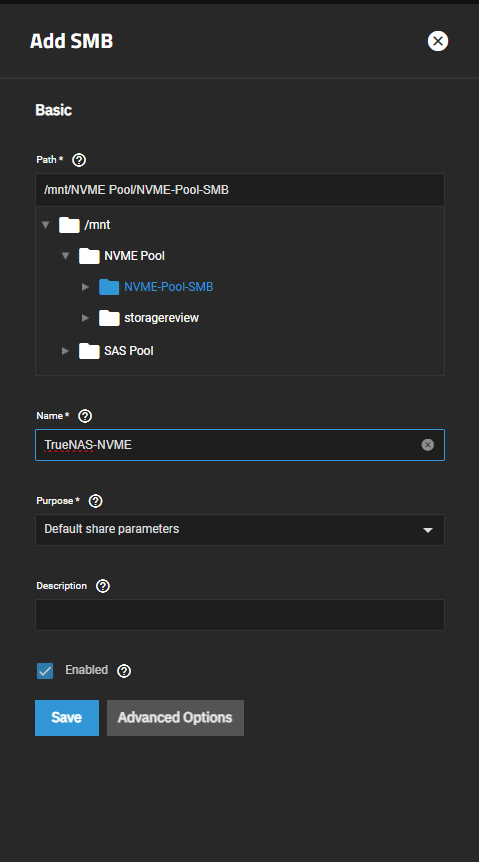
We need to use the Path option to select the dataset created earlier and make it available for sharing. Next, add a name that will display once the SMB service is accessed. The Purpose option can be set up for multiple uses, but for normal file storage, the default share parameters will work.
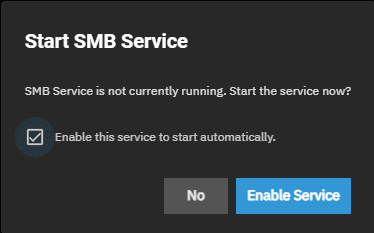
After setting up the SMB share and clicking Save, you will see the popup to enable the SMB service. If you want the service to start automatically when TrueNAS starts, select the automatic start before enabling the service. If you change your mind later, you can also toggle the automatic start.
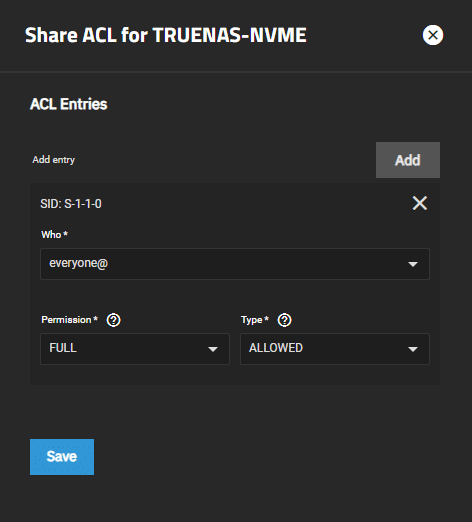
At this point, you should be able to see TrueNAS in the network section of the Windows file explorer, but depending on your preferences, there are a few additional steps. If it’s okay to provide all users with access to this share, as well as the default name, then you are finished. Otherwise, the rest is pretty simple. Just select the sharing icon next to the enabled switch on the share and edit the Access Control List (ACL). By default, the ACL gives everyone full permission. This may be okay if you are the sole user on the instance, but if not, you may want to get a little more granular.
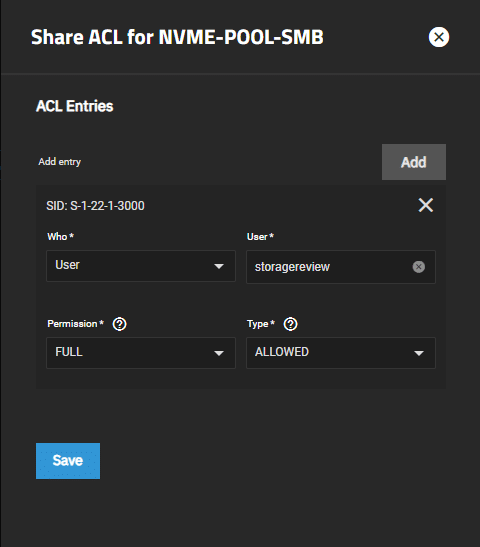
You can either add a specific deny rule to stop one user from accessing a pool or remove the “everyone@” entry and set it to allow only a single user, as we show in the screenshot below. This restricts access to the pool to only our storagereview user. You can add more users or even entire groups to this. There is also the ability to have view-only users and specific denied users.
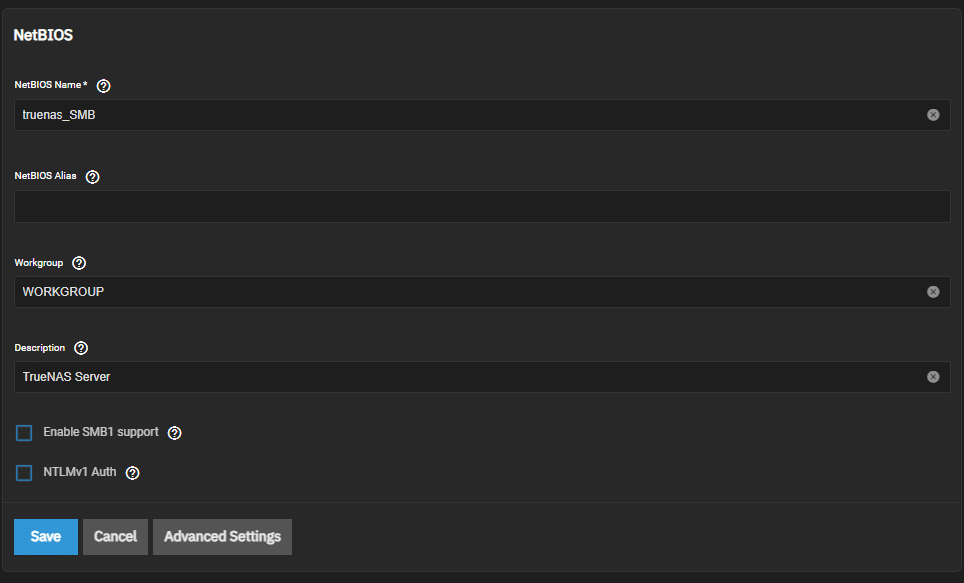
And finally, for SMB, the last step (though it is non-critical) is to change the service name. To do this, we open the kebab menu (or “three dots” menu) next to the add button and hit configure service. Here, we can just change the NetBIOS name to change how the SMB service appears to devices on the network.
After saving, we should see the name in the network tab in File Explorer on Windows.
From here, double-click on the name, and you should see an authentication window. Enter the credentials of the account you created and set in the ACL, and you should be able to see the shares that are allowed to that user. Congratulations! You now have a functional simple SMB share on TrueNAS.
If you would like the TrueNAS documentation for SMB setup, it can be found here.
iSCSI Setup
If you are interested in the iSCSI setup, you can stroll through this section. If not, skip past it.
iSCSI is a slightly different beast than SMB, and it will show up a little differently on Windows as well. iSCSI will mount like a local drive instead of a network share, but it is a little less fond of being used by multiple client machines at once. SMB is the better option for sharing with multiple client machines. Be prepared: The setup for iSCSI is pretty easy, but the mapping in Windows is a little more involved than SMB.
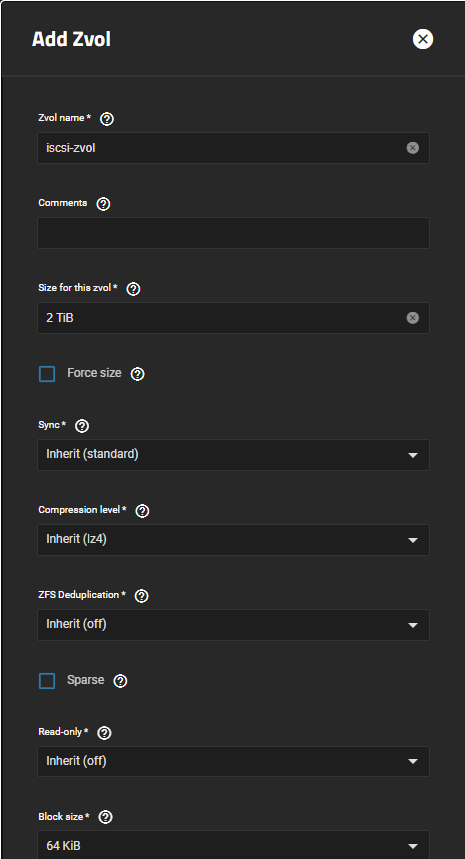
Before creating the actual share, we will need to create either a Dataset or Zvol to share. We will use a Zvol. We are creating a 2TB Zvol under our SAS pool. This is available under the Datasets tab.
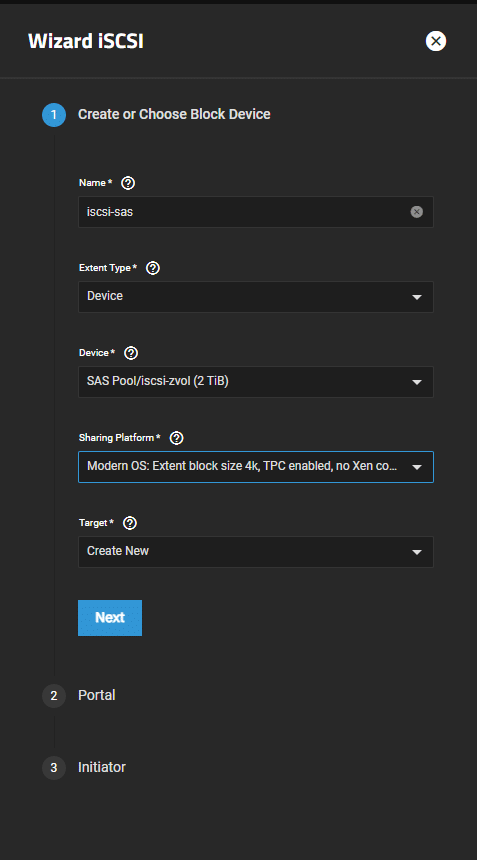
Next, we can go to the Shares tab and hit the wizard button on iSCSI. For simplicity’s sake, we are calling this share “iscsi-sas,” selecting the Zvol as our device, and changing the sharing platform to Modern OS. Since this is our first iSCSI share, we need to create a target and portal.
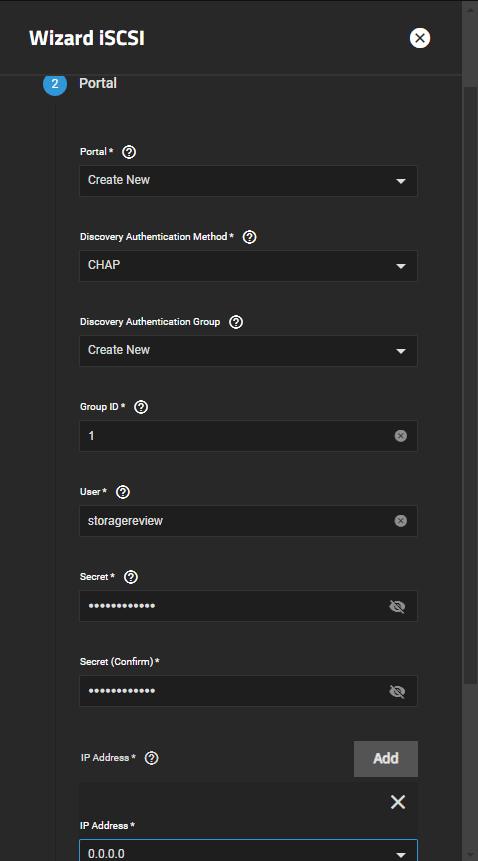
These are the settings under the portal we are using for iSCSI. The user is also set up here. After this, we can skip the initiator and move on.
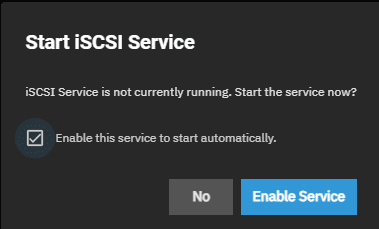
After saving, we will be prompted to start iSCSI just like we did with SMB.
You would think we are finished here, and we are on the TrueNAS side, but now it is time to go down the Windows side. The machine used in this setup is running Windows 11; views on other OSes may look different.
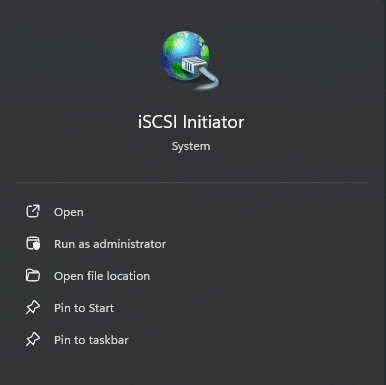
We start by finding and opening the iSCSI initiator.
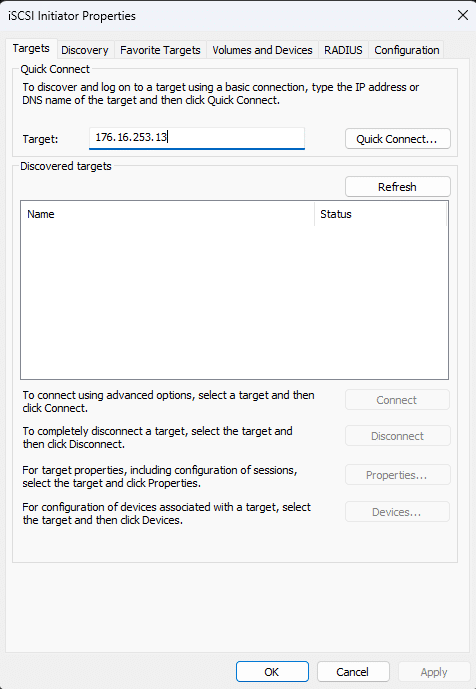
In the iSCSI initiator, enter your TrueNAS IP Address into the target box and hit quick connect.
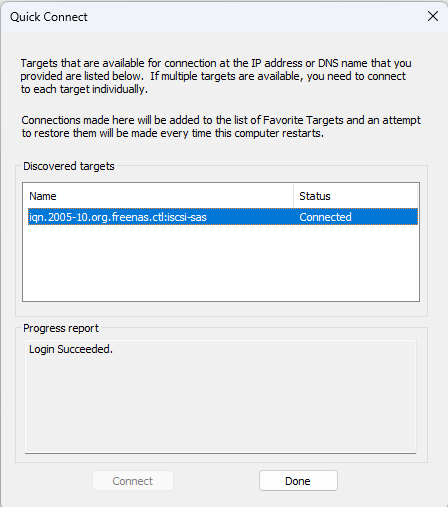
A popup for the quick connect with the discovered target will be displayed. If your status says Connected, then you can hit Done.
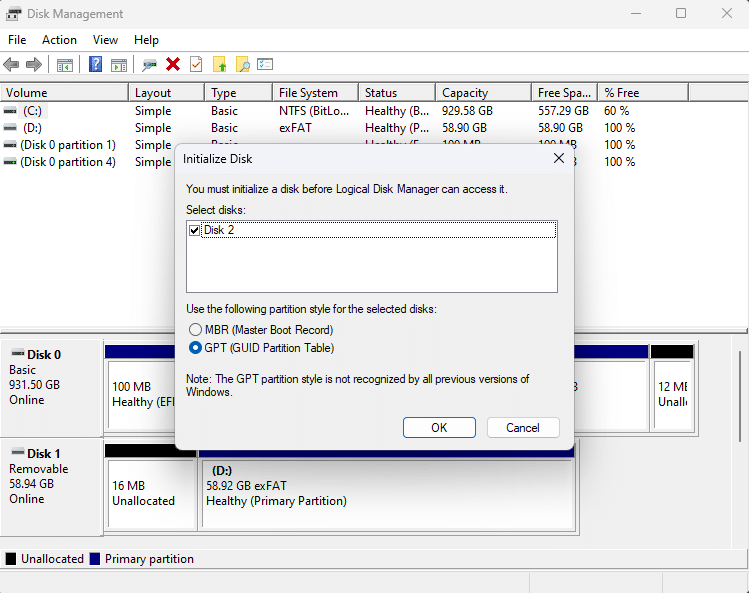
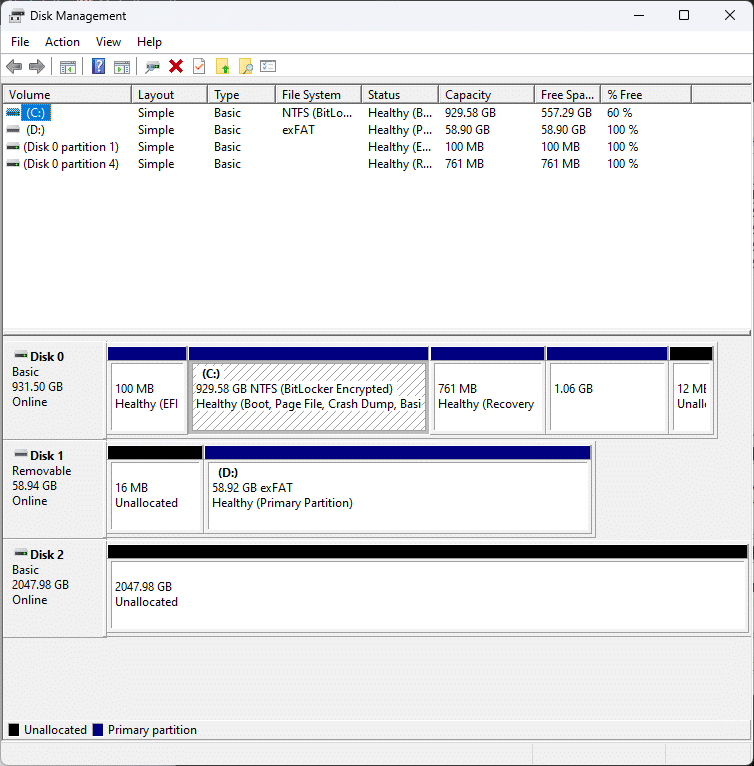
Exit the iSCSI initiator. Next, we need to open Disk Management. You should either get a popup to initialize a disk or just see your unallocated space.
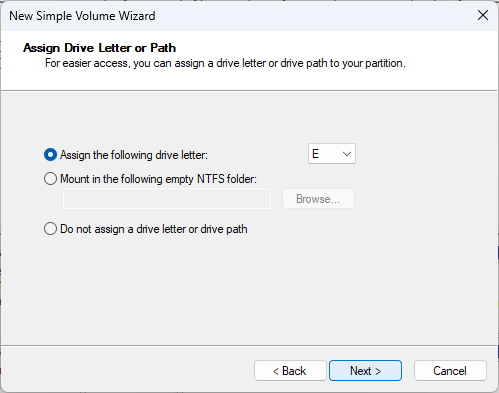
Once we have the disk initialized, we can create a new simple volume.
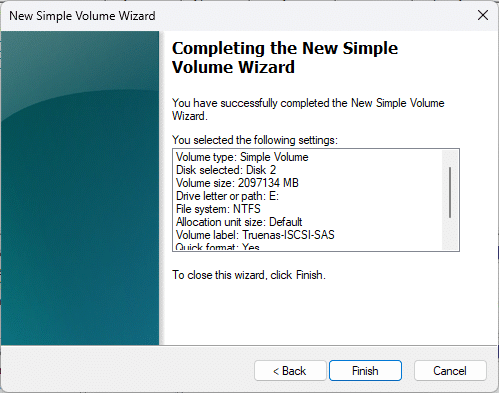
We just let the volume fill the entire disk space and gave it the letter E. We then formatted the partition with NTFS with a default allocation unit size and set the label to “Truenas-iSCSI-SAS”
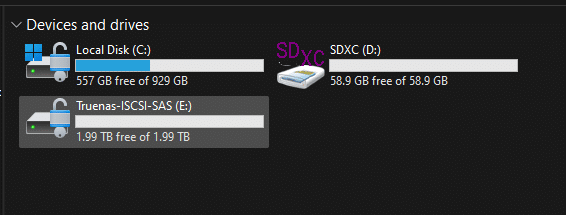
Once we finish the formatting and setup, we should be able to see the iSCSI share mounted.
And if we look at the This PC tab in File Explorer, we should see our iSCSI share mounted!
If the share is mounted here, then everything went smoothly, and you can now enjoy your networked storage. This process is a little involved for those who are not familiar with tinkering around, but overall, it doesn’t go too deep through the weeds.
For more details, you can check out the iSCSI share page in the TrueNAS documentation here.
Conclusion
Overall, TrueNAS Scale is relatively straightforward to set up once you work through the steps in order. While many retail NAS platforms have offered wizards to carry you through the steps, TrueNAS offers a more granular process. There are a few sections that can be a bit confusing, but with some guidance, those can be worked through. There is also a good bit of room for customization and further tailoring for use for the more advanced users.
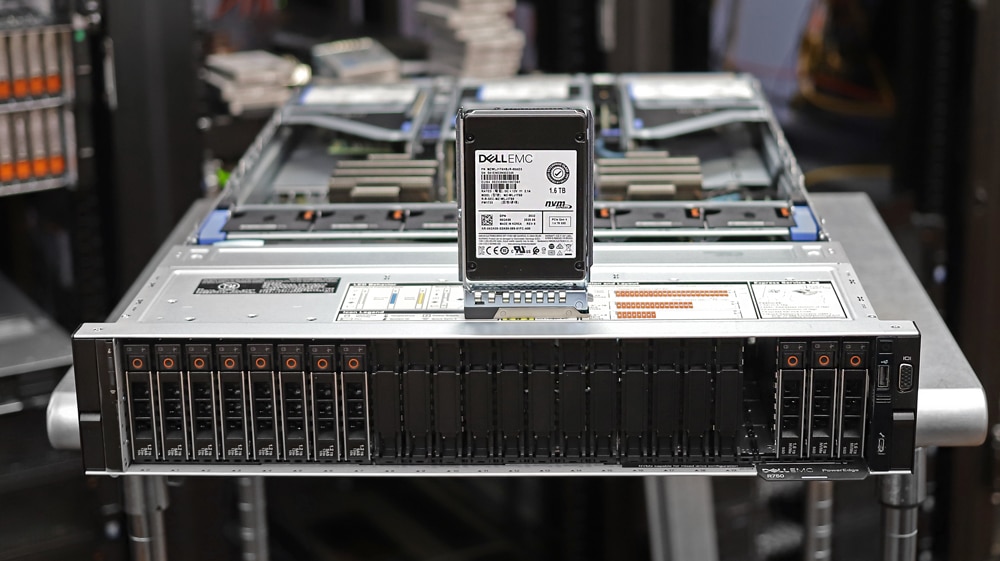
Dell R75- TrueNAS Scale Test Bed
Another bonus with TrueNAS Scale is that it can run apps and has a hypervisor as well. The KVM Hypervisor likely won’t replace the need for dedicated hosts running Proxmox or ESXi, but it can work in a pinch for spinning up a simple VM. The applications allow you to host things like Immich to streamline photo storage, Plex for video streaming, or even Nextcloud for collaboration and sharing. These apps add functionality to TrueNAS and allow you to customize it to fit your needs.
In the end, this guide isn’t an end-all be-all guide, and it isn’t meant to be. We just wanted to create something simple to cover the basics and help people get their feet wet with TrueNAS, as many find the Day 0 configuration daunting. There are many more features not covered here (we intend to cover those in the future), but for now, enjoy your newly provisioned NAS!
Engage with StorageReview
Newsletter | YouTube | Podcast iTunes/Spotify | Instagram | Twitter | TikTok | RSS Feed

