The Proxmox Import Wizard is a new way to migrate VMs from ESXi to Proxmox, providing users with a smooth path to move VMs off VMware.
Since the recent VMware acquisition by Broadcom, many smaller customers have rightfully worried about price increases and as a result, have been considering VMware alternatives. Proxmox hopes to capture many small users, who may not need the full VMware stack, with a new tool – the Proxmox Import Wizard.
Ease of migration from one hypervisor to another is a big issue, or perhaps more appropriately, the lack of ease of migration. With the Proxmox wizard reaching GA recently, we wanted to take a spin to see how easy it is to move a VM of VMware and onto Proxmox. To facilitate the conversation, we have created a step-by-step migration guide to help our readers better understand the new Proxmox Import Wizard. Although most steps and screenshots focus on Windows, some will be interchangeable with Linux and other operating systems.
Proxmox Import Wizard – Preparation and Considerations
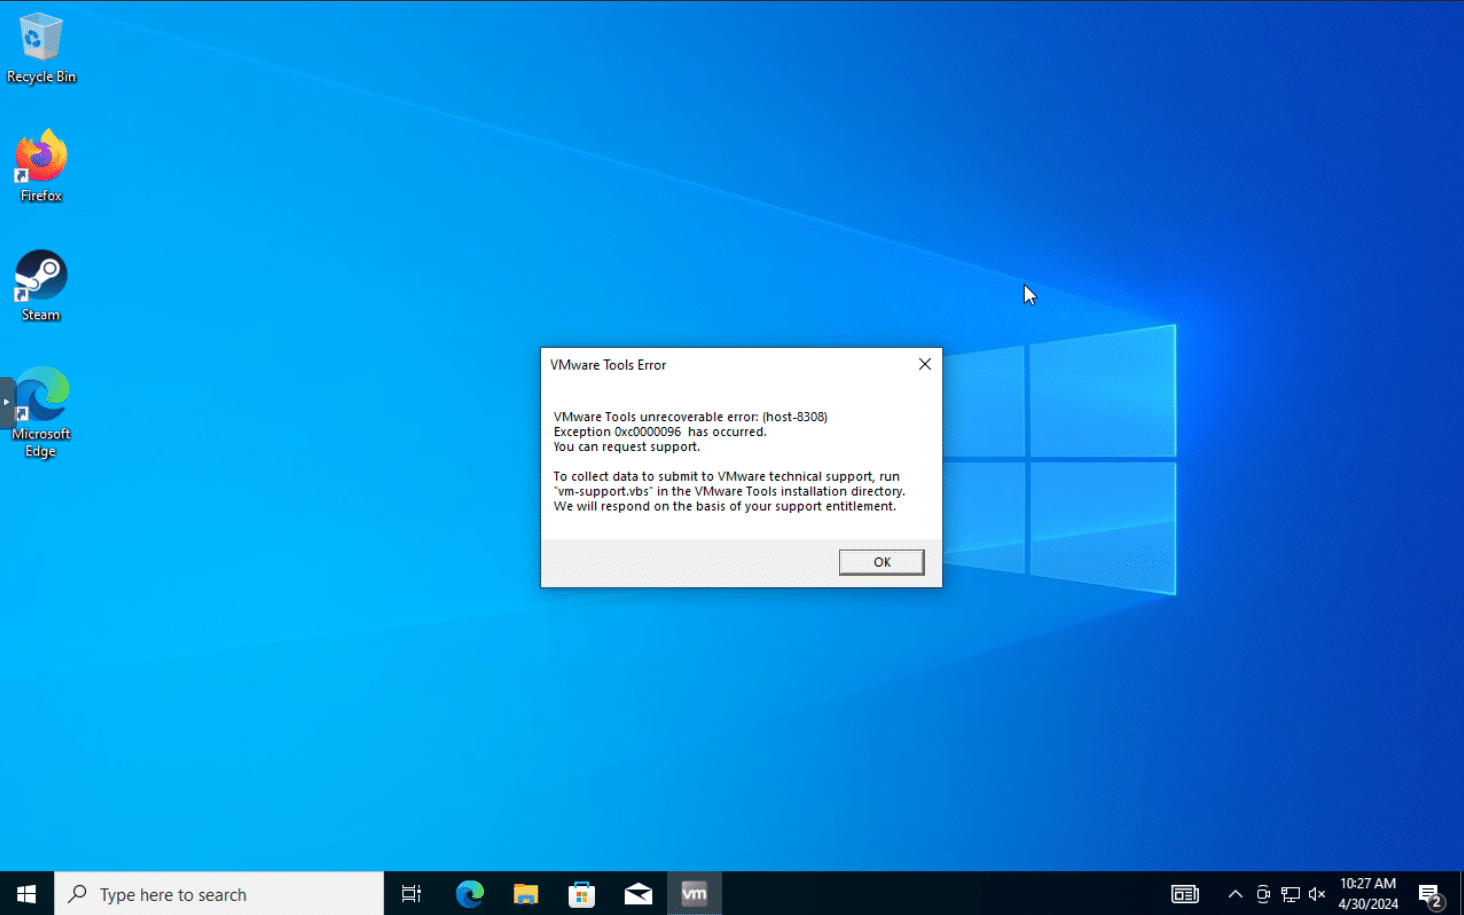
Before starting, you should perform a few steps at the guest OS level to prepare the VMs for export. You should remove hypervisor-specific tools from your guest VM, such as VMware tools in our instance. These must be removed before the migration, or they can cause problems when switching hypervisors. They may also be hard to remove after the transfer.
Another task is to remove any static network configuration before migrating if your VM runs Windows. After migrating, the VM will get a new network adapter, and you will have to configure the static settings on that adapter. If you fail to remove the static configuration, Windows will throw a warning when trying to set the same static settings on the new network adapter, even though the prior one has been removed.
For DHCP reservations, you must either switch the reservation to the MAC of the new network adapter on the VM or manually set the MAC on the network adapter within the VM.
If you are using a virtual TPM device, it is not currently possible to migrate the vTPM state from VMware to Proxmox. If you are using full-disk encryption with the keys stored in vTPM, consider disabling it. After disabling, make sure to have the manual decryption keys available just in case.
Storage-wise, importing a VM with disks backed by VMware vSAN storage does not work. Proxmox lists moving the VM’s vDisks to a local SSD or HDD of the hypervisor server as a workaround. It is also recommended that more than four VM disks are not imported simultaneously.
Before migrating, make sure to power down the source VM.
Import Sources
At the time of writing, VMware ESXi is the only supported import source, but plans include adding support for importing VMware OVAs/OVFs similarly. Importing ESXi was tested from version 6.5 up to version 8.0.
Migration Steps
Proxmox has three methods of importing VMs: manual, automatic, and live-import. The live-import function starts the VM during the import process to reduce downtime. If the live import fails, all data written since starting the import will be lost, so it is recommended to try using a test VM first.
Though there are three import methods, this step-by-step guide is focused on the automatic import method. We believe this will be the most commonly used method unless the source VMs need special care in the import process.
Full VM Automatic Import
The integrated VM importer integrates the storage plugin system into the web interface. This method imports the complete VM, with most of its config mapped to Proxmox’s config model, reducing downtime.
- Ensure your Proxmox VE is at or above version 8 and has the latest system updates.
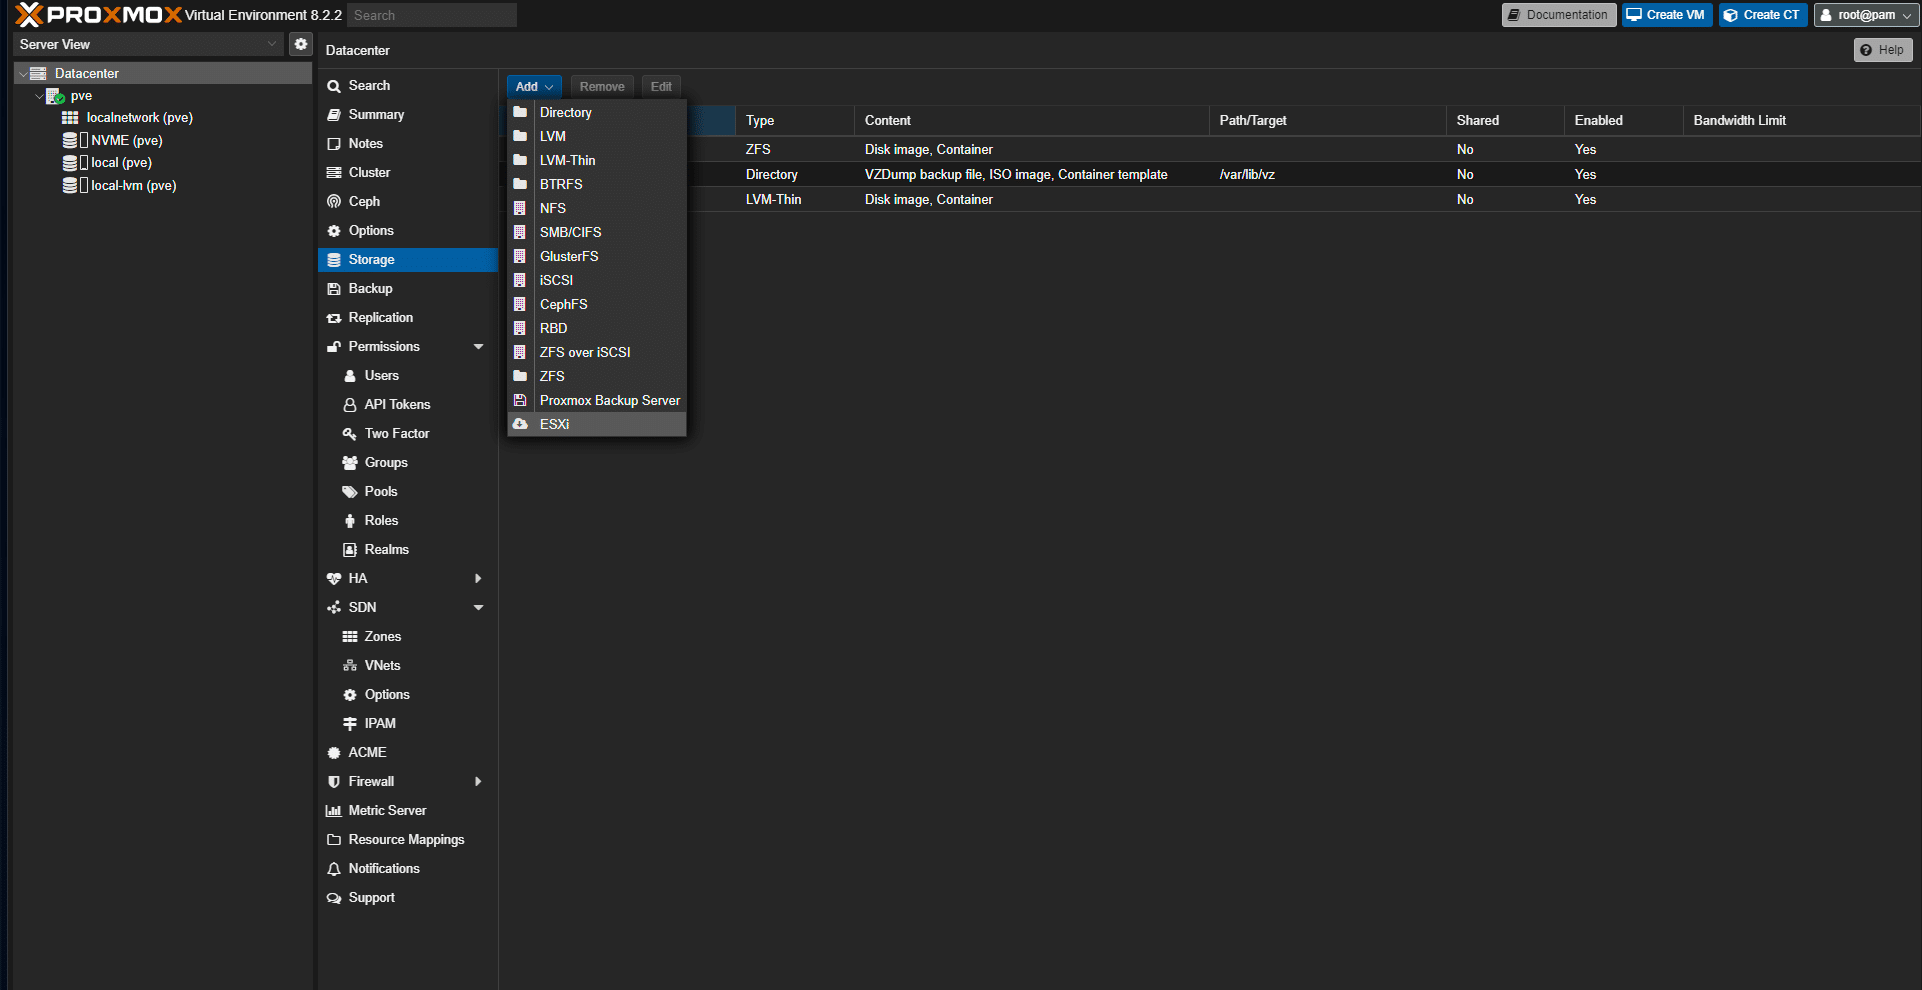
- Go to Datacenter → Storage → Add and select ESXi as import-source storage.
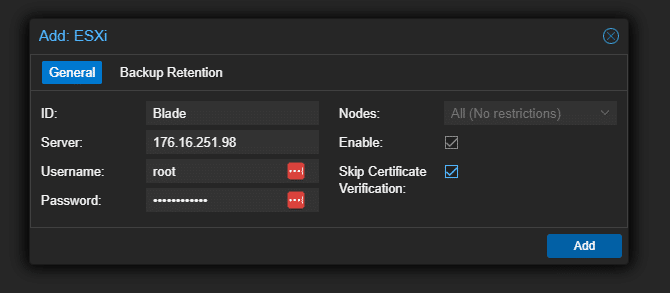
- Enter the Domain or IP address for the ESXi host and the credentials of an admin account. If your ESXi instance has a self-signed certificate, you can skip certificate verification or add the CA to your system trust store in Proxmox.
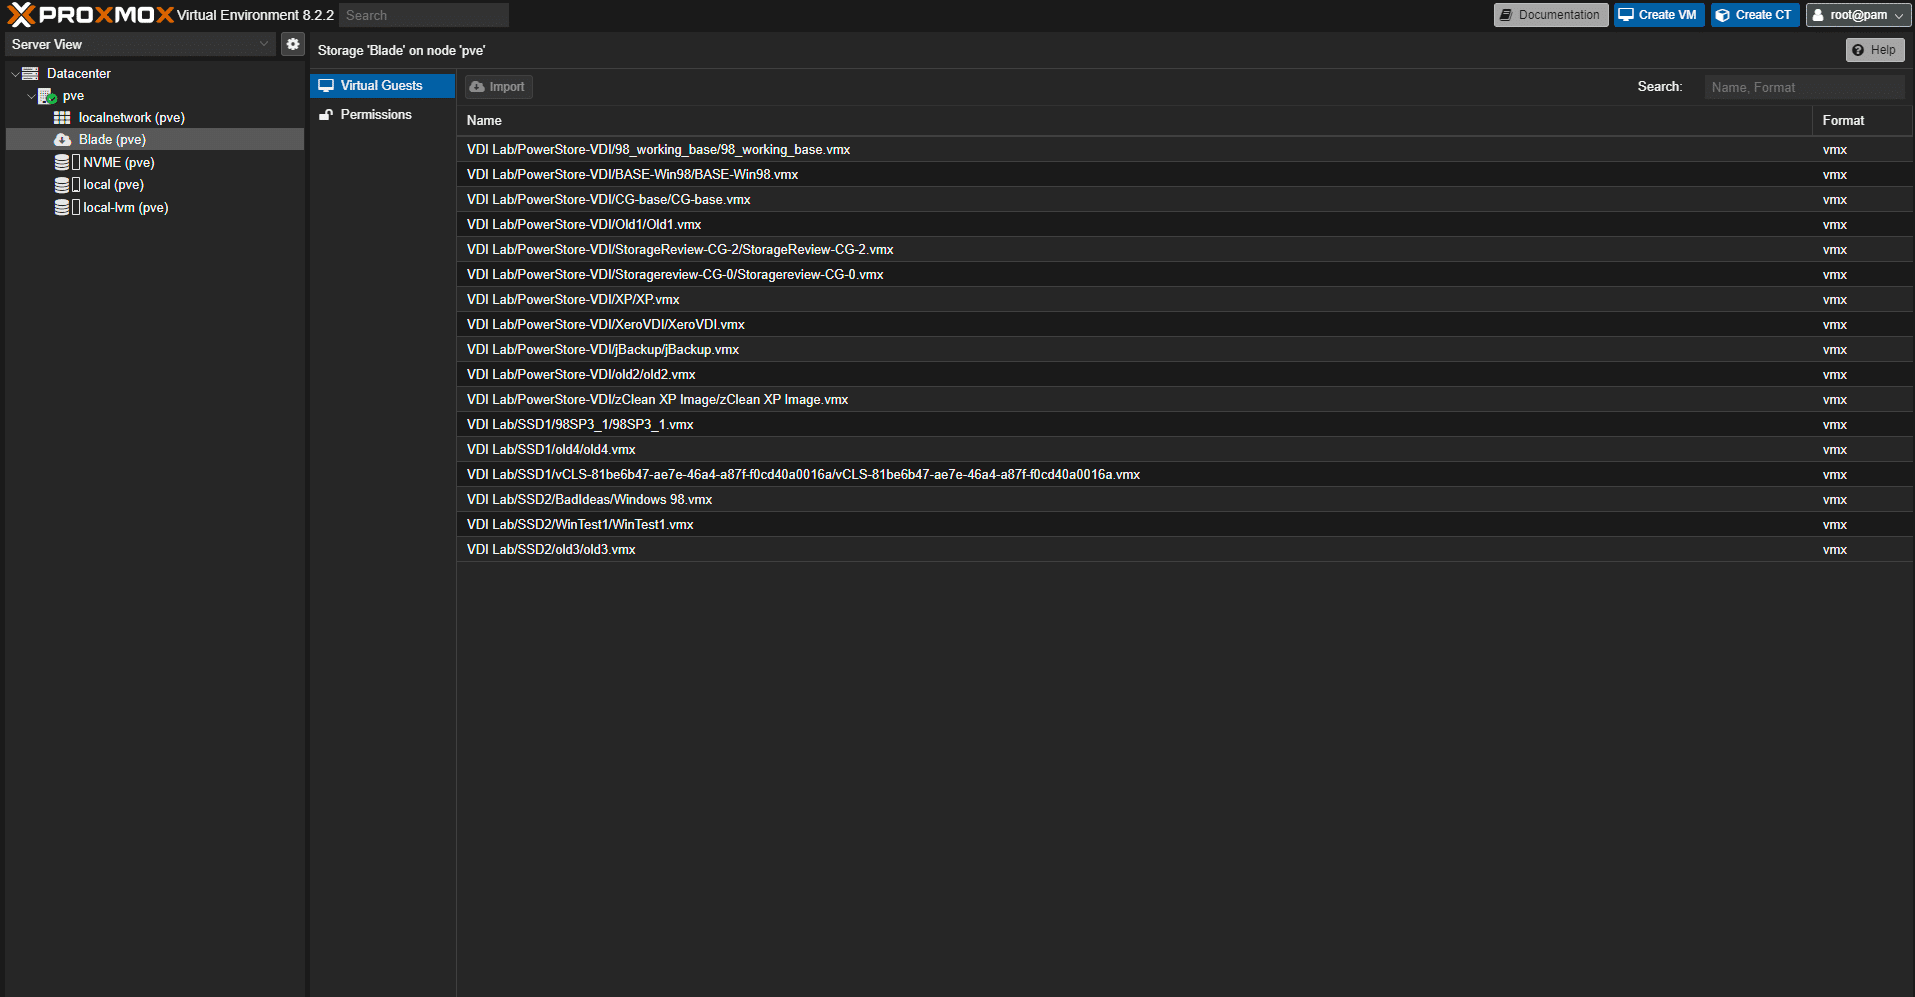
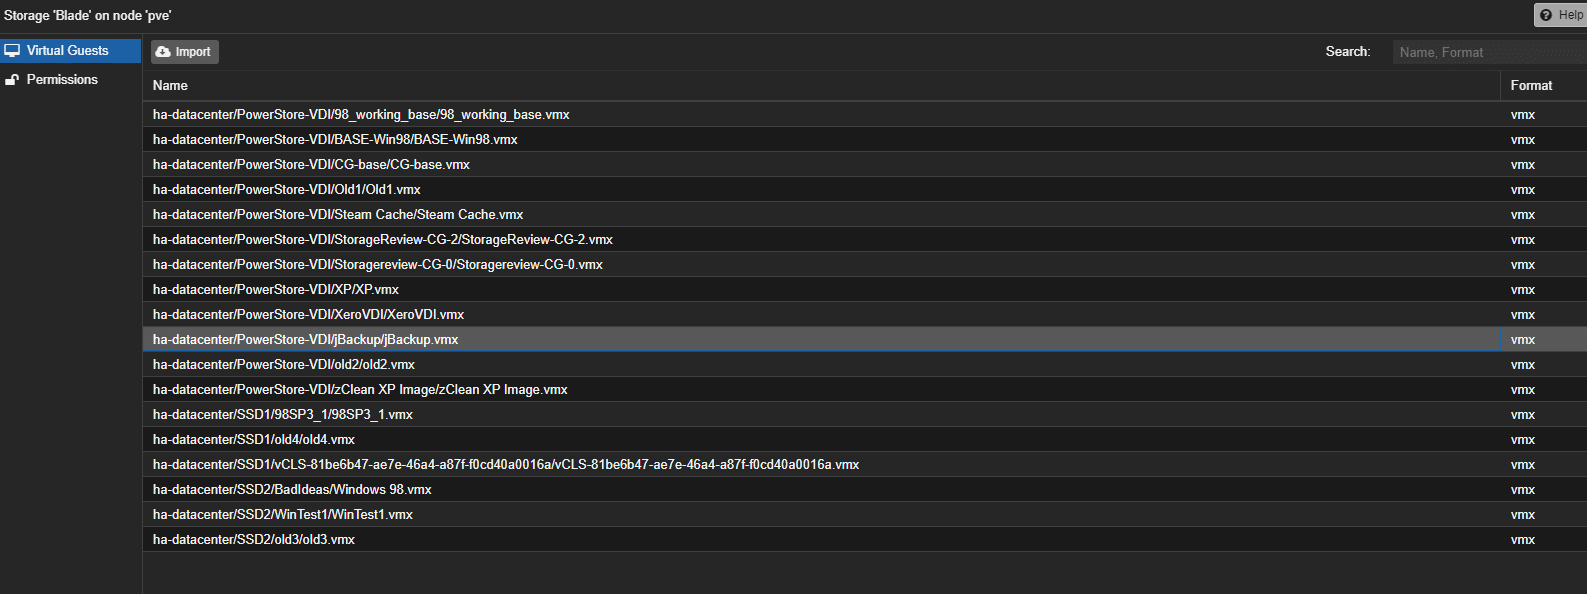
- In the left menu, select the new storage icon for your host, and make sure you can see all of your Guest VMs.
- Select the VM you want to import, then hit the “import” button in the top left.
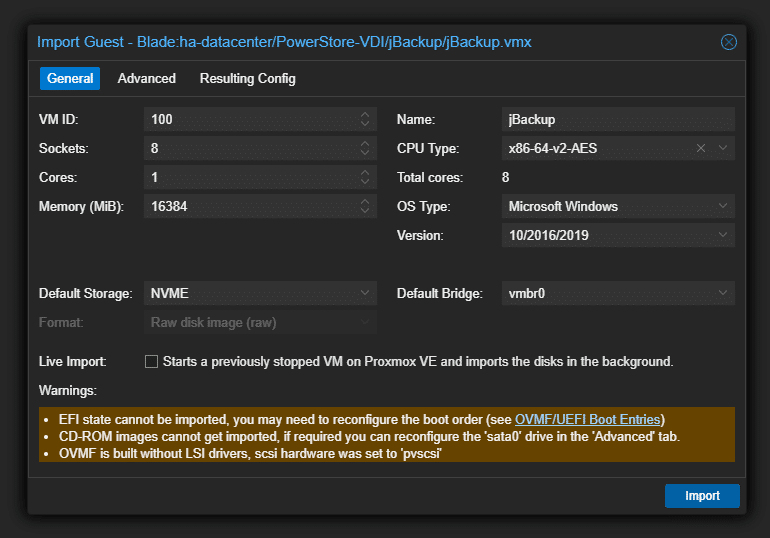
- Select your target storage and the network bridge for the VM at a minimum. If needed, use the Advanced tab for a more detailed configuration.
- Review the resulting config for your VM to ensure everything looks okay.
- Ensure your source VM is ready for import, and power it off.
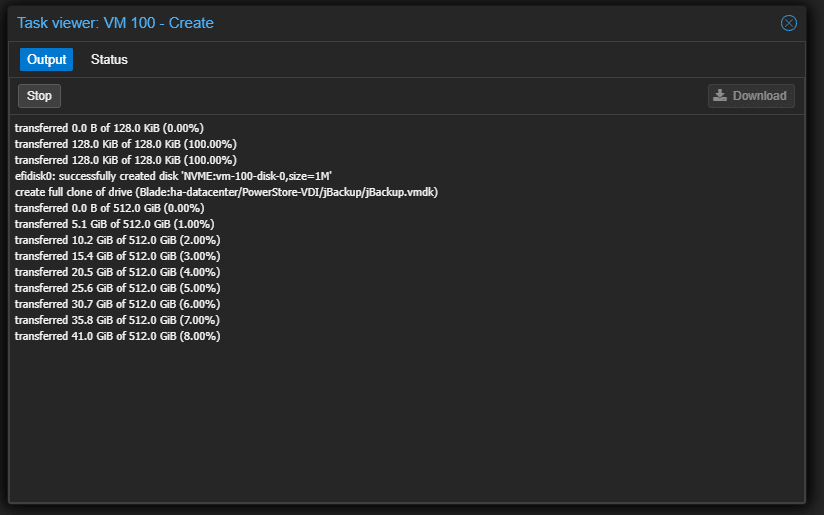
- Start the import on the Proxmox side. Depending on the disk size and your network capabilities, this step may take a while. (Do not import more than 4 VM disks at a time)
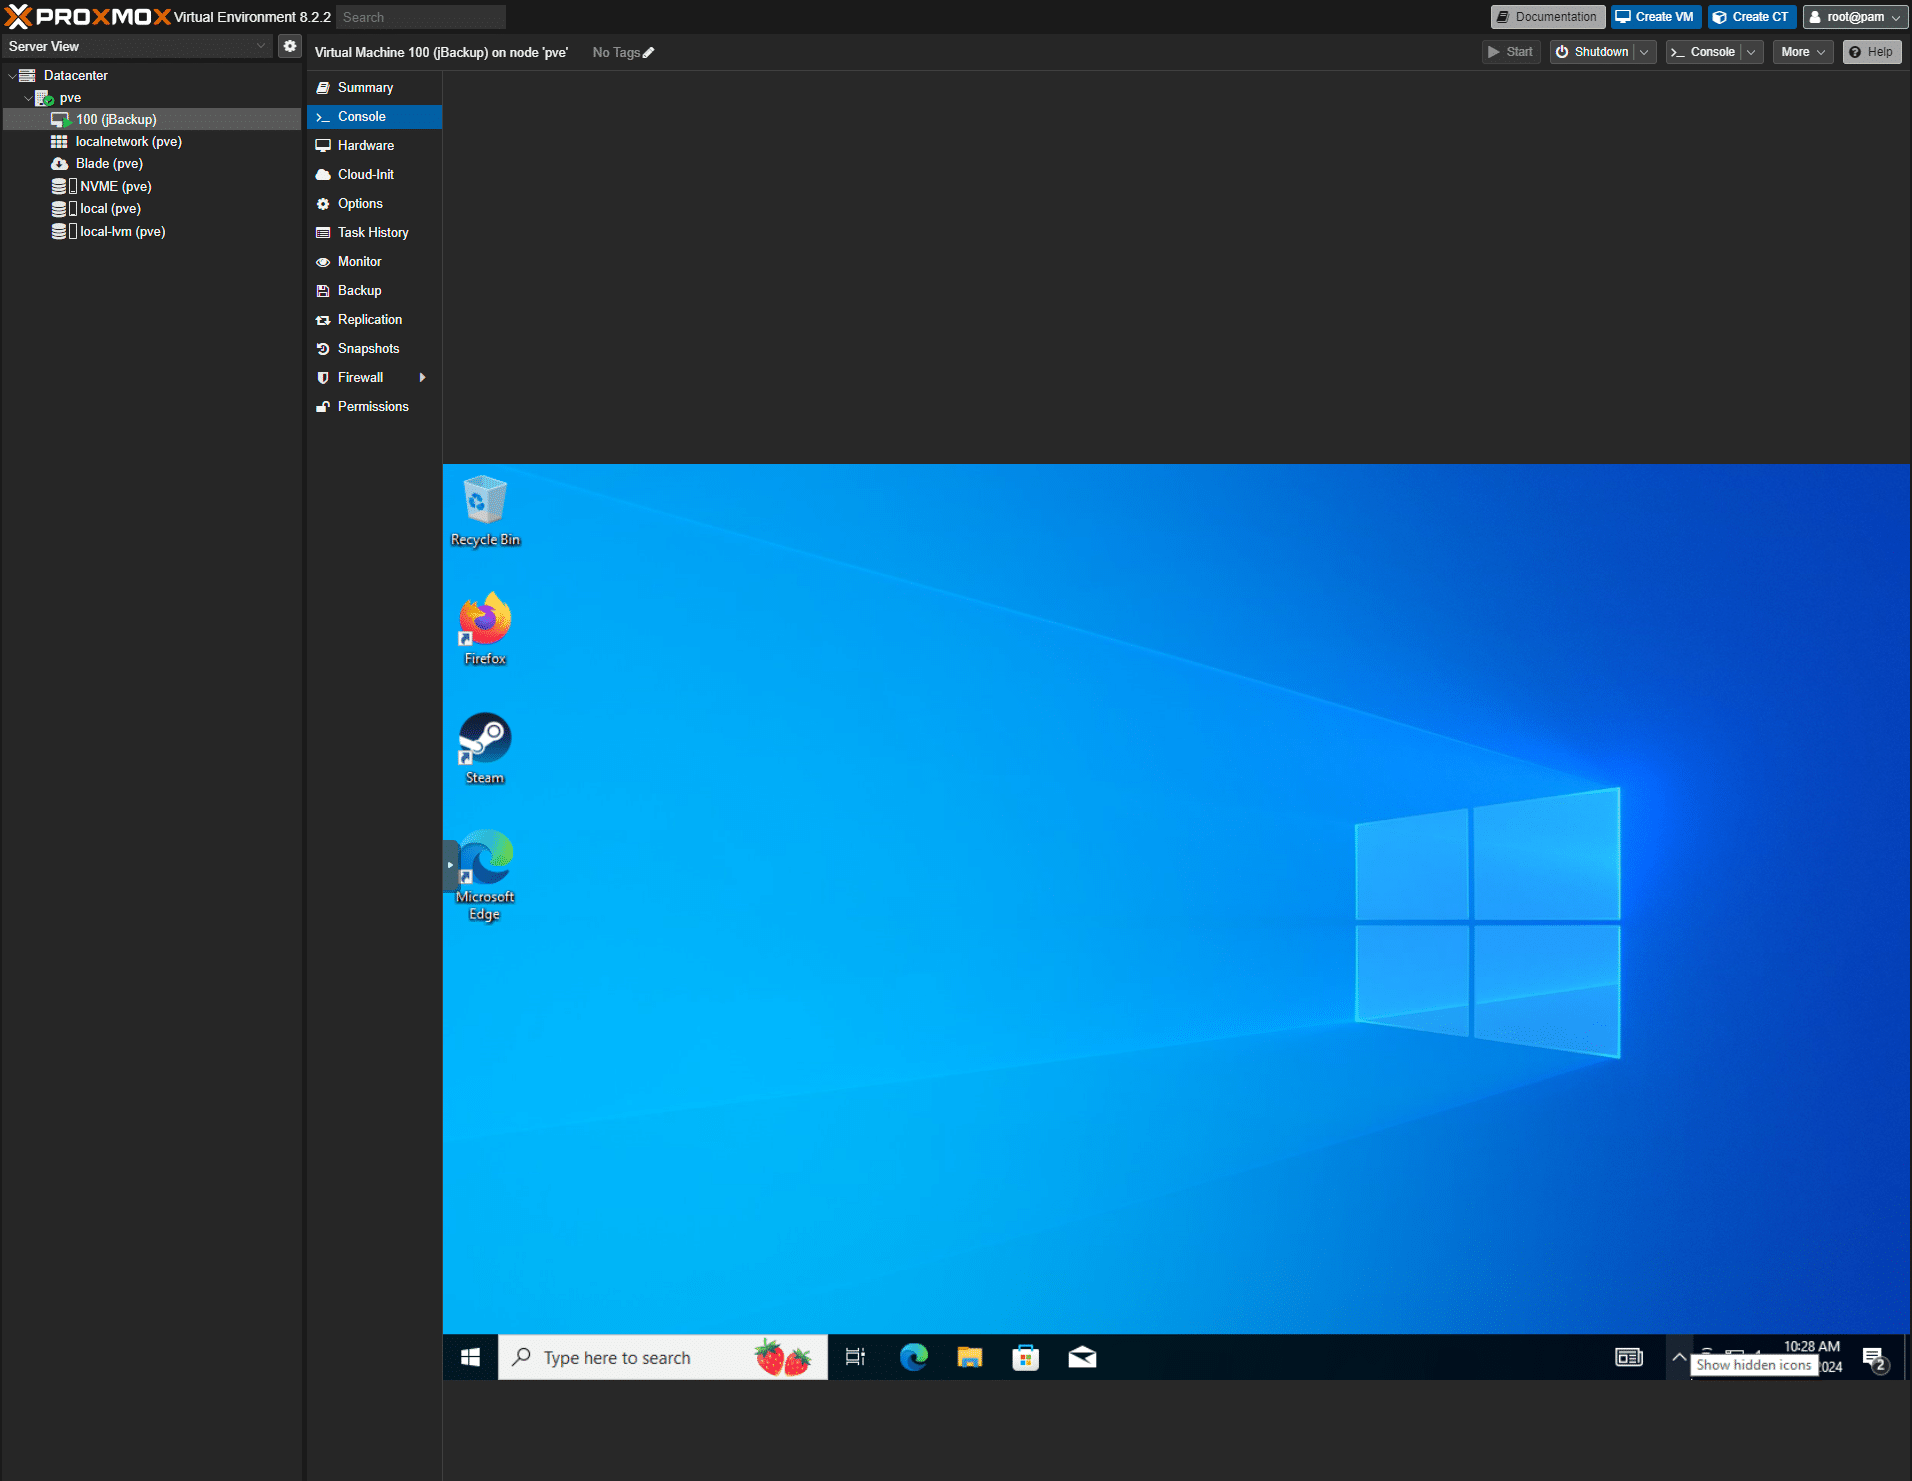
- Boot the VM and inspect the OS to see if any post-migration changes are needed.
If your VM functions correctly, you have completed your first import. However, you aren’t finished just yet. There are a few things to address after migration to get the best experience with Windows.
Post Migration (VirtIO Drivers)
- Make sure to check on your network settings after importing. The network adapter name has likely changed.
- (Primarily for Windows VMs) Install missing drivers.
- For Windows VMs, download and attach the VirtIO ISO. After the driver is installed, the boot disk must be switched to VirtIO, which is fully documented in this Proxmox wiki article.
- Using a VirtIO SCSI device performs better than emulated SCSI.
These steps for VirtIO are only needed for Windows machines. Although it is possible to run without them, this will negatively impact VM performance.
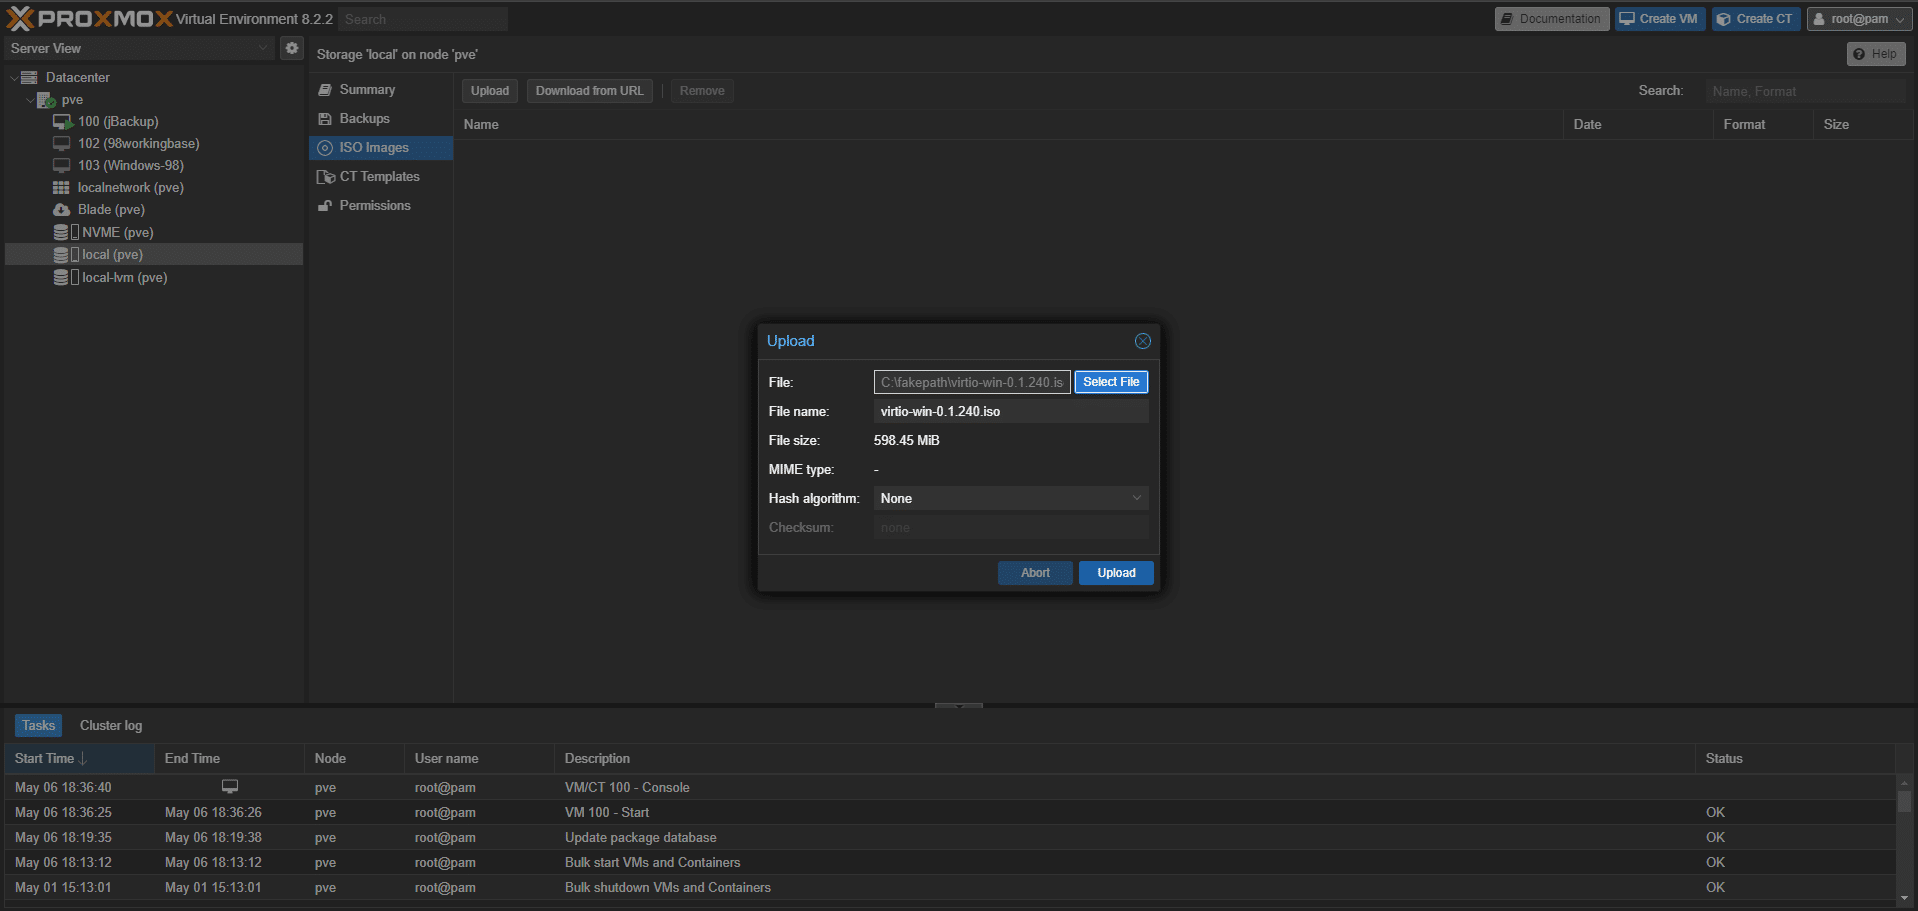
- Download the latest stable VirtIO driver ISO from here.
- Upload the driver ISO to your Proxmox ISO storage.
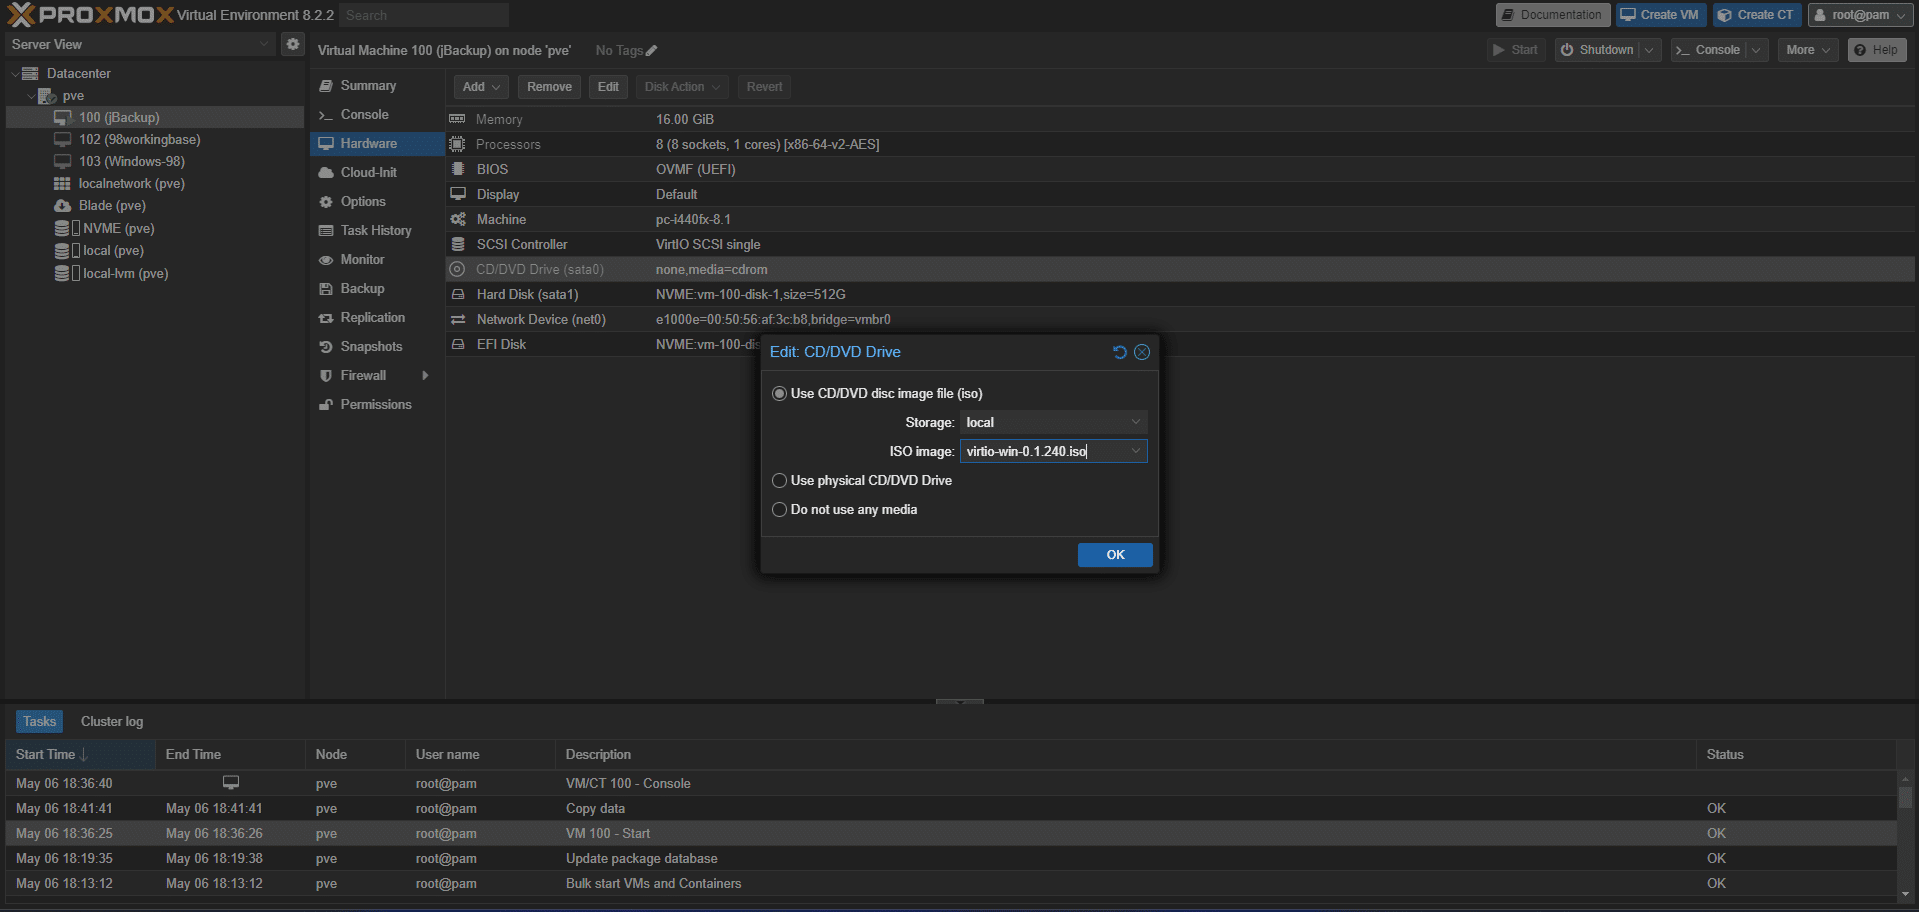
- Attach the driver ISO to the VM CDROM Drive.
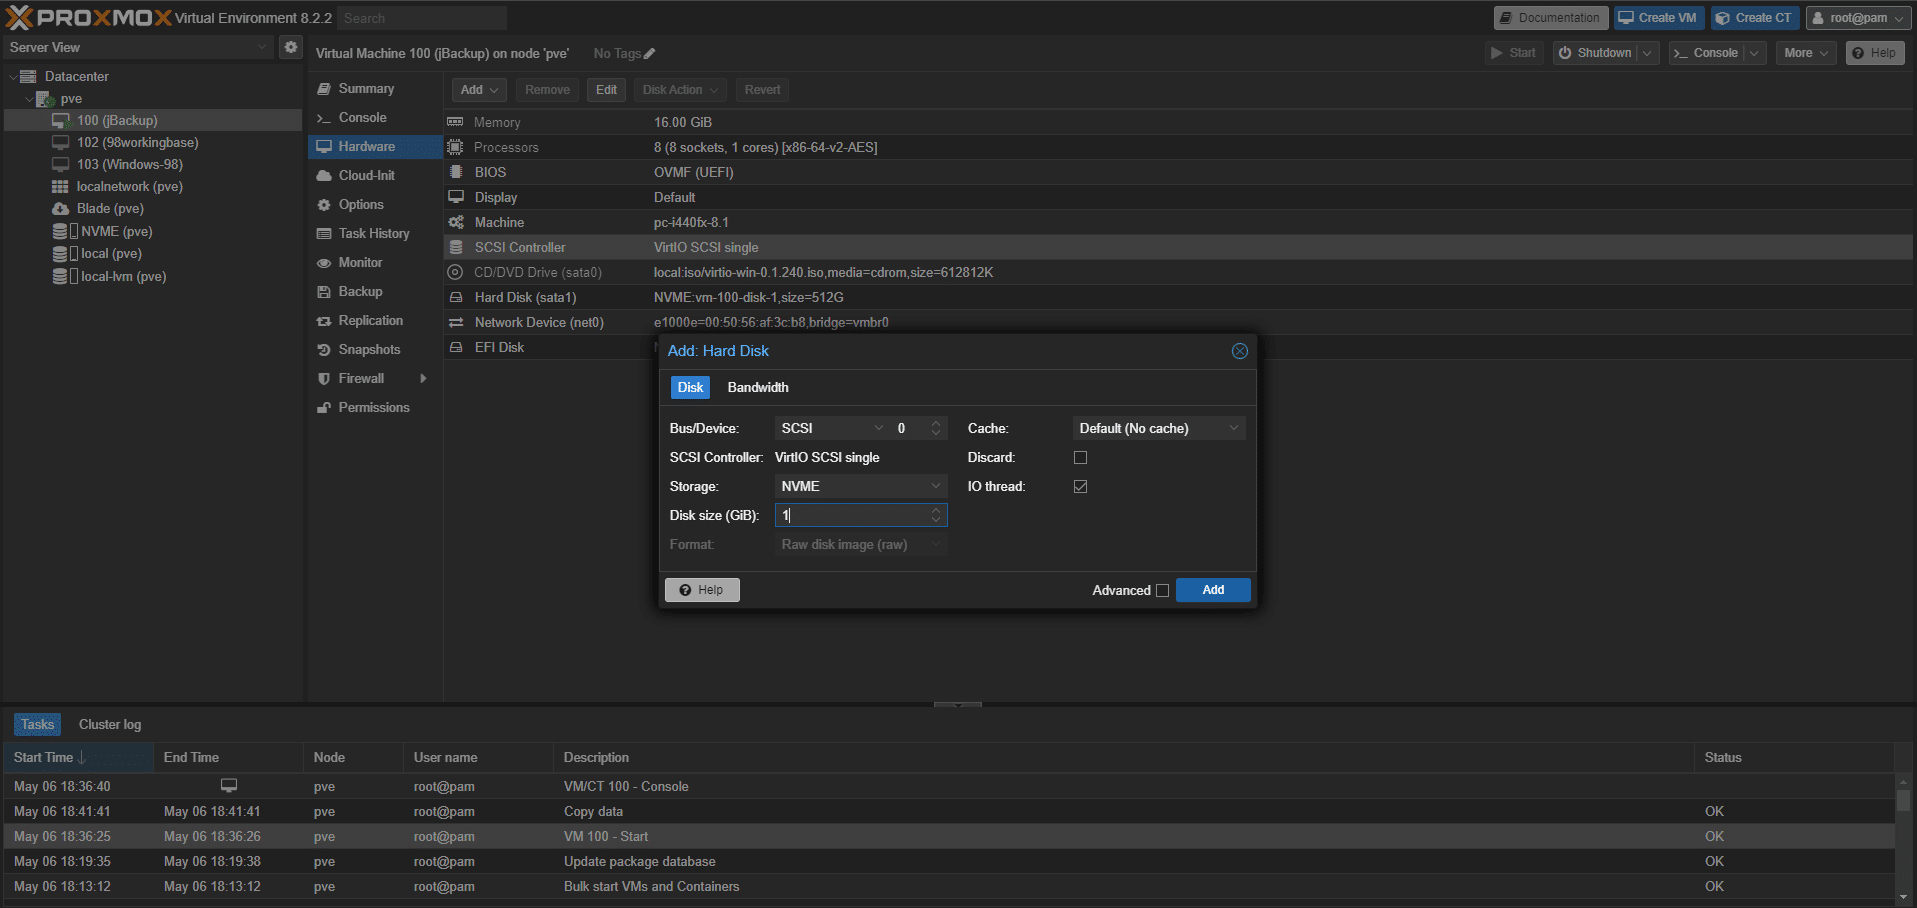
- Add a 1 GB disk with Bus Type SCSI or VirtIO Block to the VM.
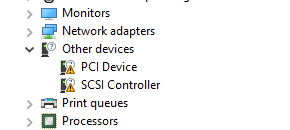
- If the disk hot plugs, move on to the next step; if not, reboot the VM. If the drivers are not installed, the disk will show up in the device manager as an SCSI controller with an error.
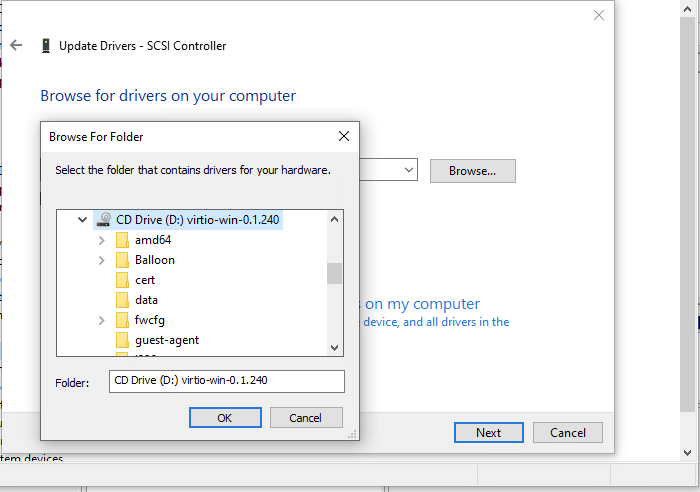
- If you see the SCSI controller, right-click it, select “update driver,” and then select “Browse my computer for drivers.” Locate the CD drive and click OK, then Next.
- You should now get a message that Windows has successfully updated your drivers.
- Shut down the VM.
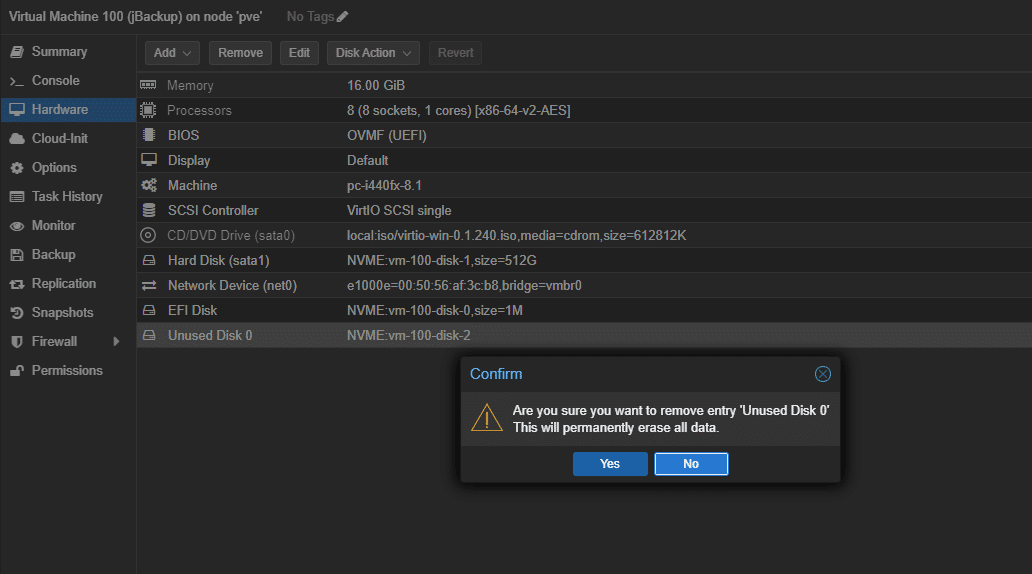
- Detach and remove the 1 GB disk we created earlier and the ISO in the CDROM Drive.
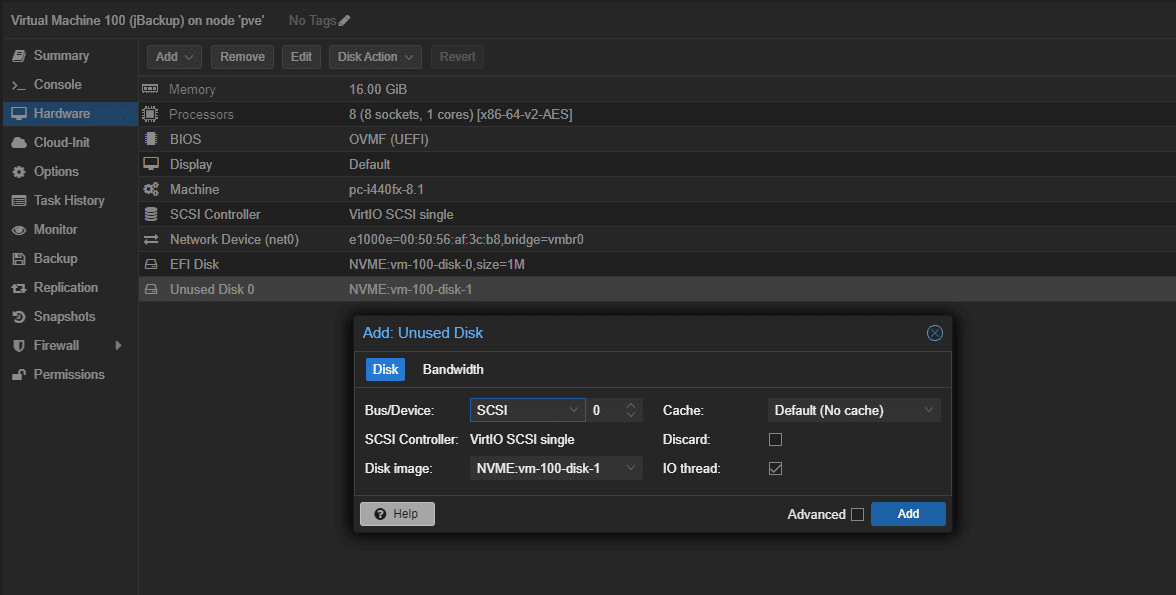
- Detach, then double-click to reattach the boot disk and any other disk you want to use as VirtIO SCSI/Block. Be sure to change the Bus/Device option to SCSI.
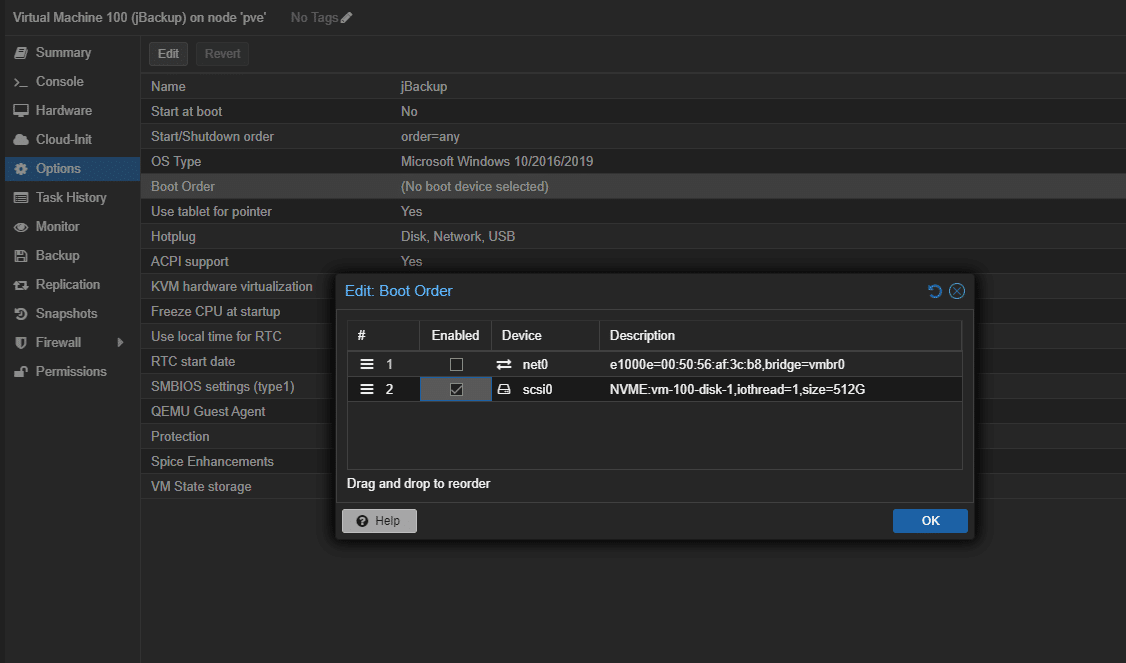
- Navigate to the Options tab and select the SCSI drive as the boot option.
- The VM can be started and should run normally. If the VM does not boot, the SCSI disk can be detached and reattached as IDE or SATA to redo the dummy disk procedure and try again.
These drivers can also be installed in Windows setup for new VMs. The Proxmox Documentation can be found here.
Conclusion
While many VMware customers know that Proxmox isn’t a complete replacement for ESXi, many realize that specific workloads could migrate to it to reduce licensing costs. The biggest hurdle for many virtualized data centers is the lack of portability, which means that once you commit to a hypervisor platform, it becomes challenging to port away from it. However, the company is making huge strides with tools such as the Proxmox Import Wizard, which will ease the burden of IT administrators.
Some hypervisor-specific tools and settings may make migrating VMs a little rocky. Still, the process will likely be simplified and better documented as more businesses take the leap. Options other than the automatic import may be better in your environment, but we believe this will be the most used method. The alternatives can be explored within the Proxmox Documentation.
Other hypervisors will likely make the leap from VMware easier for prospective clients. There is already documentation for doing so with Hyper-V.
Engage with StorageReview
Newsletter | YouTube | Podcast iTunes/Spotify | Instagram | Twitter | TikTok | RSS Feed

