The NETGEAR Business Total Network Solution offers a comprehensive approach to building and managing a high-quality network environment.
The NETGEAR Total Network Solution provides a seamless and efficient program designed to help businesses deploy high-quality networks. Integrating components like the PR60X Pro Router, Insight Managed Switches, and Pro WiFi Access Points ensures robust connectivity and high performance. The Total Network Solution is so much more than hardware components; NETGEAR includes a free consultative service, the Pro WiFi Design Team, to ensure your wireless network is ready to meet any business objectives.
Getting Started – Blueprints or Napkin Art
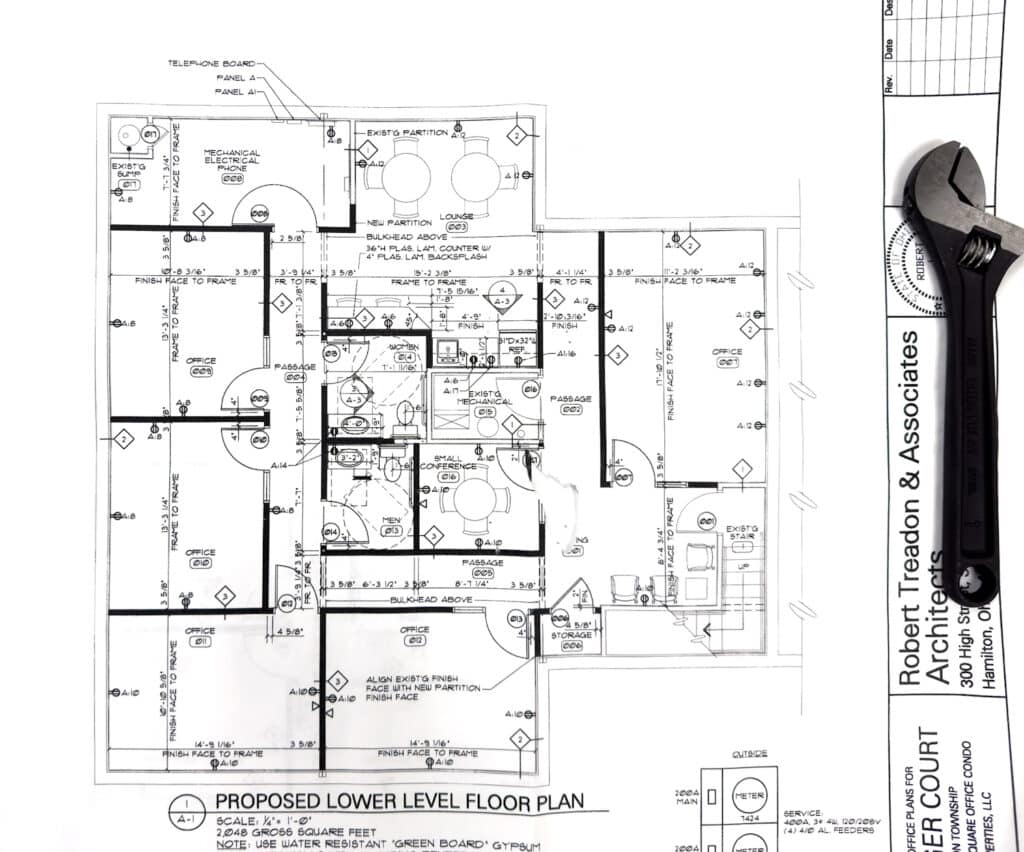
NETGEAR allowed us to take advantage of its Total Network Solution, and we couldn’t resist. To determine what equipment best fits our use case, the NETGEAR Pro WiFi Team requested a copy of our building plans and the interior and exterior building materials to calculate Access Point (AP) density and optimal placement. They also wanted a general idea of users, key coverage areas, and other operational details.
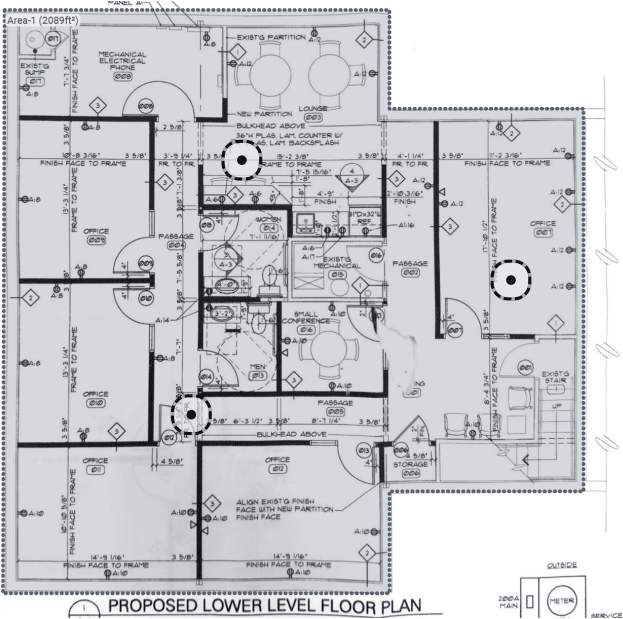
We sent two photos of our roughly 4,100-square-foot office, one for the upper floor and one for the lower level. For our lower floor, we sent the above photo. Within a day, NETGEAR returned a detailed access point layout for both floors. Note that the AP dots added to the blueprint represent the suggested access point placement.
The NETGEAR engineer assigned to our project was happy to have photos of our blueprints. NETGEAR’s technicians have received a wide range of customer-provided plans, from detailed digital layouts to hand-drawn sketches. Who doesn’t remember network diagrams on a paper napkin? Regardless of the quality of the submission, the NETGEAR team can craft an intuitive AP placement guide. However, the coverage report from NETGEAR provides more detailed information than just the placement of access points.
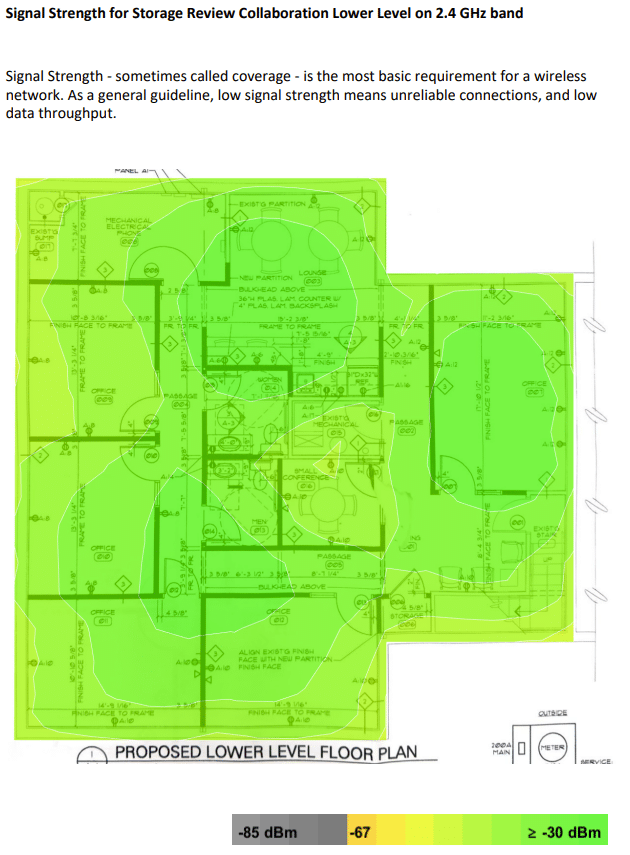
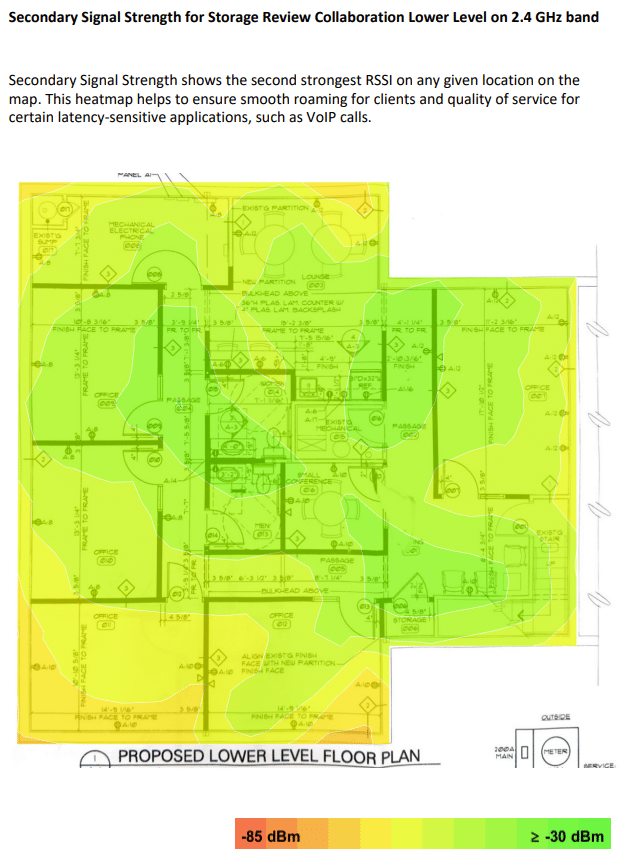
The NETGEAR report included detailed coverage charts for each floor, revealing signal strength predictions throughout the building on 2.4GHz, 5GHz, and 6GHz bands. It also included secondary and tertiary signal reports on all three bands. Additionally, it included throughput reports for all three bands on each floor. Since this was done without an on-site survey, the estimated maximum throughput on each band is displayed.
The three signal strength predictions measure coverage from the closest access point. This is important, as it takes a second to negotiate a handoff to the next access point, and you don’t want to sacrifice usability. As you move to higher bands, the rating decreases due to lower penetration at 5GHz and 6GHz, although their throughput is superior within the optimal range compared to 2.4GHz.
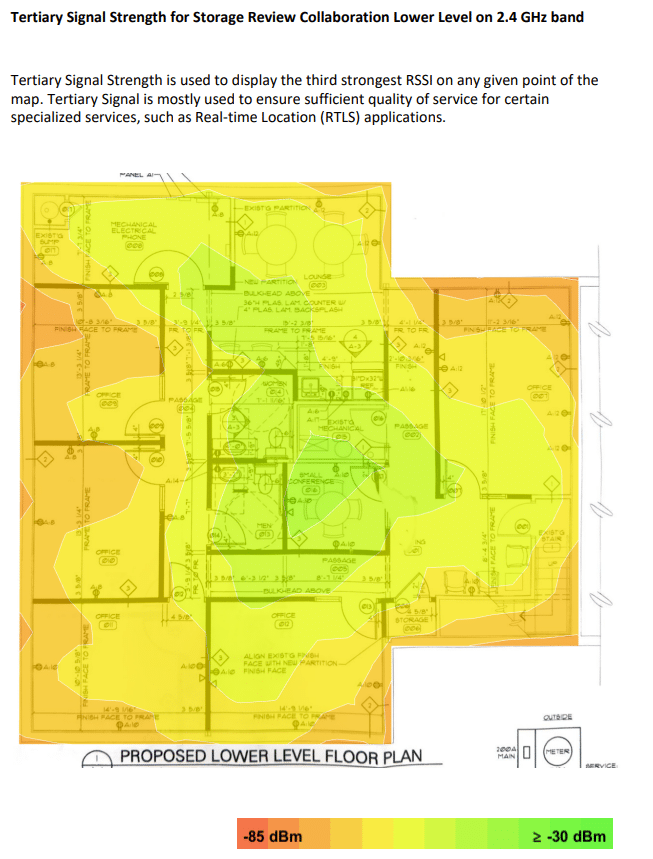
Reviewing the secondary strength report for 2.4GHz, it is evident that the edge coverage begins to decrease, and the areas with good coverage start to diminish. The objective is to guarantee a seamless transition to the next access point during roaming.
For the tertiary signal strength, there is increased signal reduction around the perimeter of the building, particularly in corners. This is to be expected, but typically, you will be using the network most on a primary or secondary RSSI (Received Signal Strength Indicator).
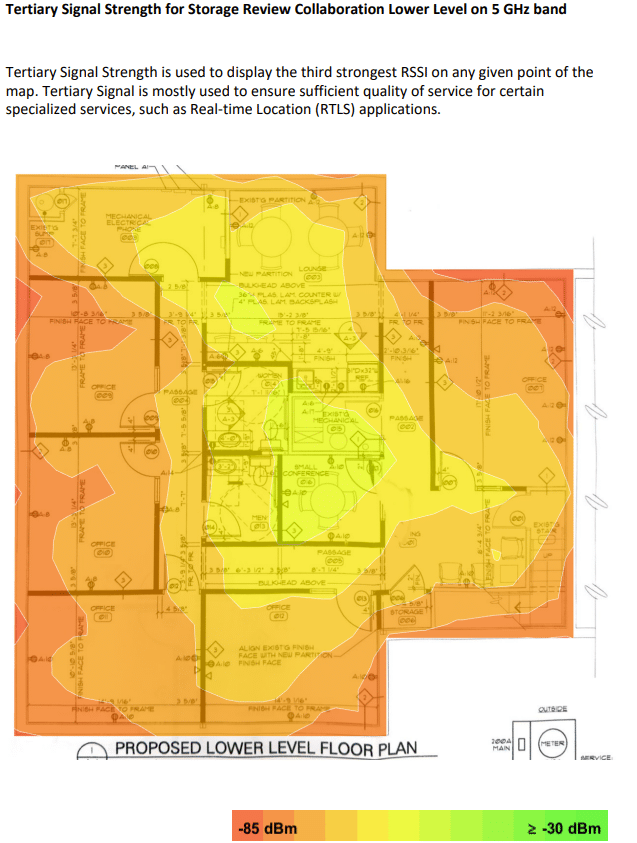
On the tertiary signal strength for 5GHz, we can see a much more drastic decrease in coverage on the perimeter as 5GHz and higher start to lose their penetrating power compared to the lower frequency bands. This is just by nature with higher-frequency radio signals, which is why access points keep radios for the lower frequency bands.
The image below shows the third RSSI on 5GHz as an example of the degradation between the first, second, and third RSSI on higher bands.
NETGEAR Kit Arrives, the Intern Gets to Work
A recommended kit list is put together based on drawings and input from NETGEAR, including their suggestion for expansion if needed. A Value-Added Reseller (VAR) would typically place the order and, if necessary, could be used for installation. However, the customer can do the installation independently if they so choose. In our case, NETGEAR sent us the components, and the intern did the installation.
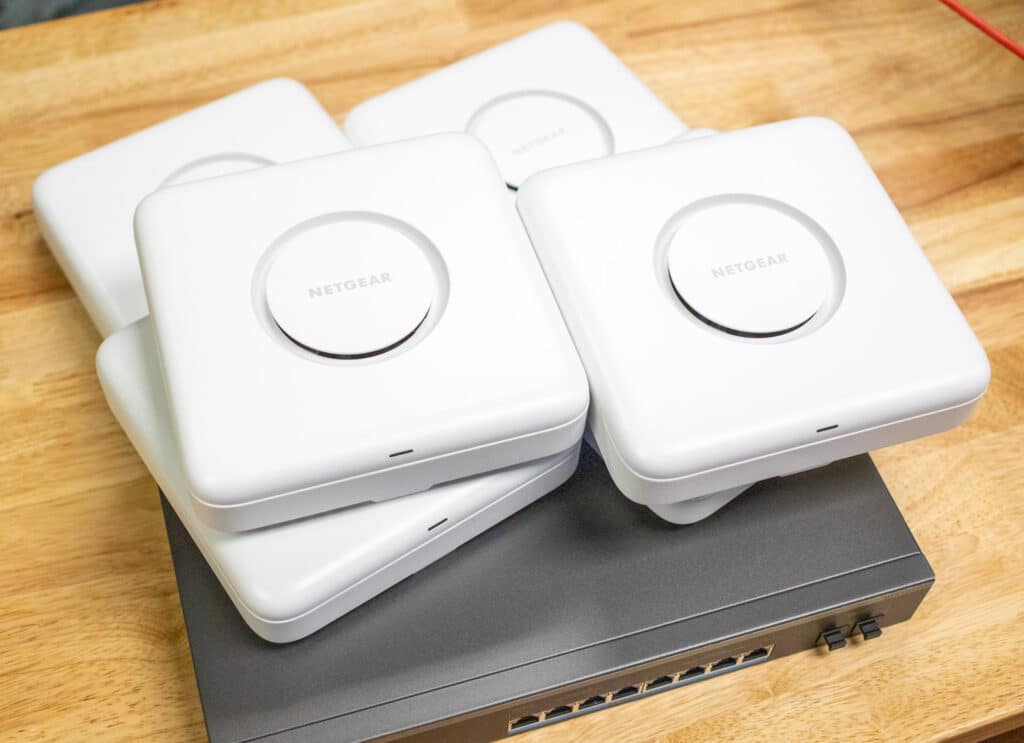
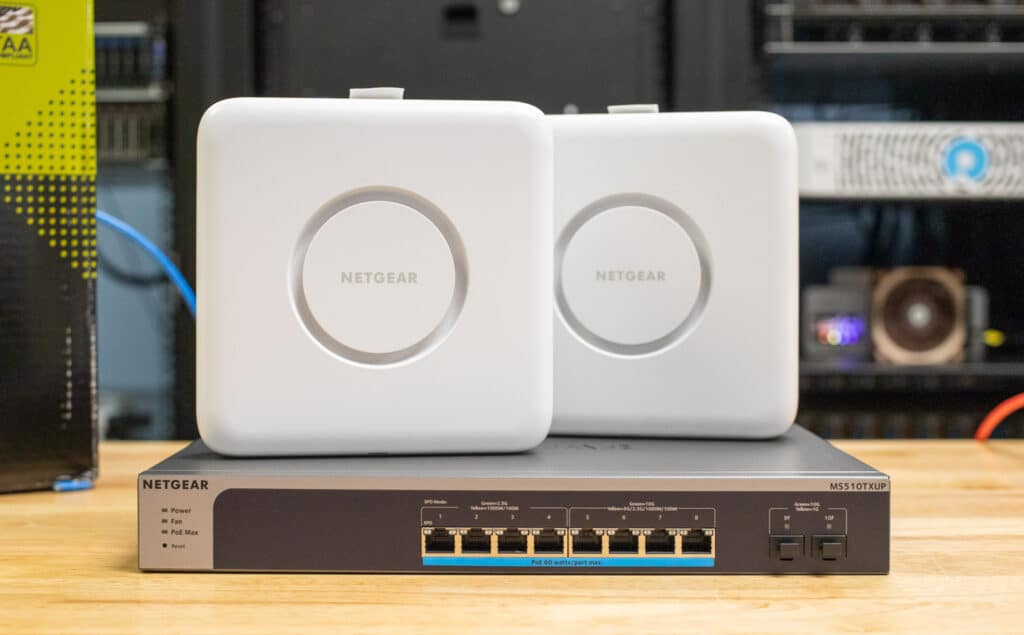
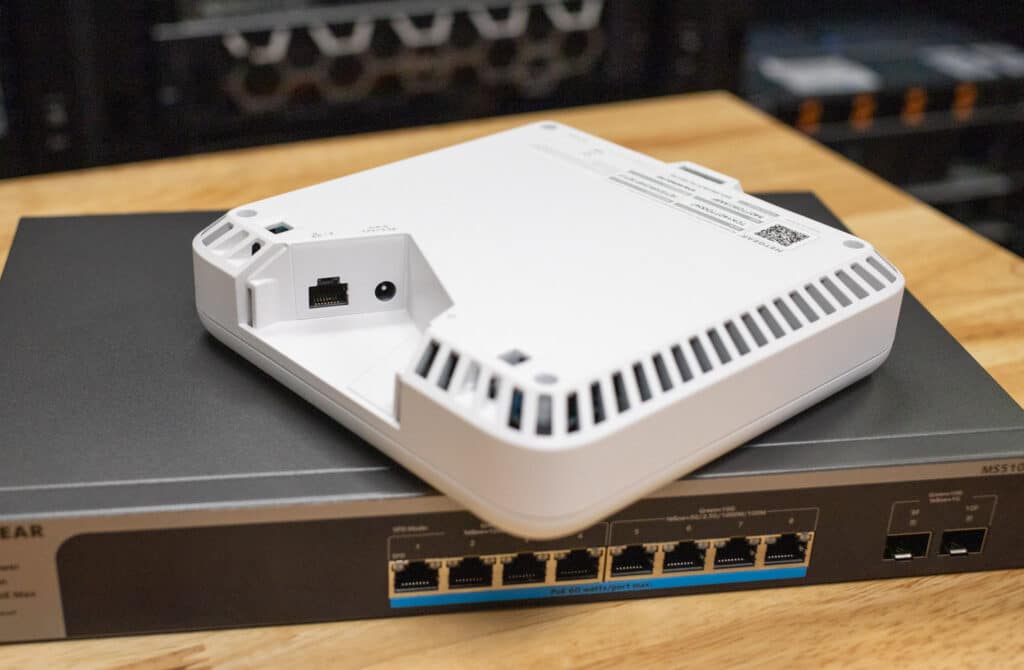
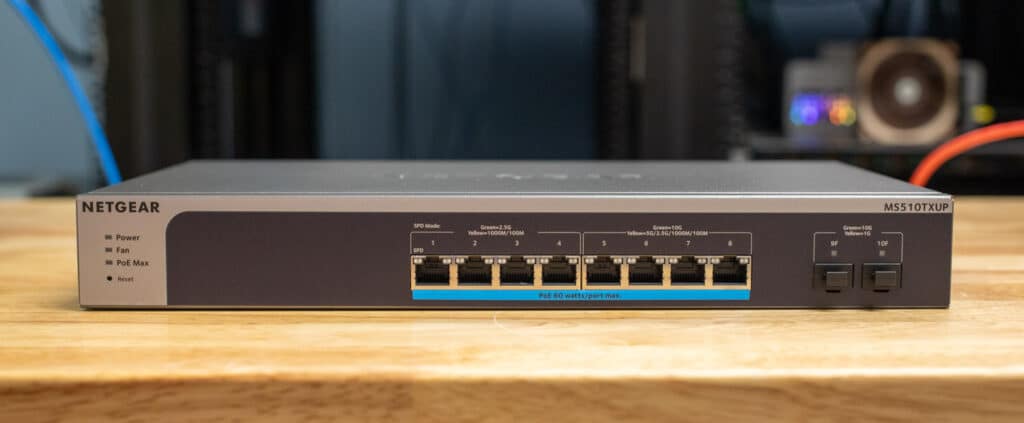
NETGEAR sent us six WBE750 WiFi 7 APs to install throughout the office. They also included the MS510TXUP PoE switch and PR60X Router. The wireless survey provided detailed recommendations for placing access points throughout the office to ensure optimal coverage and performance. The suggested locations were carefully chosen to maximize signal strength and minimize interference, ensuring that all office areas receive consistent and reliable connectivity. The placement strategy was straightforward, offering clear guidance on where to position each access point for the best possible network coverage.
One factor to remember regarding AP placement, at least in our case, is that the building drawings used for the survey didn’t account for particular details, such as light fixtures or sprinkler heads. As a result, we had to make some minor adjustments to the original plan. For example, one of our main-floor APs needed to be shifted about three feet to avoid a light fixture. These changes were minimal and didn’t significantly impact the overall layout. The flexibility of NETGEAR’s coverage maps accommodates minor adjustments without issue. However, if a more significant alteration is necessary, NETGEAR offers the option to re-run the survey to incorporate any substantial revisions, ensuring the network’s performance remains optimal.
Preparing the Ethernet backhaul tends to be the most challenging and time-consuming part of a wireless installation. Our previous installation consisted of two much older APs, one on the main floor and one on the lower level. Our Ethernet runs were especially old, coming up on 15 years, so we also took this opportunity to run fresh lines.
The NETGEAR WiFi 7 APs support up to 10G. To achieve this kind of performance, correct cabling is required. Cat6 supports 10G just fine up to 165 feet, and Cat6A supports 10G up to 328 feet. To help ease the cabling pain, TrueCable sent over two 1000ft spools of Cat6 Riser cable, along with tools and accessories. These spools were of different colors, with the blue cable designated for the APs and the red cable for our security cameras. The camera locations already had cabling, but they were old and had multiple splices along their runs. These old and spliced cables would cause PoE issues if left in place.
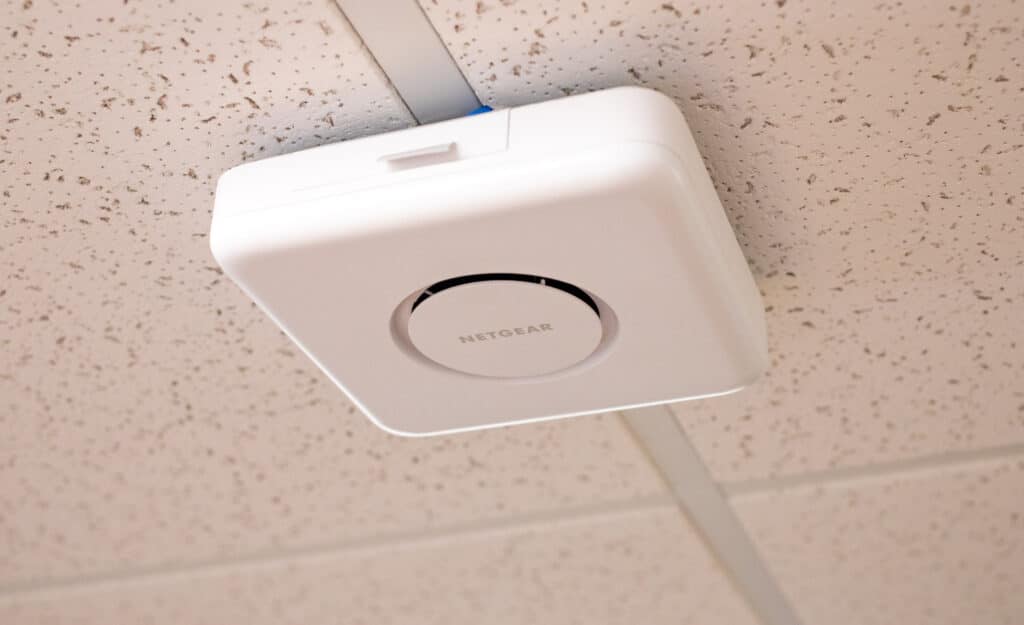
Once the new cabling to our desired locations was in place, it was time to hang the Access Points. Using the included T-Bar mounts made this process extremely simple. Our kit included two different sets of T-Bar mounts, with one dropping the AP slightly lower than the other.
Attaching the AP to the T-Bar mount is a matter of simply backing out the two screws that will hold the mount to the T-Bar, and removing the two screws on the other part of the AP mount. Then set the T-Bar mount in place, and tighten the set screws. Next, twist on the AP plate and add the two screws removed earlier. From here, it’s just positioning the cable, connecting it to the AP, and clicking the AP onto the mount. After the APs are mounted and the cabling is complete, it’s time to add them to the system.
NETGEAR Insight Ties It All Together
The Total Network Solution simplifies network management through the Insight Cloud Portal, providing interoperability, rapid setup, enhanced security, and easy scalability. This comprehensive approach reduces operational complexity, improves productivity, and supports a business’s growing needs with a reliable, high-speed network infrastructure.
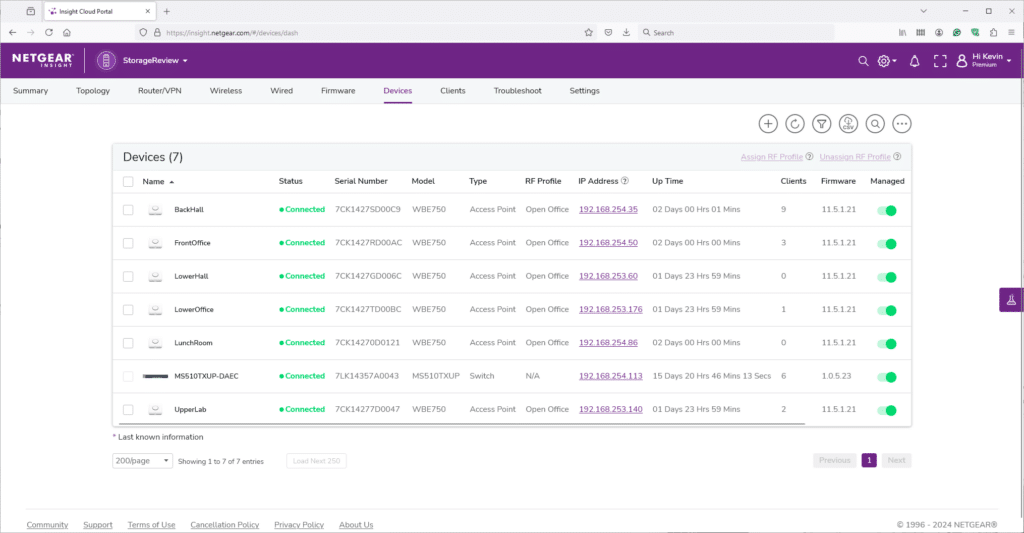
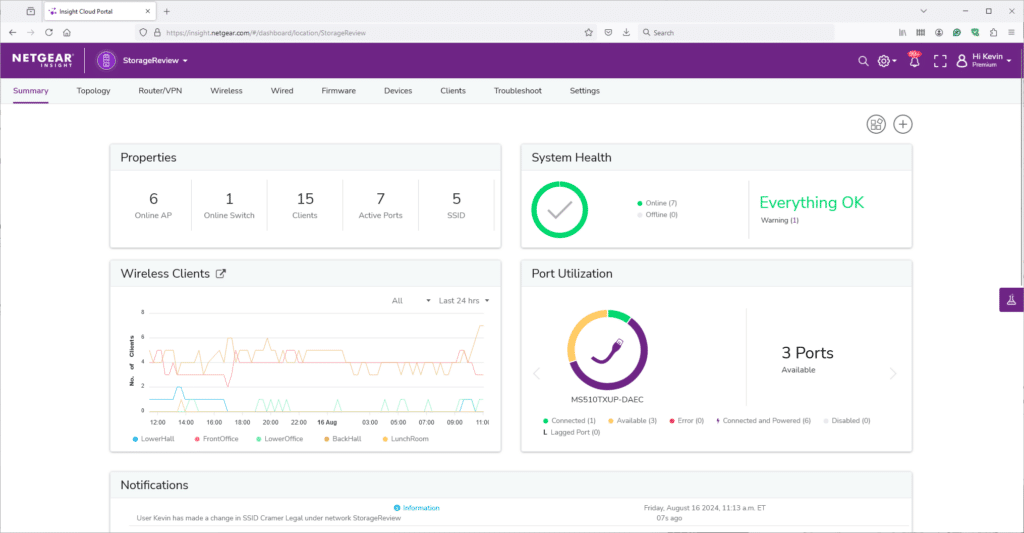
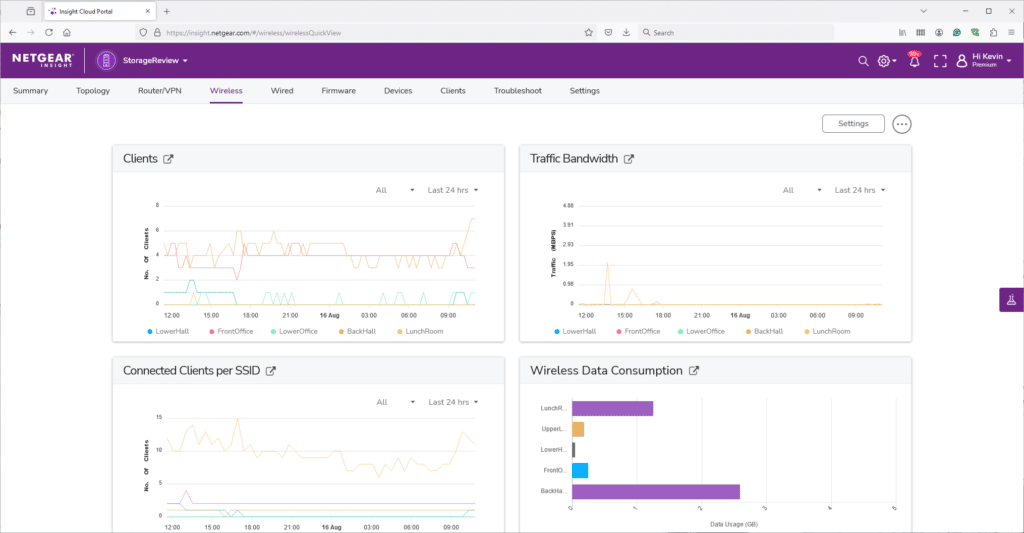
In our setup, we integrated our access points with NETGEAR Insight and gradually witnessed the seamless expansion of WiFi coverage throughout our office. Adding devices to NETGEAR Insight is straightforward: it involves collecting each device’s serial numbers and MAC addresses and entering that information into the online portal. Once the access points and other devices are online, they automatically start communicating with the external network, establishing a connection with the Insight portal. This process ensures that all devices are correctly linked and managed through the platform, making network oversight and configuration easier and more efficient.
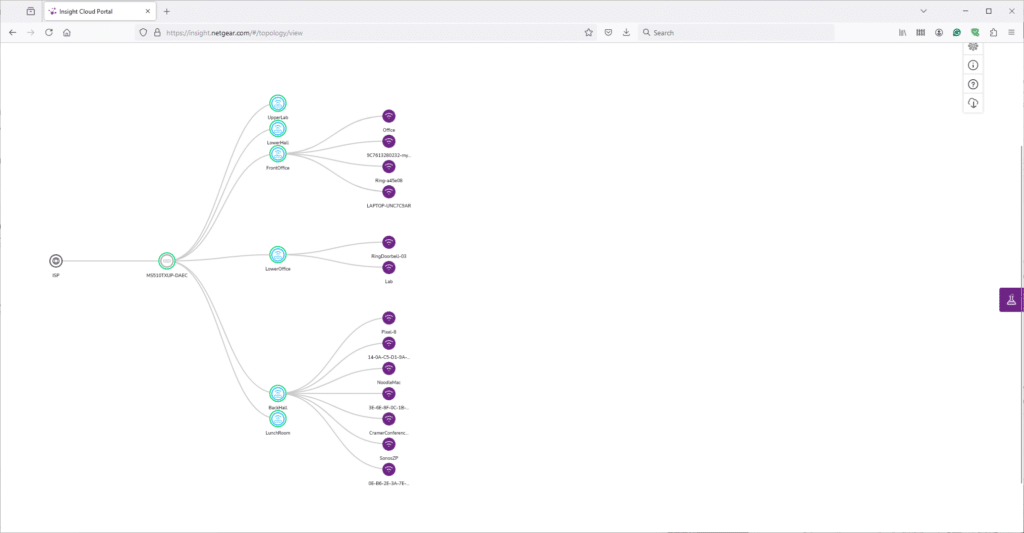
In our setup, the NETGEAR MS510TXUP switch provided the essential power and connectivity. It features 8 PoE++ ports, four of which offer multi-gig support and the other four supporting up to 10Gbase-T connectivity. We utilized this switch to connect six NETGEAR WBE750 WiFi 7 access points to our backend network, ensuring solid data connectivity and reliable power delivery to all APs. This setup not only streamlined our network infrastructure but also provided the necessary bandwidth and power to fully support our high-performance wireless environment.
One of the key advantages of centralizing all wireless networking devices into a single management portal is the ease with which SSIDs and overall configurations can be deployed. By entering the SSIDs into NETGEAR Insight, you can effortlessly assign them to specific access points, streamlining the setup process. In our environment, each network is broadcast across all APs, with some using different VLANs for segmentation. Even in our relatively small setting, the ability to simplify and minimize the setup work required to bring seven new network devices online is invaluable and greatly appreciated. This centralized approach saves time and reduces the potential for configuration errors, ensuring a smoother deployment.
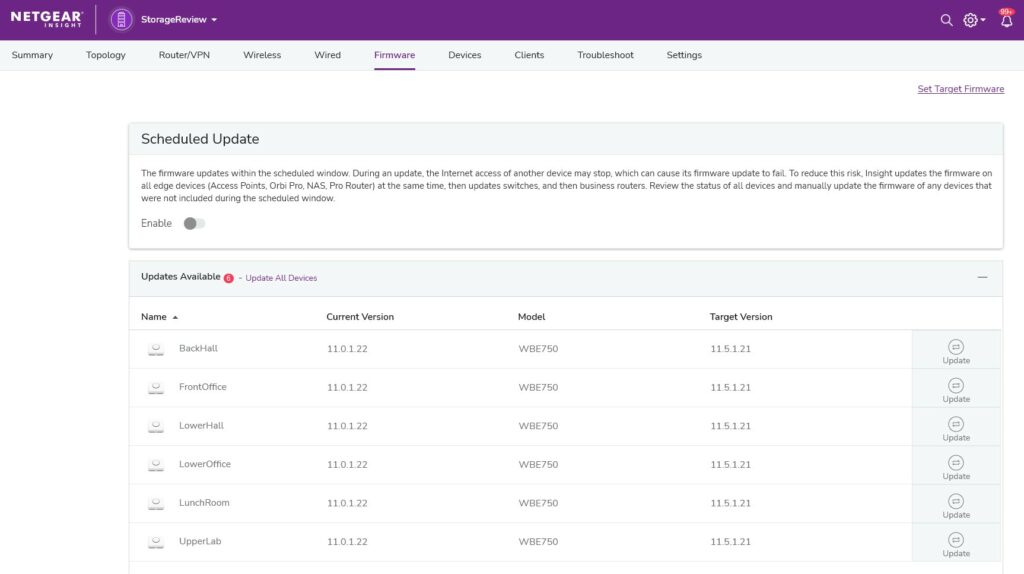
Managing updates for devices connected to NETGEAR Insight is also a breeze. NETGEAR keeps track of firmware revisions on each device connected to the ecosystem and prompts you when updates are available. You can kick off all updates in one go or roll them out manually to specific devices. All of this can take place from your phone or notebook connected to the internet.
Conclusion
NETGEAR’s Total Network Solution goes beyond merely providing hardware; it offers a comprehensive approach to building and managing a high-quality network environment. From the detailed wireless survey that ensures optimal access-point placement to the seamless integration of devices via the Insight Cloud Portal, NETGEAR delivers a solution designed for reliability, scalability, and superior performance.
The synergy between hardware—such as the Insight Managed Switches and WBE750 WiFi 7 Access Points—throughout our deployment created a robust and reliable networking backbone. These components worked seamlessly together, delivering high performance and stability across our network. NETGEAR free Pro WiFi Design Services played a crucial role in this process, ensuring that every aspect of our network was finely tuned for maximum efficiency. Their expertise and guidance were invaluable in helping us achieve an optimized and resilient networking environment for the hundreds of wireless devices in our office.
The self-installation process was straightforward, further highlighting the ease of deployment that the NETGEAR Business Total Network Solution promises. As businesses continue to demand more from their networks, the importance of a well-planned, expertly implemented solution cannot be overstated. For those who don’t want to run their install, channel partners can quickly fill that need.
With the NETGEAR Business Total Network Solution, organizations are fully equipped to tackle modern connectivity demands, ensuring their network infrastructure is reliable and coverage is impeccable. Whether expanding operations or enhancing existing systems, NETGEAR offers the comprehensive tools and expert support needed to achieve exceptional network quality.
This report is sponsored by NETGEAR. All views and opinions expressed in this report are based on our unbiased view of the product(s) under consideration.
Engage with StorageReview
Newsletter | YouTube | Podcast iTunes/Spotify | Instagram | Twitter | TikTok | RSS Feed

