
![]() The Lenovo XClarity Controller (XCC) is part of the System Management tools of Lenovo. The company refers to this family of software tools as “foundation software for data centers who put a premium on it efficiency and precision execution.” These software tools and applications aim to help systems administrators standardize, simplify, and automate foundation infrastructure processes. Among this family of software, the XClarity Controller is a powerful management tool for deploying agile IT methodologies and speed up infrastructure delivery.
The Lenovo XClarity Controller (XCC) is part of the System Management tools of Lenovo. The company refers to this family of software tools as “foundation software for data centers who put a premium on it efficiency and precision execution.” These software tools and applications aim to help systems administrators standardize, simplify, and automate foundation infrastructure processes. Among this family of software, the XClarity Controller is a powerful management tool for deploying agile IT methodologies and speed up infrastructure delivery.
The Lenovo XClarity Controller (XCC) is part of the System Management tools of Lenovo. The company refers to this family of software tools as “foundation software for data centers who put a premium on it efficiency and precision execution.” These software tools and applications aim to help systems administrators standardize, simplify, and automate foundation infrastructure processes. Among this family of software, the XClarity Controller is a powerful management tool for deploying agile IT methodologies and speed up infrastructure delivery.
The Lenovo XClarity Controller is the next generation management controller that replaces the baseboard management controller (BMC) for Lenovo ThinkSystem servers. It is embedded in every ThinkSystem server on a separate microprocessor, which provides advanced service-processor control, monitoring, and alerting functions. This controller consolidates the service processor functionality, super I/O, video controller, and remote presence capabilities into a single chip, and it is based on the Pilot4 XE401 baseboard management controller using a dual-core ARM Cortex A9 service processor.
In this review, we focus on the XClarity Controller version 1.52 released this year. The user interface was redefined from the oldest versions to make it more intuitive and productive, including at-a-glance visualizations and simple access to everyday system actions. Comparing with the latest and recent firmware versions, the GUI remains the same. But still, XClarity Controller shows to have a clean design and an easy-to-use web interface, characteristics of an excellent management tool.
Editions
There are three levels of features of XClarity Controller: Standard, Advanced, and Enterprise. All levels provide around-the-clock remote access and management of your server, remote management independent of the status of the managed server, and remote control of hardware and operating systems.
XClarity Controller Standard offers the following capabilities:
- Gathering and viewing system information and inventory
- Monitoring system status and health
- Alerting and notifications
- Event logging
- Configuring network connectivity
- Configuring security
- Updating system firmware
- Configuring server settings and devices
- Real-time power usage monitoring
- Remotely controlling server power (Power on, Power off, Restart)
- Managing FoD activation keys
- Redirecting serial console via IPMI
- Capturing the video display contents when an operating system hang condition is detected
- FIPS 140-2 compliant encryption
XClarity Controller Advanced Upgrade adds the following functionality to the Standard features:
- Remotely viewing video with graphics resolutions up to 1920×1200 at 60 Hz with 16 bits per pixel
- Remotely accessing the server using the keyboard and mouse from a remote client
- Ability to record and replay the video from a remote control session
- Remotely deploying an operating system
- Component replacement logs
- Syslog alerting
- Redirecting serial console via SSH
- Security Key Lifecycle Manager (SKLM)
- IP Address blocking
- Displaying graphics for real-time and historical power usage data and temperature
XClarity Controller Enterprise Upgrade adds the following functionality to the Advanced features:
- Capping power usage
- Mapping the ISO and image files located on the local client as virtual drives for use by the server
- Mounting the remote ISO and image files via HTTPFS, CIFS, and NFS
- Collaborating across up to six users of the virtual console
- Virtual console chat
- Ability to capture and replay the server’s boot-up video
- Ability to capture and replay the server's video information leading up to the point where the operating system may hang or crash.
- Out-of-band (OOB) performance monitoring – System performance metrics
- Controlling quality and bandwidth usage of the virtual console
Web-Based Interface Overview
There are two options to access the XClarity controller management processor remotely. One option is using the Command-line interface, via SSH, and log into the management processor; another option is using the web-based interface. Besides, the XClarity Controller can also be managed locally from the XClarity Mobile app on a phone or tablet. To carry out this review, we used the web-based interface.
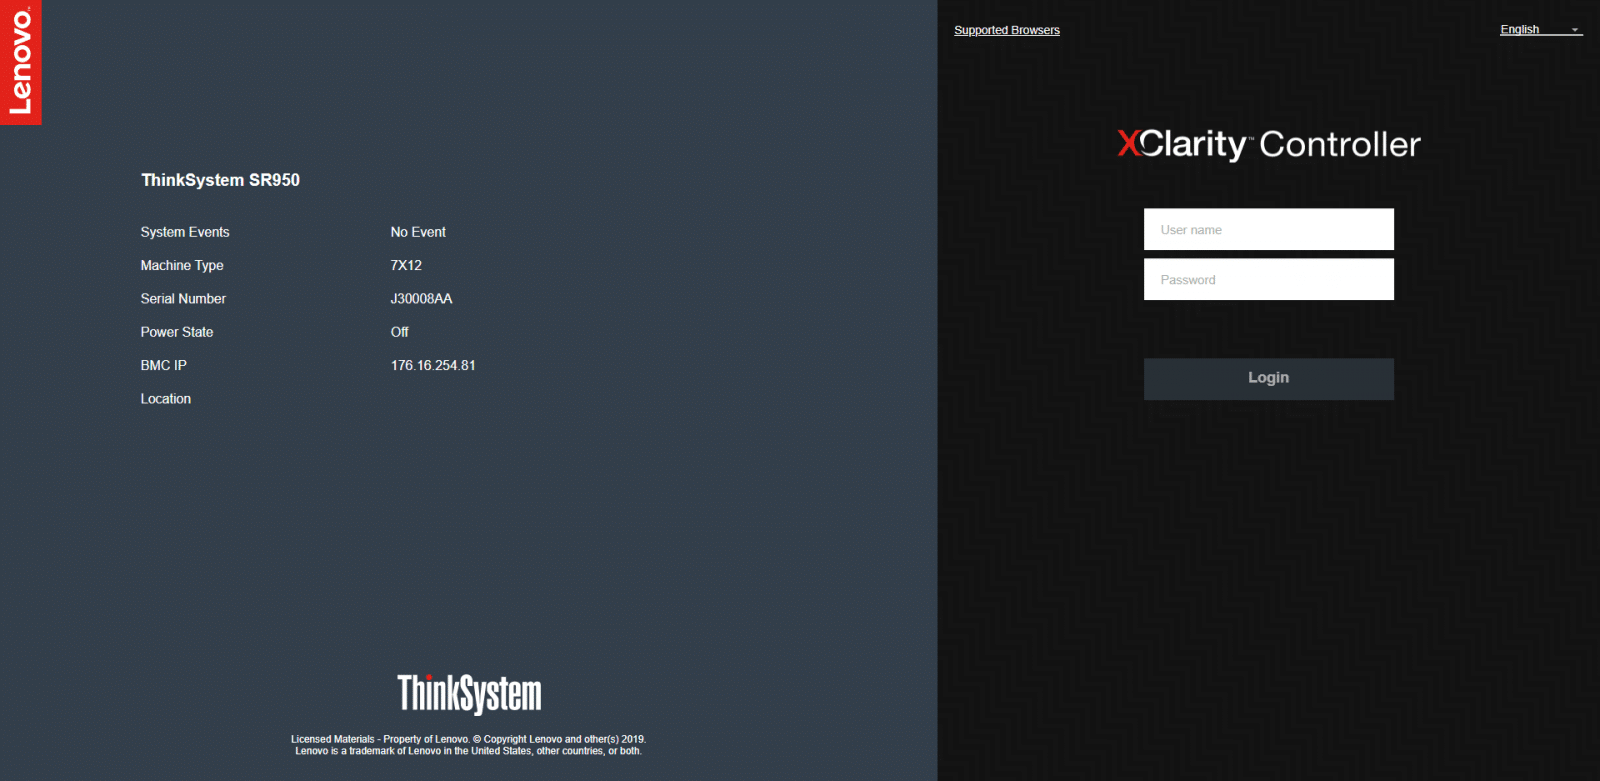
To access the XClarity Controller web interface, we need to use a web browser and type the IP address or hostname of the XClarity Controller to which we want to connect. We will be brought to the login window; on the right, we have basic information to make sure we access to the proper system; also, we can select the desired language from the language drop-down list on the top-right corner, and then enter credential and log in.
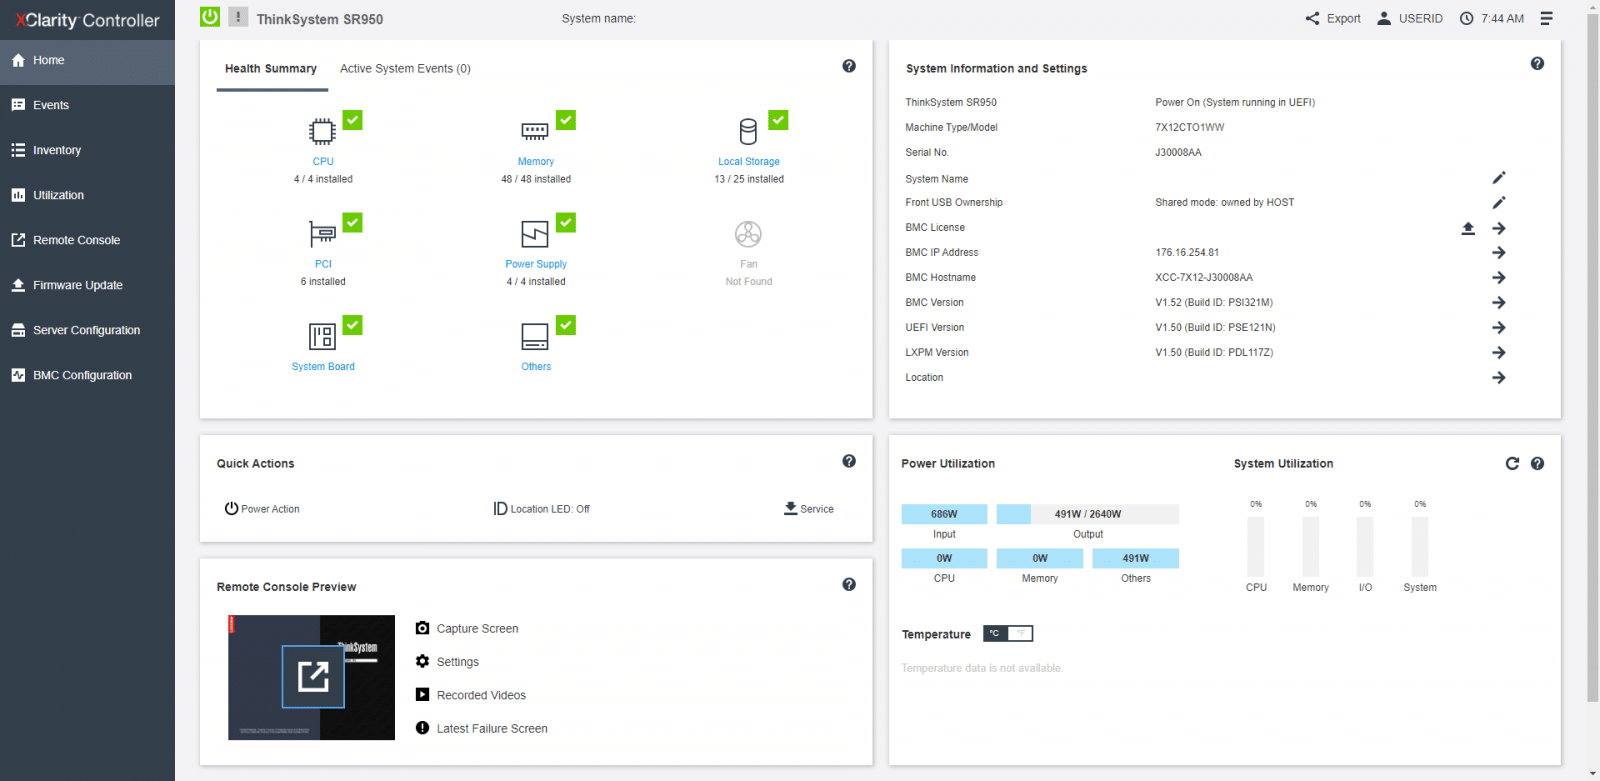
The first page we get to see is the home page. The home page is mainly divided into two sections: On the left, the navigation panel, and on the right is the graphical information section; where we can see details about the system that the XClarity Controller manages plus icons indicating how many critical errors and how many warnings are currently present in the system. If we see all green here, we are good. Other areas here are System information and settings, Quick Actions, Power Utilization, and Remote Console Preview. The home page is not only an overview; one can perform direct actions from this page, avoiding, in some cases, navigating on the left panel.
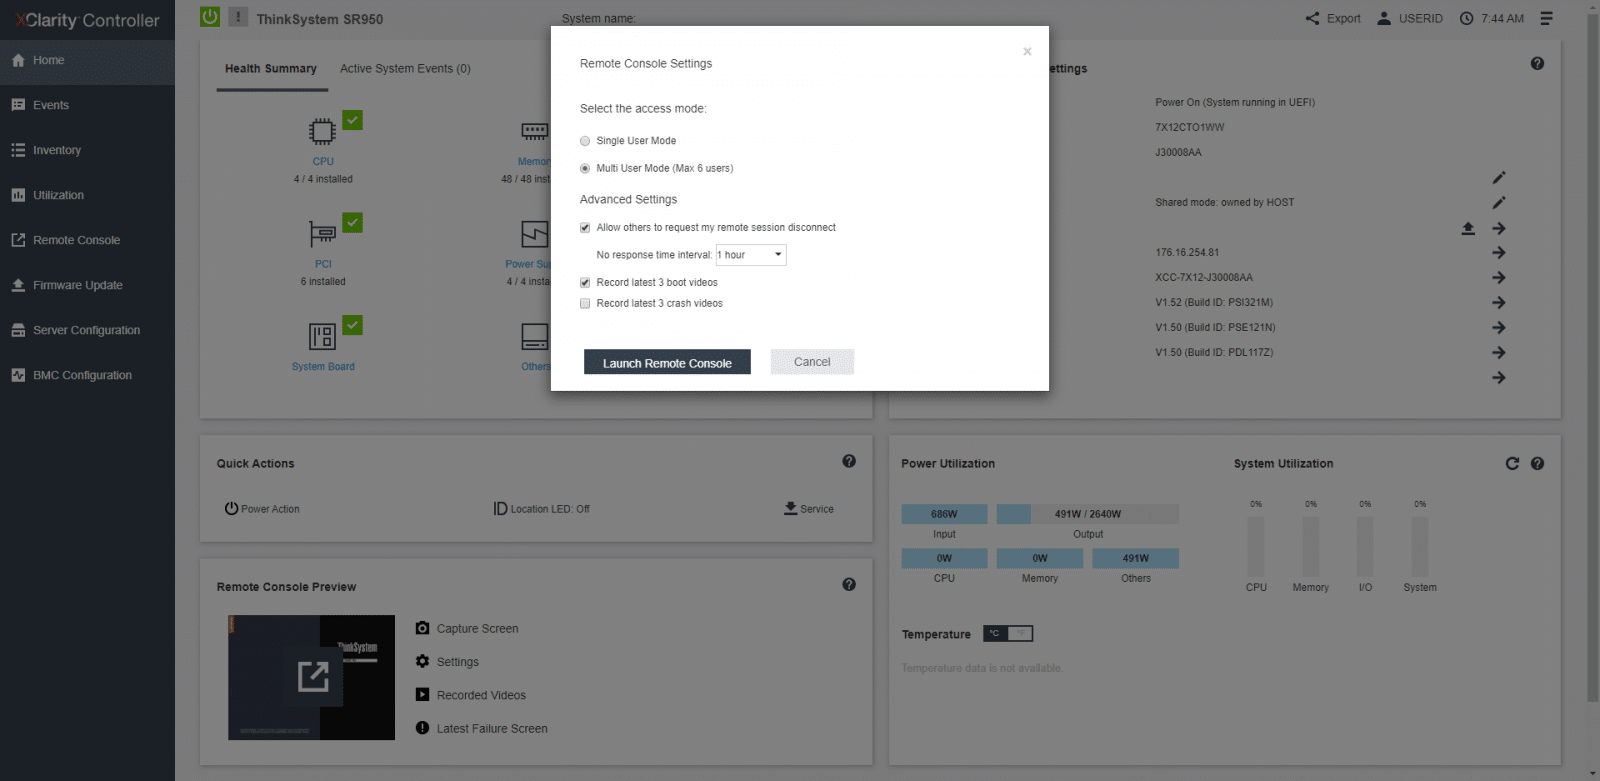
One of the actions that can be performed straight from the home page is accessing the remote console. By clicking on the remote console preview thumbnail, a Remote Console Settings will pop up, allowing quick settings, and then we could launch the remote console in an additional tab on our web-browser. From the remote console area, one can also perform actions that include to take a screenshot capture, remote console settings, view the latest boot videos, or see the latest OS failure screen.
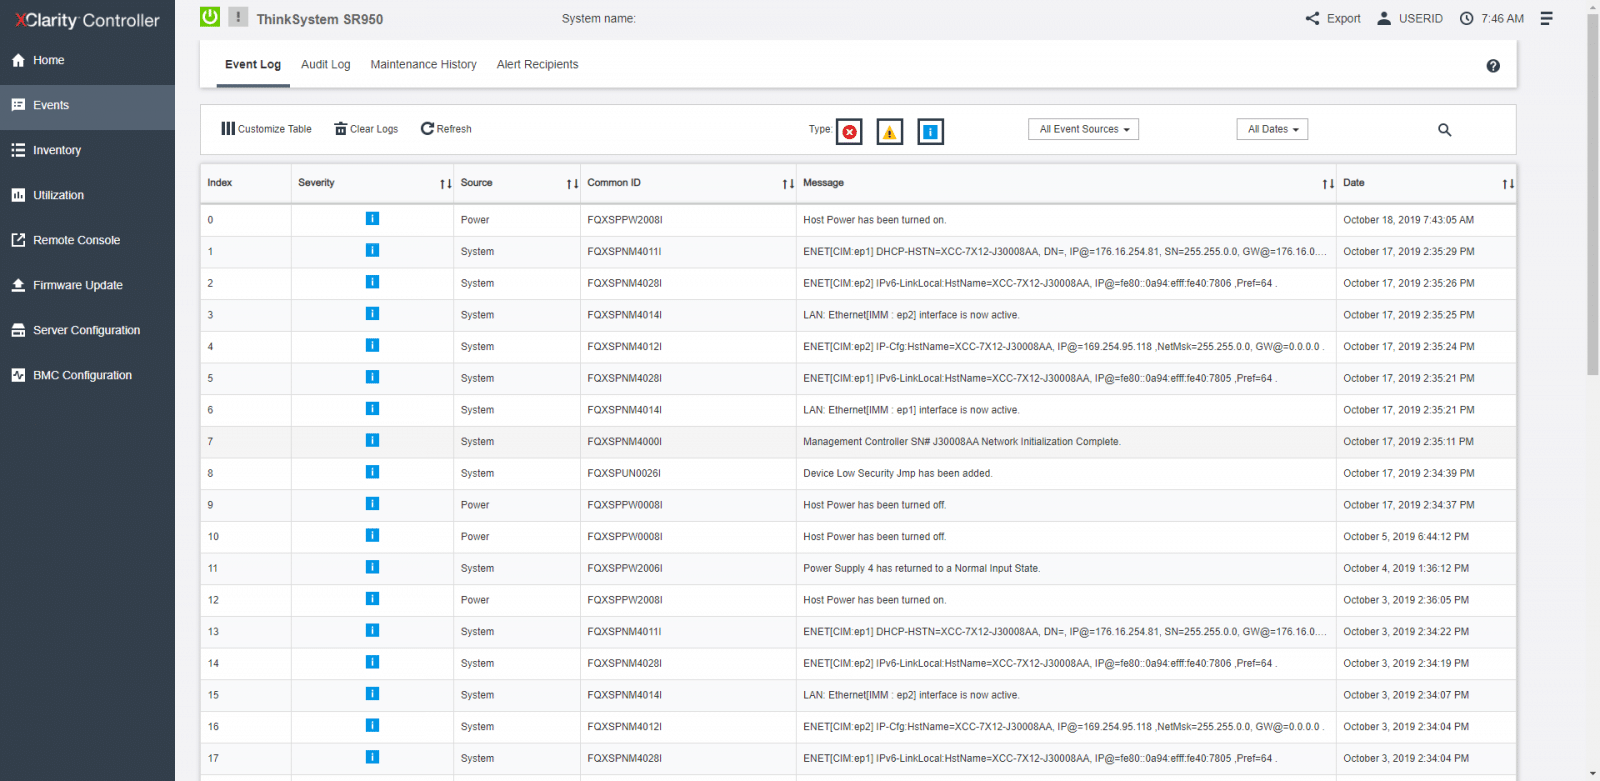
The next option in the navigation panel is Events. From Event Log, we see a historical list of all hardware and management events. Other pages under Events include Audit Log, Maintenance History, and Alert Receipts. From the last one, we can configure each recipient and manage settings that apply to all event recipients.
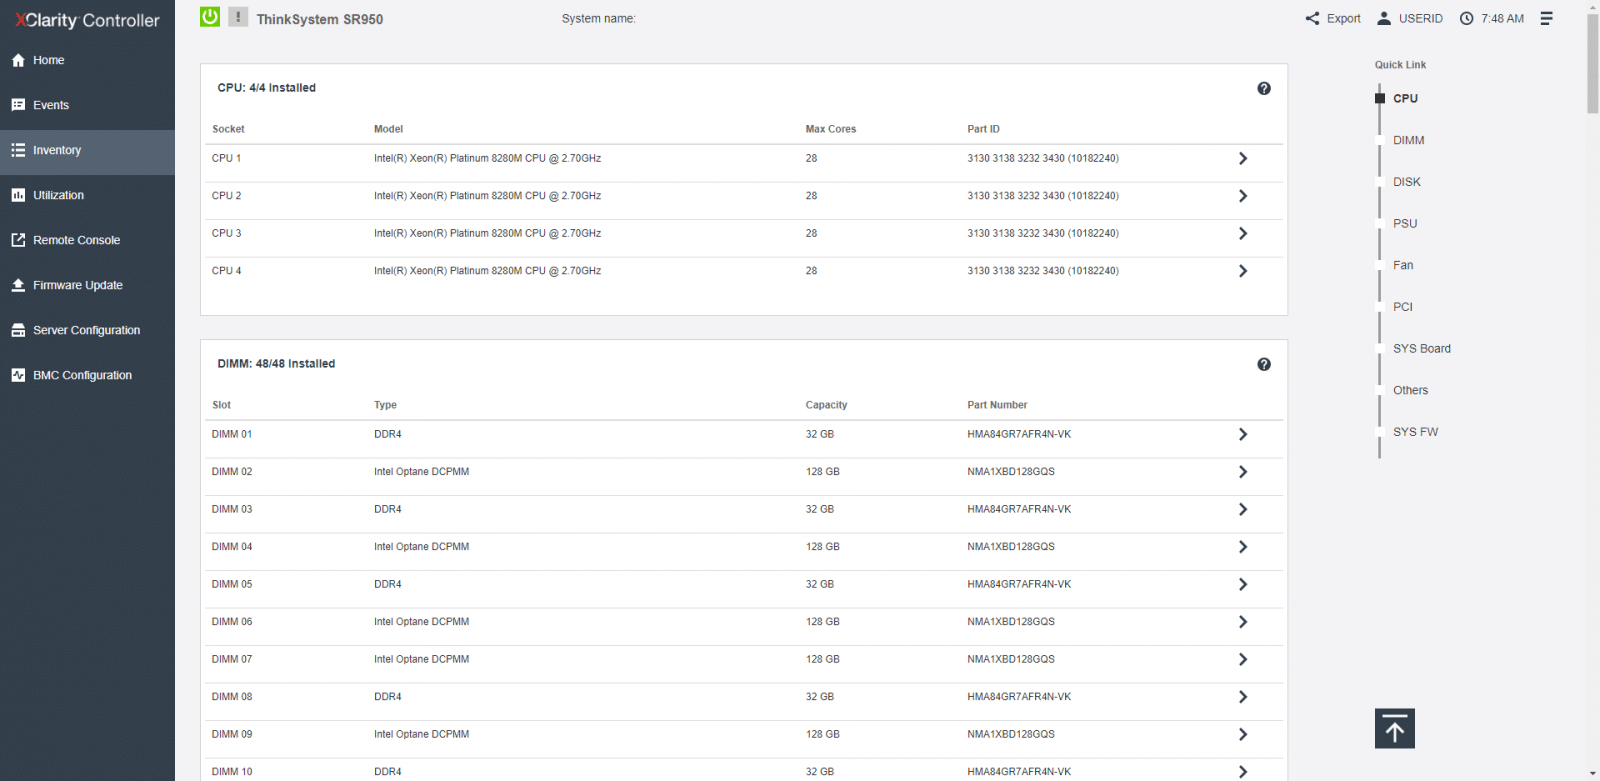
Now we take a look at the Inventory. The first thing we see here is the CPU and DIMM area, but if we scroll down, we see all the inventory inside the system; the essential information of the items is going to be detailed in specific sections. On the left side, we can access the Quick Link menu. This menu is a great and fancy addition from Lenovo to management GUIs; it allows you to jump into individual sections of the inventory quickly.
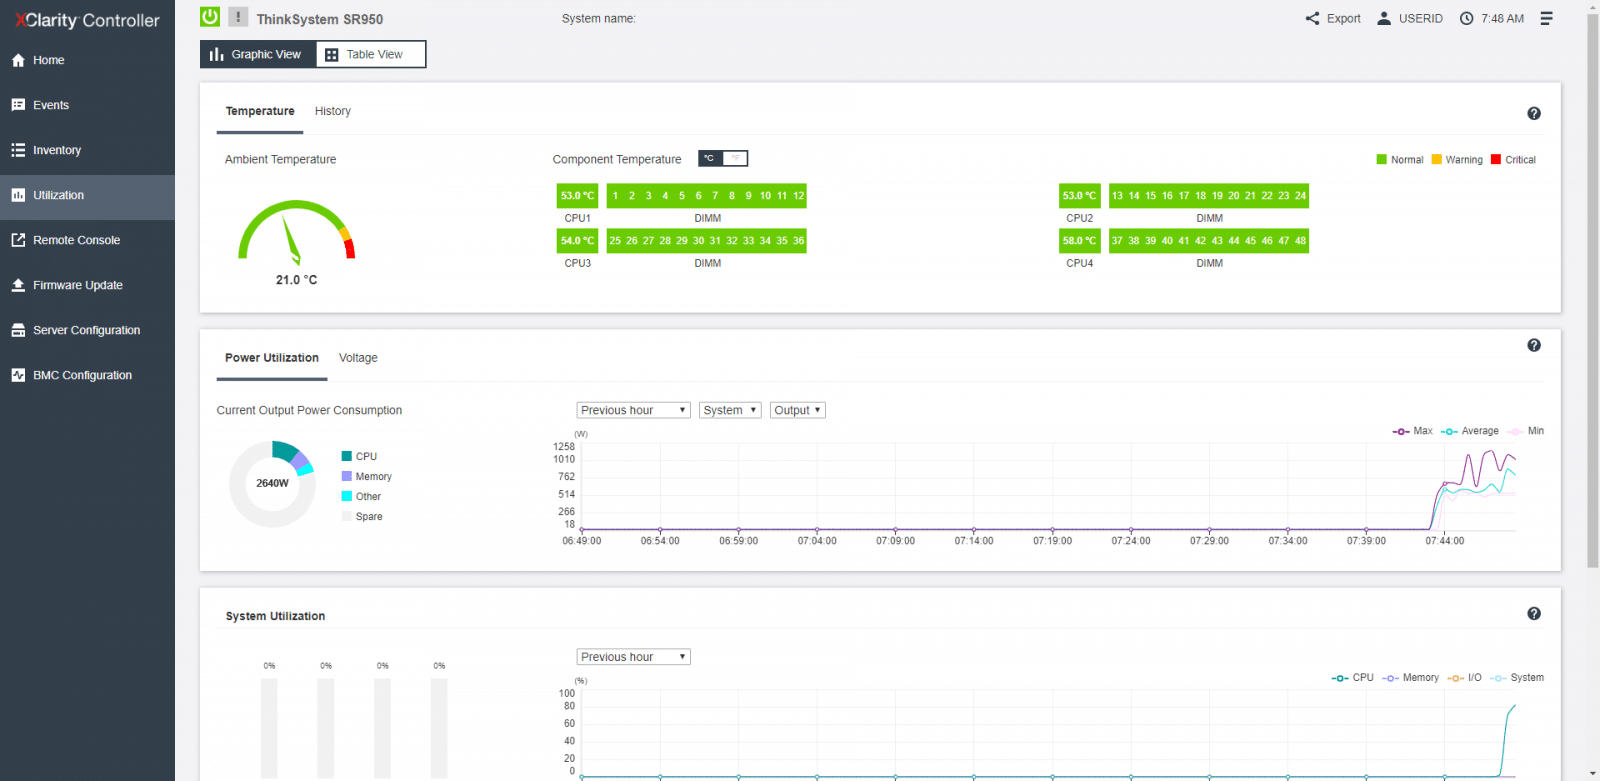
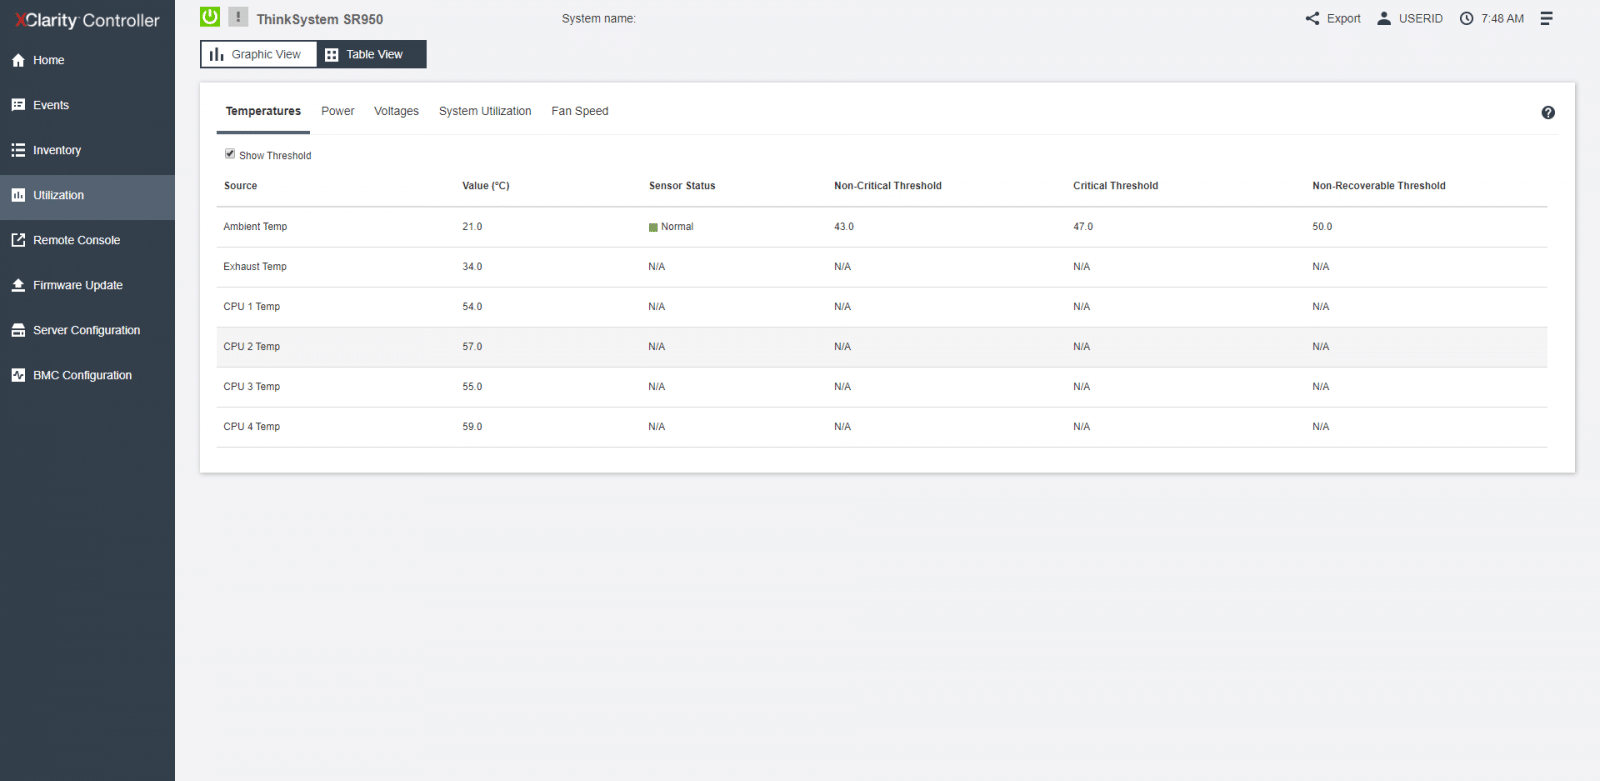
Next, we take a look at the Utilization page. This page shows what is going on inside the system. We can find the temperature, power utilization, voltage levels, system subsystem utilization, and fan speed information of the server and its components.
Still under the Utilization page, if we change to the Table view, we can see components information in a tabular format.
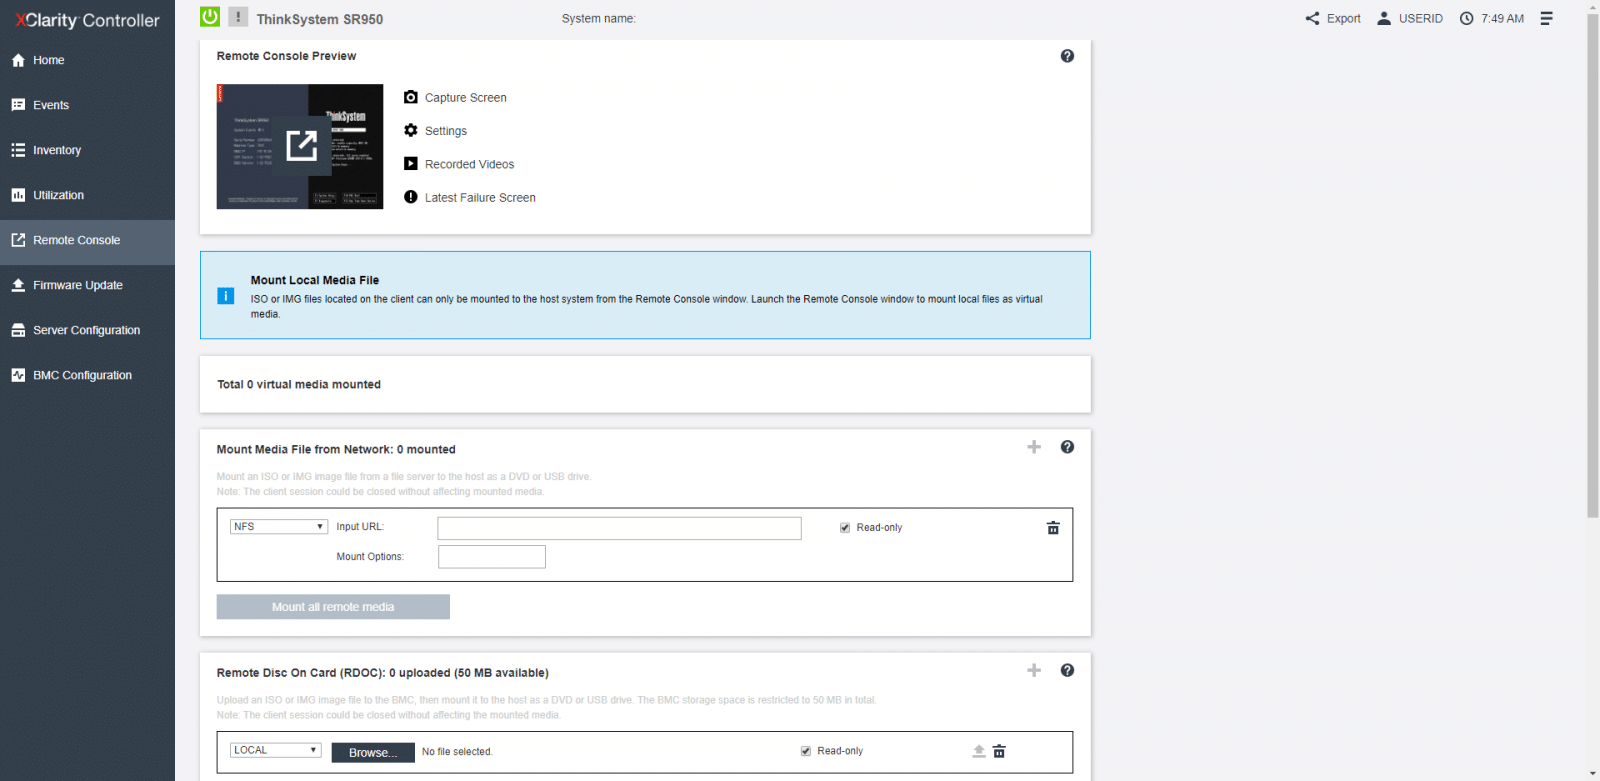
The Remote Console page provides access to remote console options. Same as the home page, from the remote console preview area, one can also perform quick actions, like taking a screenshot capture, remote console settings, view the latest boot videos, or see the latest OS failure screen. One of the top functions here is the use of the virtual media feature to mount ISO or IMG files. These files can be located on the system or a network location. The mounted disk should appear as a USB disk drive that is attached to the server.
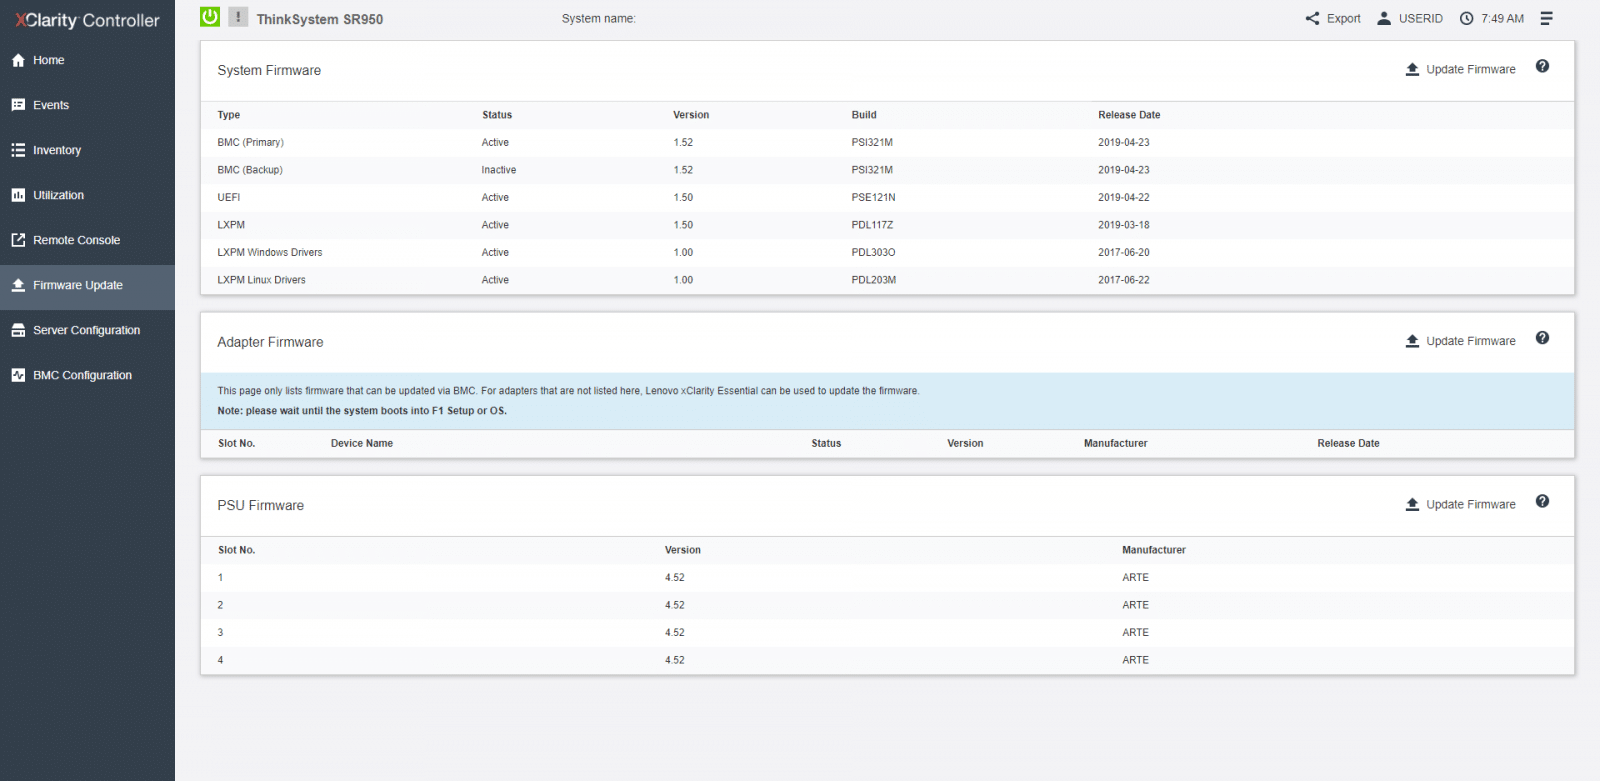
The Firmware Update page displays the system firmware levels. This page also allows updating the XClarity Controller and server firmware.
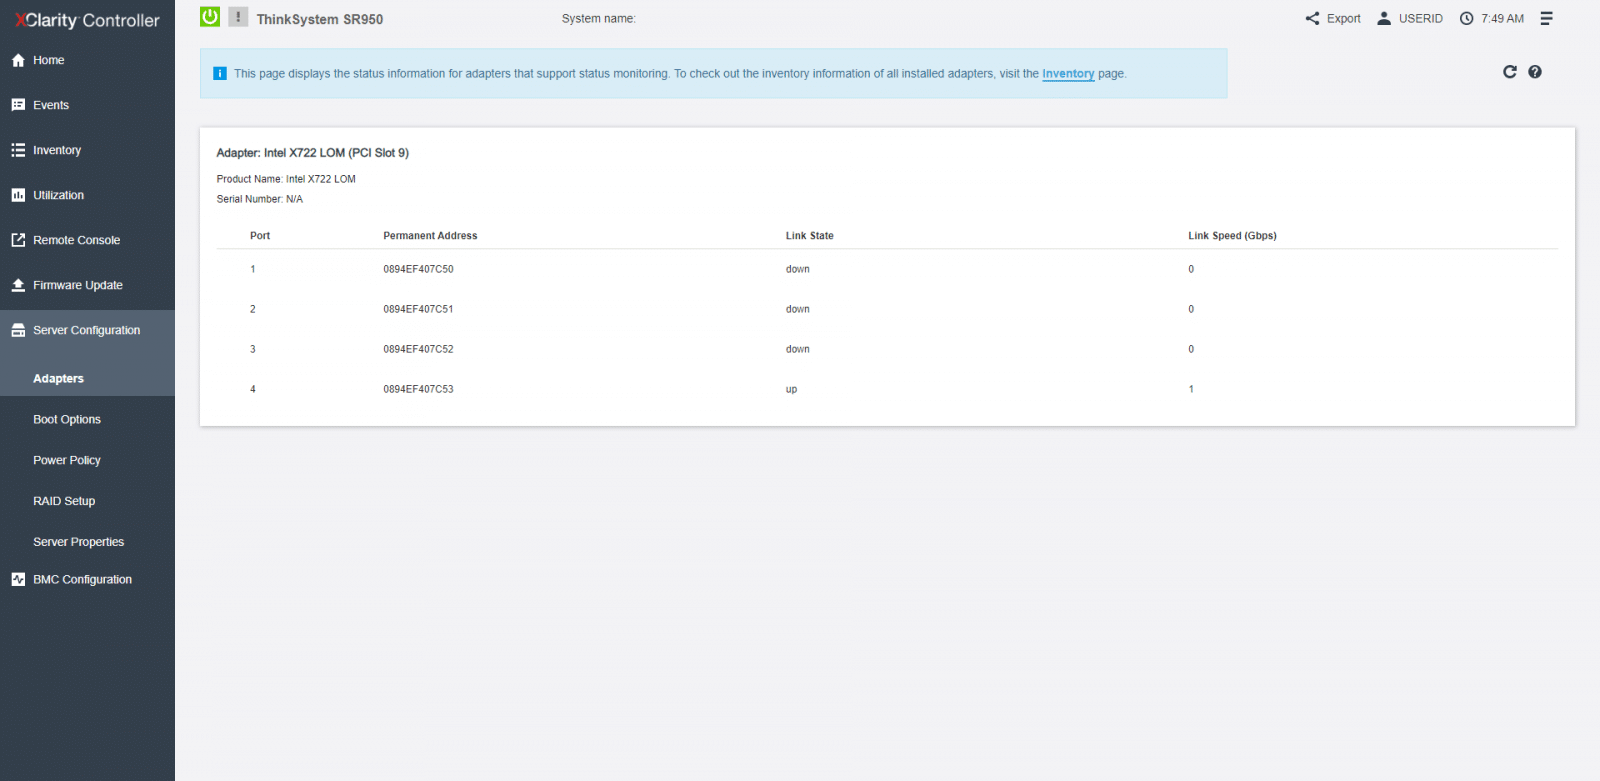
The next two tabs (Server Configuration and BMC Configuration), shows an expansible submenu. The first page to take a look here is Adapters under Server Configuration. From the Adapters pages, we see the information on the network adapters installed.
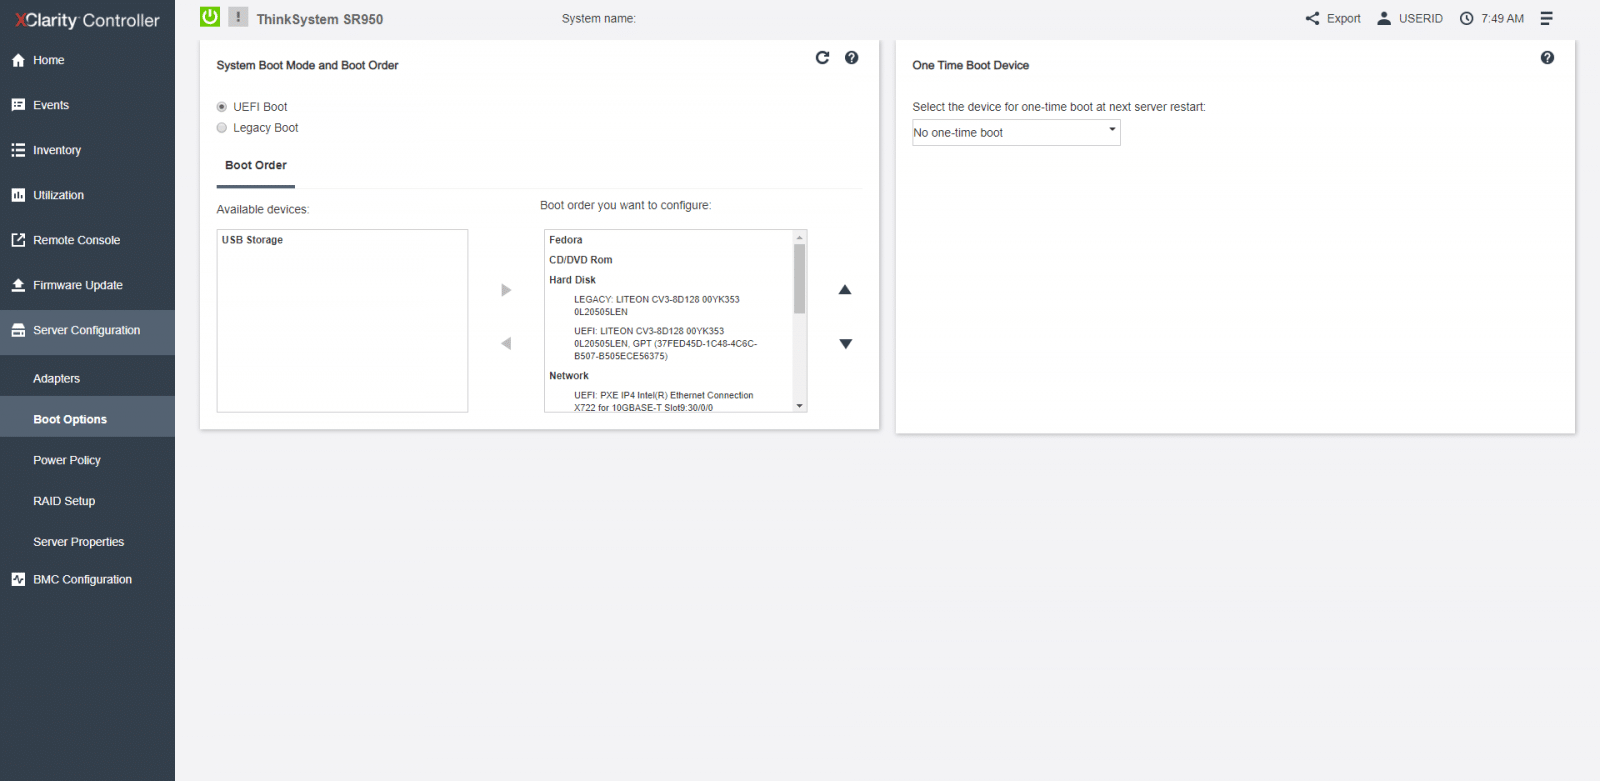
The next tab we check is Boot Options, and here we can change the boot mode, boot order settings, as well as set up a one-time boot device.
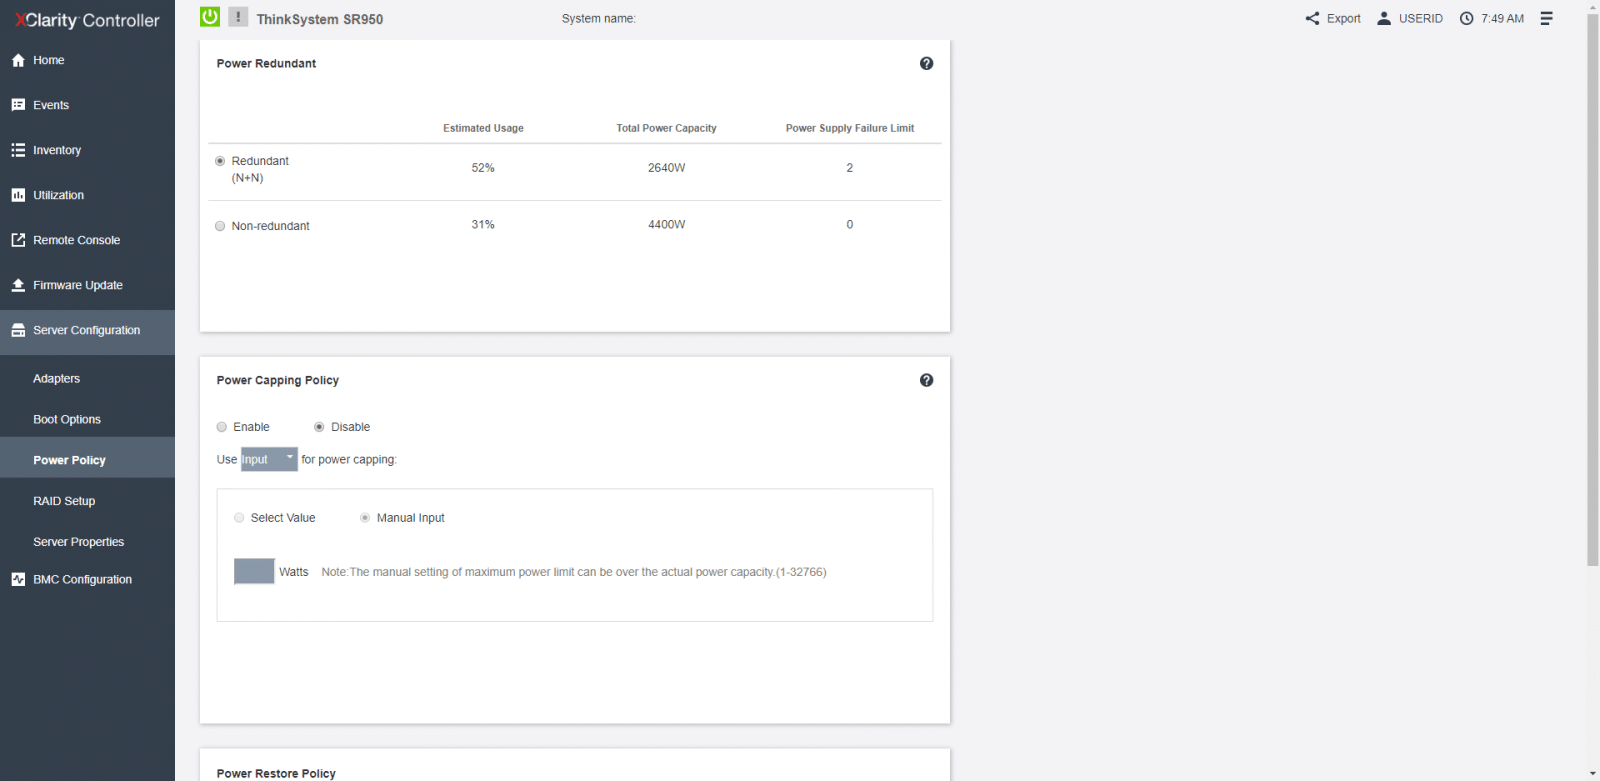
From the Power Policy page, we can configure some useful power policies such as the power redundancy during the event of a power supply failure, power capping policy, and power restore policy.
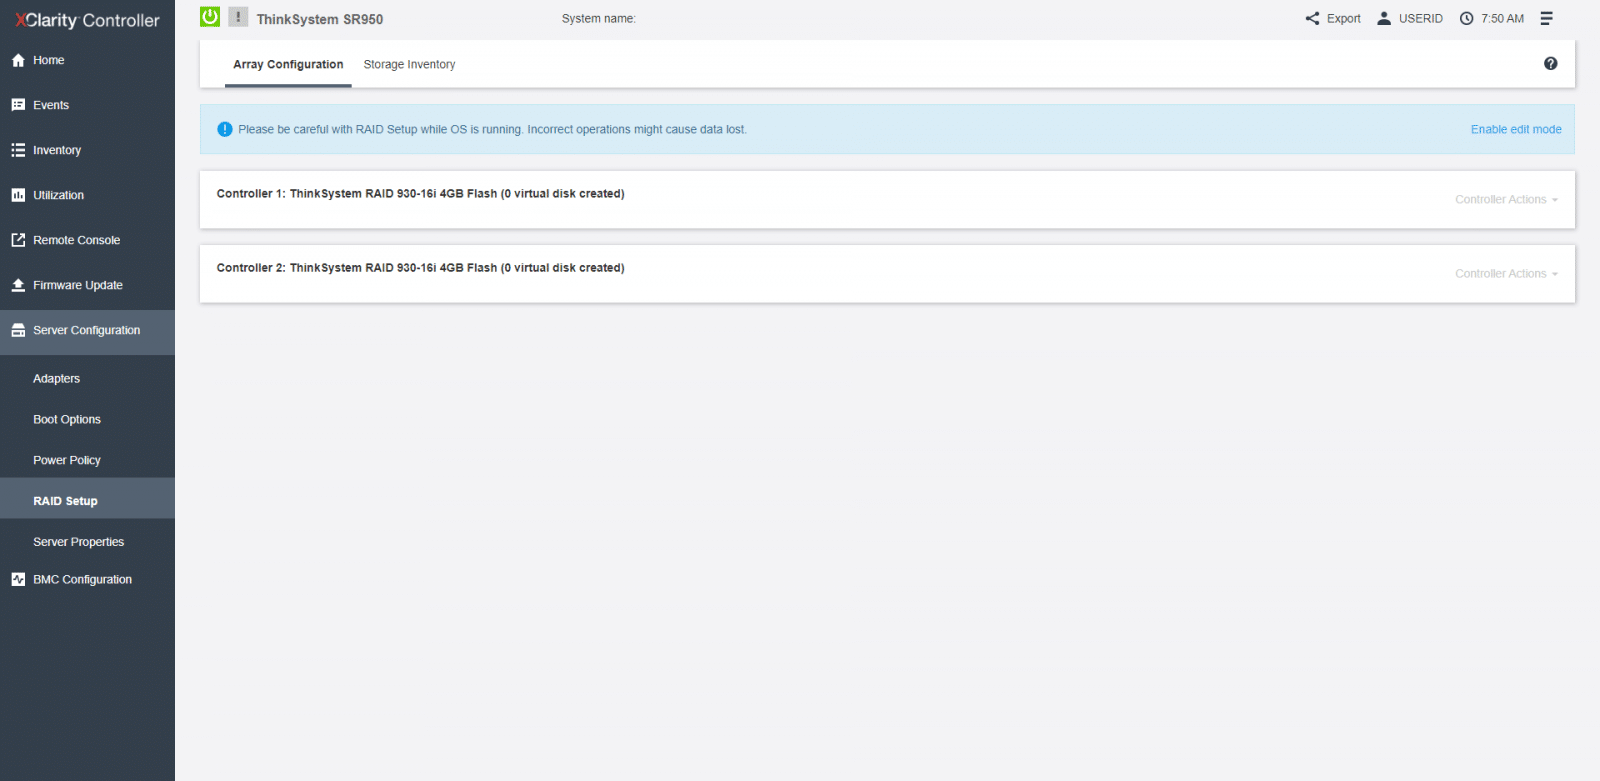
From the RAID Setup page, we can view or modify current RAID configuration, including the information of virtual disks and physical storage devices. This configuration could be applied per controller or at the storage level.
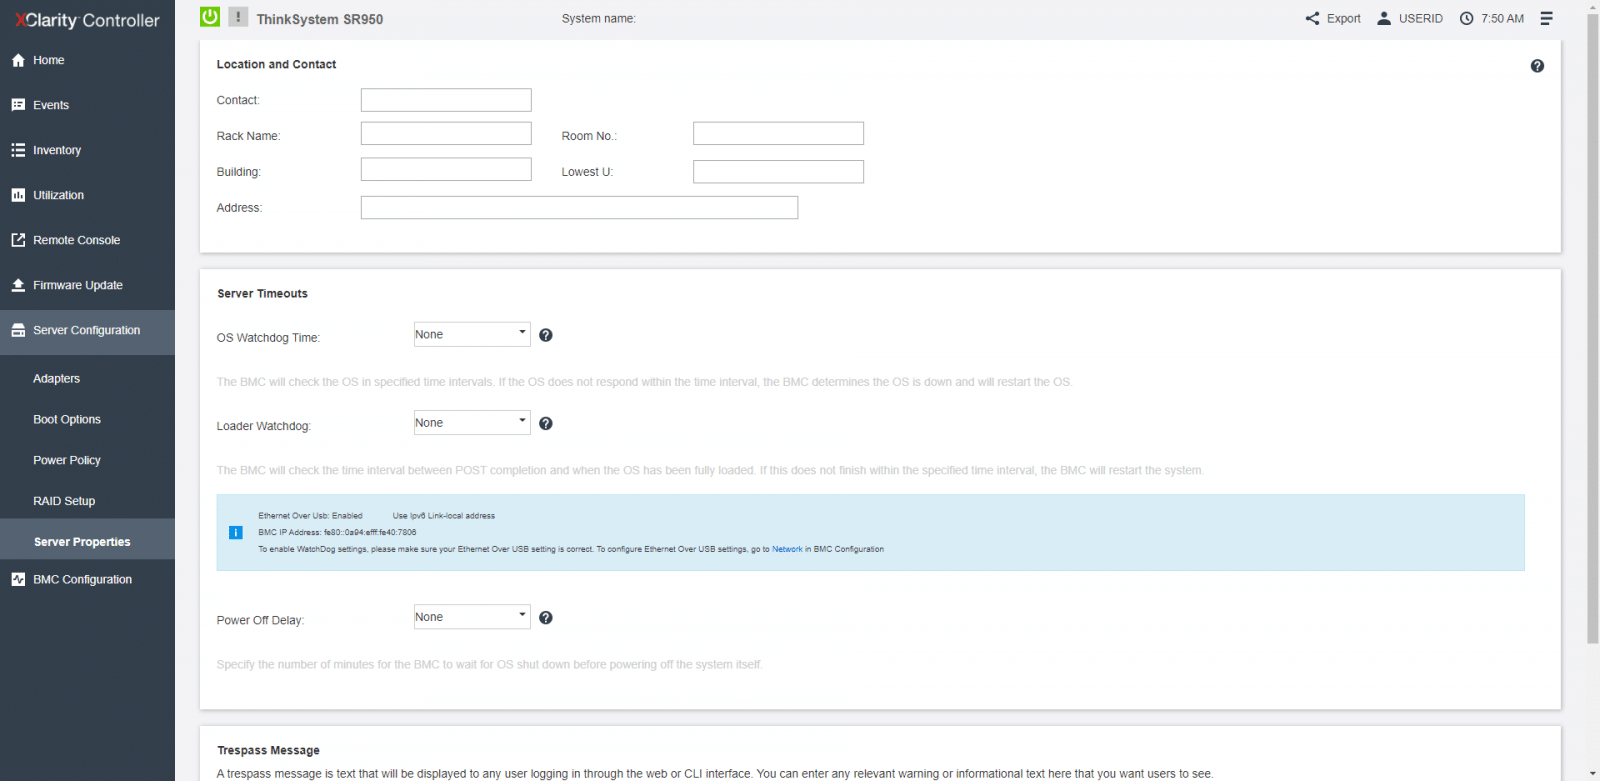
The last tab, under Server Configuration, is Server Properties. Server Properties allows monitoring various properties, status conditions, and settings for the server, as well as manage server start timeouts, and create a Trespass Message, handy to see when users log in to the XClarity Controller.
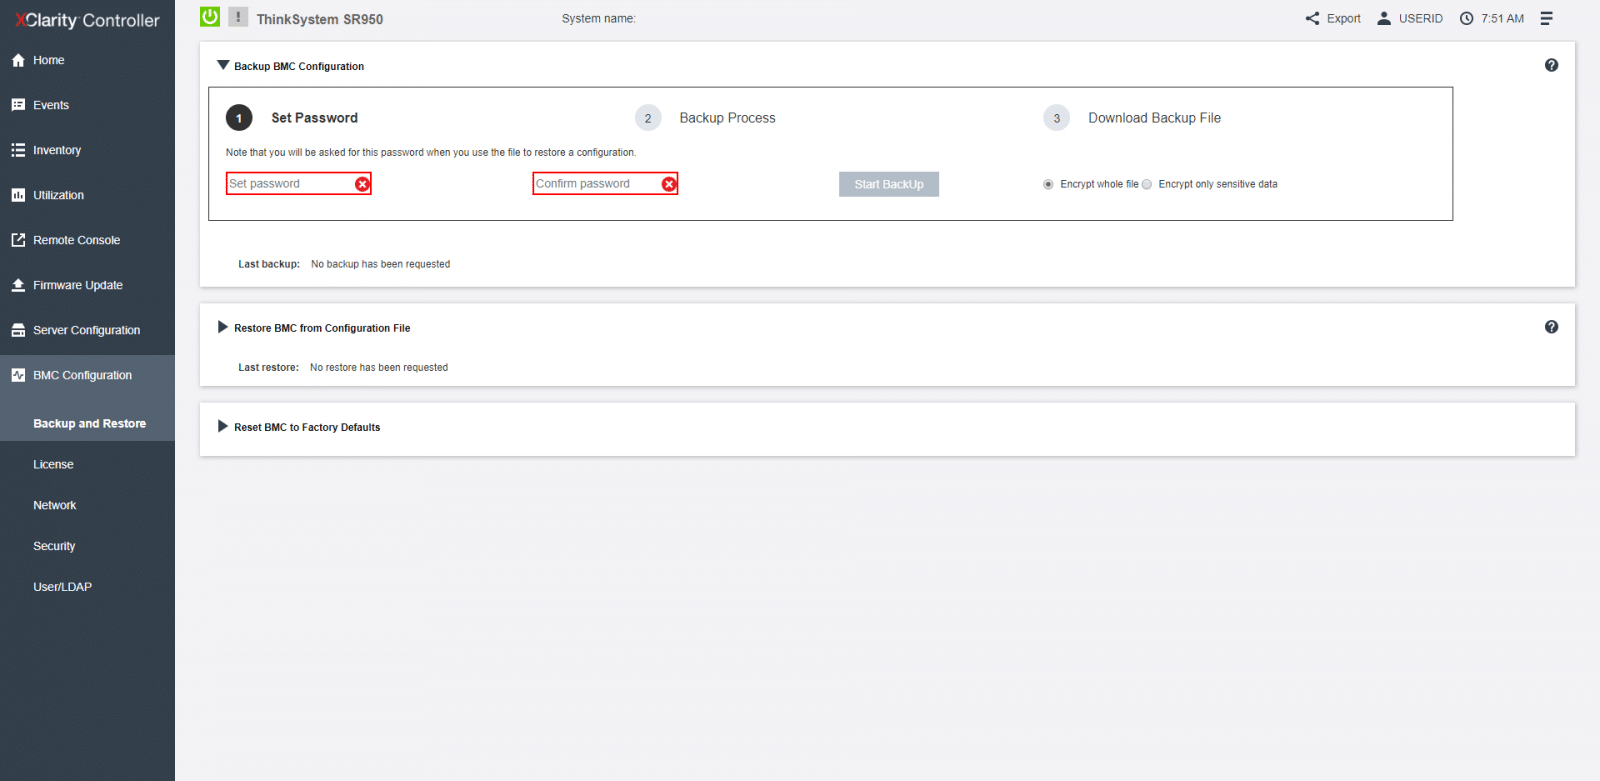
Moving down to BMC configuration, the first tab we see is Backup and Restore. From here, one could backup the current configuration of the XClarity Controller, restore the configuration from a file, or reset the configuration to factory defaults.
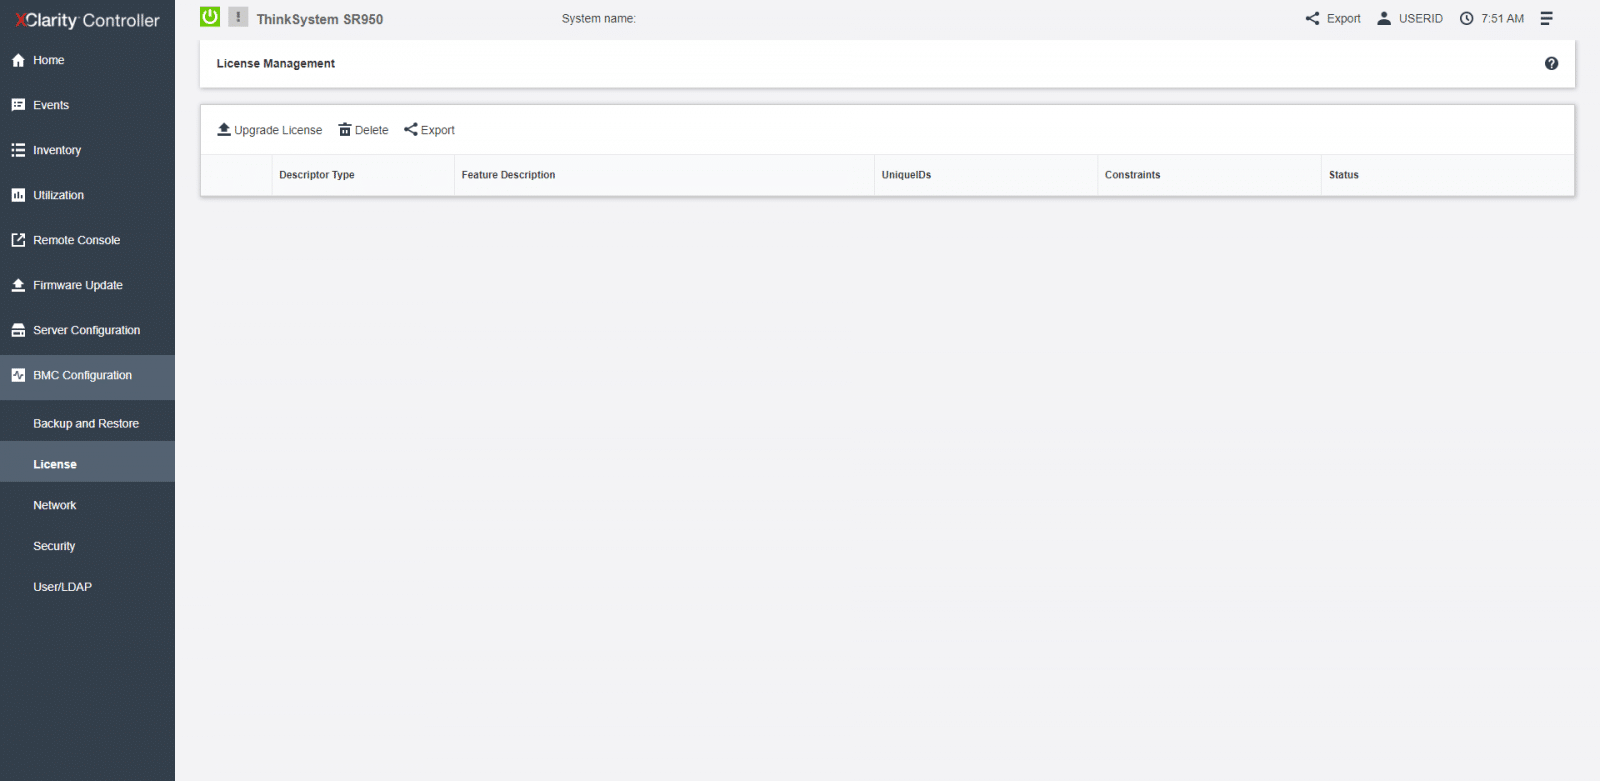
On the License Management, we can upgrade activation keys for optional XClarity Controller features. Lenovo XClarity Controller is available in Standard, Advanced, and Enterprise editions.
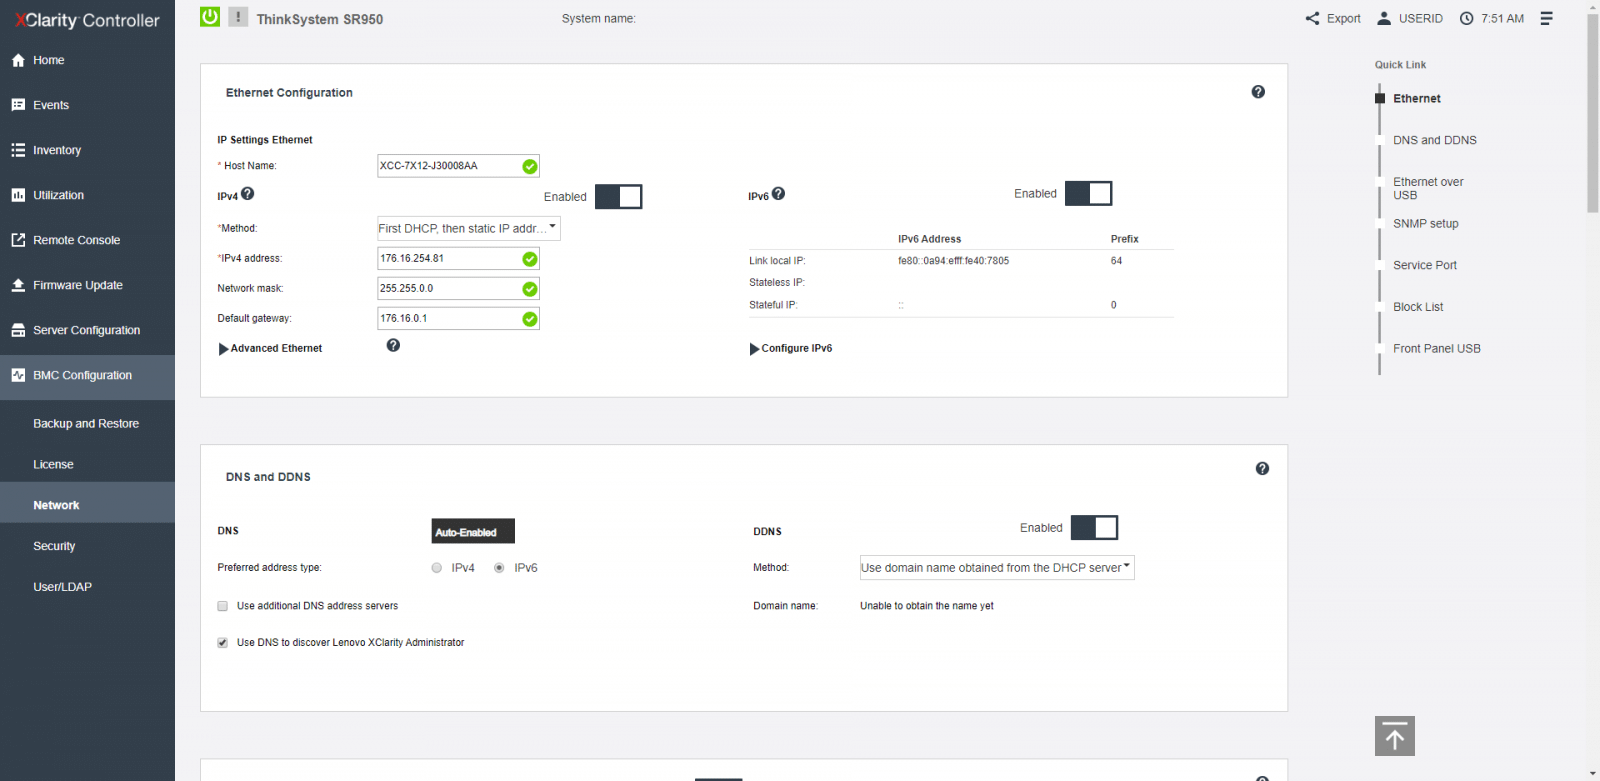
Under Networks, we can configure networking properties, and from the Quick Link menu, we can jump to the different network sections, including Ethernet, DNS and DDNS, Ethernet over USB, SNMP setup, Service Port, Block List, and Front Panel USB.
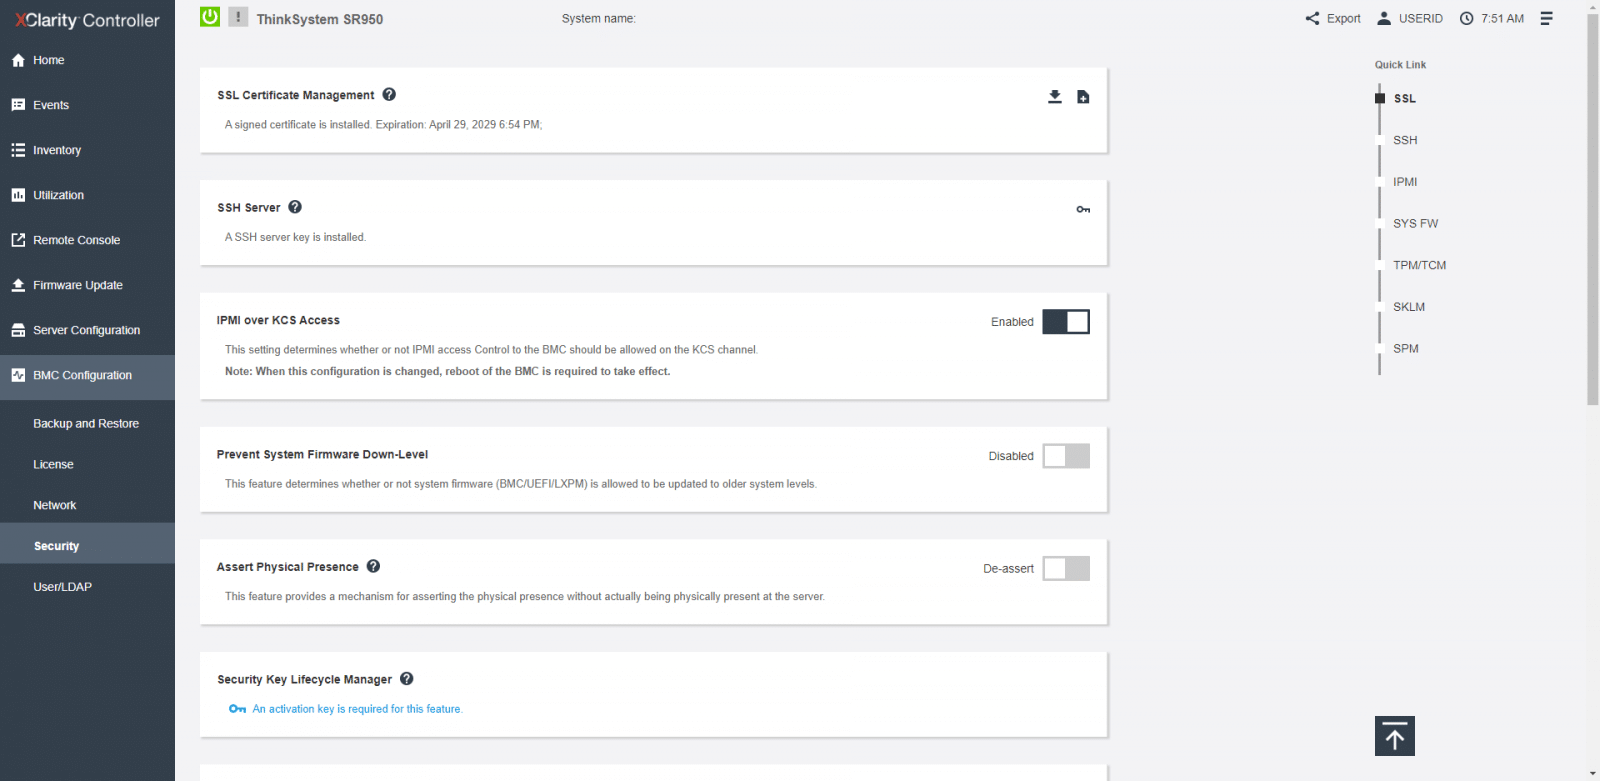
On Security, is where we configure security properties for the XClarity Controller. Here we can also find the Quick Link menu, and we have the option to move over SSL, SSH, IPMI, SYS FW, TPM/TCM, SKLM, and SPM.
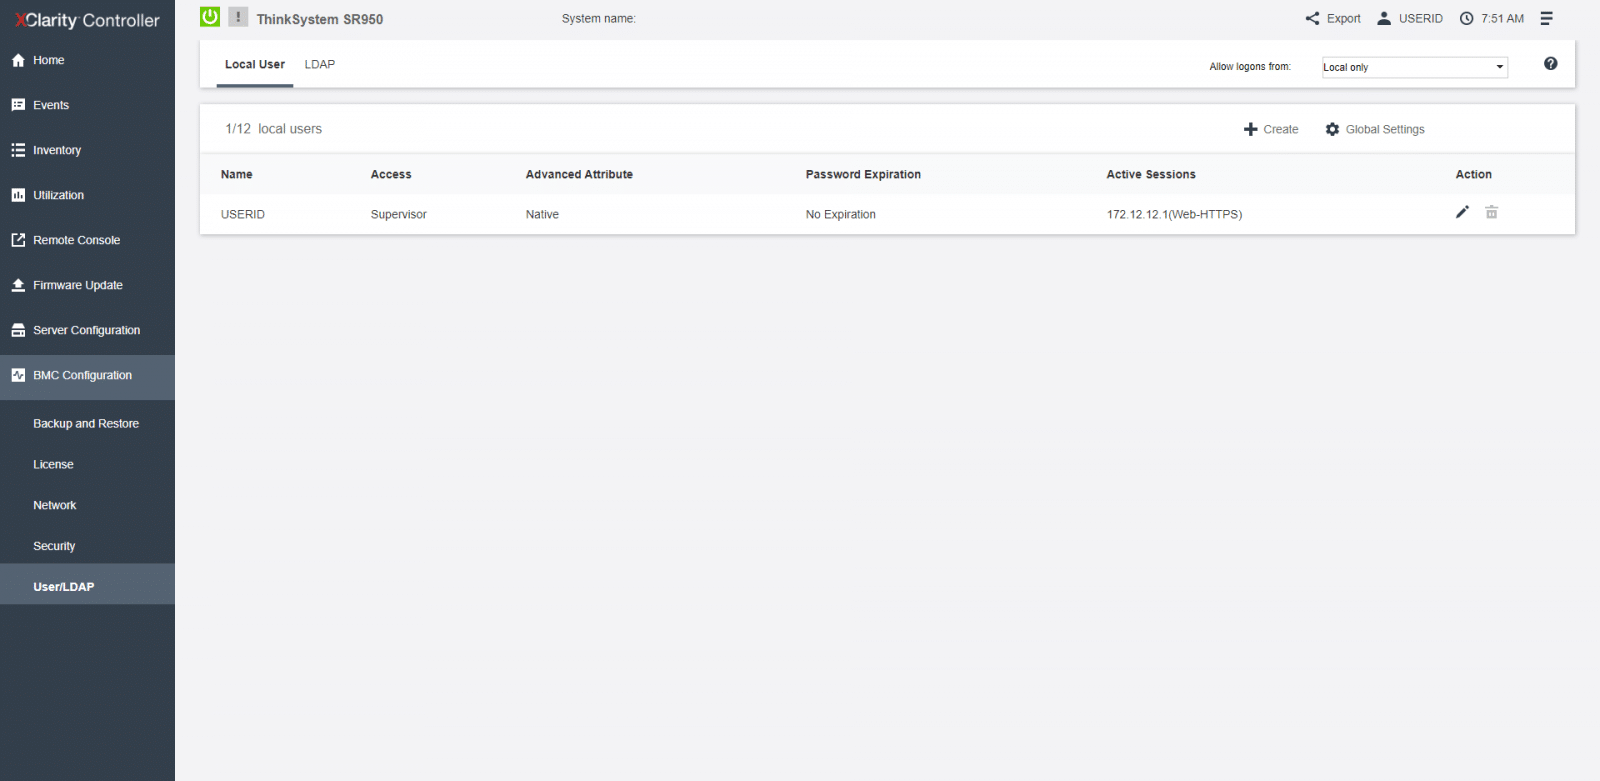
Finally, we take a look at Users/LDAP. From this page, we can view user accounts that are currently logged in to the system and Configure login profiles and global login settings. Also, from the LDAP tab, we can configure user authentication for use with one or more LDAP servers.
Conclusion
The XClarity Controller, integrated with all ThinkSystem servers, is an excellent tool designed by Lenovo to help to regulate, automate, and make more comprehensible foundation server management tasks. From the user interface, we see modern-looking dashboards, quick status visualizations, and easy access to everyday actions. The easy navigation through the main menu and quick-link submenu; redefine the configuration and visualization of the system in an elegant management solution. All these characteristics help in deploying and managing Lenovo ThinkSystem servers with ease.
Sign up for the StorageReview newsletter