With the continued growth for Azure Stack HCI, customers have been asking for a tool to help with ongoing sizing challenges. Responding to requests, Azure developed the Sizing Tool For Azure Stack HCI. The sizing tool can be accessed here. Microsoft has created a tutorial to make the tool easier to use. Go here to get to the preview from the Microsoft Azure blog page.
With the continued growth for Azure Stack HCI, customers have been asking for a tool to help with ongoing sizing challenges. Responding to requests, Azure developed the Sizing Tool For Azure Stack HCI. The sizing tool can be accessed here. Microsoft has created a tutorial to make the tool easier to use. Go here to get to the preview from the Microsoft Azure blog page.

Azure Stack HCI Integrated Systems from DataON
What is the Sizing Tool For Azure Stack HCI?
The Azure Stack HCI sizing tool is available to supplement existing HCI documentation and ease the burden of selecting resources without all the necessary information. When initially launched, the user is presented with a signup page to create an account. Input to the sizing tool can be saved and modified later when workflows or demands change.
The sizer allows you to create multiple projects with different requirements, reflecting various business needs. Create as many projects as needed, with the option to edit or delete them. Because every workload can be diverse, changes can be made at any stage of sizing.
Sizing Tool For Azure Stack HCI – A 3-Step process
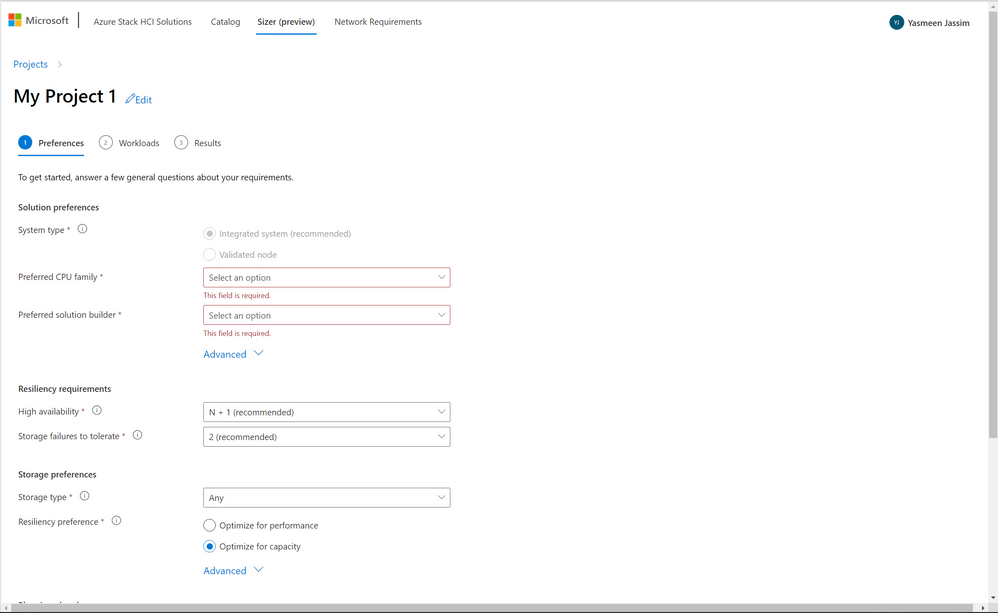
Step 1 of the sizer asks for preferences that will stay consistent across that project. Preferred system type, CPU family, and solution builder will filter through hardware meeting preferences. Should an existing relationship or preference for a specific OEM, this will be accounted for by asking upfront. Multiple workflow scenarios can be included in the project.
For instance, high availability hardware suggestions can be specified to keep workloads running in emergency cases. Input fields like storage failures to tolerate and resiliency preferences help directly account for best practices in storage spaces. There is also an option to plan for future growth by indicating the percentage of hardware to reserve for future growth and keeping some bays empty for future memory and storage expandability. Software-Defined Networking (SDN) and the number of VMs required for SDN are accounted for in the calculations.
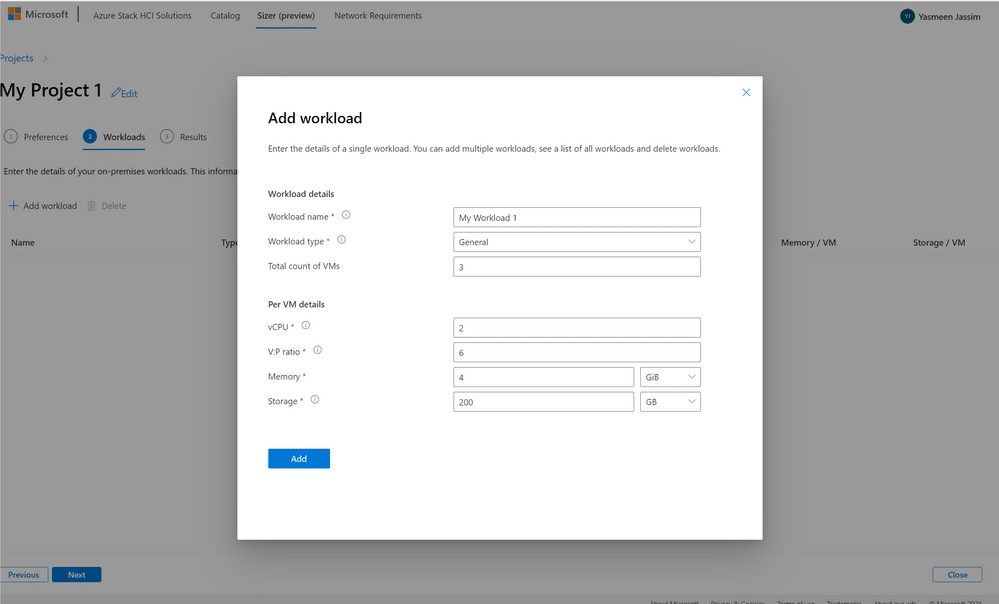
Step 2 of the sizer asks for workload information. Create as many workloads as desired within a given project. Several workload types, including General Purpose, VDI, and SQL can be specified. VM details will determine how many vCPUs are needed per VM, how many virtual cores are required to pack into each physical core, and how much memory and storage are necessary per VM.
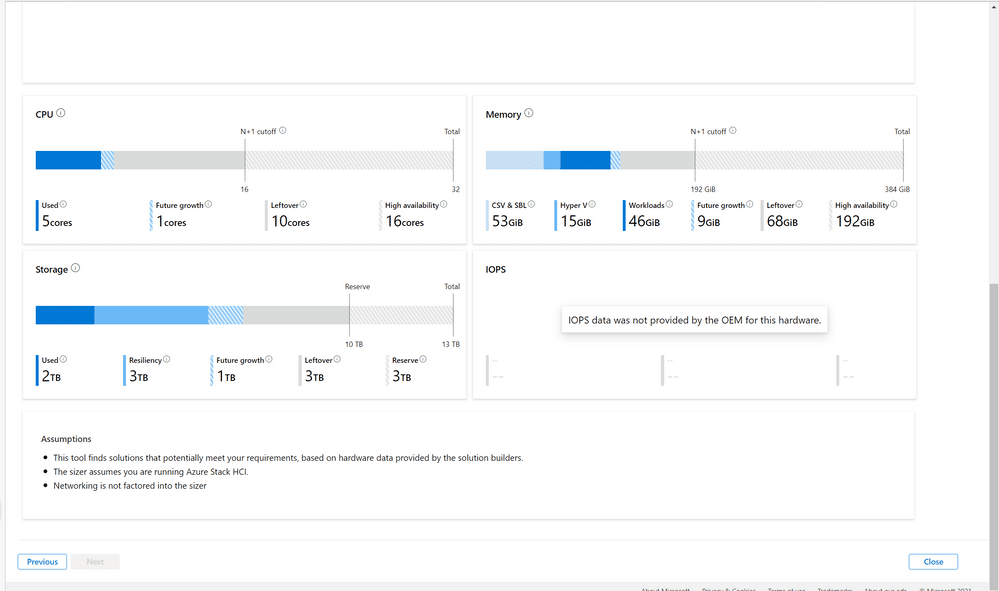
This is the final stage with all steps completed and the output of recommended hardware for the workloads specified in step 2. It is possible to go back and make any changes to workload or environmental input at this stage. The sizing tool suggests the exact model, number of nodes, and node-level recommendations to satisfy the HCI needs. The output also includes CPU, memory, and storage utilization bars, indicating resources consumption used to create the recommendation.
This is the first phase of the sizer with plans to update the tool regularly with more dimensions and features that will help size an Azure Stack HCI. Feedback can be directed to [email protected]!
Engage with StorageReview
Newsletter | YouTube | LinkedIn | Instagram | Twitter | Facebook | TikTok | RSS Feed


