Recently we put together a budget PC with 240GB SSD for under $150, that was capable of handling most computing tasks. Luci proceeded to give it away on our social channels once we were done. But before its departure, Kevin got together a mostly insane idea and wanted to briefly convert the Lenovo SFF PC to a NAS. Of course, he also had to throw in upgraded 10GbE networking, while keeping the SSD for the TrueNAS CORE OS and creatively making space for the hard drives. The net result is a 2-Bay NAS with SSD Boot and 10GbE for under $200.
Recently we put together a budget PC with 240GB SSD for under $150, that was capable of handling most computing tasks. Luci proceeded to give it away on our social channels once we were done. But before its departure, Kevin got together a mostly insane idea and wanted to briefly convert the Lenovo SFF PC to a NAS. Of course, he also had to throw in upgraded 10GbE networking, while keeping the SSD for the TrueNAS CORE OS and creatively making space for the hard drives. The net result is a 2-Bay NAS with SSD Boot and 10GbE for under $200.
$200 NAS Without Hard Drives Right?
Well yes. Think of it this way. If you were to go buy a Synology or QNAP 2-bay NAS, you’d spend a minimum of $300 (in some cases much more) to get an upper-tier NAS that would have moderate performance. Performance is limited largely by a small RAM footprint, lower-bin CPU, and onboard networking. QNAP at least supports 2.5GbE now, but none of the major packaged NAS solutions offer 10GbE in their 2-bay systems or an expansion slot that lets you add a card.
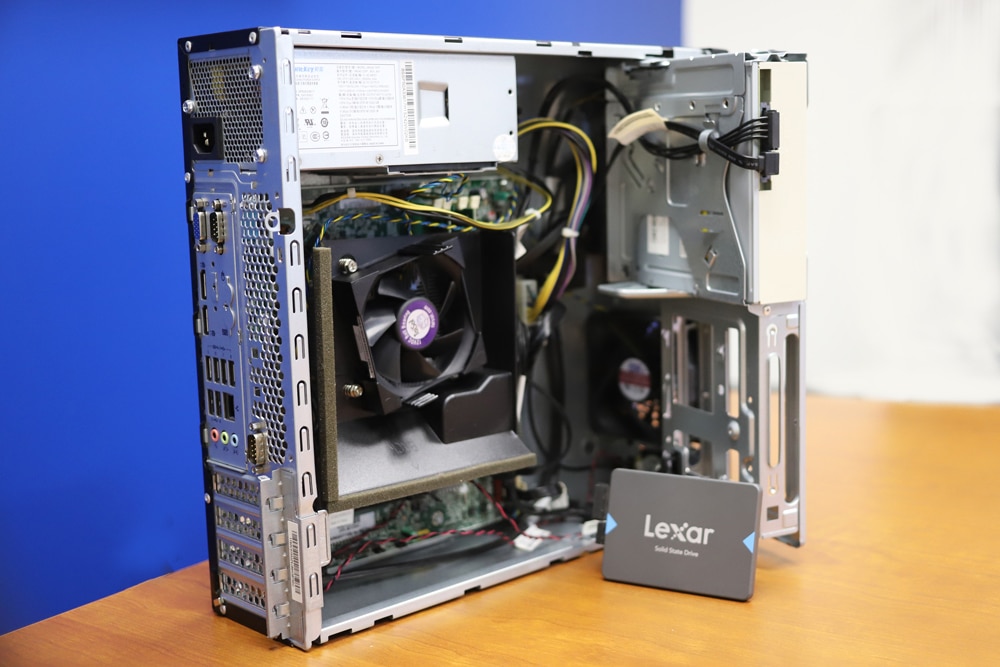
We’re looking at this SFF Lenovo chassis as a NAS chassis in this case. As a refresher, here’s the PC we selected. It’s a Lenovo ThinkCentre M83, with these high-level specs:
-
- Intel Pentium G3220 3.00GHz Processor
- 8GB DDR3 Memory
- 500GB Hard Disk Drive (Seagate Barracuda)
- DVD±RW optical drive
- Intel HD Graphics
- 2x DisplayPort
- VGA Port
Windows 10 Pro x64TrueNAS CORE 12
Further, we added the Lexar NQ100 SSD for boot ($30) and an Emulex dual-port 10GbE card that can be found on eBay for under $20. In total then, our build is roughly $160. If one were to desire a higher-spec system, there are open RAM slots and the CPU can be upgraded. Either upgrade still keeps the budget well under $200. That is until we add hard drives.

In this case, we went with what any reasonable person would do and slammed two Seagate IronWolf Pro 18TB HDDs inside. Because we saved so much money putting this TrueNAS system together, it just made sense to put over $1000 of capacity inside. If you’re on a budget, any HDDs will do.
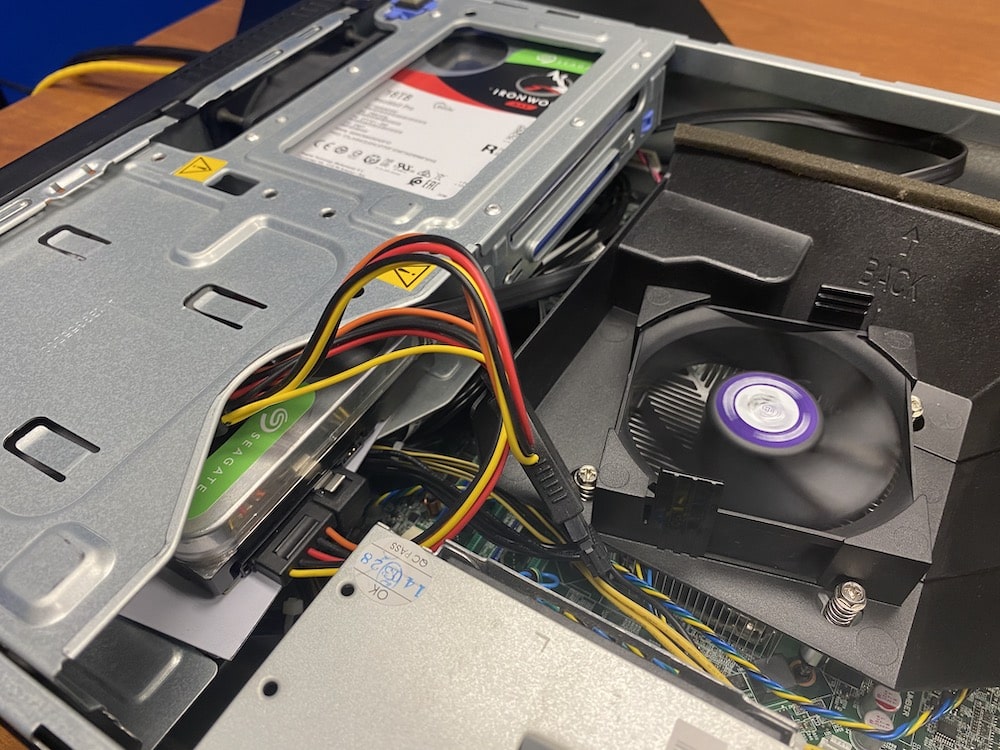
We made room for the second hard drive by removing the 5.25″ optical drive. We needed its SATA and power cables that we actually ended up splitting out. The system was cabled for just two SATA devices, in this build, we have three. Our result looks pretty shady and you can see the postcard Kevin used to keep the PCB of the hard drive safe as he built the platform in a matter of minutes. If this were going to be a longer-term solution, investing in a 5.25″ SSD/HDD holder would be a worthy investment for a few bucks. Those go for $10 and under, with this Icy Dock model being an example.
What About Performance?
This is the best part – our little budget NAS enclosure performs amazingly well! TrueNAS CORE 12 ran flawlessly on our build and actually remained quite performant. The 2 core 3.0GHz CPU was plenty fast for this build, and 8GB of RAM is right in the sweet spot for base features. While the single onboard 1GbE port would suffice for most uses, a dual-port 10GbE card is nearly free these days, or close to it on eBay. Different OEM versions now go for around $20.
Read More – TrueNAS CORE Install Guide
While performance is really going to be limited by what you install, it was really fun to see just how high we could push the small box testing it the same way we’d benchmark other 10GbE NAS platforms. With four shares presented, each with a 25GB test file inside, we used FIO to hit the box with some sequential workloads.
Large-block transfers topped out at 994MB/s read and 530MB/s write. 8K sequential numbers floated between 25-30k IOPS read and 28-30k IOPS write. Moving to SSDs you’d probably find where the CPU would top out at, but with four total SATA ports, you probably aren’t going to go too wild on this type of build.
Final Thoughts
Admittedly, our TrueNAS Core 12 budget build isn’t as pretty as a QNAP and doesn’t offer twin M.2 NVMe bays (unless you add in an adapter in one of the open PCIe slots!) like the DS720+ from Synology. I’d argue though that what our makeshift Lenovo TrueNAS lacks in beauty, it makes up for with a certain carefree attitude and a dash of confidence. Oh, and a combination of 10GbE and 36TB of raw capacity that drives really impressive results, given our $160 spend on the chassis, networking card, and boot drive.
In the end, our decision to build and benchmark this NAS can be rightfully questioned. That said, this type of build illustrates how low you can go on the budget for a high-performance NAS build. Getting 4+ drive bays will add to the cost, but if you needed a box for a homelab type environment, there are many refurb platforms similar to this that can fit the role. It goes without saying though that barely pushing $160 into a NAS build, getting 10Gb LAN and compression, snapshots, iSCSI… the list goes on, is pretty impressive.
Engage with StorageReview
Newsletter | YouTube | LinkedIn | Instagram | Twitter | Facebook | TikTok | RSS Feed

