Chia farming is a less intensive task when trying to get in on the latest crypto craze. While Chia plotting requires an SSD for optimal performance, farming on the other hand thrives on hard drives and can run on just about anything. Of course, the Raspberry Pi is the homelabber’s delight, a little unit that is as flexible as it is affordable. So, on the surface, it seems a great candidate to connect to a few USB hard drives for low-impact Chia farming duty. Let’s take a look at how to set up Chia farming on Raspberry Pi 4.
Chia farming is a less intensive task when trying to get in on the latest crypto craze. While Chia plotting requires an SSD for optimal performance, farming on the other hand thrives on hard drives and can run on just about anything. Of course, the Raspberry Pi is the homelabber’s delight, a little unit that is as flexible as it is affordable. So, on the surface, it seems a great candidate to connect to a few USB hard drives for low-impact Chia farming duty. Let’s take a look at how to set up Chia farming on Raspberry Pi 4.
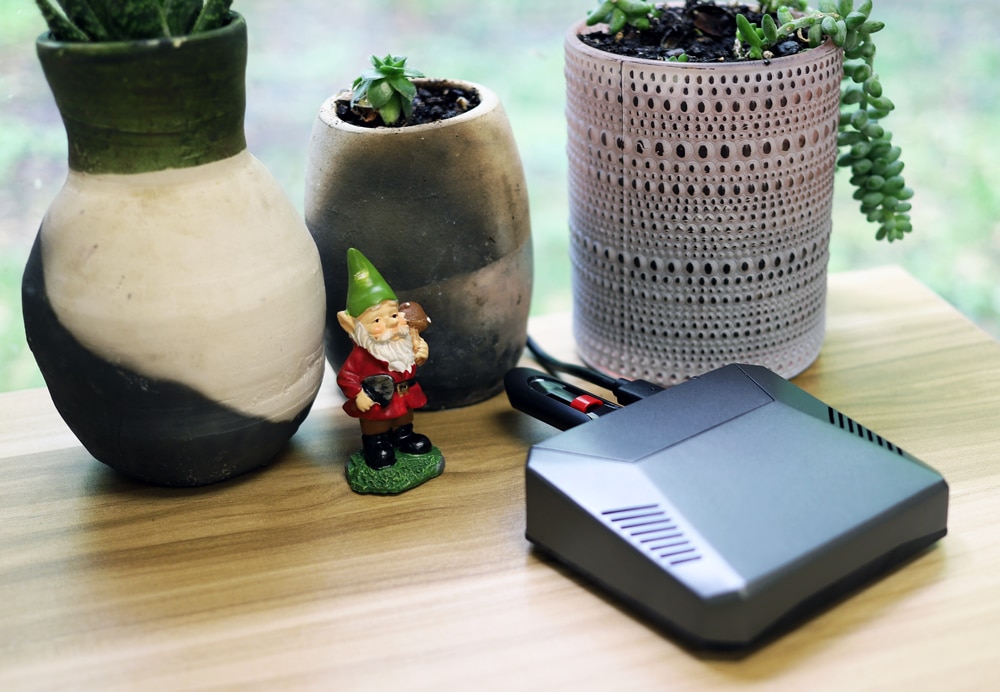
Farming Chia on Raspberry Pi
Note – this will only work on the Raspberry Pi 4 (4GB version). Pi 4 kits go for around $100 on Amazon.
The Raspberry Pi Foundation makes flashing and deploying a raspberry pi SBC about as easy as
- Pick your operating system
- Give it a storage location
- Write
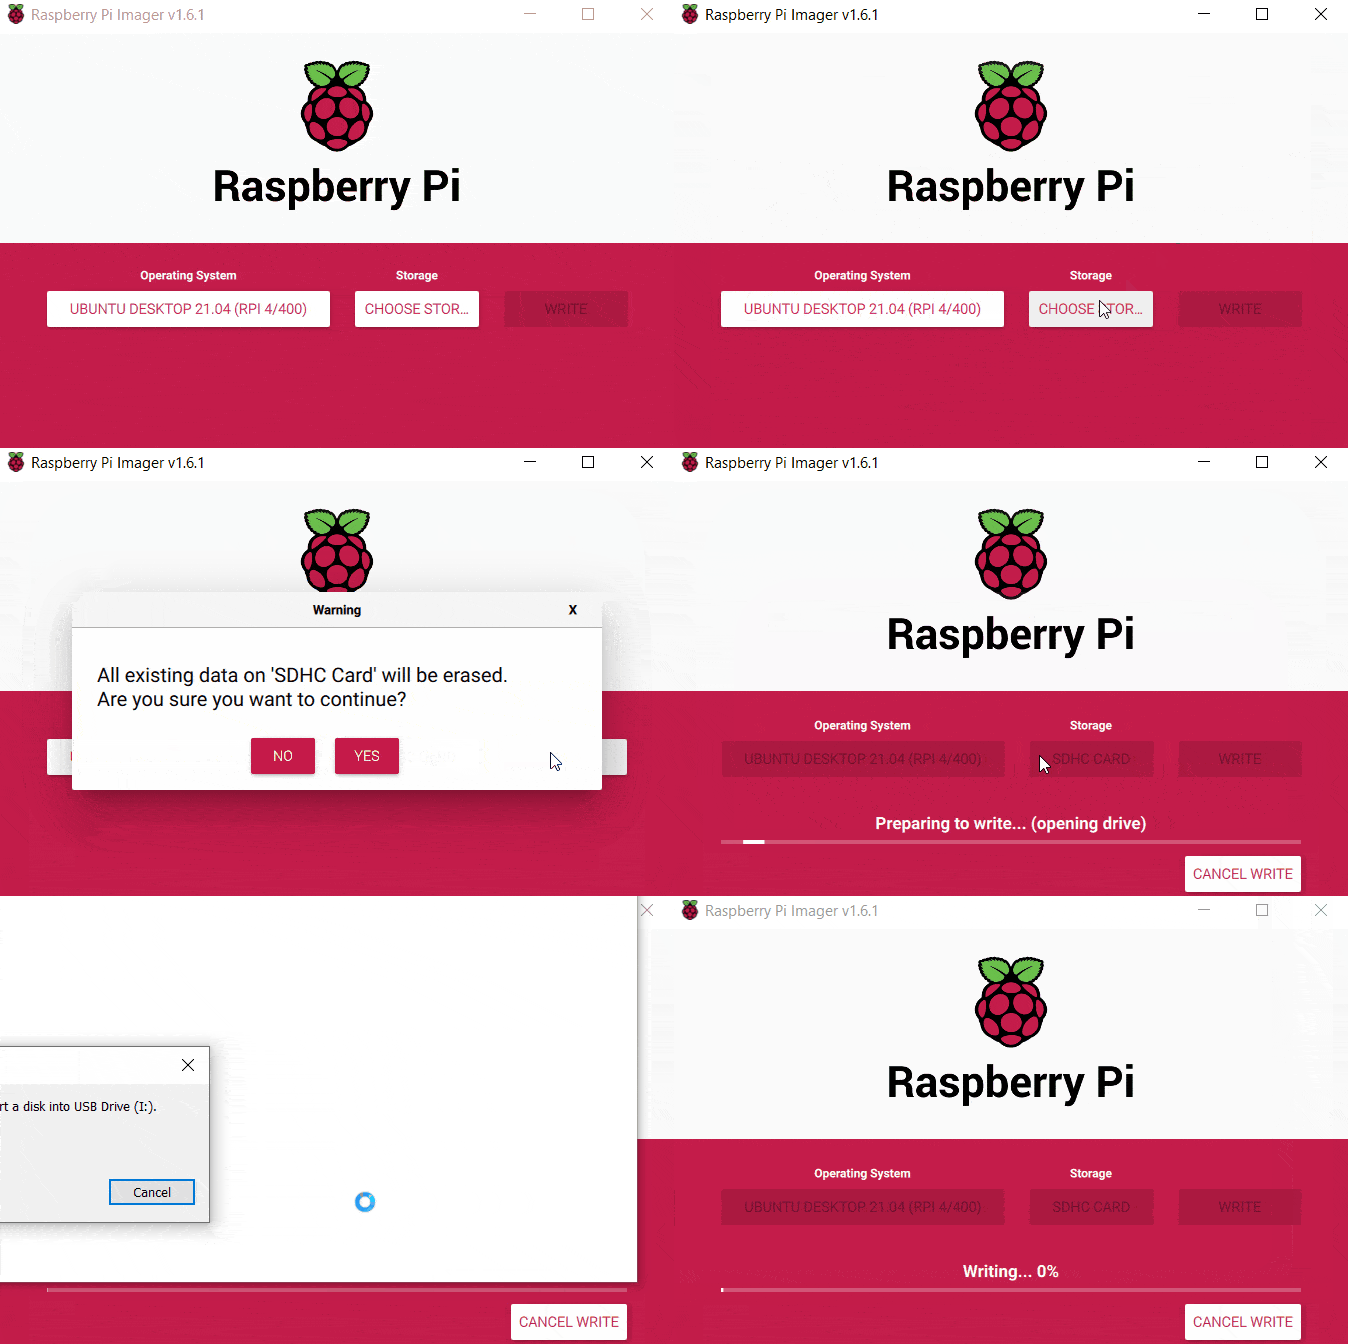
Jump over to https://www.raspberrypi.org/software/ and download the latest version of the imager – Yes you can use many other imagers (I have a soft spot for Balenaetcher, however, we are looking for quick and easy here). First up, plug in your SD Card you want to flash. After that, open the Raspberry Pi imager. We want to use Ubuntu desktop 21 – located under (Other general-purpose OS – Ubuntu – Ubuntu Desktop 21 for RPi 4/400).
Select the storage (SD Card) that you want to use. Click Write (If you get a windows error saying to insert a disk in drive D or E, just hit escape – it just means you re-used an old raspberry pi SD card).
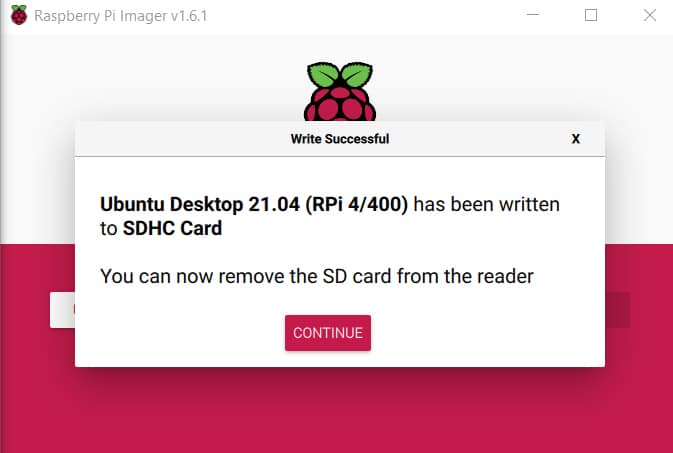
Once the write is complete – click continue
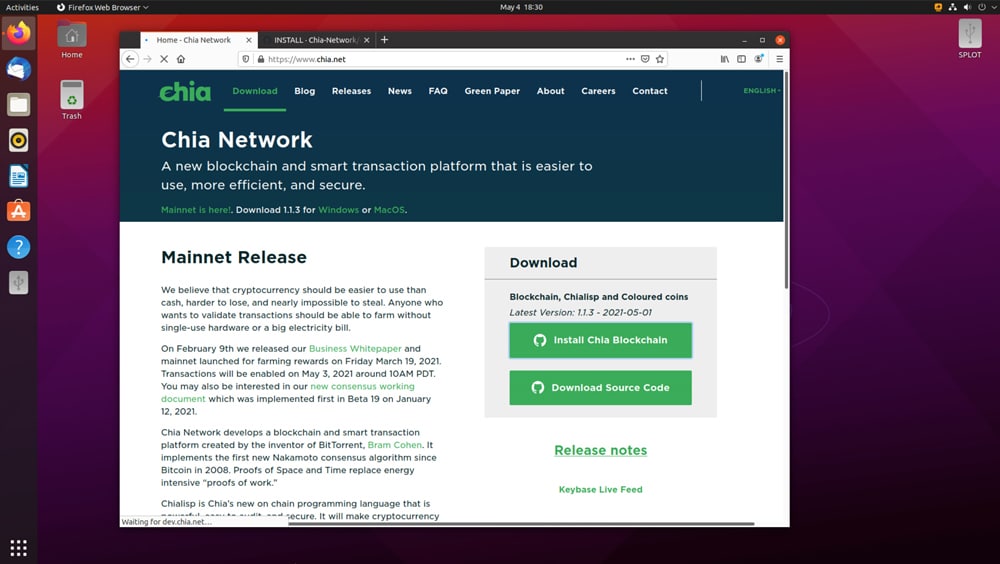
After you set up Ubuntu with your username and password – open up Firefox and head over to chia.net
Select Install Chia Blockchain. Select “Other install methods” and select Raspberry Pi 4.
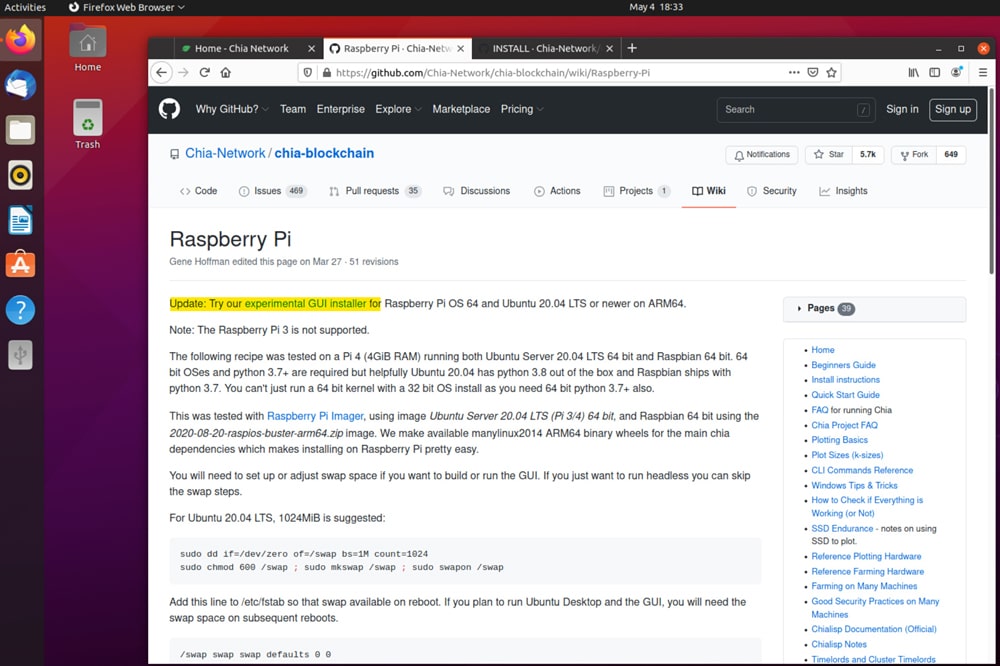
Now you will click on “Try our experimental GUI for installer.”
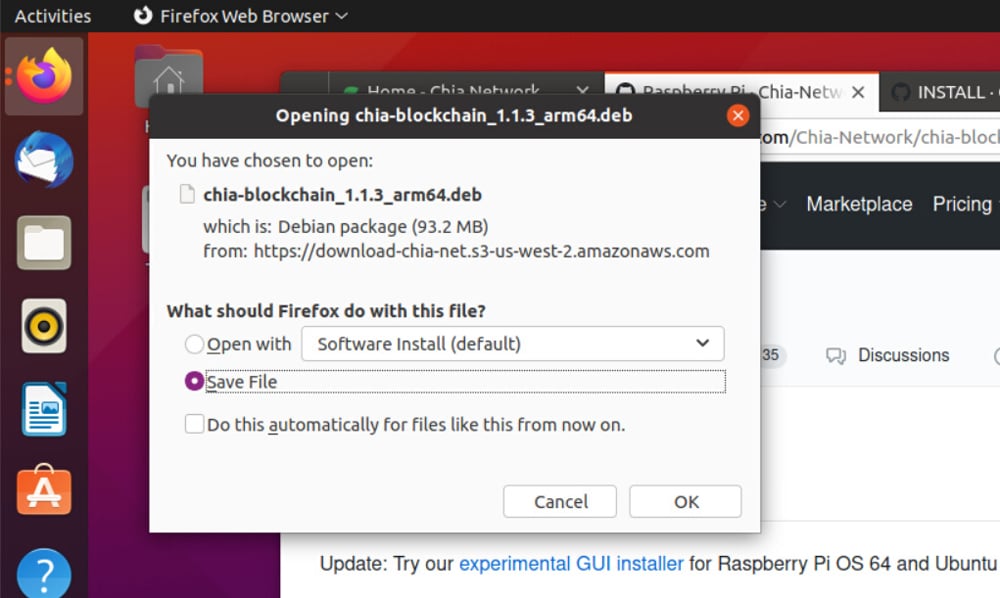
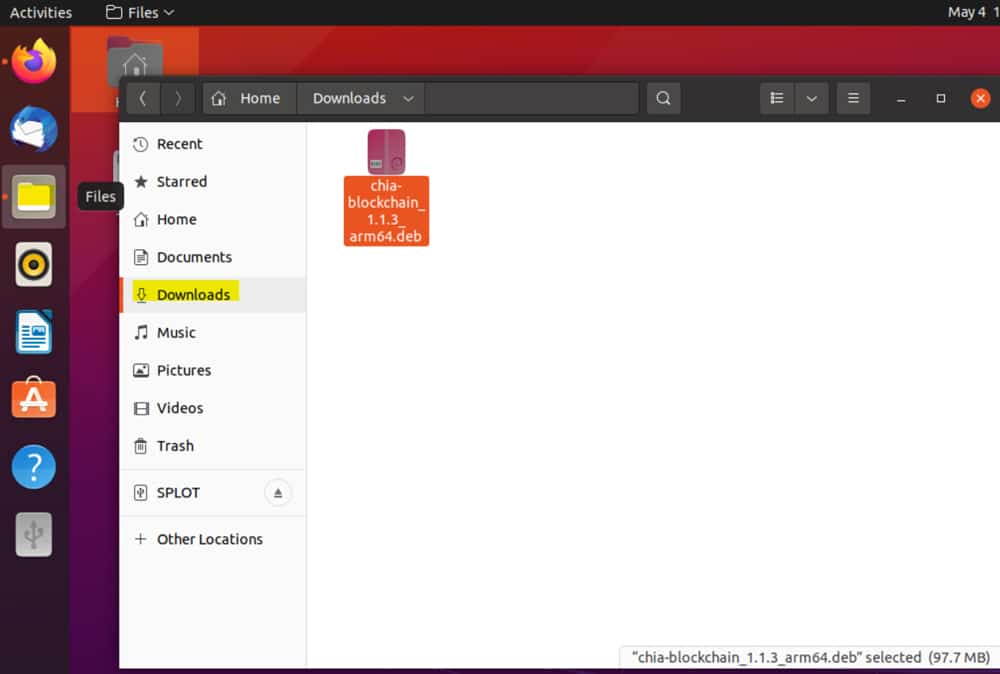
Save File – Don’t just open them. Open Files and Navigate to Downloads.
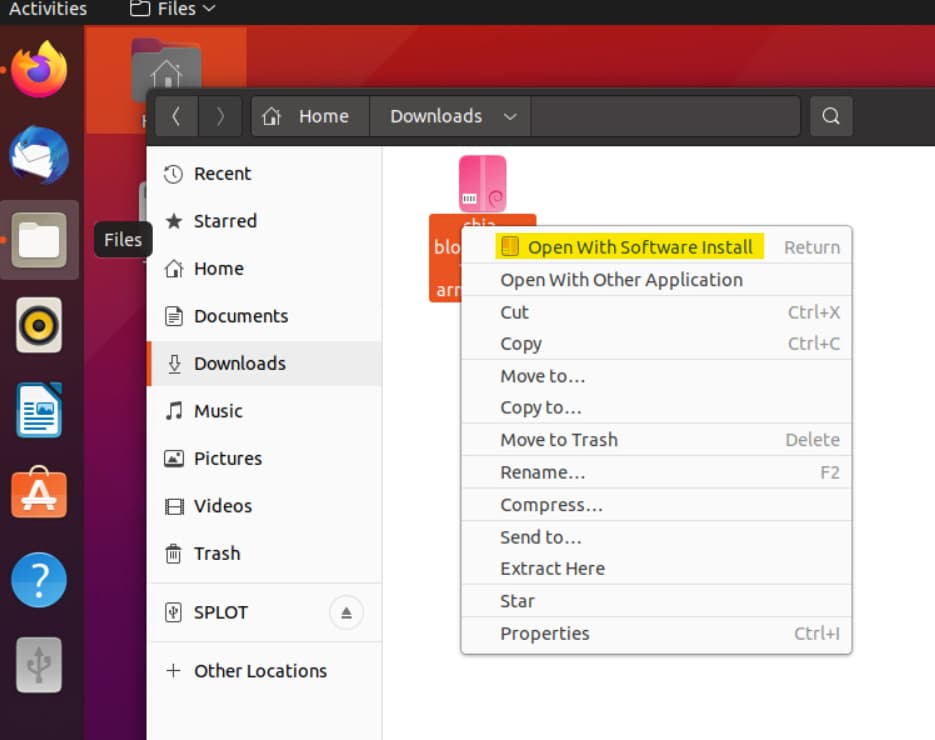
Right-click on the installer – and Open with Software Install.
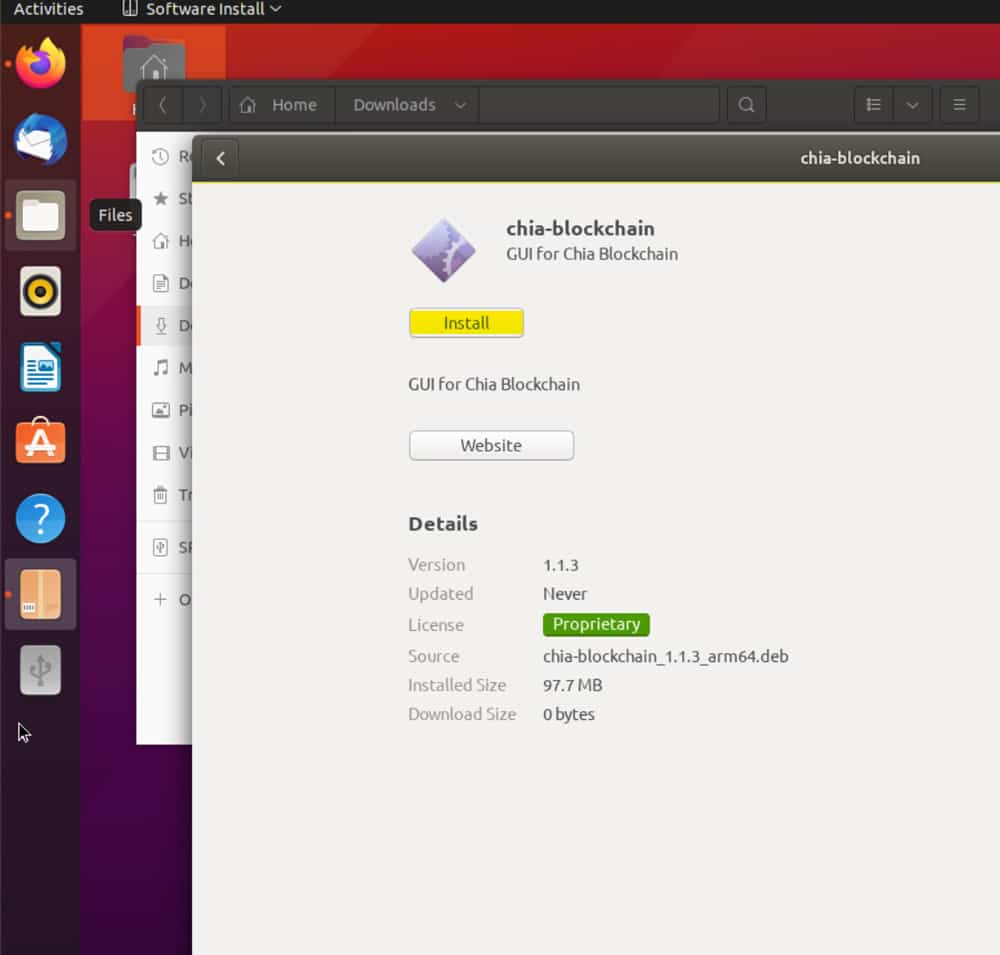
Click Install.
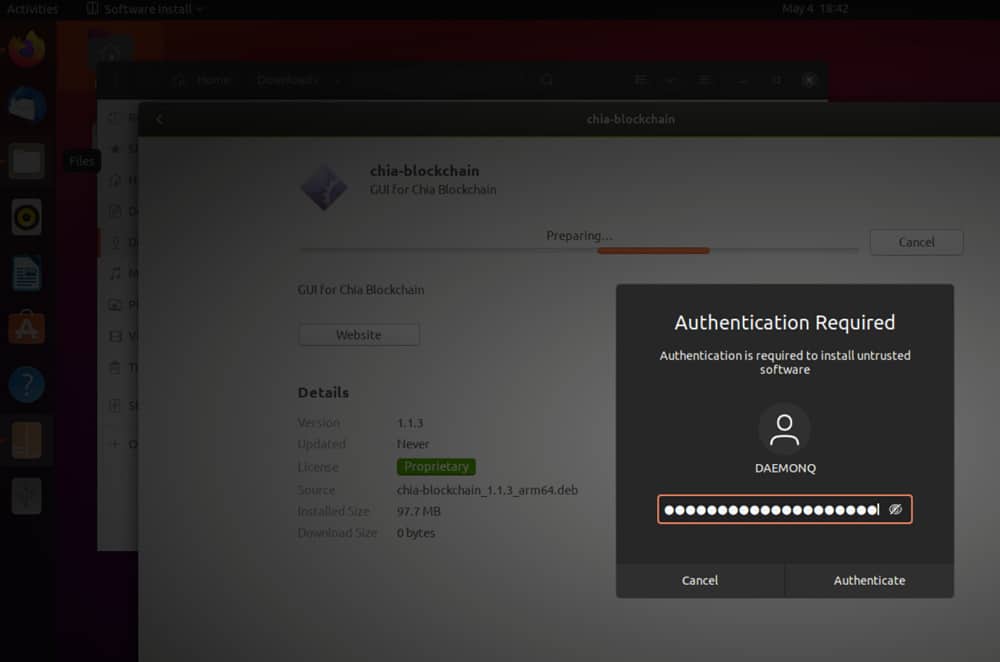
Enter your user password when prompted.
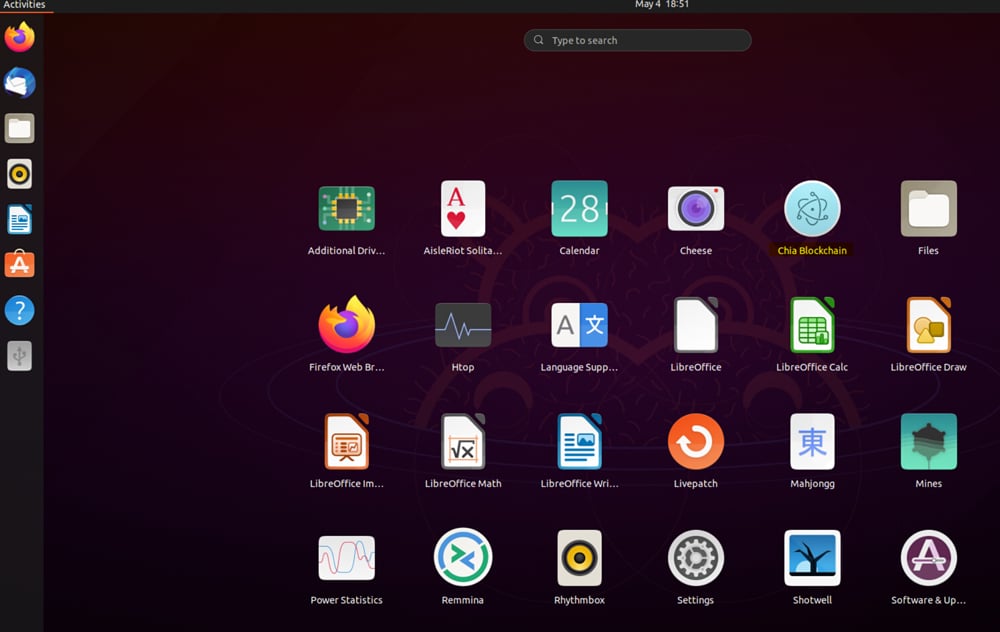
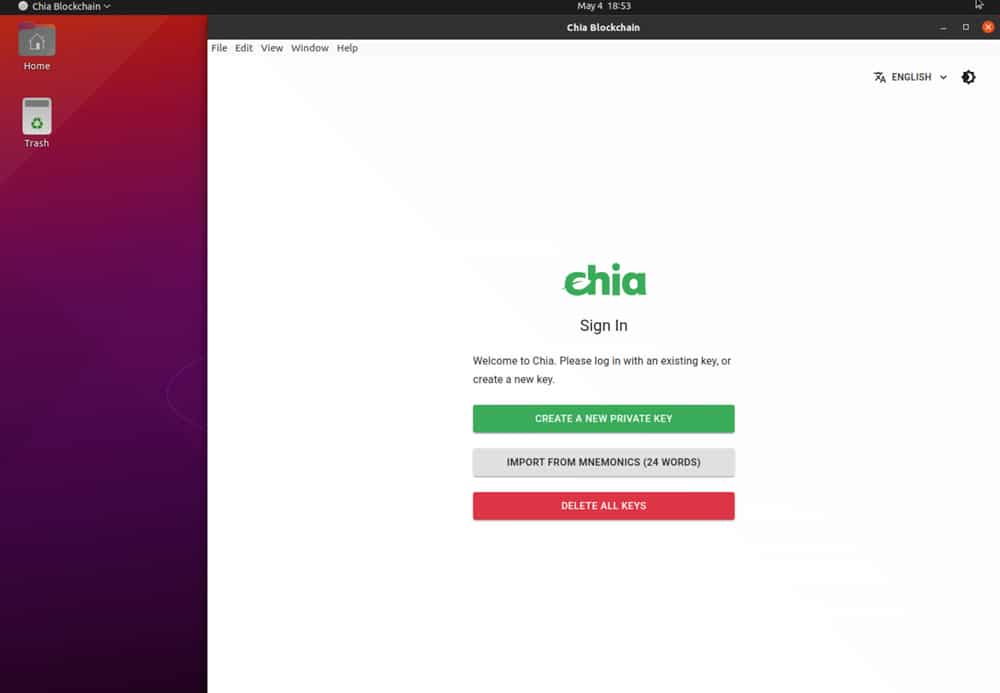
Provide your password and the install will complete. After the install is complete – REBOOT your Pi. Once the system has returned to the desktop – Launch Chi Blockchain.
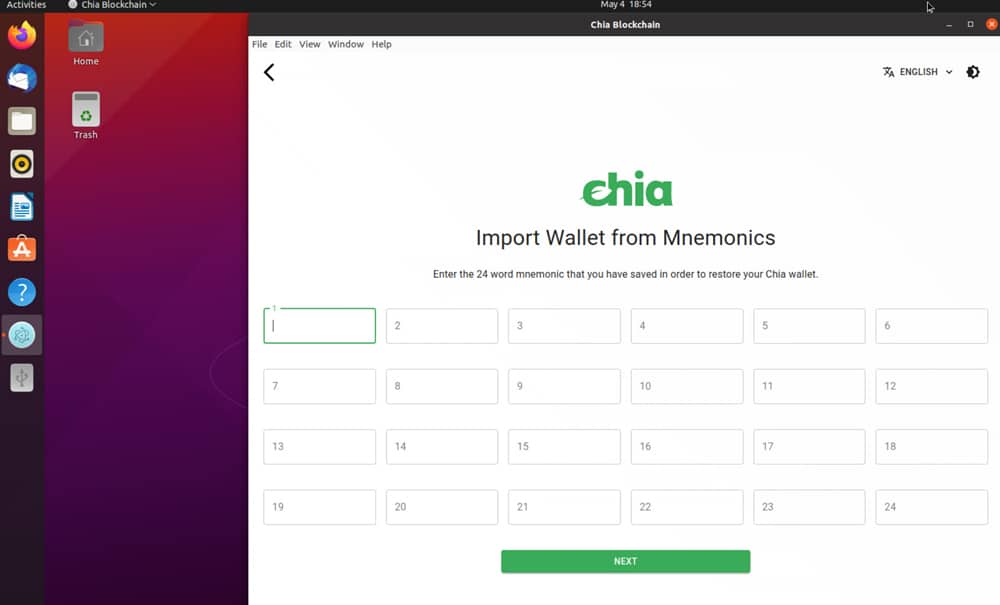
As the Raspberry Pi 4 is NOT an ideal plotting device – its best to restore your key from your plotting box by selecting Import From Mnemonics.
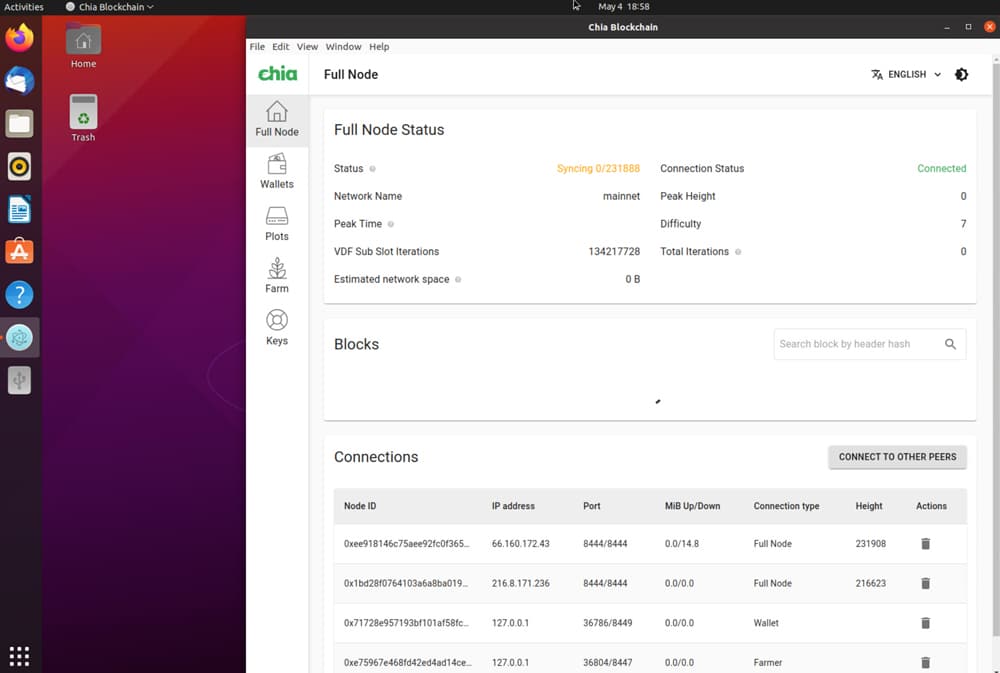
After you restore your wallet – the network needs to sync if you want the Rasberry Pi to become a full node. If you prefer to put less load on the device and instead opt to make it into a harvester, that would be done using the CLI. That process while not too difficult is a bit more challenging for someone not familiar with console commands. The guide for farming on many machines can be found here.
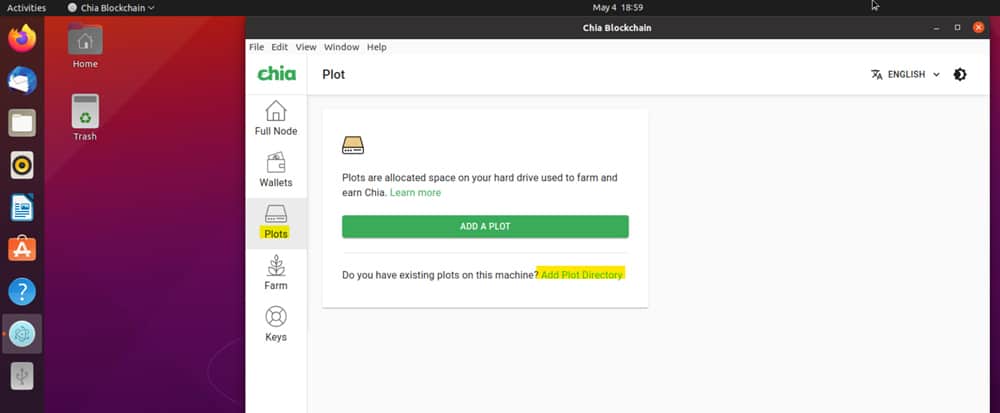
Now make sure you plug in your USB HDD with the plots you have already generated into the Raspberry Pi and select “Add Plot Directory.”
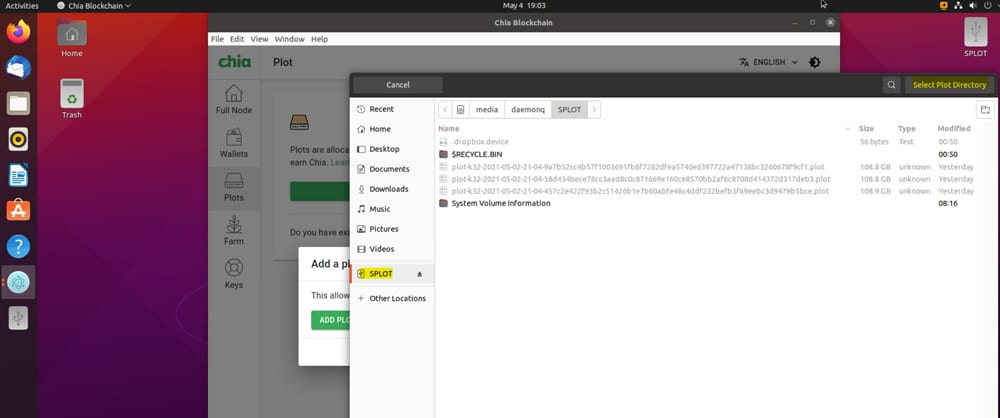
Select the drive and folder and click “Select Plot Directory.”
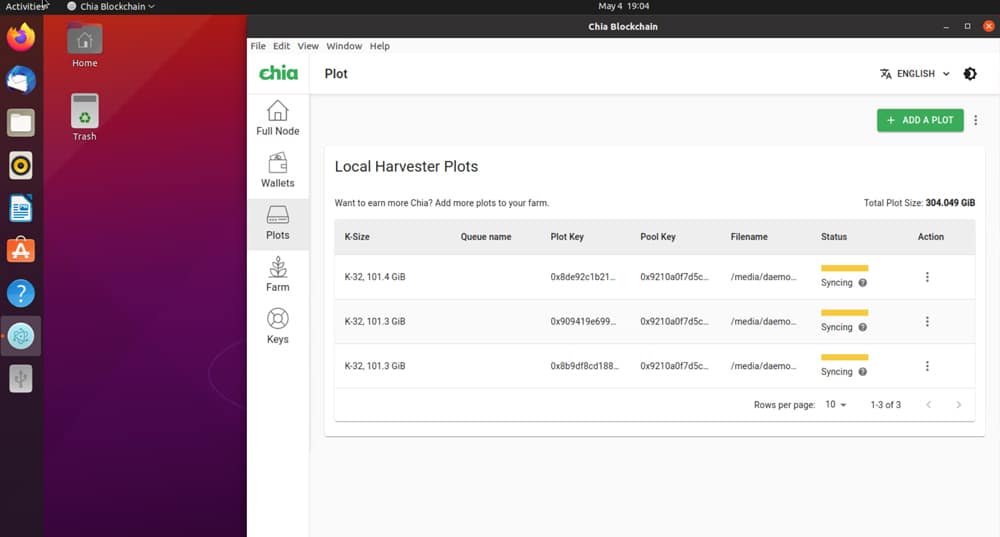
The Plots will appear on your Harvester dashboard.
Plots will not be available to farm until the network sync is complete – this can take some time – a day or more in some cases. If you went the route of making the Pi a harvester, it will start harvesting immediately to the farming it is connected to (as long as that itself is synced).
Closing Thoughts
And that is it. The Raspberry Pi may not have enough oompf to plot Chia, as it is not more than a board with a tiny bit of compute and memory. However, it can be set up to farm or harvest Chia once a user gets going. Following the above should have you ready to go within a few minutes, minus the network sync that can take a while. If you want to step up the budget a little bit, the Lenovo Nano will let you plot and farm for under $400. If you happen to have a Pi on hand though, it should handle the Chia farming task just fine.
Read More:
- Our Favorite Chia Plot Migration
- Best Cheap SSDs for Chia Plotting
- Best Budget Chia Plotting Rig
- Keep your Chia Sync Online
- Cooling is critical for chia plotting speed and safe farming
- Best Budget Chia Farming Rig
Engage with StorageReview
Newsletter | YouTube | LinkedIn | Instagram | Twitter | Facebook | TikTok | RSS Feed

