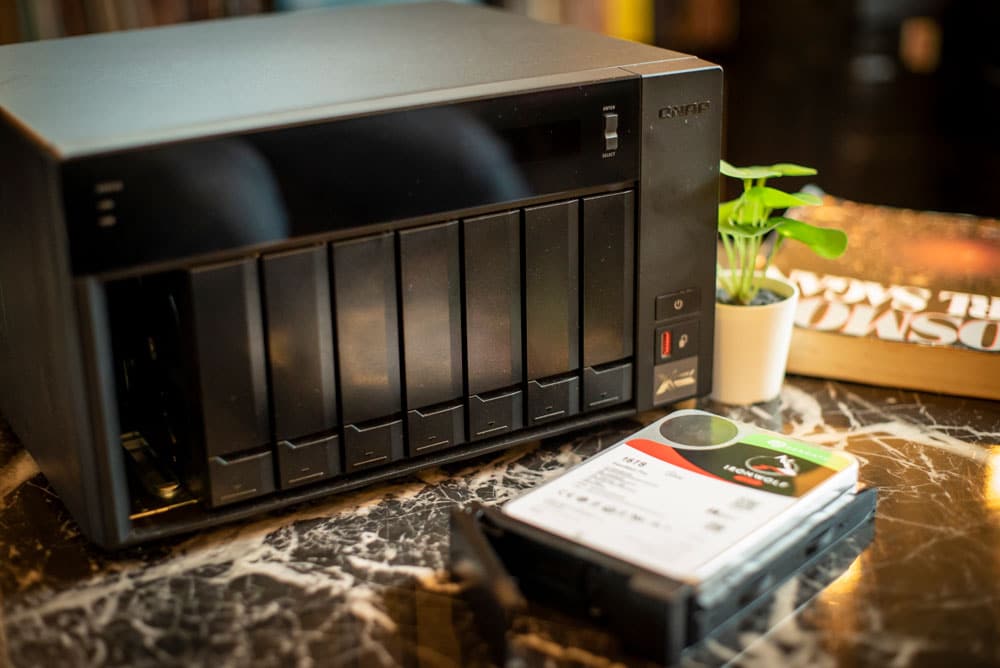
The QNAP TVS-872XT is an 8-bay, Thunderbolt NAS designed primarily for video and media applications. It’s part of QNAP’s x72XT lineup of NASs that offer both dual Thunderbolt 3 ports as well as 10GbE on board for cross-platform collaboration between macOS and Windows users. Today, we’re going to be looking at how I use this device in my workflow both on and off film and commercial sets.
The QNAP TVS-872XT is an 8-bay, Thunderbolt NAS designed primarily for video and media applications. It’s part of QNAP’s x72XT lineup of NASs that offer both dual Thunderbolt 3 ports as well as 10GbE on board for cross-platform collaboration between macOS and Windows users. Today, we’re going to be looking at how I use this device in my workflow both on and off film and commercial sets.
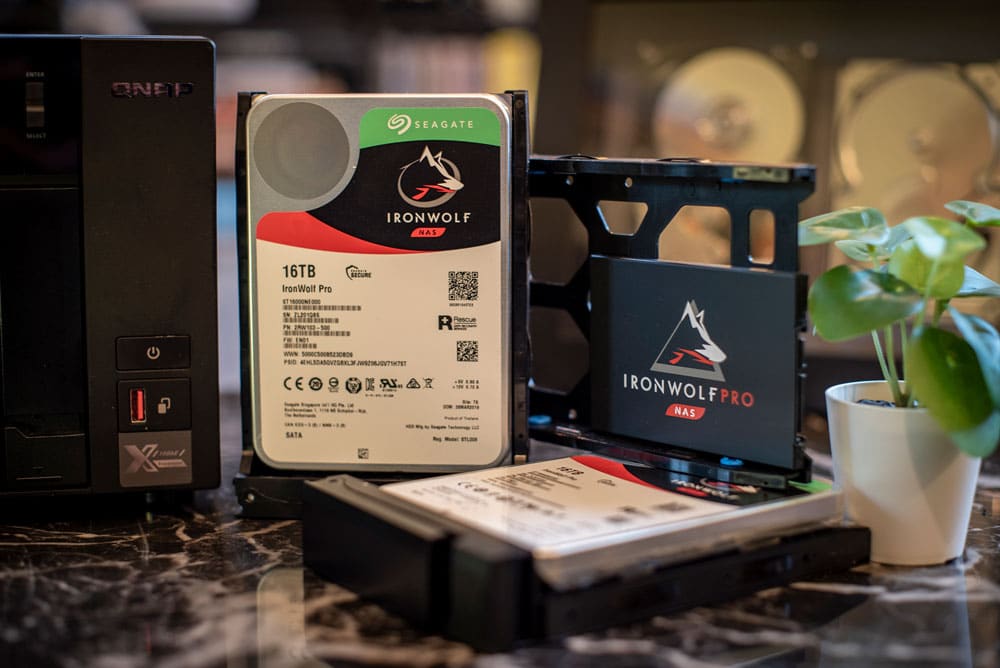
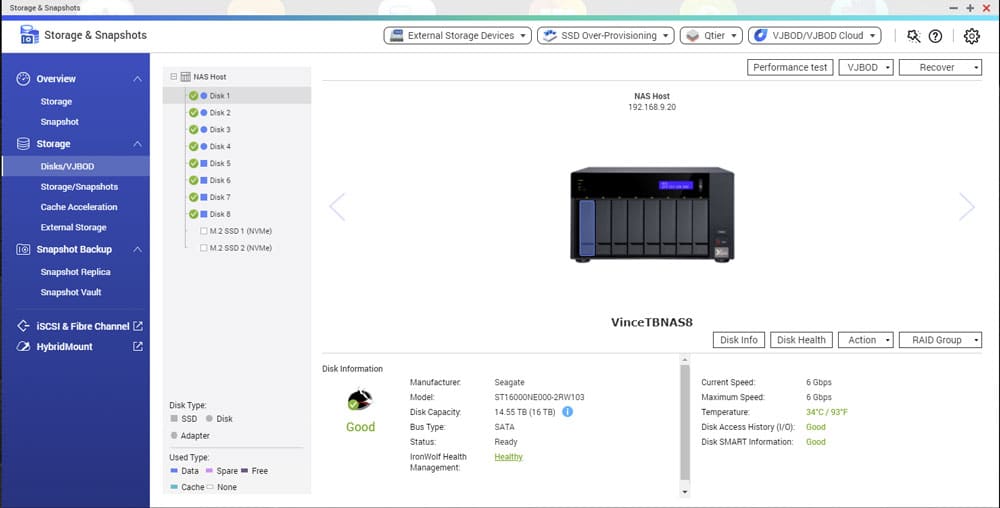
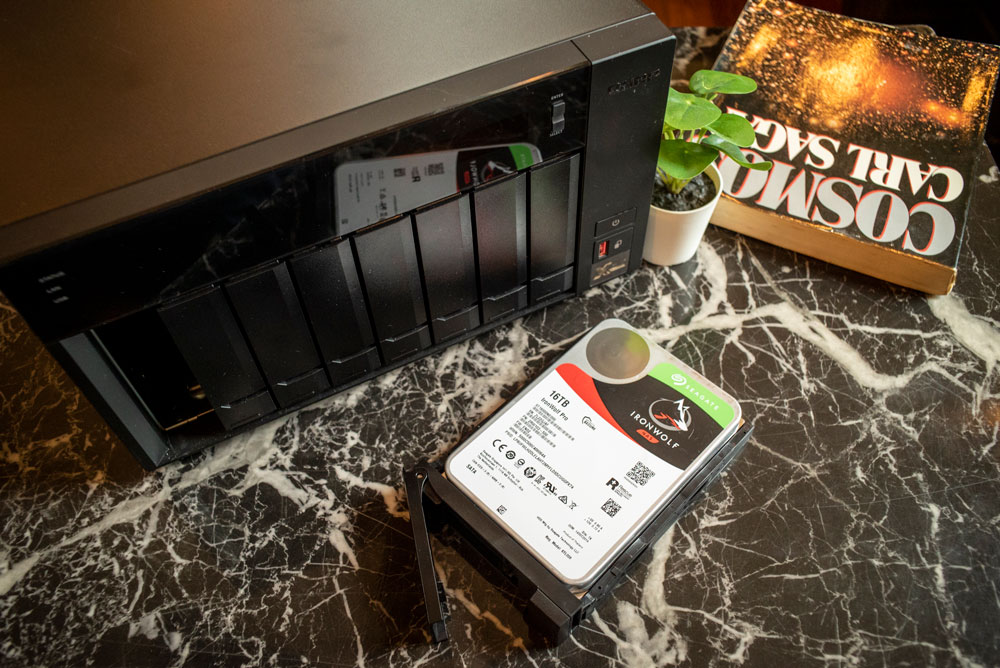
I’m running four 16TB IronWolf Pro hard drives from Seagate in RAID5, as well as four Seagate IronWolf 125 SSDs in RAID5 with 23% Over Provisioning. On paper, this is a really feature-rich NAS, and given its price, it ought to be. Let’s quickly look at the specifications of this NAS and then get into a bit about me and how I’ve been using this.
QNAP TVS-872XT Thunderbolt NAS/DAS Specifications
| CPU | Intel Core i5-8400T, 6-core 1.7GHz – 3.3GHz |
| GPU | Intel UHD Graphics 630 |
| Hardware-accelerated Transcoding | Yes |
| System Memory | 16GB DDR4 (2x8GB), expandable to 32GB |
| Drive Bays | 8×3.5-inch SATAIII 6Gb/s (hot-swappable) |
| Drive Support | 3.5-inch SATA HDD 2.5-inch SATA HDD 2.5-inch SATA SSD |
| M.2 Slot | 2xM.2 2280 PCIe Gen3 slots |
| Ethernet | 1x 10GBASE-T RJ45 port(10GbE, 5GbE, 2.5GbE, 1GbE) 2x Gigabit RJ45 Ethernet ports |
| Thunderbolt Support | 2x Thunderbolt 3 ports via included expansion card |
| PCIe Slots | Slot 1: PCIe Gen 3 x16 (CPU, Occupied) Slot 2: PCIe Gen 3 x4 (PCH) |
| USB | 1x USB 3.2 Gen 1 2x USB 3.2 Gen 2 (Type-A) 2x USB 3.2 Gen 2 (Type-C) |
| Dimensions (HxWxD) | 7.41 x 12.96 x 11.01 inches |
| Power Consumption | 65.03W (Typical) 41.47W (HDD Sleep Mode) |
By day, I’m a Digital Imaging Technician (DIT) and a member of IATSE Local 600, and I primarily work in New York City. A DIT, briefly, is in charge of the color pipeline on film, television, and commercial sets, working with the Director of Photography to manage the image coming out of the camera to achieve the look and feel they desire. It’s a lot more involved than that, but I’m oversimplifying for the sake of brevity.
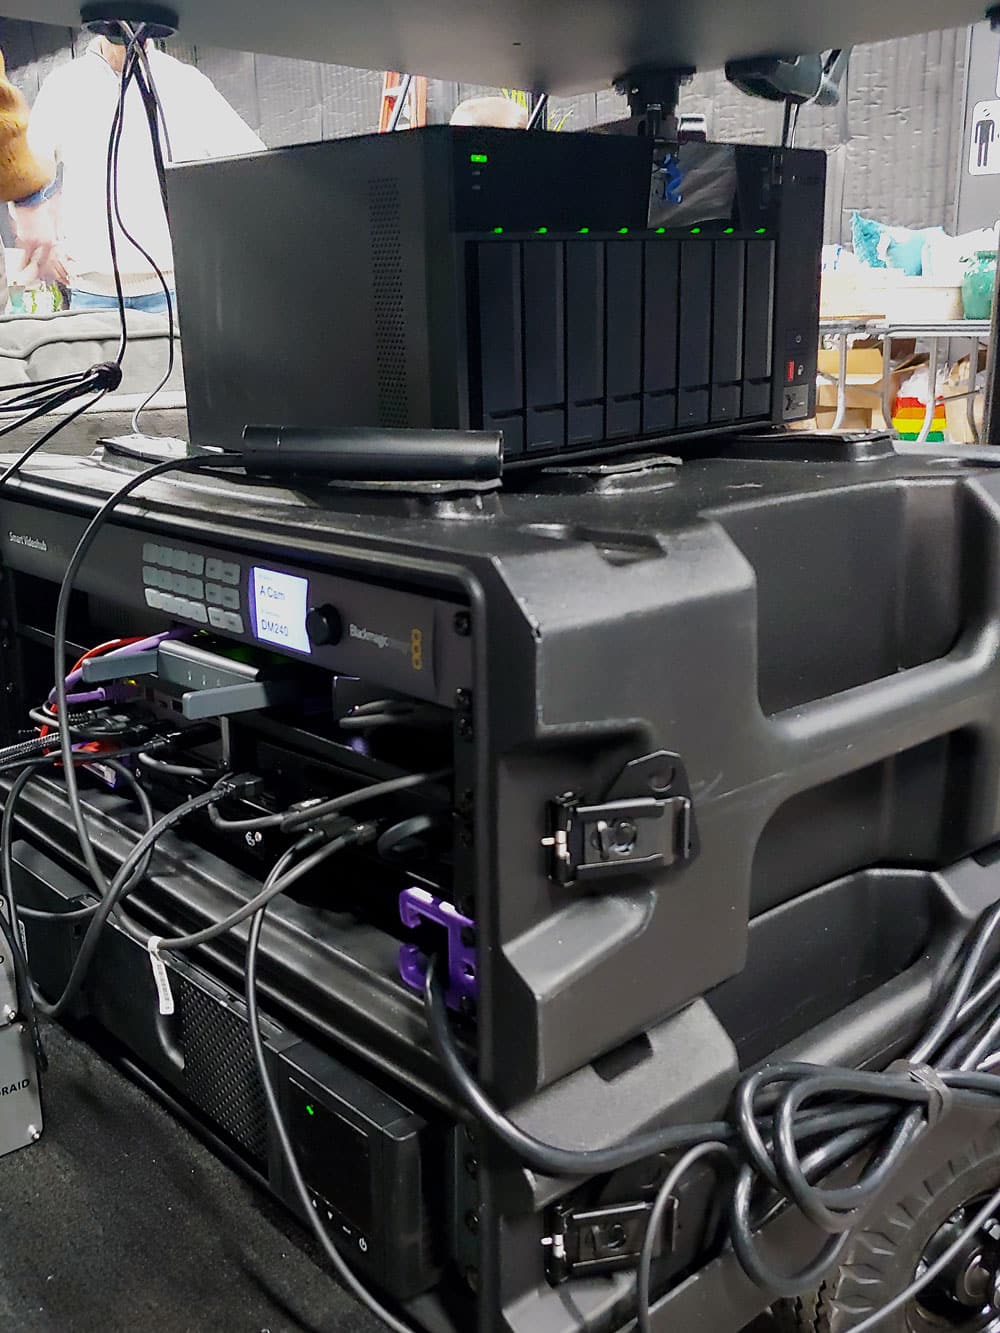
In addition to image and color responsibilities, I’m also in charge of managing all of the data on set, including downloading footage from the camera, transcoding the digital camera negatives into a format for post-production, and creating “dailies,” which are smaller versions of the footage for the Director and Cinematographer to review at the end of the day. All of this, as you can imagine, is very data-intensive and this is where a device like the QNAP TVS-872XT comes in.
Raw throughput is the name of the game, with multi-camera shoots capable of producing terabytes of data per day, with hours of footage needing to be transcoded. The biggest bottleneck in most of this is drive speed. While production will provide me with something like a 2-bay external RAID for delivery to post-production (G-Tech G-RAIDs are a popular option), those drives quickly choke when offloading multiple cameras and transcoding the previous batch of media at the same time.
Unfortunately for me, production doesn’t usually have the budget to buy me a high-end all-flash RAID array for each job, so offloading that work is critical. I also like to have a copy of the shoot on something I bring home as an additional backup. Let’s get into how I have my QNAP configured and how this configuration helps me avoid the aforementioned bottlenecks.
QNAP TVS-872XT Thunderbolt NAS Setup and Performance
I’m running four 16TB Seagate IronWolf Pro hard drives from Seagate in RAID5 for a total of about 43TB usable. This provides me with a single drive failure tolerance which for my use case is fine, as the data is always backed up in at least two other locations. RAID5 also greatly increases my read speed, without sacrificing too much write speed and these huge 16TB drives are pretty quick for spinning rust, to begin with.
The capacity also allows me ample room to store footage from jobs for months, as well as record live footage for playback for myself and the cinematographer. This might seem like overkill, and frankly it kind of is, but I can’t even count the number of times I’ve heard from a production a month after the shoot asking me if I’d happen to have a backup of the footage; answering that with a yes is always nice.
I’m also running four 1TB Seagate IronWolf 125 SSDs in RAID5 with 23% Over Provisioning, for a total usable capacity of 2TB. While RAID5 is generally discouraged for SSDs, these aren’t running 24/7, and Seagate rates these drives at 1.4 Petabytes of write endurance not accounting for over-provisioning, which for reference would mean I’d need to write 1TB per day, every single day, for over two and a half years.
Like with the hard drives, I can lose a single drive and still keep working, and being SSDs, there are minimum speed penalties. The speeds aren’t spectacular (compared to my internal NVMe system drives), since these are SATA SSDs, but we’ll touch on this more later. The SSDs are used for transcoding and moving footage to other drives. This allows me to offload media to other drives and transcode at the same time without slowing either process down, a sort of facsimile of storage tiering.
I’m not using any NVMe drives in my NAS as the type of work I do doesn’t really benefit from a cache, and unfortunately, the NVMe drives are limited to only 2 lanes of PCIe, which would be slower than my SSD array. RAID0 is an option, but I don’t want to risk that. More on this later, as well.
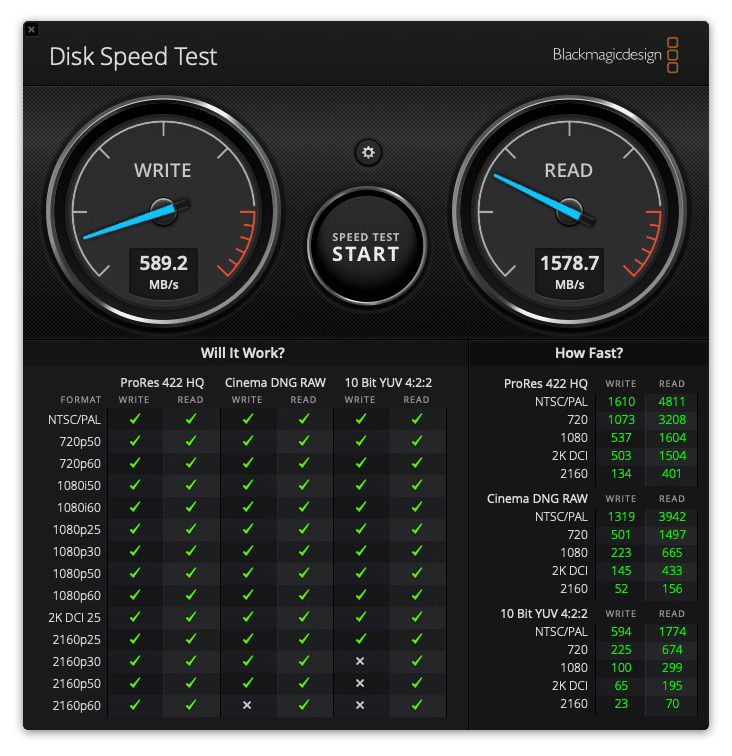
Above is a Blackmagic Design Disk Speed Test for the HDD array over Thunderbolt 3. This was tested on a 2018 Mac mini with the 6-core Intel i7-8700B and 32GB of DDR4 memory. I typically see speeds of about 600MB/s write and 1,550MB/s read, and this about the expected performance for four hard drives in RAID5. This is perfectly adequate as the most common media I’m offloading is CFast 2.0 cards, which top out at about 550MB/s anyway.
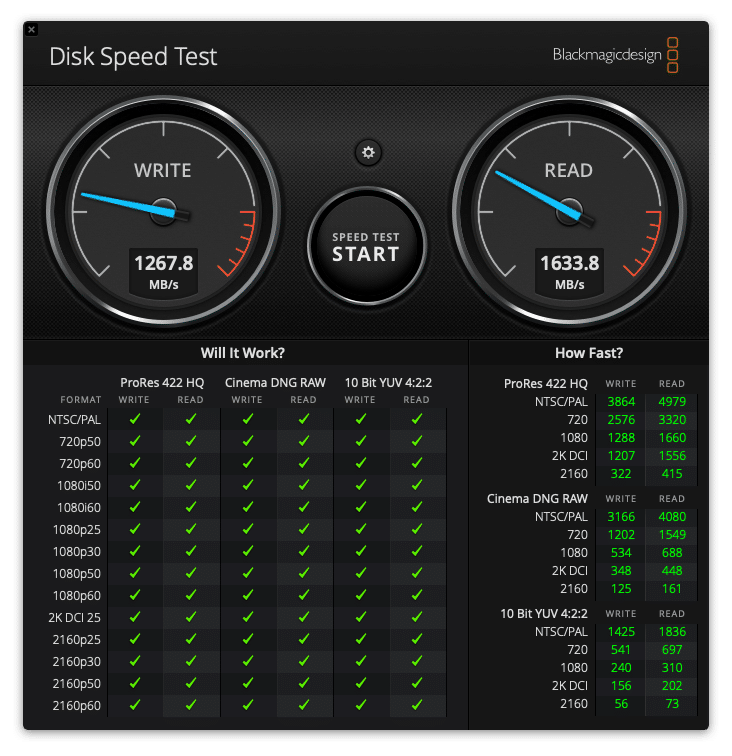
Above is the Blackmagic test for the SSD array and was tested on the same 2018 Mac mini as the hard drives. The performance is a bit underwhelming and while random IOPS will be much better than the spinning drives, my work is 99% sequential reads and writes, as is the nature of large video files. This isn’t really the NAS’s fault, however, as these drives are bottlenecked by SATA. Even with over-provisioning, which QNAP’s built-in tool is excellent for, about 1,300MB/s write and 1,750MB/s read is the best you’ll get with SATA SSDs. Those numbers are not quite reflected in the above screenshot, but performance does spike up to that occasionally.
The Good
Let’s go over the good things with this setup, because there’s a lot to like. One of the best features for me is the ability to have all the data from the shoot day saved on it, bring it back to my home office, connect it up to my 10GbE network for backup to my other NAS and, if the job calls for it, edit the footage directly over the network on my Windows PC. The performance is great all things considered and I’ve yet to run into issues where the QNAP was too slow for a job I needed to be done.
Expandability and flexibility are also huge pluses. With an empty PCIe slot, 8 drive bays, and 2 M.2 slots, there’s a huge variety of configurations you can have to suit your specific needs and workloads. QNAP offers a wide variety of PCIe expansion card options, including Fiber channel, WiFi, additional Ethernet, and more, allowing this device to stay relevant and grow with your needs.
The device itself is also pretty powerful, with 16GBs of RAM and a 6-core i5-8400T. It also has native video encoding for use with a Plex server or similar home media server. I’d have loved to take advantage of this, but my transcodes are very specific and generally ProRes.
The Thunderbolt 3 connectivity is obviously a huge selling point for this NAS. Having two Thunderbolt ports to connect to two different Macs directly, while also having the device available on a 10GbE network is an amazing feature. Speaking of, having built-in 10GbE networking is a major plus in my book, as a device with this level of performance needs it. It also has two 1GbE network ports as well for remote management, internet access, and offsite backup, if you’re so inclined.
The connectivity doesn’t end there, though, as this device also has four USB 3.2 Gen 2 10Gbps ports (two Type-A and two Type-C) for directly connecting external drives for fast backup or ingestion of data.
From a software perspective, QNAP’s QTS operating system is fairly easy to use and if you’re already familiar with QNAP’s other devices, you’ll feel right at home with this one. Setting up and managing storage pools does require a bit of a learning curve, but once you figure it out, it’s not hard.
QNAP also has a handy over-provisioning tool that allows you to test different levels of OP on your SSD pool to get the best balance of performance and usable capacity. I personally found this tool extremely helpful in getting every last drop of performance out of the Seagate IronWolf drives.
QTier is a great tool to help manage your tiers of storage if you configure it with NVMe drives. The QFinder application in macOS is very easy to use and allows you to mount your storage pools easily, as well as keep the NAS updated with the latest firmware. The QFinder app also bypasses SMB encryption in macOS that greatly hurts performance, letting you get the most out of your NAS without having to mess with Terminal commands.
There are a few other little nice-to-haves that make this NAS good for me, personally. It sips power, generally only using about 55W under normal use, which is great if I need to move my set up on set and temporarily goes on UPS power. It’s also very quiet, which is critical for on-set use, but also great if you have it in a home office. It’s especially important considering that with the Thunderbolt NAS connections, you’ll likely have it set up right next to your computer.
The Challenges
The issues here aren’t terrible, they’re inconvenient at worst. We’ll start with my biggest minor gripe, which is no Thunderbolt passthrough. This isn’t a huge deal with most high-end Intel-based Macs, as they typically have at least 4 Thunderbolt ports, my Mac mini included, but it would have been nice, especially since the Thunderbolt network this device sets up to connect to your computer is only 20GbE. Yes, this is a Thunderbolt 3 device and TB3 is capable of 40Gbps, but each port will only provide a 20GbE connection over the Thunderbolt Bridge QFinder creates. I’m not entirely sure, but this may be because there’s only a single Thunderbolt controller on board so the 40Gbps is split between the two ports, or it’s a limitation of the Thunderbolt Networking feature. It would have been nice to get the full 40Gbps on a single machine, especially if the device is configured with more SSDs, which can easily exceed the 20GbE speed limit of 2,500MB/s. That also makes 2,500MB/s the hard limit on throughput for this device.
A disappointing feature is that the two M.2 bays are limited to only two lanes of PCIe Gen 3, meaning you can only get a maximum of 1,667MB/s out of a given NVMe drive, and there are plenty of Gen 3 NVMe drives that have more than double that throughput. You can set up two NVMe drives in RAID0 to alleviate some of these performance limitations, but striped with no redundancy is never recommended. It can certainly work if you have two small NVMe drives you’re just looking to use as a cache.
This isn’t specific to this NAS but more so NASs in general, and that’s the setup time is about two days, depending on your configuration. The initial building of a RAID5 array takes a long time, especially with large double-digit TB hard drives. Running the over-provisioning tool also takes a very long time. This device is not plug-and-play, but to be fair it was never advertised as one, so that’s on me for having incorrect expectations. Another extremely minor thing is this device is less than a half-inch too tall to fit in 4Us on a rack; you may be able to squeeze it in if you remove the rubber feet. This is also minor, but I was a little annoyed that this doesn’t come with a Thunderbolt cable and you have to buy them separately.
QNAP’s QTS OS can be finicky at times. I often get error messages about apps failing to install because the Thunderbolt connection does not connect the device to the internet; that requires connecting an ethernet port to the internet in addition to the Thunderbolt connection. This also happens when trying to update the firmware through the QFinder app. It will complain, requiring you to either manually download the firmware update from QNAP’s website, or connect the NAS to the internet first.
Thunderbolt NAS Networking on Windows 10
The QNAP TVS-872XT has one major flaw and unfortunately, it’s out of QNAP’s control. You may have noticed I’ve exclusively been talking about using the Thunderbolt NAS in macOS. While I do primarily use a Mac mini for work, I also have a very powerful Windows PC with an RTX 3090, (which you can read my review of here) in my home office that’s equipped with Thunderbolt 3.
Unfortunately, Thunderbolt Networking straight up does not work in Windows 10. This is a known issue and affects all devices that use Thunderbolt Networking, not just QNAP’s. It’s extremely unfortunate, as the major appeal of this product for me was going to be the ability to work between my Mac and Windows computer with ease and get the benefits of Thunderbolt speeds while doing so.
As it stands at the time of this writing, you’re limited to using 10GbE networking in Windows, effectively halving the maximum throughput for this NAS. If you primarily work in Windows and were hoping to use this device over Thunderbolt, you’re out of luck. There’s a lot of talk around forums on the internet to just use a 10GbE adapter, but that ultimately defeats the whole purpose of buying a Thunderbolt NAS in the first place. For Windows users, it’s a hard no and I recommend one of QNAP’s other NASs with a 10GbE NIC.
Conclusion
So where do I stand on the QNAP TVS-872XT? I’m going to keep using it for work, as it serves me well on sets. Now that I’ve had time to work with it and configure it how I like, it’s been good. I wouldn’t say it’s exactly what I need, but it does offer better performance than just a 10GbE NAS would, and even though the Thunderbolt Network is limited to 20GbE, my configuration doesn’t saturate that connection so I don’t feel like I’m leaving anything on the table. Having the 10GbE networking built-in is a nice-to-have for directly working with footage from sets on my Windows 10 computer, even if I can’t use it to its full potential while doing so. I’d personally be better served with a strictly Thunderbolt 3 direct-attached storage device, and had I not been provided this unit for review from QNAP with drives from Seagate, my money would be better spent there. All that said, it works. It’s quiet, and I forget it exists while I’m using it, which in my book is a good thing. It lets me focus on working and not worrying about whether or not my data is safe.
There’s a lot I left out, particularly in regards to the operating system, since I either didn’t use it or it didn’t apply to my specific work. For example, having 16GBs of RAM is great for virtual machines, and they’re easy to set up with QNAP’s Virtualization Station hypervisor, but I currently don’t have a use for that in my workflow. This device does offer a lot, and I highly recommend reading up on QNAP’s page about QTS. The software is way more powerful than I’ll ever need, but there may be something in there that’s exactly what you’re looking for.
If you’re primarily a macOS-based editor or run a small post-production operation with a handful of editors with a mix of Mac and Windows machines, this device serves that niche perfectly. Even if you just have Mac computers, the extra performance the Thunderbolt connection offers is worthwhile. Otherwise, and specifically because of the Thunderbolt Networking issue in Windows, I’d recommend a different NAS.
Fortunately, QNAP has plenty of 8-bay (and smaller) options like their TVS-872N, or the TS-873 if you don’t quite need as much horsepower. They have optional 10GbE and you still get a ton of features and apps in QNAP’s QTS operating system without paying a premium for Thunderbolt. I’d even recommend QNAP’s TVS-h1288X which, while more expensive, offers a lot more features and power and even has an upgrade path for four Thunderbolt 3 ports via expansion cards if you have multiple Macs or if the Windows issue ever gets fixed. If you’re looking for 10GbE built-in, QNAP does have the TS-832PX with dual SFP+ ports for less than half the price of the TVS-872XT, although it is significantly less powerful and marketed as “entry-level”. It is also worth considering the cost of this device versus a similarly powerful one without Thunderbolt for direct connection, including the cost of a 10GbE NIC if you don’t already have one, particularly on most Macs where a $40 ConnectX-3 from eBay isn’t an option, and even a 10GbE switch if you have multiple systems.
With all that said, the TVS-872XT fills a very specific niche, and if you fall into that niche it’s just about the best you can get without a much more expensive bespoke solution. However, if you don’t fall into that niche, there are better and more cost-effective options.
Engage with StorageReview
Newsletter | YouTube | Podcast iTunes/Spotify | Instagram | Twitter | Facebook | RSS Feed

