QNAP NAS platforms have the most unique and capable hardware designs in their class. So, we added a GPU to one and tested the AI capabilities.
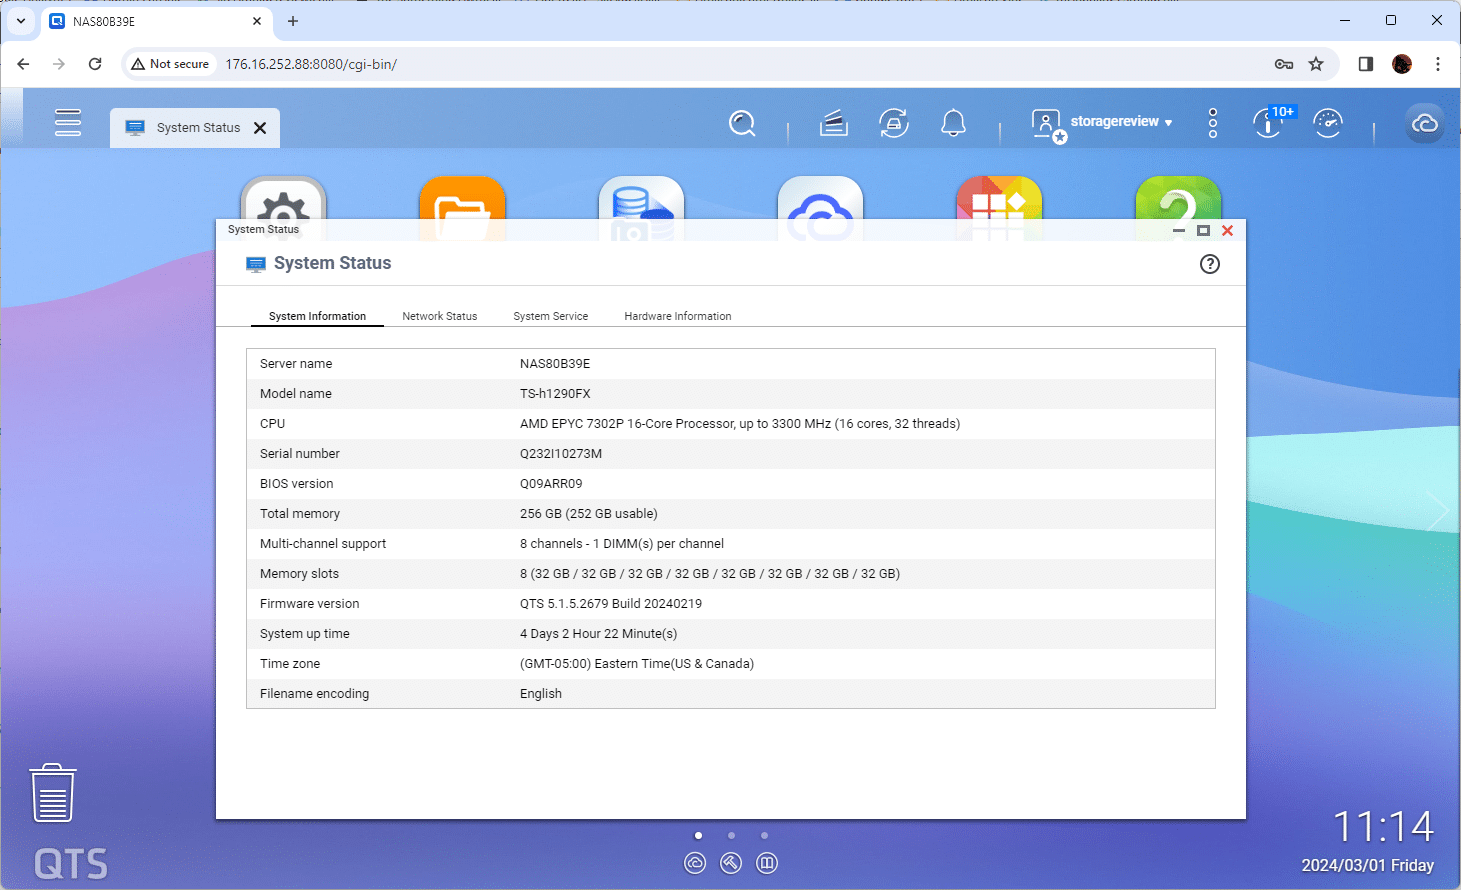
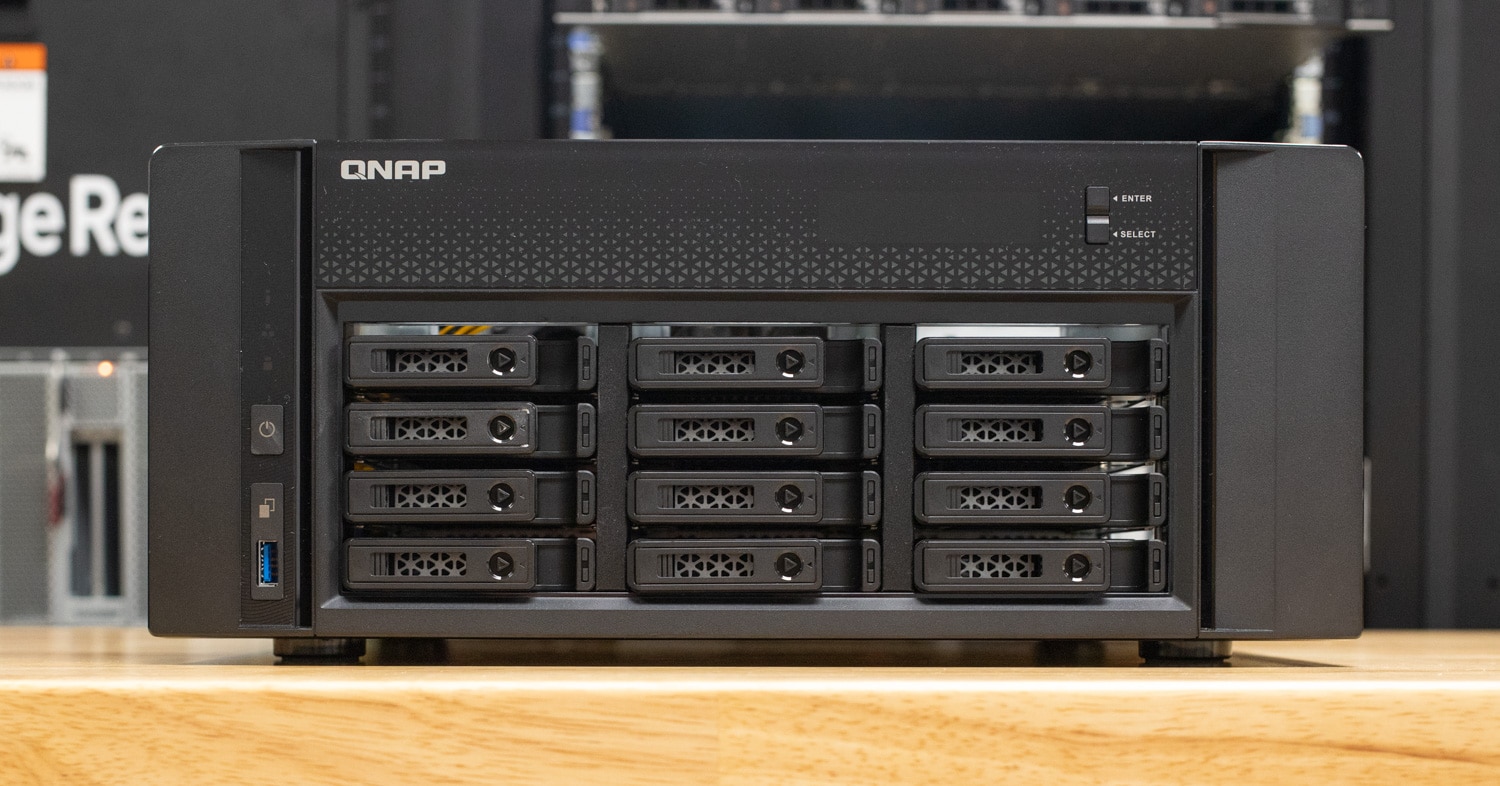
QNAP is known for its hardware design, as well as smashing more power, expansion, and flexibility into its hardware designs than anyone else in the category. Recently, we reviewed the TS-h1290FX, a 12 NVMe NAS with an AMD EPYC 7302P CPU (16C/32T), 256GB DRAM, 25GbE onboard, and plenty of PCI slots. With all that pent-up power and apps on board, what happens if we drop in a GPU and see how far we can push this NAS when it comes to running AI, like a private ChatGPT?
NAS Storage Potential for AI
The QNAP TS-h1290FX has a lot to offer businesses looking to break into AI. The NAS offers a unique advantage in that it can support an internal GPU and has the potential for a massive storage footprint. Large AI models require a significant amount of data, which must be stored and accessed efficiently. This can be challenging for storage platforms that use hard drives, but the TS-h1290FX with U.2 NVMe support has everything covered.
When you think of large capacity NAS, the first thought is that of 3.5″ HDD platforms with support for drives as large as 24TB. That sounds big, but it’s nothing compared to what you can find with QLC U.2 SSDs. QNAP recently added support for the Solidigm P5336 family, which goes up to an incredible 61.44TB per drive capacity. For a 12-bay model such as the TS-h1290FX, customers get up to 737TB of raw storage before data reduction kicks in. For a compact desktop footprint NAS, there are very few systems that could compete with that.
As businesses quickly adopt AI, having a system that can provide storage capacity for AI workflows and run models is a huge advantage. The impressive feat, though, is that this QNAP NAS can run those AI workflows while still handling its primary duties of sharing storage across the SMB or SME environment.
It should be said, too, that AI isn’t a monolithic thing. Different AI projects require different types of storage to support them. While we’re focused on the desktop unit here, QNAP has plenty of other NAS systems that have support for high-speed flash and networking, critical elements in supporting a more ambitious AI need than what we’ve covered here.
How Does QNAP Support GPUs?
QNAP supports GPUs in many of their NAS systems. They also have a few apps that support GPUs as well. For this article, we’re primarily looking at the GPU through the lens of Virtualization Station. Virtualization Station is a hypervisor for the QNAP NAS, which lets users create a variety of virtual machines. Virtualization Station also has a deep feature set that supports VM backups, snapshots, clones, and, most importantly, GPU passthrough for the context of this article.
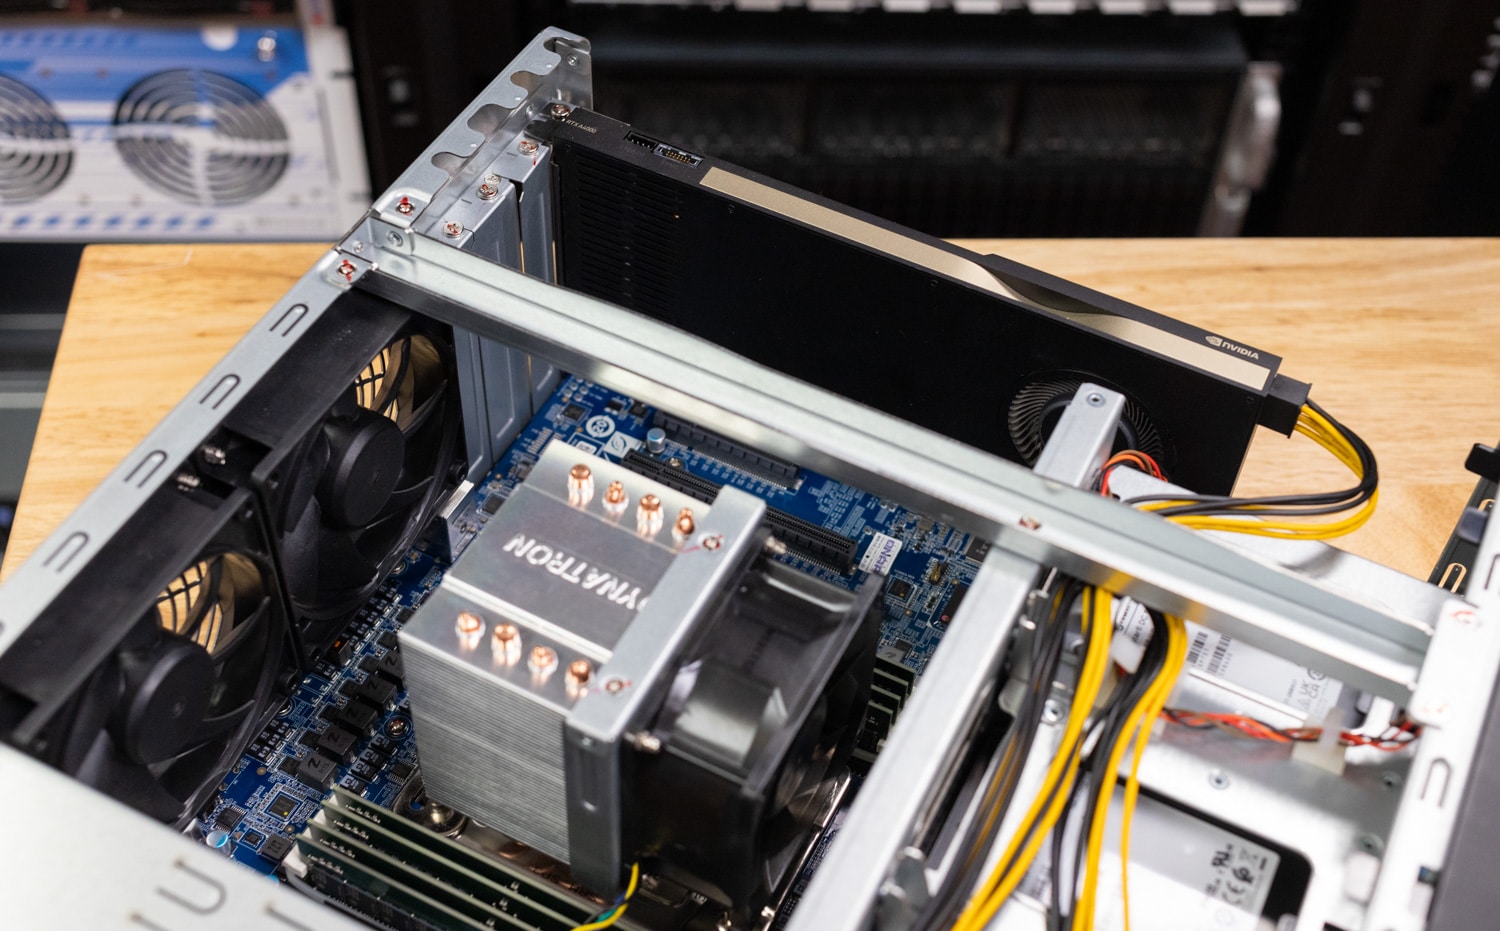
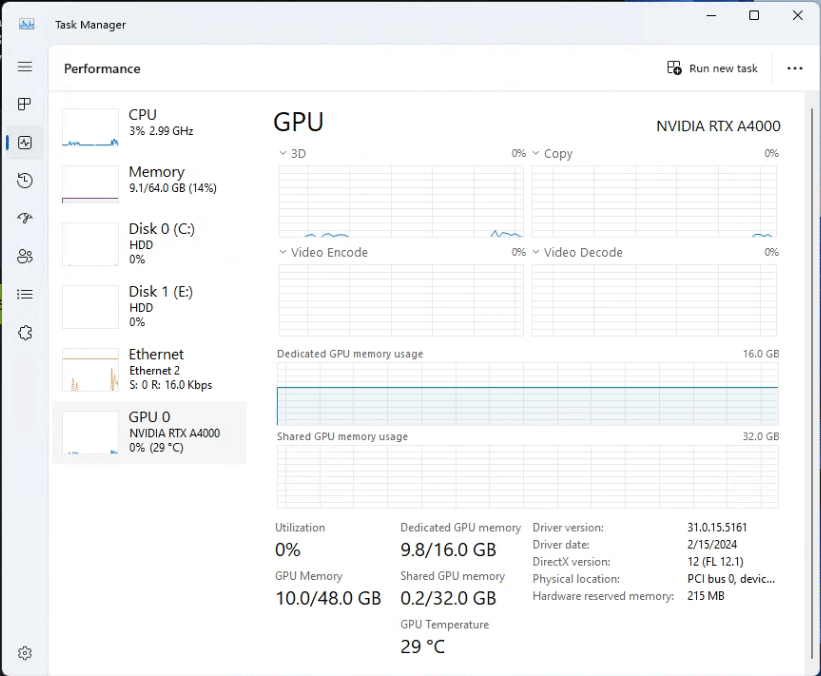
Inside our test unit, the QNAP TS-h1290FX is equipped with a typical server board with several available PCIe slots for expansion. QNAP also provides the necessary GPU power cables inside the chassis, so no funny business is required for cards that need more than PCIe Slot power. We found the single-slot NVIDIA RTX A4000 fit perfectly with adequate room for cooling. In this platform, a GPU with an active cooler is preferred. Your choice of GPU will be determined by the workload and what the NAS can physically support and cool.
Configuring the QNAP for AI
Setting up a virtual machine (VM) with GPU passthrough on a QNAP NAS device involves several steps. It requires a QNAP NAS that supports virtualization and has the necessary hardware capabilities. Below is a guide on how we set up and configured the QNAP NAS with GPU passthrough.
1. Verify Hardware Compatibility
Ensure your QNAP NAS supports Virtualization Station, which is QNAP’s virtualization application.
- Confirm the NAS has an available PCIe slot for a GPU and that the GPU supports passthrough. Compatibility lists are often available on the QNAP website. While the current compatibility list doesn’t officially support the NVIDIA A4000, we had no trouble with functionality.
2. Install the GPU
- Power off the NAS and disconnect it from power. Open the case and insert the GPU into an available PCIe slot. Connect any necessary power cables to the GPU. Close the case, reconnect power, and power on the NAS.
3. Update Your QNAP Firmware and Software
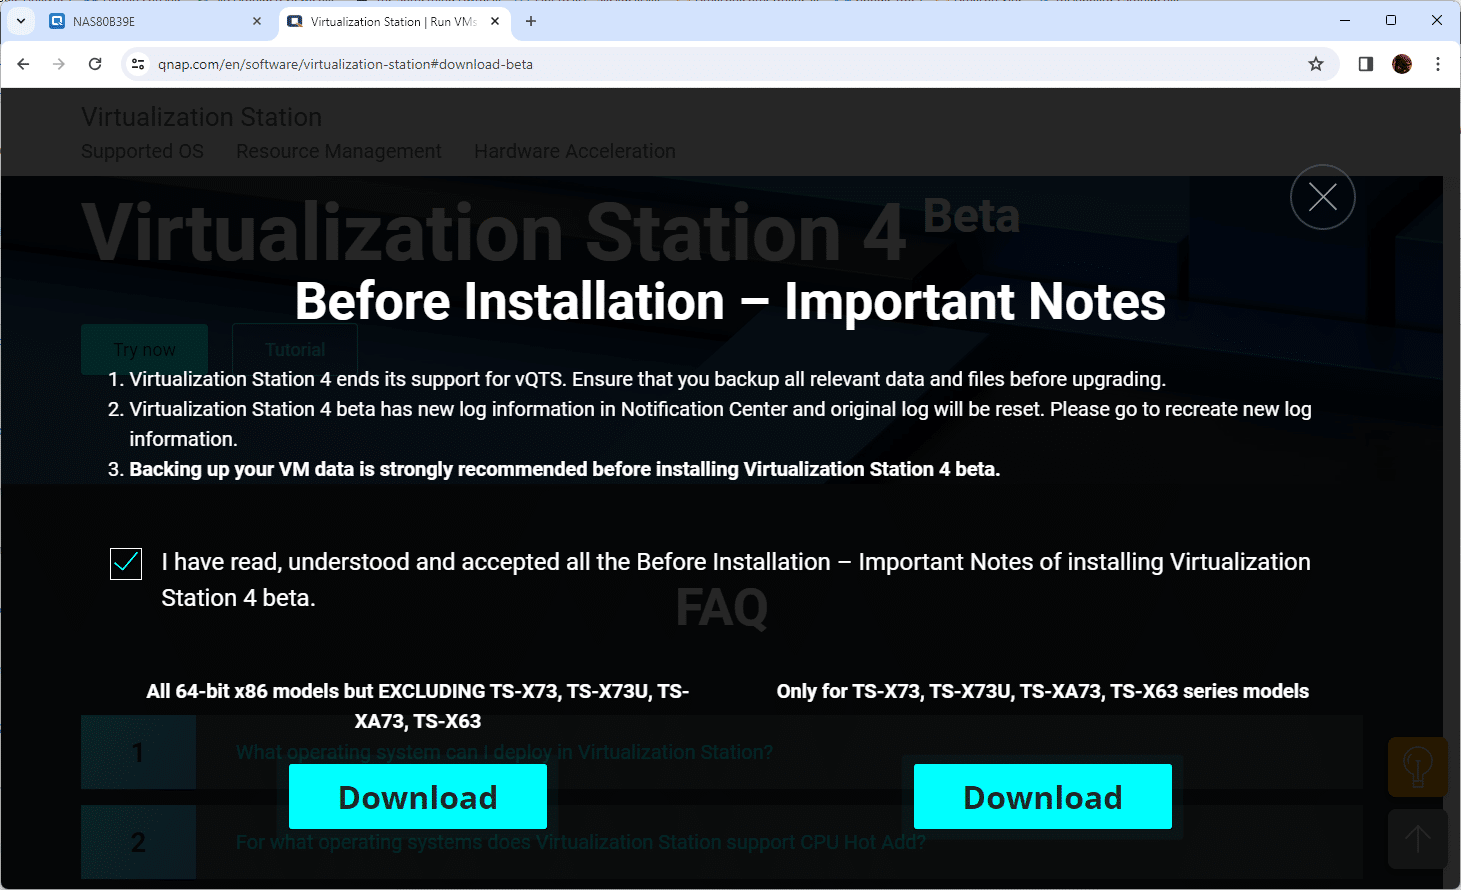
Make sure that your QNAP NAS is running the latest version of QTS (QNAP’s operating system). We used Virtualization Station 4, which is a QNAP open beta, to provide better support and performance for GPU work. Virtualization Station 4 is a self-install package, unlike others that are installed directly through the QNAP App Center.
4. Install the Operating System on the VM
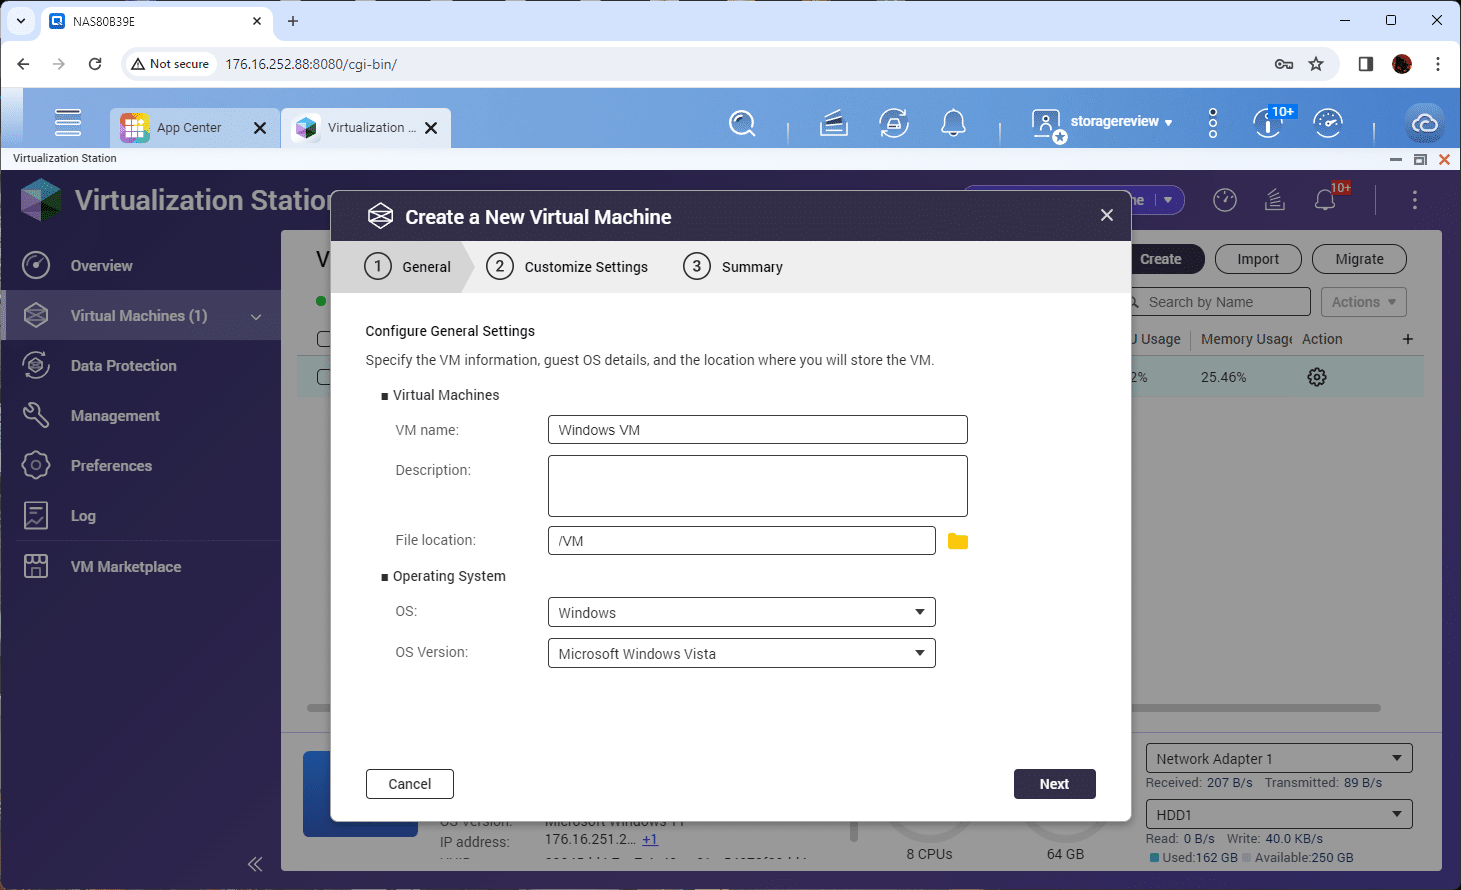
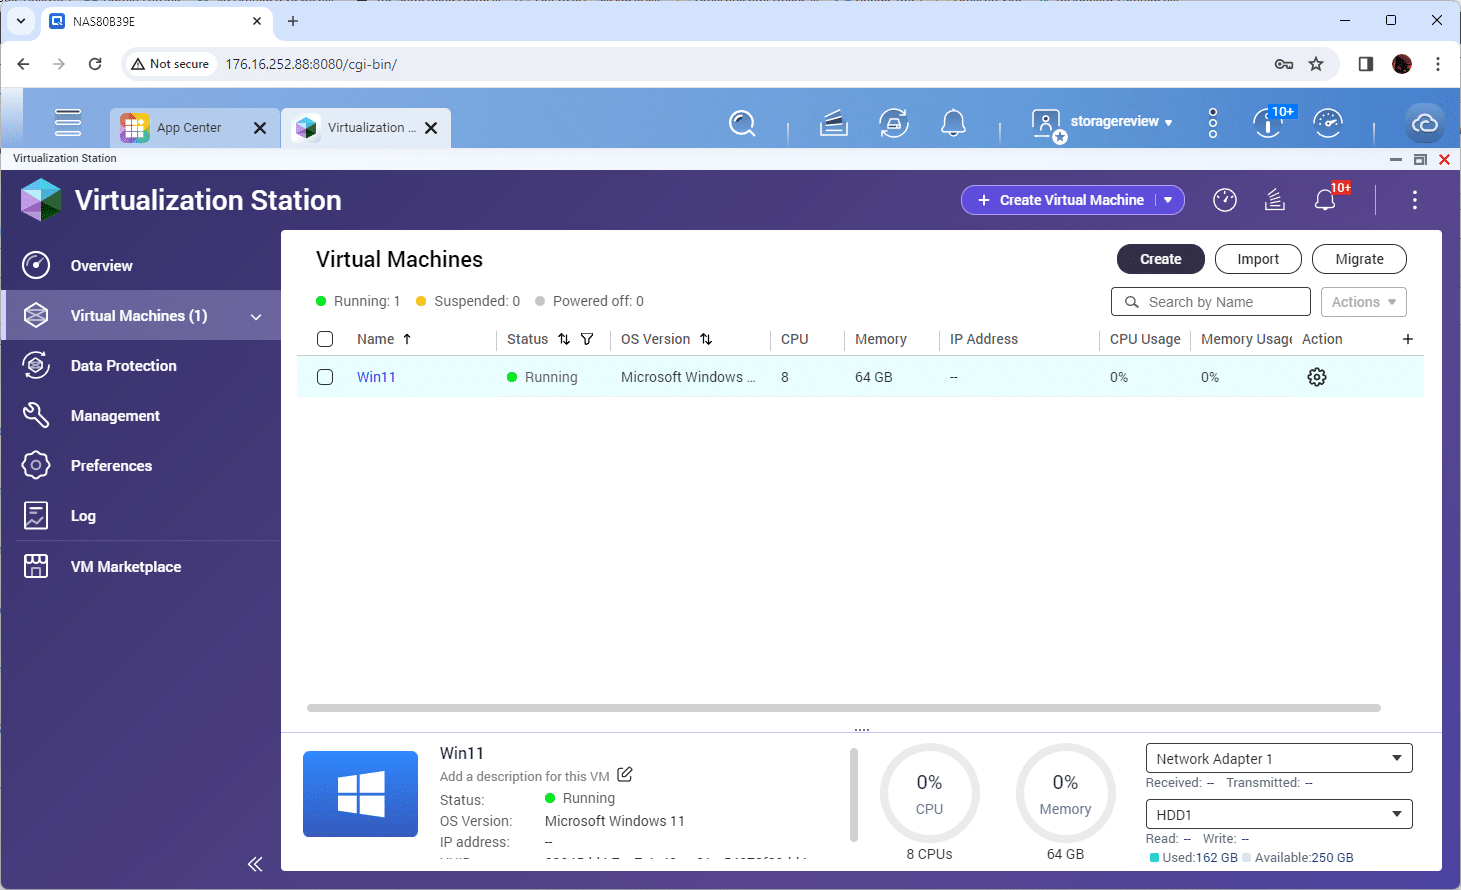
After installing QNAP’s Virtualization Station on your NAS, you can go to the management interface to deploy your virtual machine (VM). When you click on “Create,” a prompt window will appear for you to provide the VM name and select the location on the NAS where the VM will run. You may need to make some minor adjustments to the OS and version information in most cases.
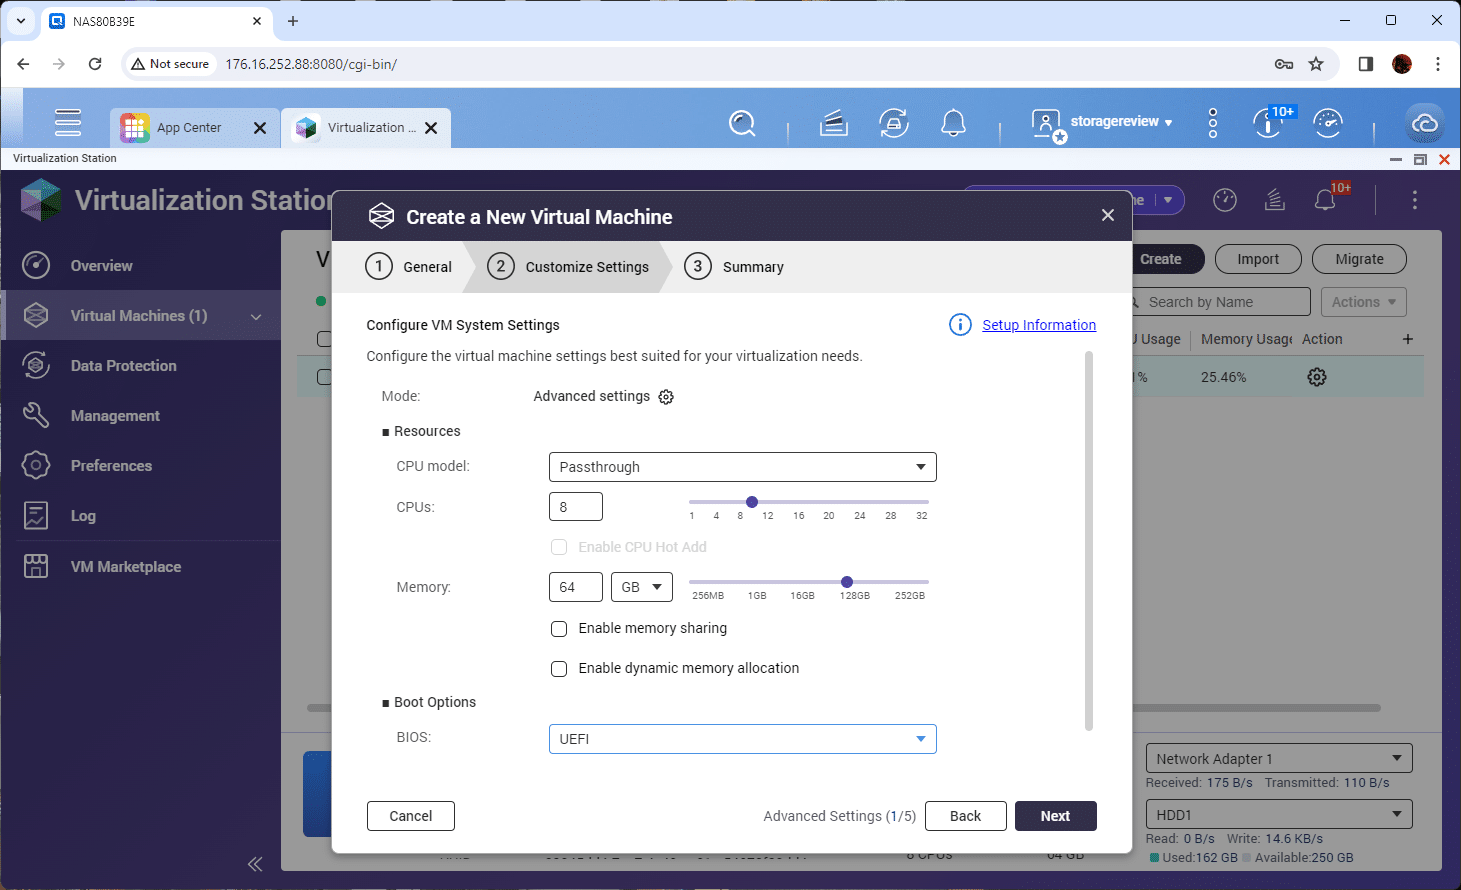
Next, adjust the resources and CPU compatibility type the VM will see at the guest OS level. In our case, we gave our VM 64GB of memory and 8 CPUs. We selected the passthrough CPU type for the model and changed the BIOS to UEFI.
To boot and install the OS, you must upload and mount an ISO file as a virtual CD/DVD drive. Once the installation process is complete, enable RDP for management before proceeding to the next step. The QNAP VM management functionality changes once GPU passthrough is enabled, and RDP simplifies this process significantly. At this point, turn off the VM.
5. Configure GPU Passthrough
Within Virtualization Station:
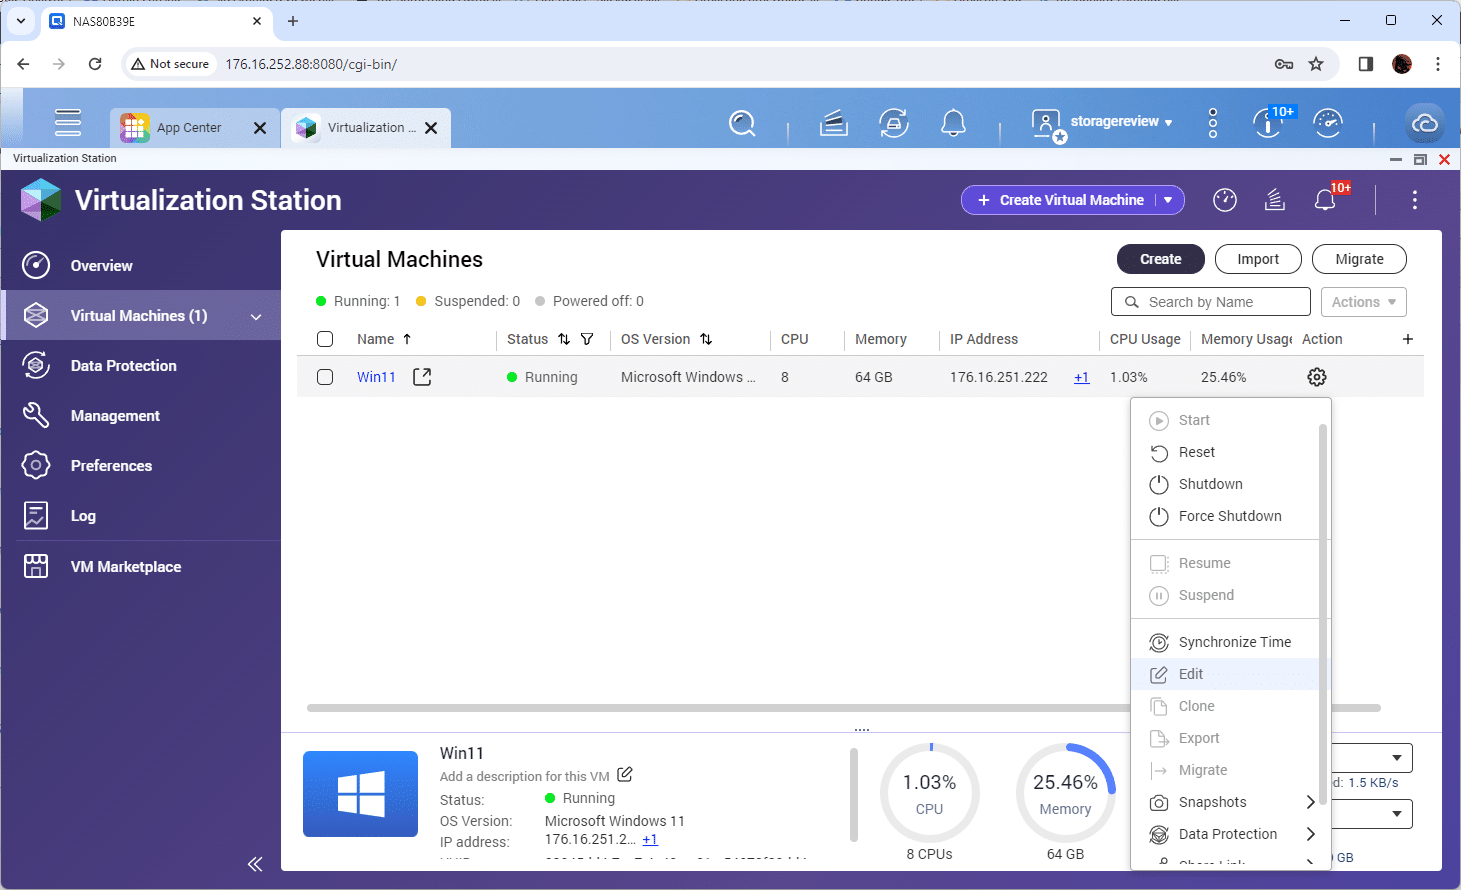
- With the existing VM powered down, edit your VM.
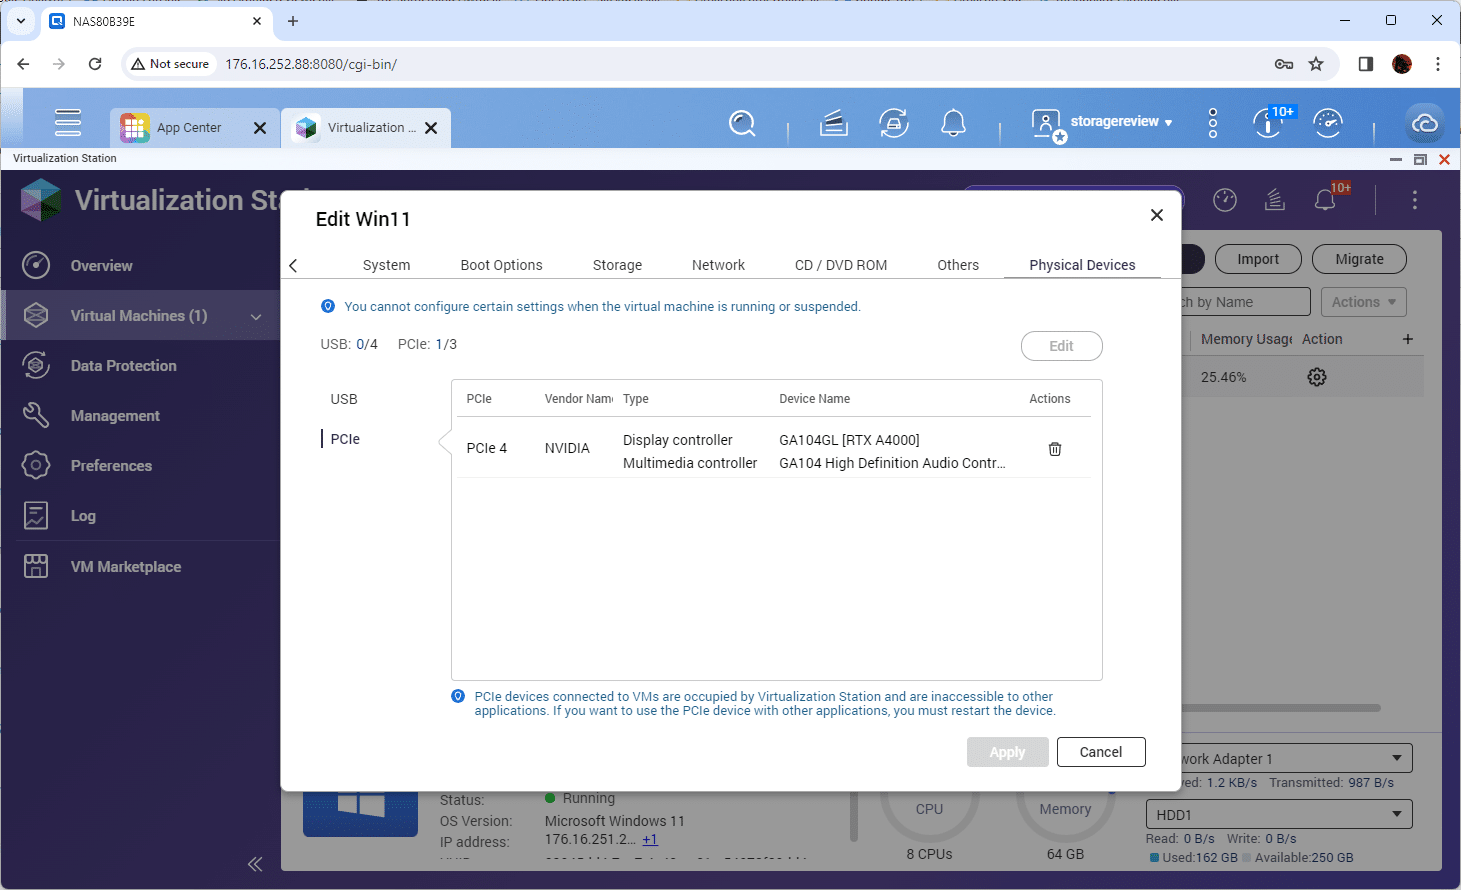
- In the VM settings menu, look for the physical devices tab. From here, select PCIe. You will see an available device for the passthrough. In our case, it was the NVIDIA RTX A4000. Apply this change.
- If you need to allocate other resources for your VM, such as CPU cores, RAM, and storage, this is the time to do it.
- Turn the VM back on.
6. Install GPU Drivers in the VM
Once you are back in the VM using RDP with the GPU connected, download and install the appropriate drivers for your GPU within the VM. This step is crucial for the GPU to function correctly and provide the expected performance improvements.
7. Verify GPU Passthrough Functionality
After installing the drivers, verify that the GPU is recognized and functioning correctly within the VM. You can use the device manager in Windows or relevant command-line tools in Linux to check the GPU status.
Troubleshooting and Tips
- Compatibility: Check the QNAP and GPU manufacturer’s websites for any specific compatibility notes or firmware updates that might affect passthrough functionality.
- Performance: Monitor the performance of your VM and adjust resource allocations as necessary. Ensure your NAS has sufficient room for cooling, especially after adding a high-performance GPU.
- Networking and Storage: Optimize network settings and storage configurations to avoid bottlenecks that could impact the performance of VM applications.
NVIDIA Chat with RTX – Private ChatGPT
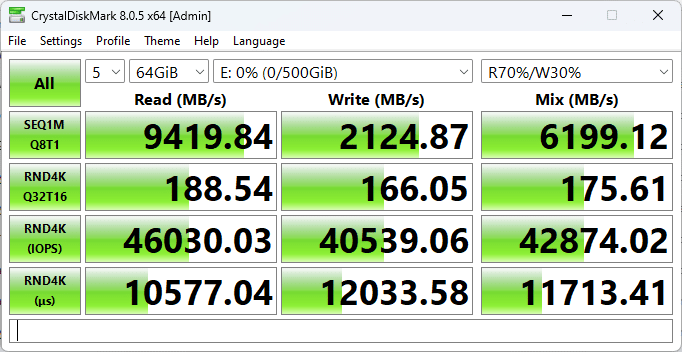
While it is easy to stop here (creating a Windows VM with GPU access), we pushed further in this experiment to provide businesses with a unique way to take advantage of AI safely and securely, tapping into the performance of the NVMe-based NAS. In our case, the VM tapped into RAID5-protected storage that offered performance of 9.4GB/s read and 2.1GB/s write.
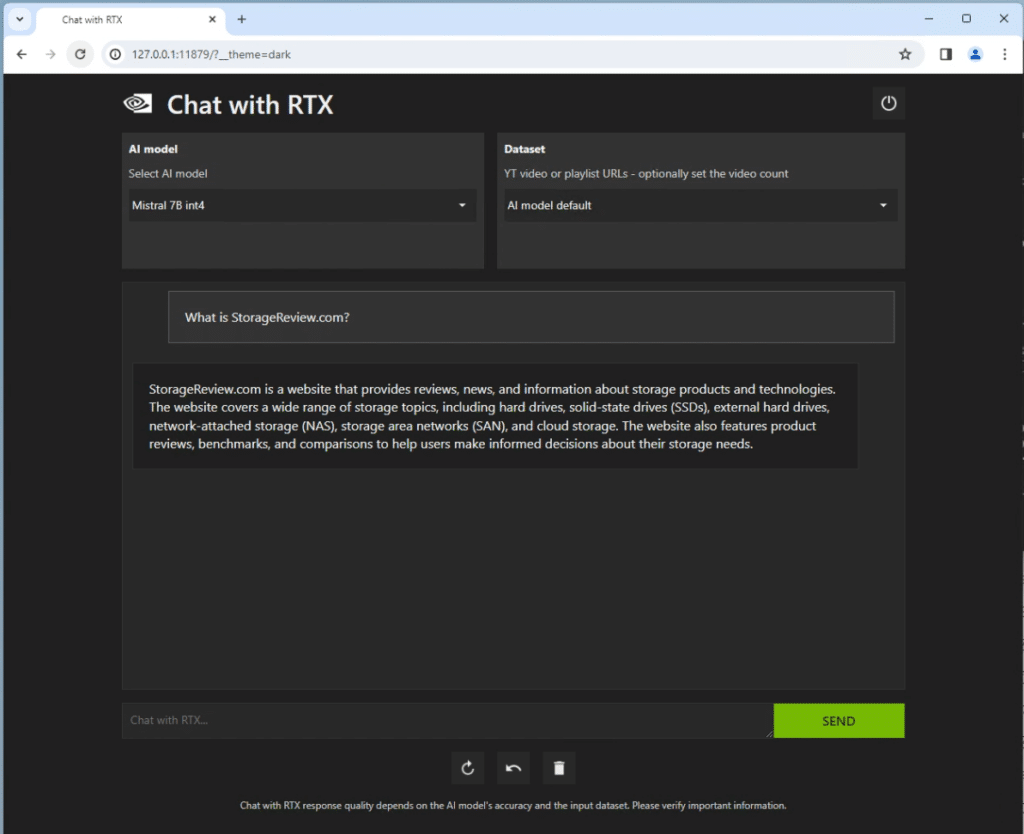
NVIDIA has recently launched a software package named Chat with RTX. Chat with RTX revolutionizes AI interaction by providing a customized experience through the integration of a GPT-based large language model (LLM) with a local, unique dataset. This includes the ability to process documents, notes, multimedia, YouTube videos, playlists, and more.
This turn-key application harnesses the power of retrieval-augmented generation (RAG), combined with the efficiency of TensorRT-optimized LLM and the high-speed capabilities of RTX acceleration. These deliver context-aware responses that are both rapid and highly relevant. Operating directly on your Windows RTX desktop or workstation, this setup ensures swift access to information and a high degree of privacy and security, as all processing is handled locally.
Implementing an LLM with RAG capabilities offers an excellent solution for business professionals and power users who prioritize privacy, security, and personalized efficiency. Unlike public models such as ChatGPT, which process queries over the Internet, a local LLM operates entirely within the confines of your QNAP NAS.
This offline feature ensures that all interactions are kept private and secure. This allows users to customize the AI’s knowledge base to their specific needs, whether it’s confidential corporate documents, specialized databases, or personal notes. This approach significantly enhances the relevance and speed of the AI’s responses, making it an invaluable tool for those requiring immediate, contextually aware insights without compromising privacy or data security.
Also worth noting, and this may be obvious, adding a GPU to the NAS directly simplifies the linkage between a company’s data and the LLM. There’s no need to move data around to take advantage of this particular model, and the process is as simple and cost-effective as dropping a midrange GPU into the NAS. Also, at this point, all of this software is free, greatly democratizing the potential of AI for small organizations.
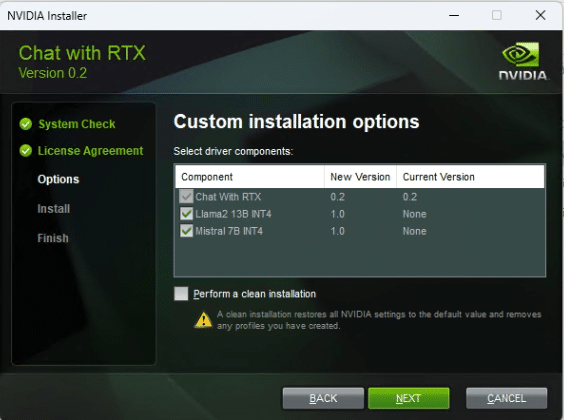
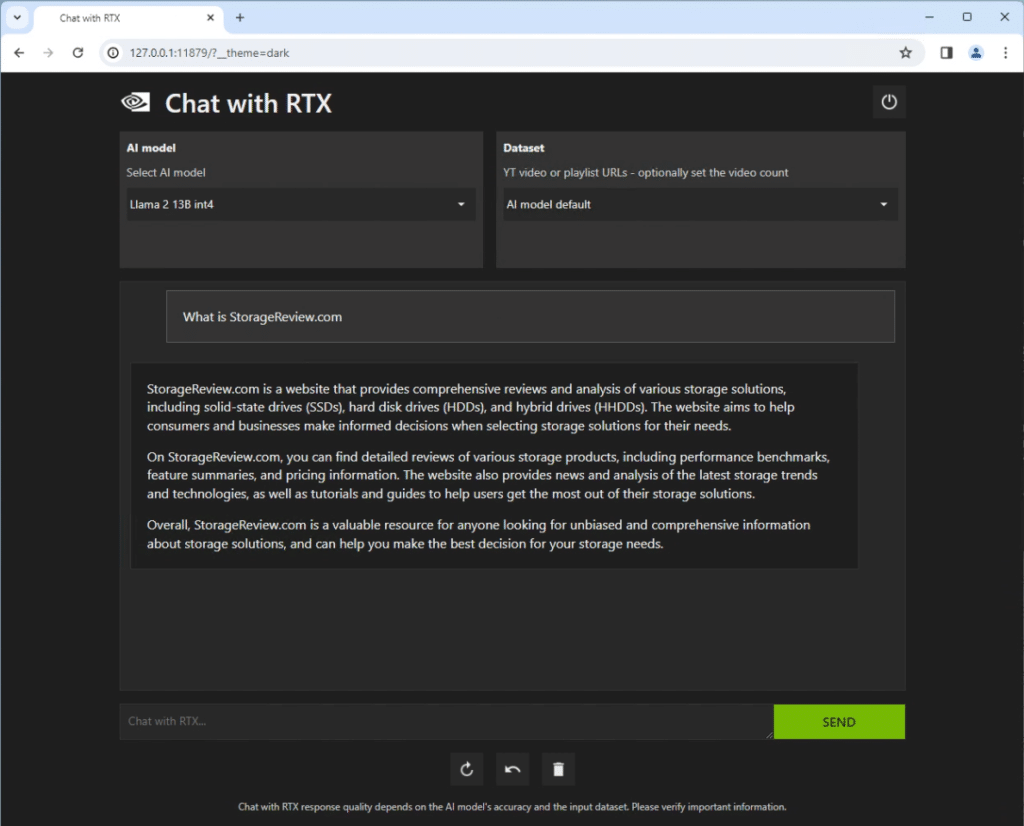
Chat with RTX is still a beta program, and at the time of writing, we used version 0.2. But the ease of installing it and getting the web interface up and running was refreshing. Anyone who knows how to download and install an application can now get a local LLM with RAG running with just a few clicks.
Enabling Remote Access to Chat with RTX through a Universally Accessible URL
We took our scenario to the next level and made it available for the whole office.
Step 1: Locate the Configuration File
Begin by heading to the folder with the configuration file:
- File Path:
C:\Users\{YourUserDir}\AppData\Local\NVIDIA\ChatWithRTX\RAG\trt-llm-rag-windows-main\ui\user_interface.py
Step 2: Update the Launch Code
Open the user_interface.py file and Ctrl-F for interface.launch Locate the correct segment, which by default will appear as follows:
interface.launch(
    favicon_path=os.path.join(os.path.dirname(__file__), 'assets/nvidia_logo.png'),
    show_api=False,
    server_port=port
)
To enable network access, you have to add share=True like so:
interface.launch(
    favicon_path=os.path.join(os.path.dirname(__file__), 'assets/nvidia_logo.png'),
    show_api=False,
    share=True,
    server_port=port
)
Save the modifications to the user_interface.py file. Then, launch Chat with RTX via the Start Menu, which will initiate a command prompt window and activate the interface.
Step 3: Finding the Public URL
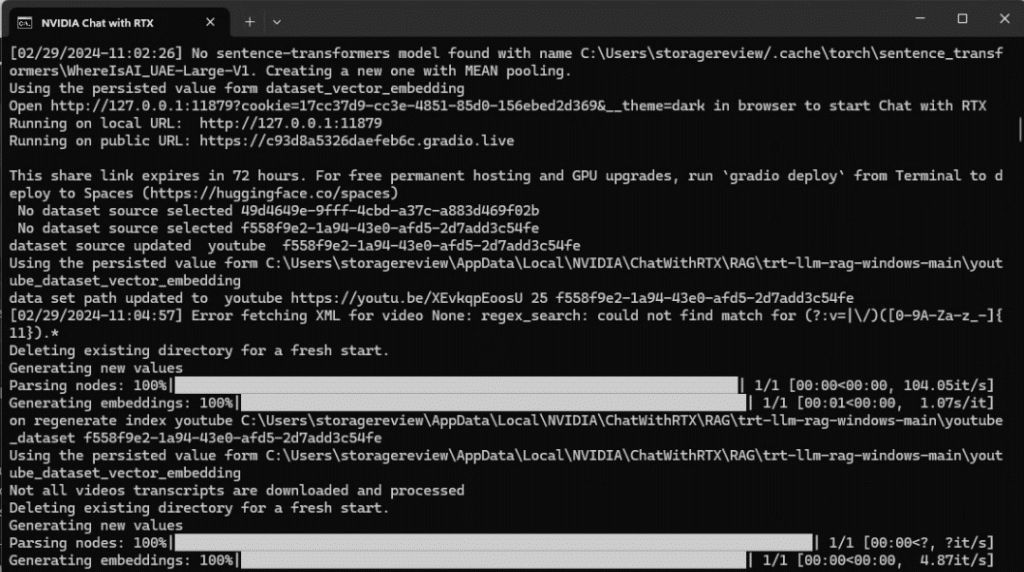
The command prompt window will display both a local and a public URL. To craft a functional public URL accessible from any device, merge elements from both URLs. It would be best if you took the Public URL and added the local cookie information to the end of it:
- Public URL:
https://62e1db9de99021560f.gradio.live - Local URL with Parameters:
http://127.0.0.1:16852?cookie=4a56dd55-72a1-49c1-a6de-453fc5dba8f3&__theme=dark
Your combined URL should look like this, with the ?cookie appended to the Public URL:
https://62e1db9de99021560f.gradio.live?cookie=4a56dd55-72a1-49c1-a6de-453fc5dba8f3&__theme=dark
This URL grants access to Chat with RTX from any device on your network, extending its usability beyond local constraints.
Final Thoughts
We’ve been fans of QNAP’s leadership in NAS hardware design for a long time, but there’s so much more value available to QNAP customers than they probably know. Truthfully, Virtualization Station is a great starting point, but why not take it to the next level and try GPU Passthrough? If nothing else, organizations can deliver a high-end GPU-powered VM to the organization without having to set up a dedicated workstation. There are also the apparent benefits of a VM sitting next to a massive internal storage pool with native performance levels. In this case, we had shared storage performance of almost 10GB/s, without worrying about a single 100GbE connection or switch, all because the GPU-accelerated VM sat inside the NAS itself.
Why not go even a step further to realize the benefits of AI for the organization? We’ve shown that adding a decent GPU to a QNAP NAS is relatively easy and inexpensive. We put an A4000 to work, and with a street price of about $1050, that’s not bad when you consider Virtualization Station is free and NVIDIA Chat with RTX is available at no charge. Being able to securely point this powerful LLM at a company’s private data should deliver actionable insights while making the company more dynamic.
Another lens to consider here is a file store for models that may be external to the QNAP system itself. This is ideal for small businesses that need a quick spot to store their working data. With the advanced networking capabilities, you could conceivably use the NAS as a place to hold data for RAG work on a larger GPU server, allowing for an easily sharable data store from which to infer.
This is just one AI example. The industry is moving rapidly, so tools will continue to be made available. Intelligent businesses must learn to leverage AI, and this simple feature from QNAP is a great way to get started.
Engage with StorageReview
Newsletter | YouTube | Podcast iTunes/Spotify | Instagram | Twitter | TikTok | RSS Feed

