
SiPEED NanoKVM-PCIe: a compact PCIe card that delivers remote access and KVM control to systems without IPMI.
SiPEED sent us the NanoKVM-PCIe for review. We’ve looked at a few KVM products from SiPEED, like the NanoKVM-USB and NanoKVM-Cube. These are solid devices, but the new NanoKVM-PCIe combines the best of both products and integrates them into a desktop device designed to fit inside a standard PCIe slot like any other expansion card.
The NanoKVM-PCIe is built around a RISC-V processor and is tailored for true remote desktop access, startup control, remote OS installation, and even dual-machine collaboration. The integrated PCIe baffle sets it apart, allowing the unit to mount securely within a desktop chassis, making it a permanent solution for users who need consistent, always-available remote access.
It draws power directly from the motherboard’s PCIe slot, removing the need for external power. Optional WiFi and PoE support further extend its flexibility depending on your setup, and the wired Ethernet connection has been enhanced for improved stability to support more professional applications.
The NanoKVM-PCIe has built-in Tailscale support, enabling secure, seamless remote access across networks. It’s a practical solution for desktops and servers that lack IPMI or traditional remote management tools, giving you complete control without the enterprise price tag.
SiPEED NanoKVM-PCIe Specifications
| Specification | SIPEED NanoKVM-PCIe |
| Processor | SG2002 (RISCV) |
| Resolution | 1080P @ 60fps |
| Video Encoding | MJPEG, H264 |
| Video Delay | 90-230ms |
| ETH | 100M/10M |
| POE | Optional |
| WiFi | Optional |
| ATX Power Control | Directly connects to 9-pin power header |
| UEFI/BIOS | yes |
| Virtual HID (keyboard & mouse) | yes |
| Emulated USB Storage | supported |
| Wake On LAN | supported |
| Tailscale | supported |
| IPMI | supported |
| WebSSH | supported |
| Custom Scripts | supported |
| Serial Port Terminal | supported 2 channels |
| Micro SD Card | Yes, ready to use on boot |
| OLED Display | 64*32 0.49″ white |
| Power Supply | Multiple power modes, USB-C, PCIe, POE |
| Power Consumption | 0.2A@5V |
| Size | 66x57x18mm (without panel) |
| Cooling | Silent, fanless |
| Price | Pre-Order Price $40-55, dependent on config. |
NanoKVM-PCIe Build and Design
Before we deep dive into the build and design, the NanoKVM-PCIe comes in the following configurations:
- NanoKVM-PCIe Eth
- NanoKVM-PCIe Eth + WiFi
- NanoKVM-PCIe Eth + PoE
- NanoKVM-PCIe Eth + WiFi + PoE
For this review, we were sent the NanoKVM-PCIe Eth + WiFi + PoE model. It offers the broadest range of connectivity and power input options. This model supports wireless and wired networking and power via PoE, providing flexibility in how and where it can be deployed. It can be mounted in a standard full-height PCIe slot or optionally with a half-height bracket for more compact systems.
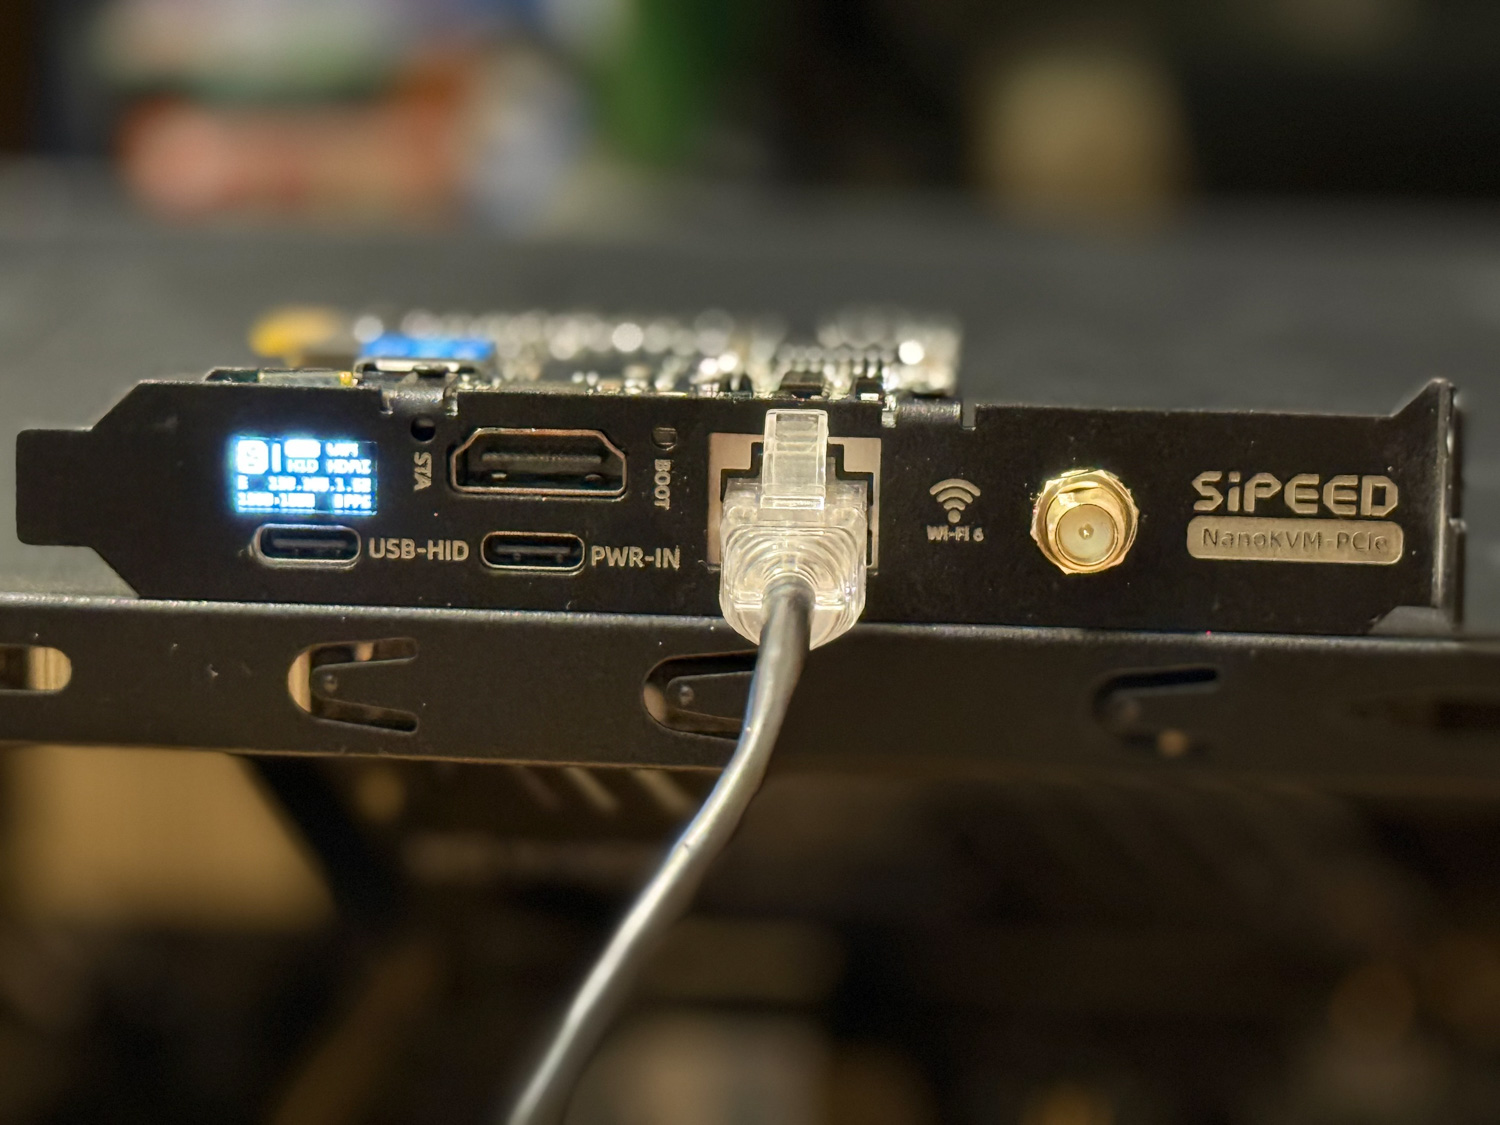
On the device’s connectivity side, we have USB-C for power input, USB-C for HID (keyboard and mouse control), and one RJ45 10/100Mb Ethernet port. On WiFi-enabled models, there is also a single WiFi antenna connector. For status and feedback, the unit includes a 0.49″ OLED screen that displays connectivity and device information, along with a status LED to indicate the operational state. Additionally, there’s one HDMI In port for video input from the host system.
On the unit’s top side, several clearly labeled pin headers and connectors expand the functionality of the NanoKVM-PCIe. These include:
- UART interface: with two ports for serial terminal access.
- 9-pin power interface (to mainboard): connects to the motherboard to provide remote power control.
- 8-pin power interface (to chassis): for linking with the chassis and relaying power-on signals.
- USB PWR Pins: these are used for USB PWR In (2-pin) and USB HID (4-pin) connectivity, functional for clean internal cable routing.
- RESET Button: which acts as the device’s restart button.
- PoE Power Module: area, allowing optional use of PoE for power input.
- GPIO and debug headers: located nearby for developers and integrators.
- PCIe PWR Goldfinger: edge connector, draws power directly from the PCIe slot when available.
These top-side components give the NanoKVM-PCIe a high level of integration and customization, making it suitable for typical users and advanced setups that require internal power routing, serial debugging, or integration with chassis-level control. Here, we can also see our SG2002 RISC-V controller, PoE section for our Ethernet connection, and WiFi 6 controller.
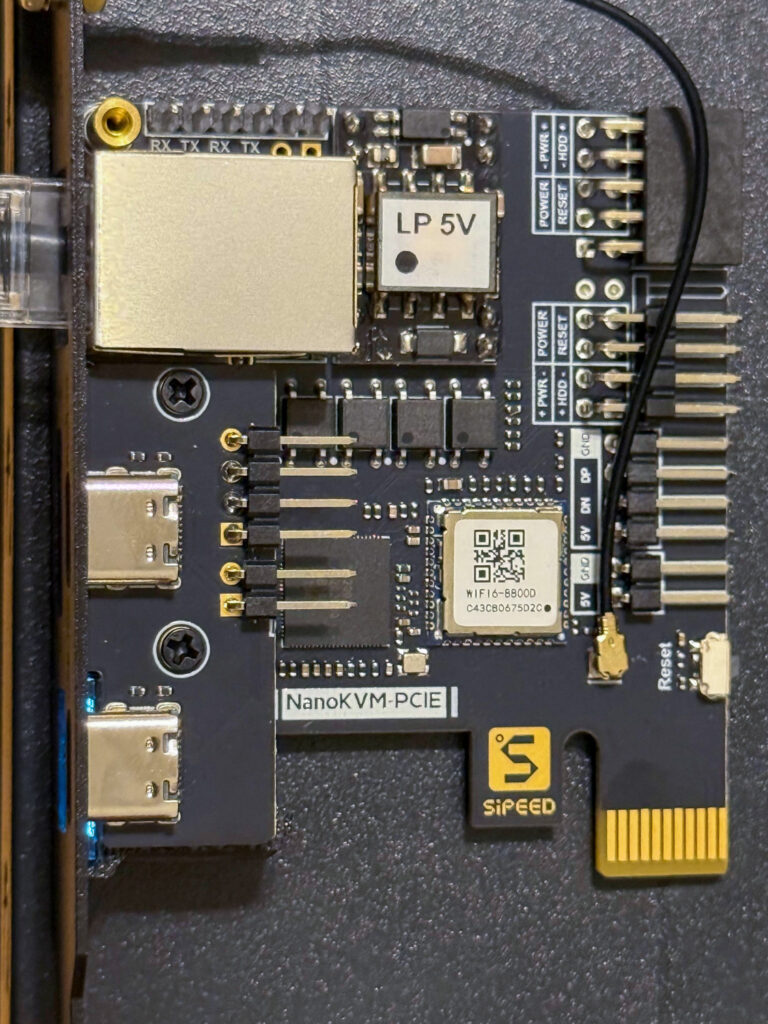
There are no connectivity items on the back, but one notable feature is the 32GB Kioxia Exceria microSD card pre-installed in the slot. This card holds the system image and any ISOs uploaded to the device, allowing for remote installation and OS deployment. The 32GB capacity is sufficient for storing several operating system images for remote installations of the device in which it will be housed.

NanoKVM-PCIe Overview and Example Setup
In this overview of the NanoKVM-PCIe, we’ll walk through installing the unit into a system, along with a basic getting-started guide and a look at some of its features and setup process. For this demonstration, we’re using a standard consumer desktop without onboard IPMI capabilities—an ideal scenario for home-lab enthusiasts running custom-built NAS units or desktop servers/workstations. The NanoKVM-PCIe is designed precisely for this setup, bridging the gap by bringing remote access, control, and OS installation capabilities to systems that traditionally lack out-of-band management options.
![]()
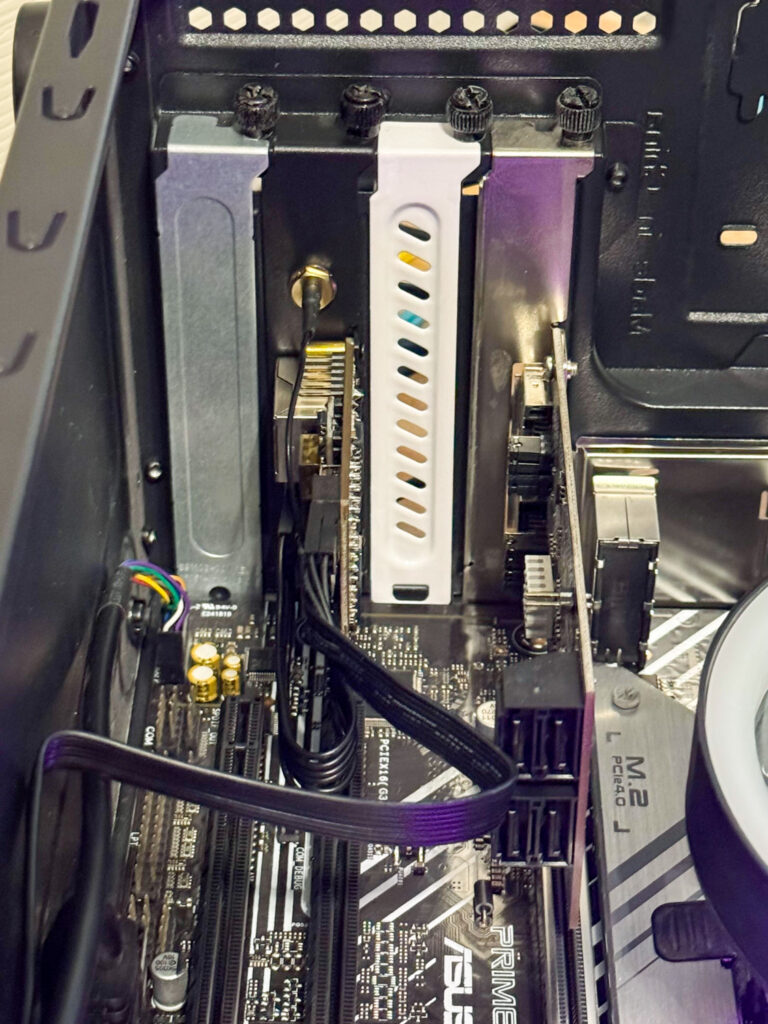
This motherboard doesn’t have an available PCIe x1 slot, so we’ve installed the NanoKVM-PCIe in a full-width x16 slot. While this isn’t an issue for functionality, since the card only draws power and doesn’t transmit data over PCIe, an x1 slot would typically be more suitable in systems with limited expansion slot availability.
We’re using the provided cable to connect the NanoKVM-PCIe’s 9-pin power interface to the motherboard. Optionally, another cable can be connected back to the chassis to maintain the functionality of the system’s power button and LEDs.
HID functionality has two options: you can use the USB HID connection directly to a motherboard USB header or route it externally. In our setup, we connected externally using the USB jumpers to an onboard header, allowing us to interface with the system using a single USB-C to USB-A cable and an HDMI connection, which are included with the NanoKVM-PCIe. This setup keeps things clean and straightforward for remote access. SiPEED has a helpful Wiki Site for configuring these items.
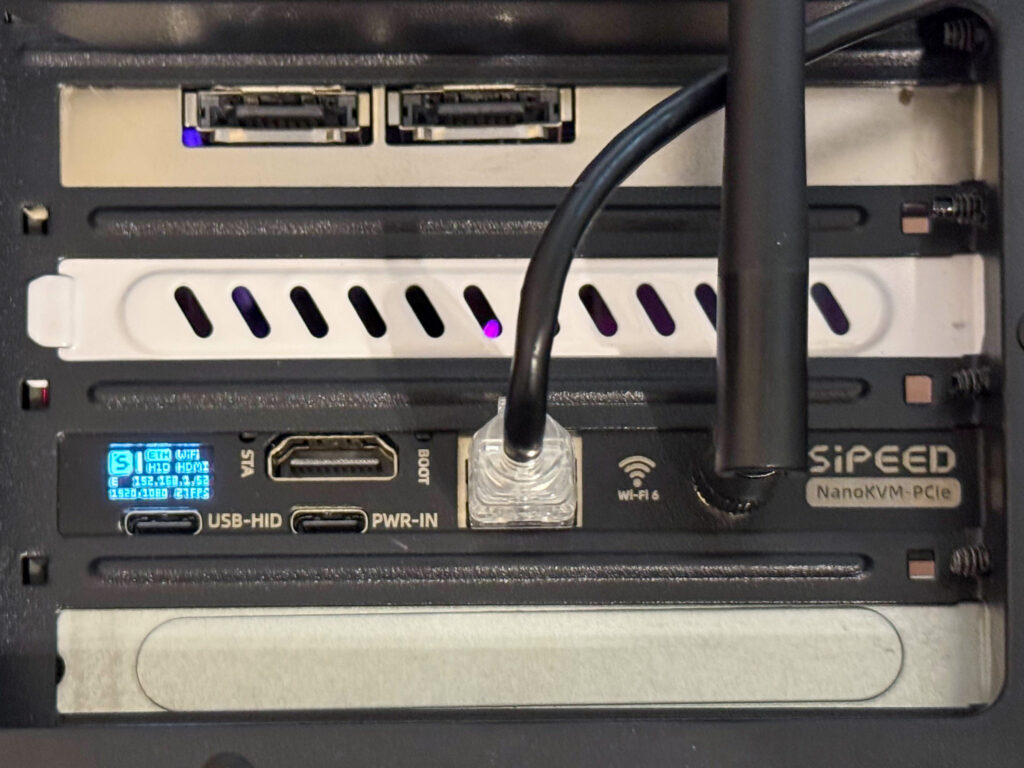
After setting everything up, simply powering the system and connecting a standard Gigabit or 100Mb Ethernet cable to the NanoKVM-PCIe will initiate the boot process. Once powered, the onboard OLED screen displays the device’s IP address. You can then navigate to that IP address using any web browser. Upon loading the page, you’ll be greeted with a login screen. The default credentials are: User: admin Password: admin.
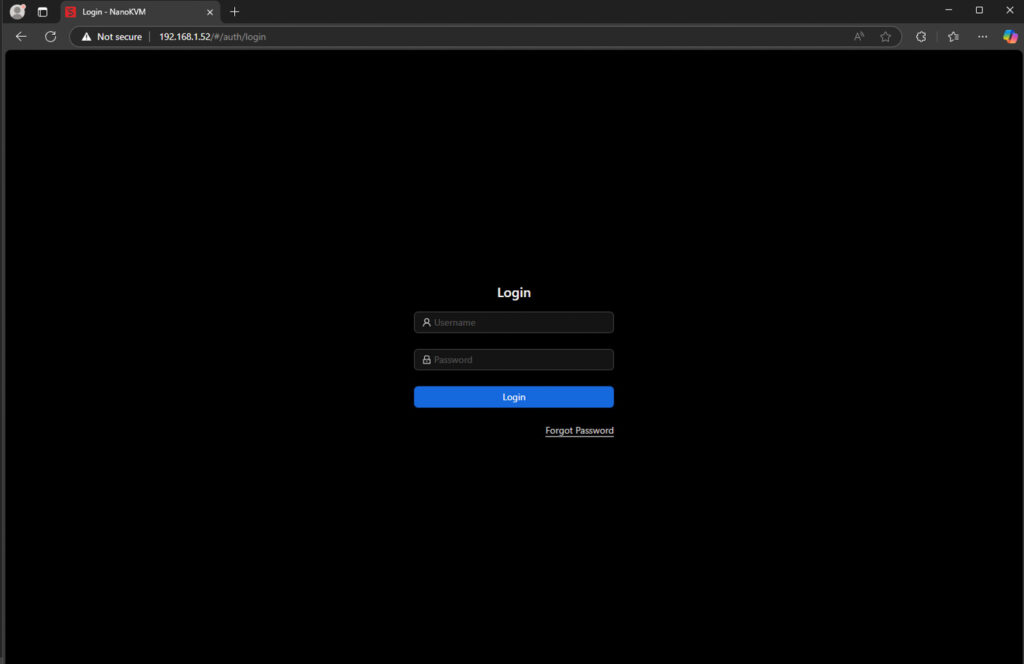
After entering these credentials, you will automatically be prompted to change the default credentials, which is a nice feature.
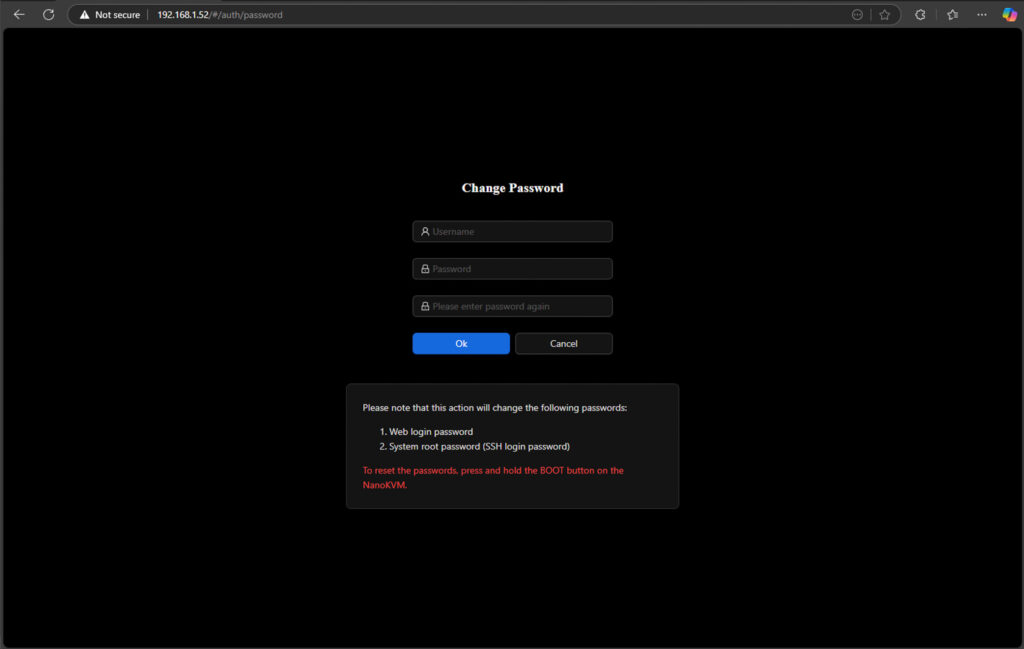
Here’s an example of the GUI used for resetting the password. What’s especially helpful is that it indicates which components of the device the new password will apply to, such as the web interface and SSH access. Suppose you make an error during the reset process or lose access. In that case, you can easily recover by pressing and holding the BOOT button on the NanoKVM-PCIe, which initiates a reset and allows you to regain control of the device.
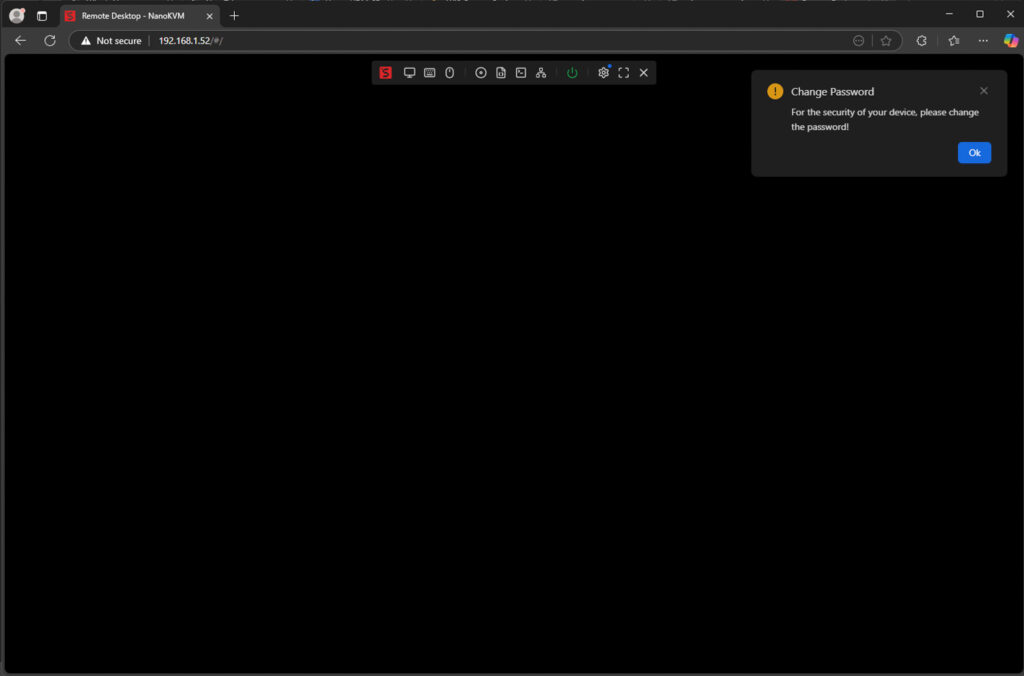
Once fully logged in, the interface presents a layout similar to the NanoKVM-USB but with an expanded set of options tailored to the more capable NanoKVM-PCIe. The available settings include:
- Screen – for viewing the host system’s display output
- Keyboard and Mouse – for remote HID input control
- Images and Image Downloader – for managing and uploading OS ISOs
- Scripts – for custom automation or system tasks
- Terminal – for direct shell access
- Wake-On-LAN – to remotely power on systems
- Power – for triggering reboots or shutdowns
- Device Settings – for managing network, security, and device behavior
- Full Screen Settings – for optimizing the remote viewing experience
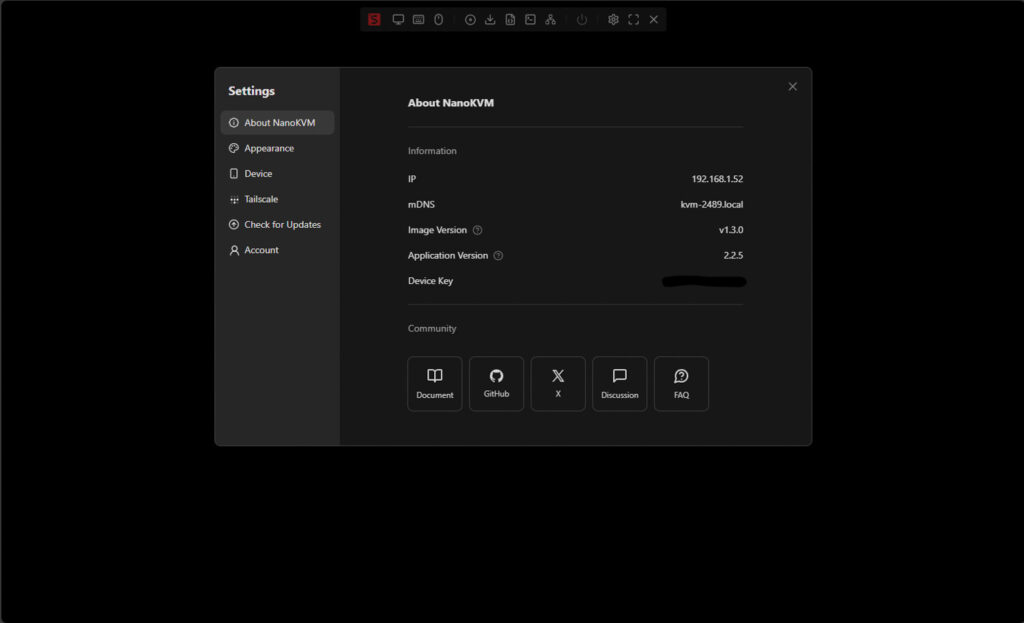
When navigating to the Settings section, you’ll find a wide range of configurable options, but starting with the About tab gives you a quick overview of the device’s status. Here, you’ll see essential information such as:
- IP Address
- mDNS Hostname
- Image Version
- Application Version
- Device Key
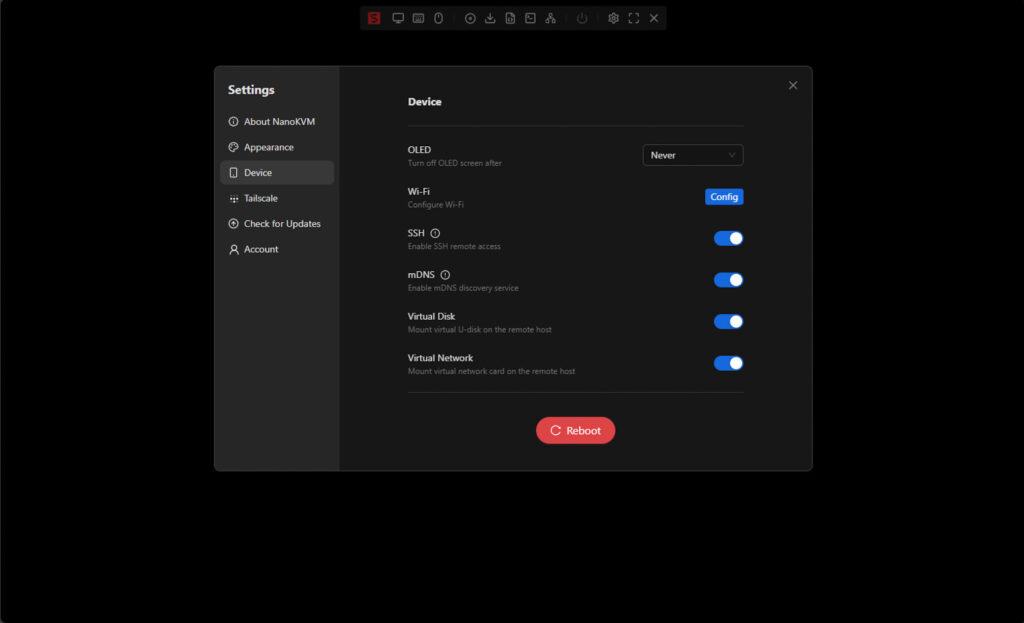
The Device menu under Settings gives you control over several operational options. This includes toggling various device features on or off based on your setup needs. One notable option here is the ability to configure the OLED screen timeout, allowing you to set how long the display remains active before turning it off. Another useful menu is Check For Updates, a one-click operation to update the device.
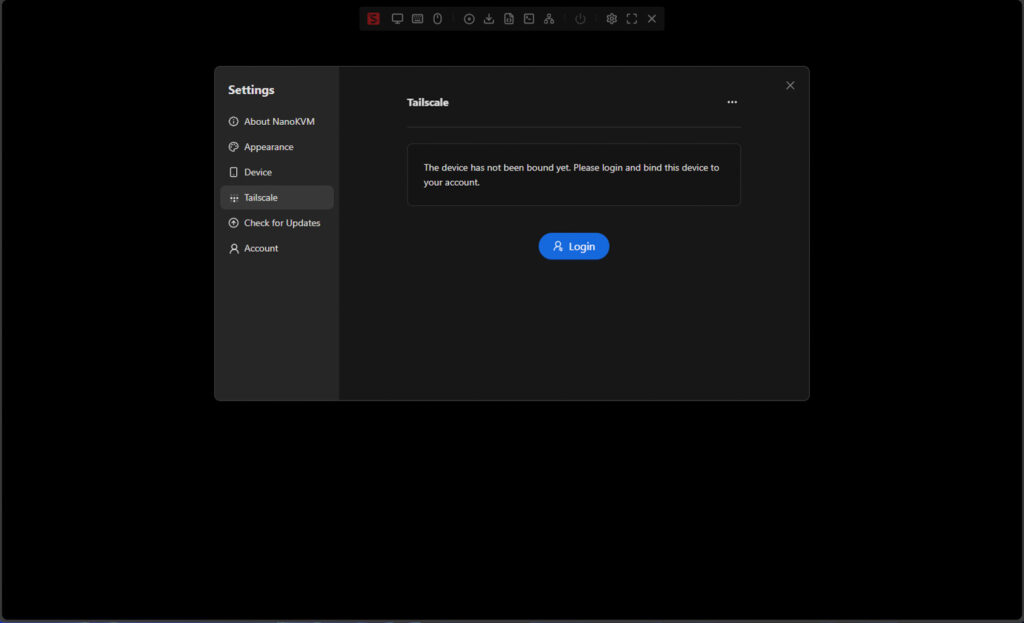
One of the standout features of the NanoKVM-PCIe for remote management is its built-in support for Tailscale, making secure remote access incredibly straightforward. To set it up, navigate to the Tailscale section in the interface and click Login. This will redirect you to the Tailscale authentication page, where you can log into your account. Once authenticated, the device joins your Tailscale network, allowing you to access it remotely from anywhere without configuring complex VPNs or port forwarding in your network.
After logging into our Tailscale account, the NanoKVM-PCIe appears in the Machines section of the Tailscale dashboard, just like any other connected device. In our case, the KVM was initially running an older version, v1.70.0. From the dashboard, we could push an update directly to the device. Once the update was initiated, a quick reboot of the NanoKVM-PCIe was required for the new version to reflect correctly in both the Tailscale console and the device interface.

Before installing an OS, we powered down the host system to ensure a clean start. Since the machine restores the last known state due to BIOS settings, we performed a short press on the power control option. In the example below, you can see the previously installed operating system initiating a proper shutdown sequence, confirming that the remote power control is functioning as expected.
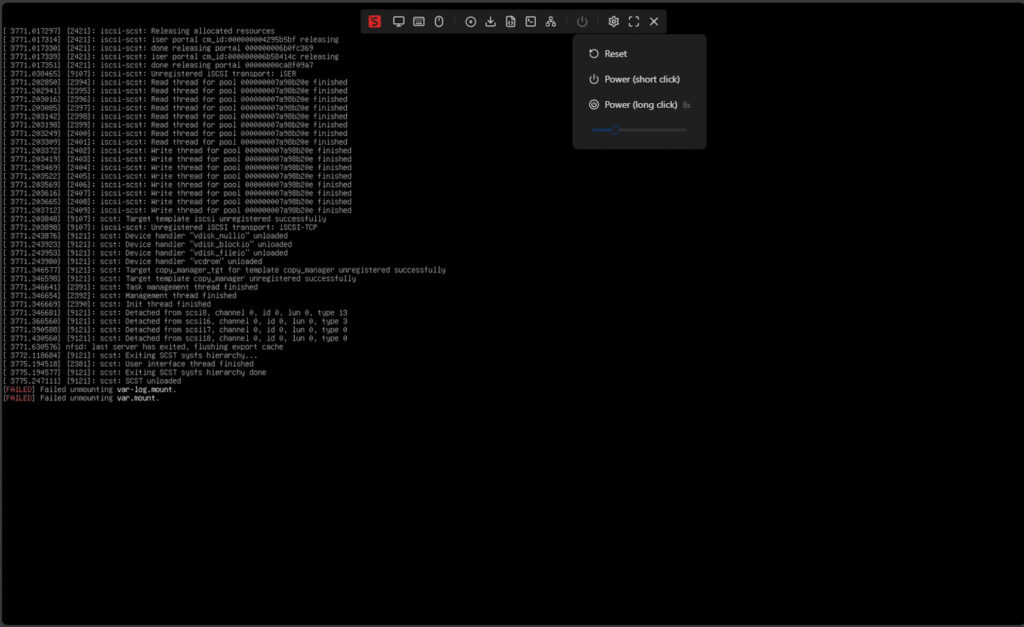
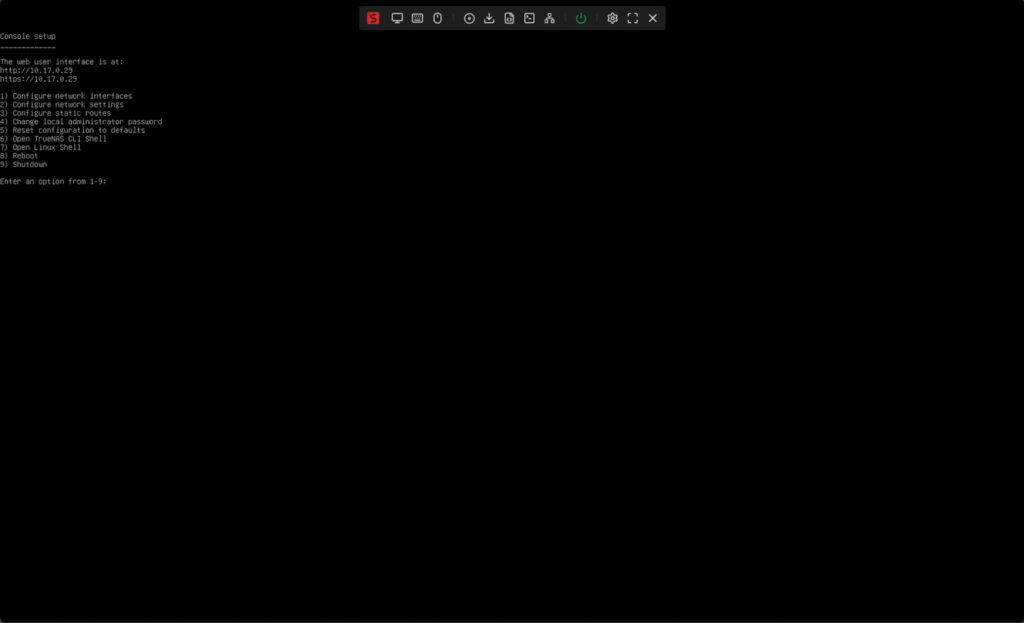
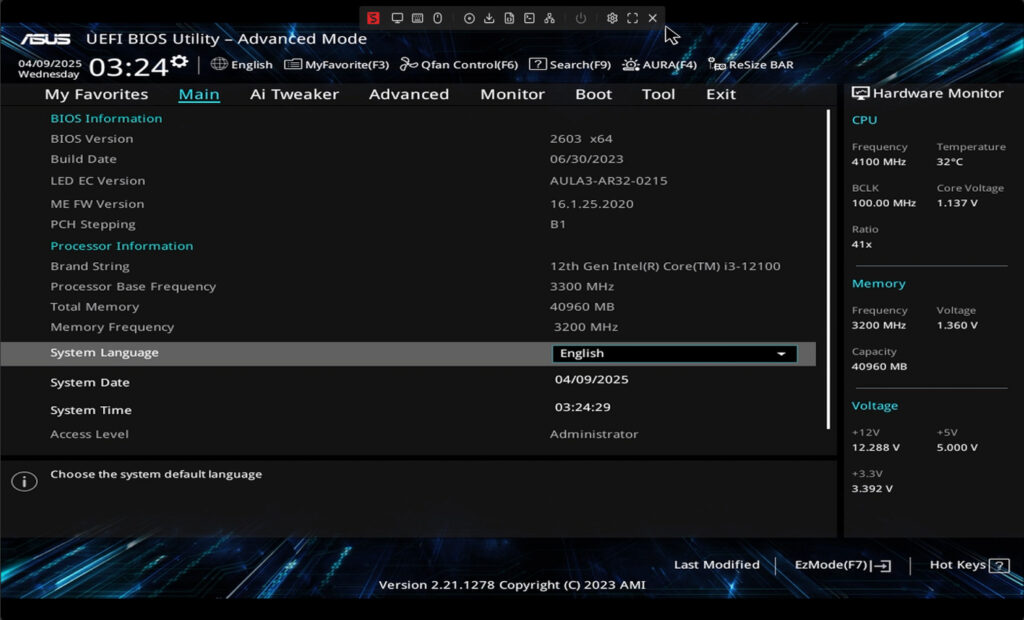
Once the system screen went completely blank, it confirmed that the host machine had fully powered down. A simple press of the power button from the UI brought the system back to life, and from there, we hit F2 to enter the BIOS on this ASUS motherboard.
We used a straightforward installation method: a bootable USB drive connected directly to the host machine. However, the NanoKVM-PCIe offers several flexible options for handling OS installation media:
- Direct microSD card method: Copy ISO files directly to the /data directory on the microSD card using a file manager.
- SCP method: Use secure copy to send the ISO from another system
Example: scp your-image-path.iso root@your-nanokvm-ip:/data - Virtual USB disk: Connect the device as a USB drive to your computer, then drag and drop your image file into the root directory of the virtual disk.
These methods give you plenty of ways to prepare the installation media without physically interacting with the host machine.
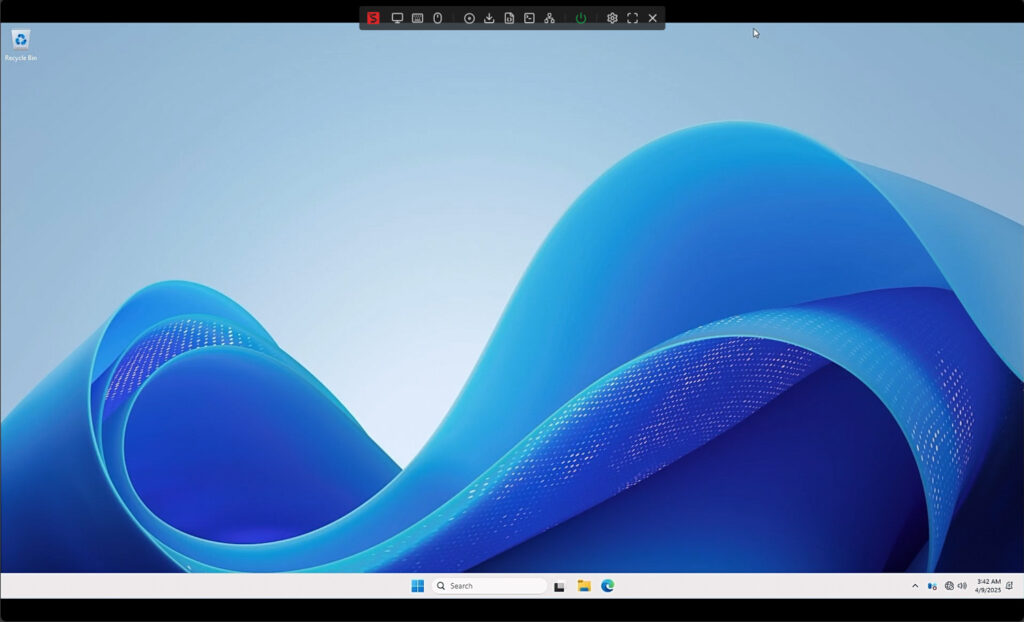
While we’re not covering the full OS installation process in detail here, interacting with the system through the NanoKVM-PCIe was effortless. Throughout the Windows Server 2025 installation, the experience was smooth, and there were no issues with display flickering or scaling problems. The remote control felt responsive with a minor delay, making the entire setup feel like you were in front of the machine.
Conclusion
The SiPEED NanoKVM-PCIe is a remarkably versatile and affordable solution that brings advanced out-of-band management features to systems lacking traditional IPMI or remote access capabilities. With its compact PCIe form factor, integrated power and HID controls, and optional Wi-Fi and PoE support, it fits seamlessly into various setups, from home labs to remote workstations and custom servers. The integration with Tailscale, intuitive web interface, and robust feature set make it a practical choice for users seeking reliable remote access without the complexity or cost of enterprise-grade tools. For $40–$55, depending on the configuration, it delivers impressive value and functionality in a highly integrated package.
Engage with StorageReview
Newsletter | YouTube | Podcast iTunes/Spotify | Instagram | Twitter | TikTok | RSS Feed