
Our Sipeed NanoKVM-USB review covers this compact, browser-based KVM solution for seamless headless device access and remote management.
The Sipeed NanoKVM-USB is a compact and versatile tool that simplifies headless device access and multi-computer collaboration. Sipeed sent us the NanoKVM-USB to review, and at the time of review, the unit was available for pre-order in multiple configurations and colors ranging from $39 to $49. This showcases its ability to bridge the gap between host and target machines by enabling seamless keyboard, video, and mouse (KVM) functionality without additional software installations or hardware. Whether for server maintenance, debugging single-board computers (SBCs), or managing multiple systems, the NanoKVM-USB streamlines operations through its simple browser-based graphical interface.
Sipeed NanoKVM-USB Specifications
| Specification | NanoKVM-USB |
| Resolution | 4K in 1080P out |
| Video Encoding | MJPEG |
| Video Delay | 100.150ms |
| Connection | USB3.0 |
| UEFI/BIOS | yes |
| Virtual HID (keyboard & mouse) | yes |
| Virtual ISO | Switchable USB-A |
| Wake On LAN | not supported |
| ATX power control | not supported |
| IPMI | not supported |
| Serial Port | not supported |
| Display | None |
| Power Supply | USB-C |
| Power Consumption | 0.15@5V |
| Size | 55x22x25 mm |
| Price | $39-49USD |
Build and Design
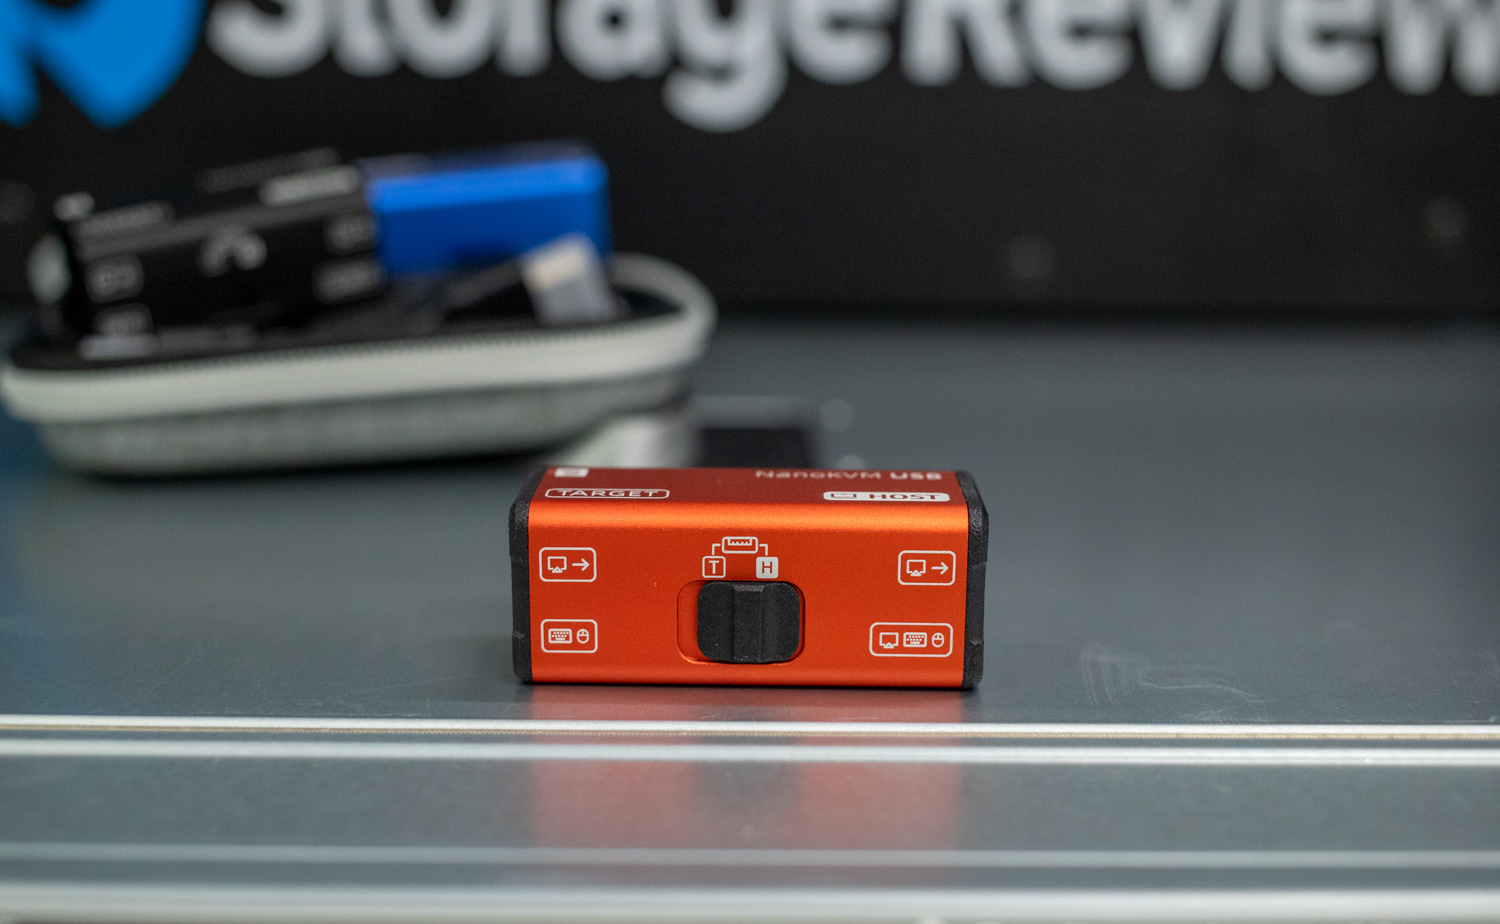
The NanoKVM-USB features a sleek, compact aluminum case measuring 55x22x25 mm, offering a compact yet durable design. It delivers a premium look and feel and is available in anodized red, blue, and black finishes. Sipeed has etched labels onto the case, identifying all key ports and functions.
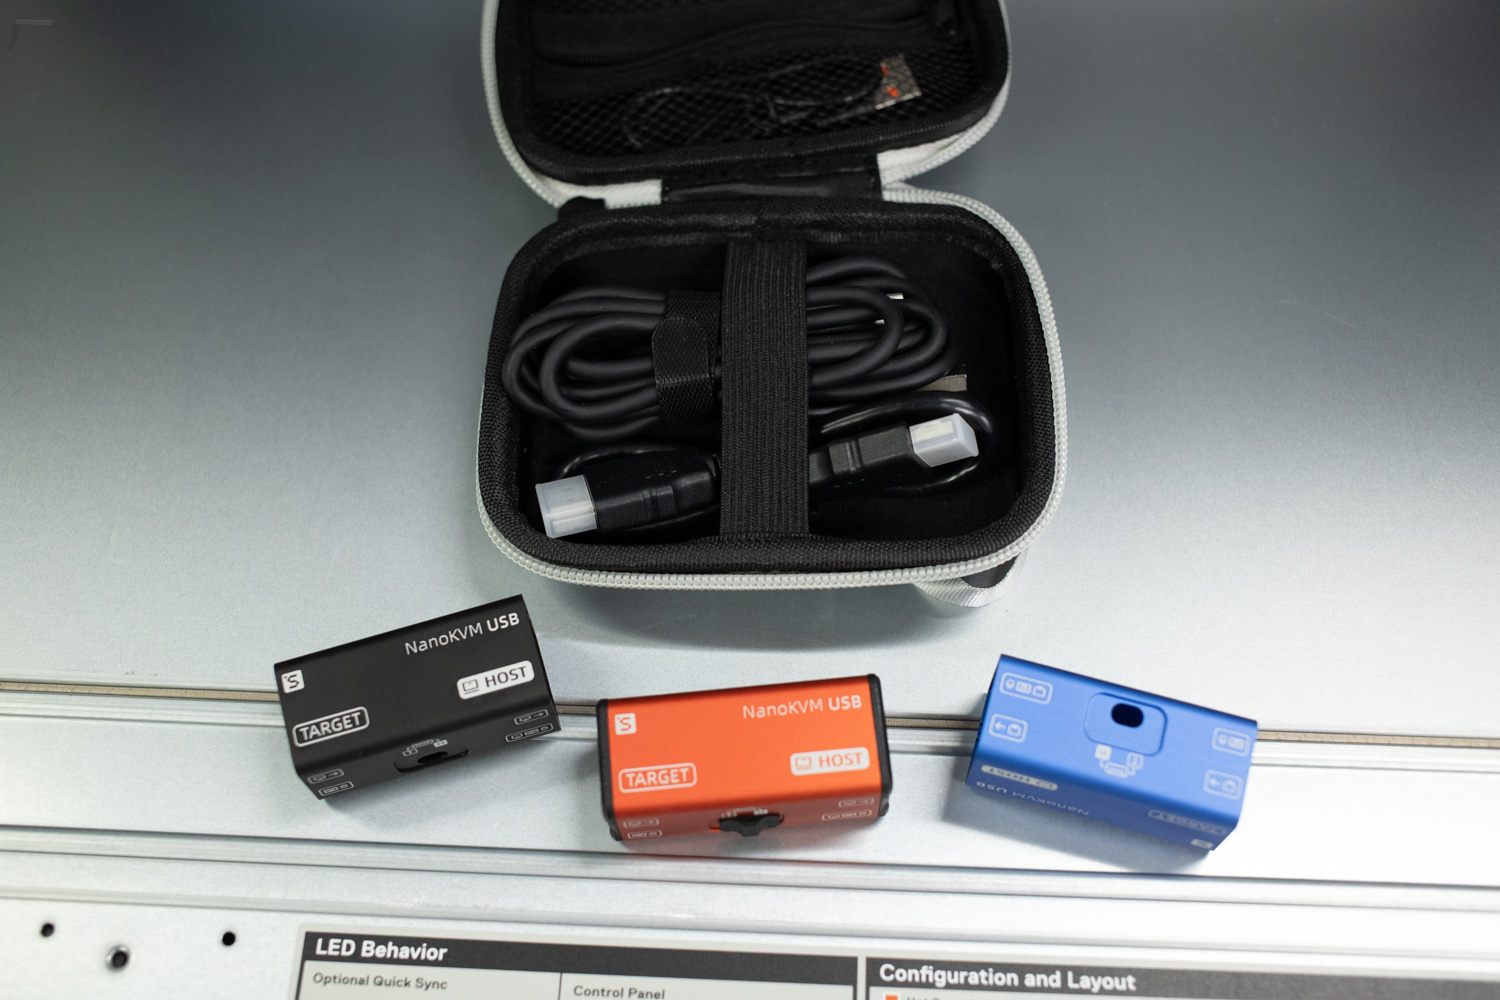
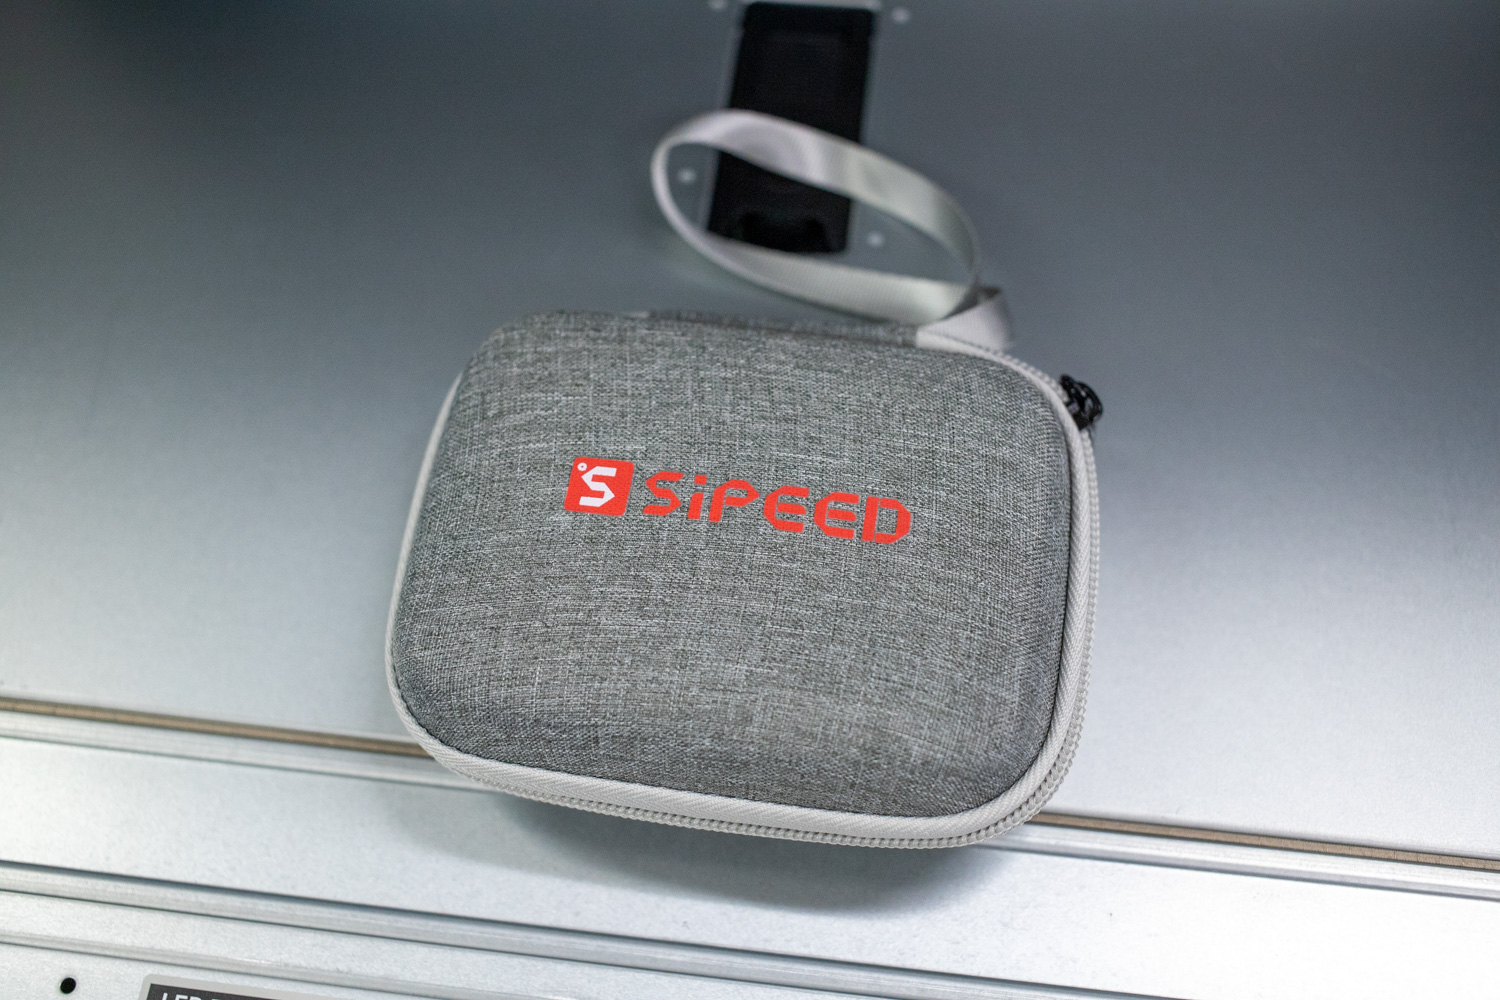
We received the $49 toolkit, which includes a sleek clamshell zippered carrying case to protect and organize the unit and its accessories. The kit comes with one USB-C to USB-A cable, one USB-C to USB-C cable with a USB-A adapter, and a short HDMI cable—everything you need to get up and running out of the box.
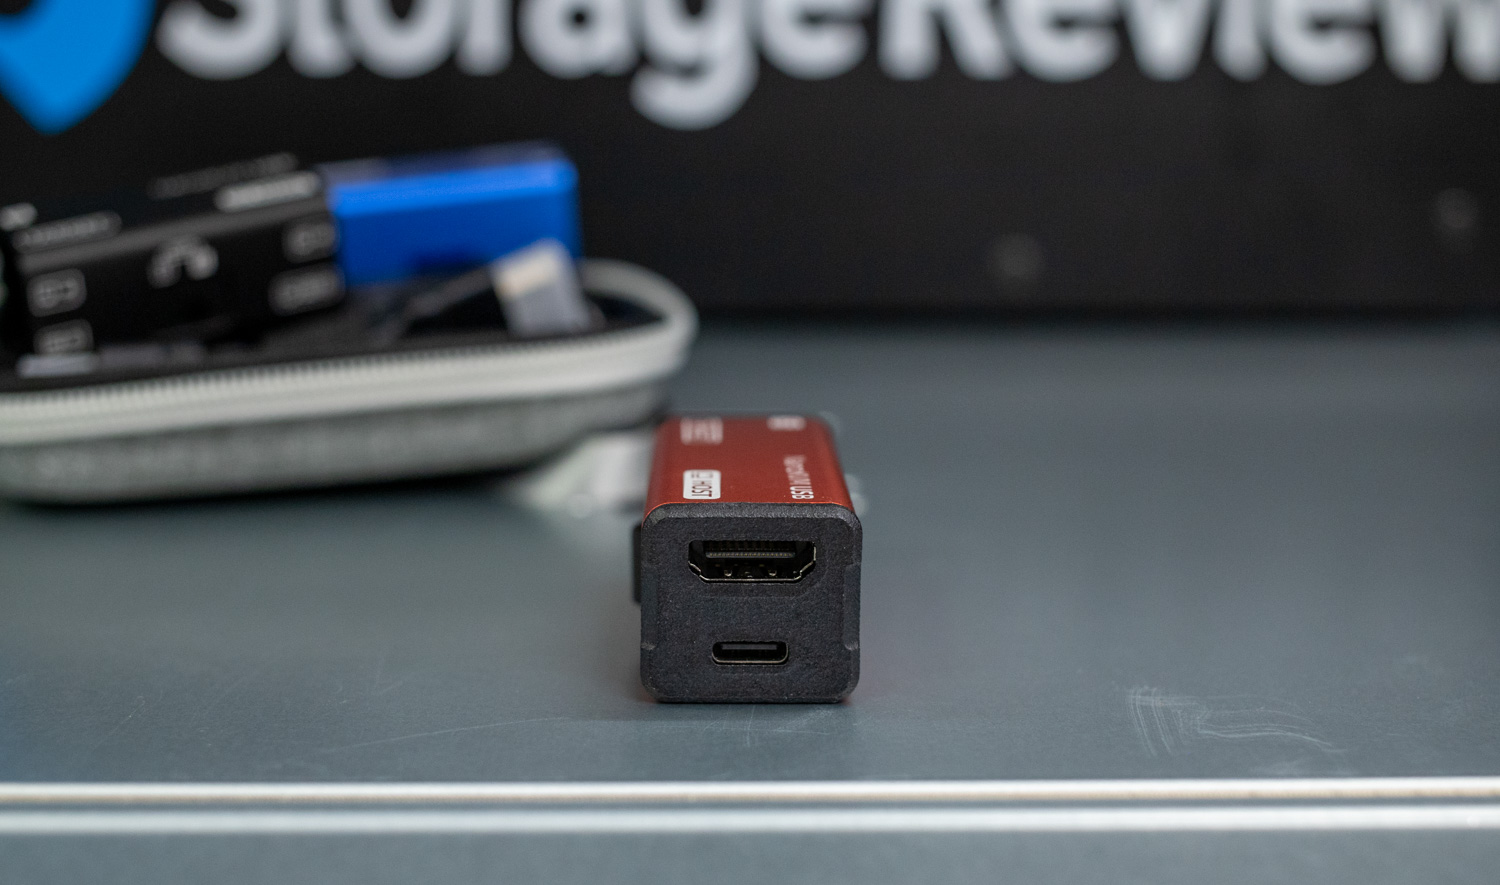
Each end of the NanoKVM-USB has a USB-C port, an HDMI input, and an HDMI output for the host side, with arrows indicating the input and output directions. A USB-A port on the side allows USB drives to enable virtual media functionality between the host and target, controlled by a switch on the side of the unit.
NanoKVM-USB in Use
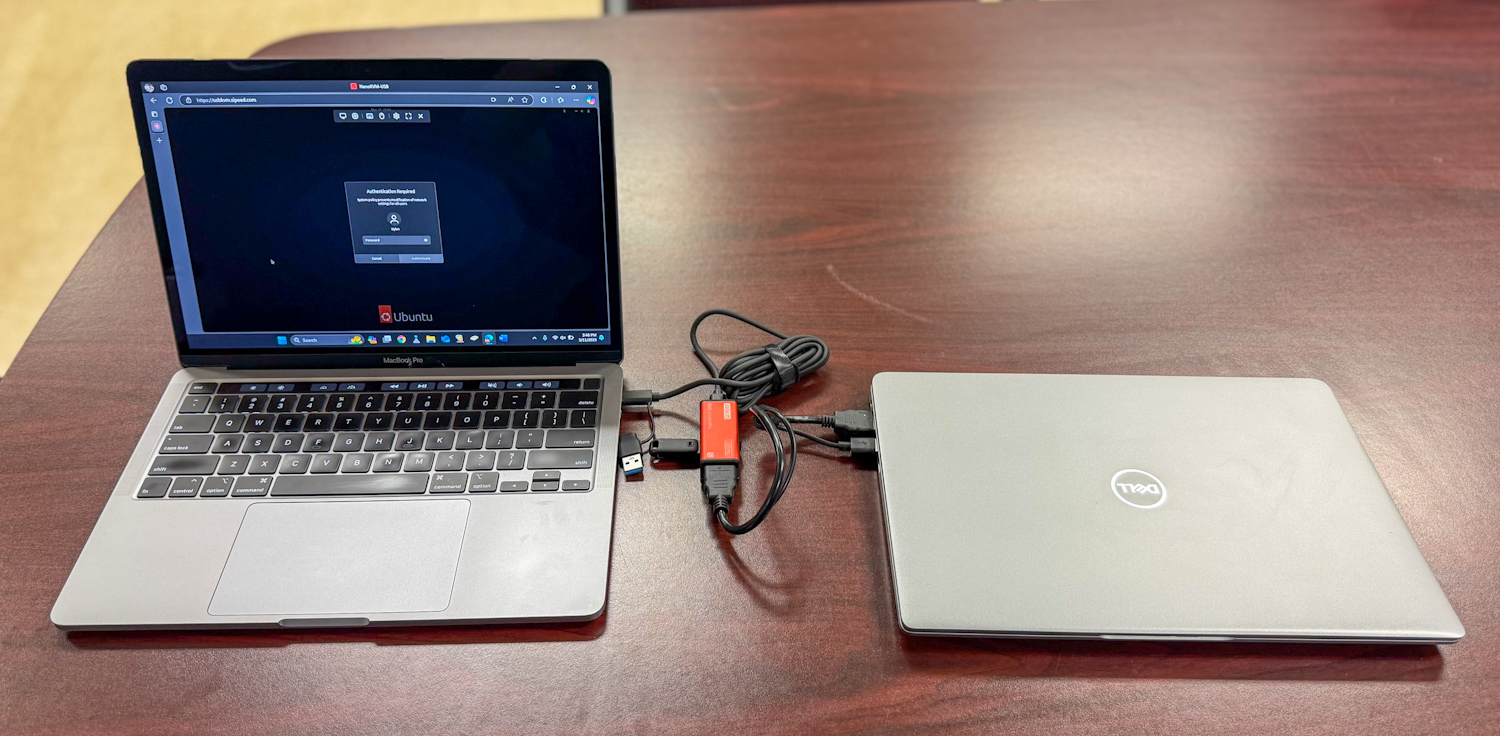
Before testing the NanoKVM-USB’s functionality, we connected it to a Dell Latitude 3340 laptop with its lid closed. The laptop’s HDMI output was plugged into the NanoKVM-USB on the target side, while the included USB-C to USB-A cable enabled keyboard, mouse, and data transfer. On the host side, the device was connected using the included USB-C to USB-C cable, providing both power and data connectivity between the host and KVM device. Additionally, a 64GB USB-A flash drive was inserted into the unit’s side port for testing file transfer capabilities.
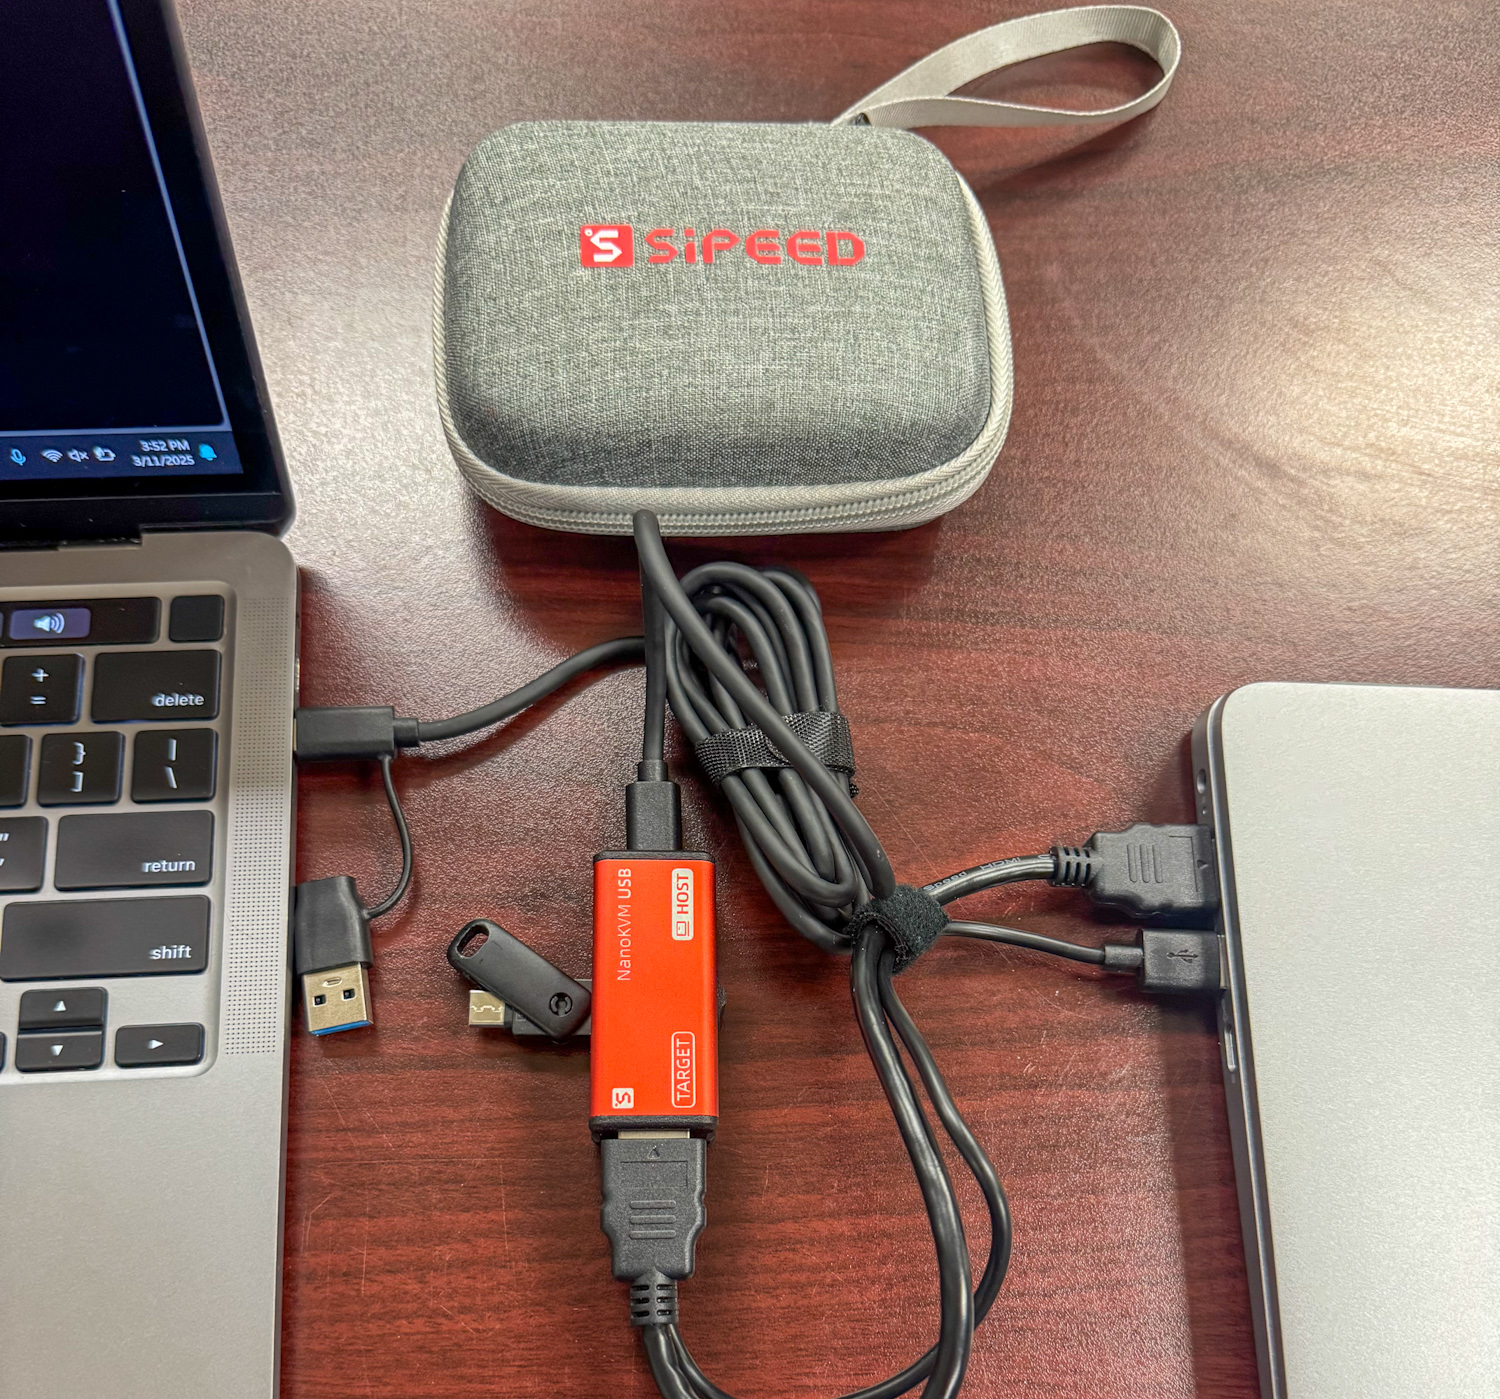 Above shows the physical connected host device: a MacBook Pro running as a Windows 11 device connected to the NanoKVM-USB and the Dell Latitude 3340 with the mentioned USB storage.
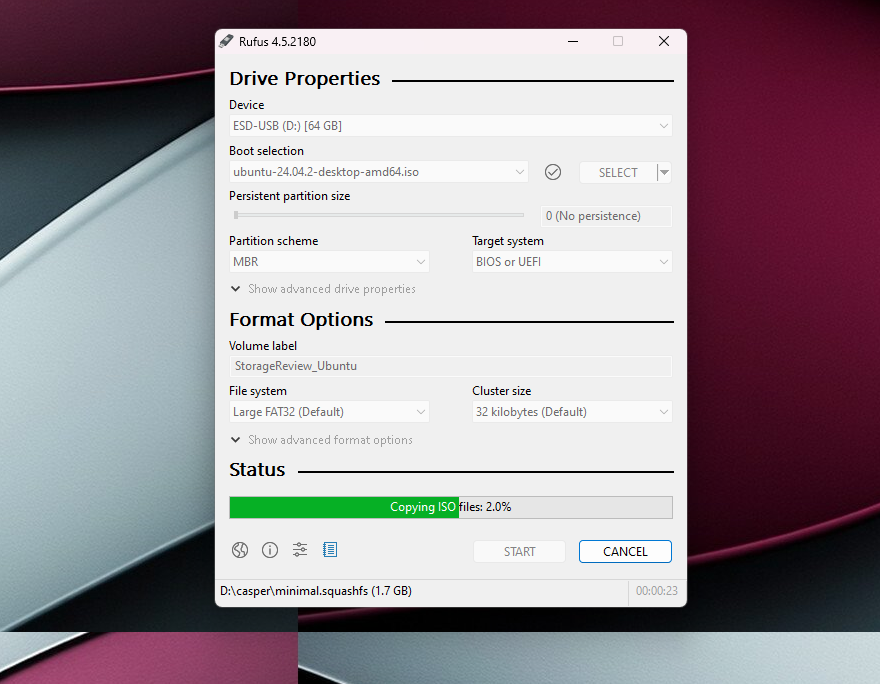
Now that everything is connected, we can flash an image to the USB drive from our host machine. To accomplish this, move the selector switch to the (H) position to assign the USB drive to the host machine. Using Rufus on the host, the drive is detected without issue, allowing us to write an ISO to the disk. For this review, we used Ubuntu Desktop as an example to demonstrate the device’s functionality.
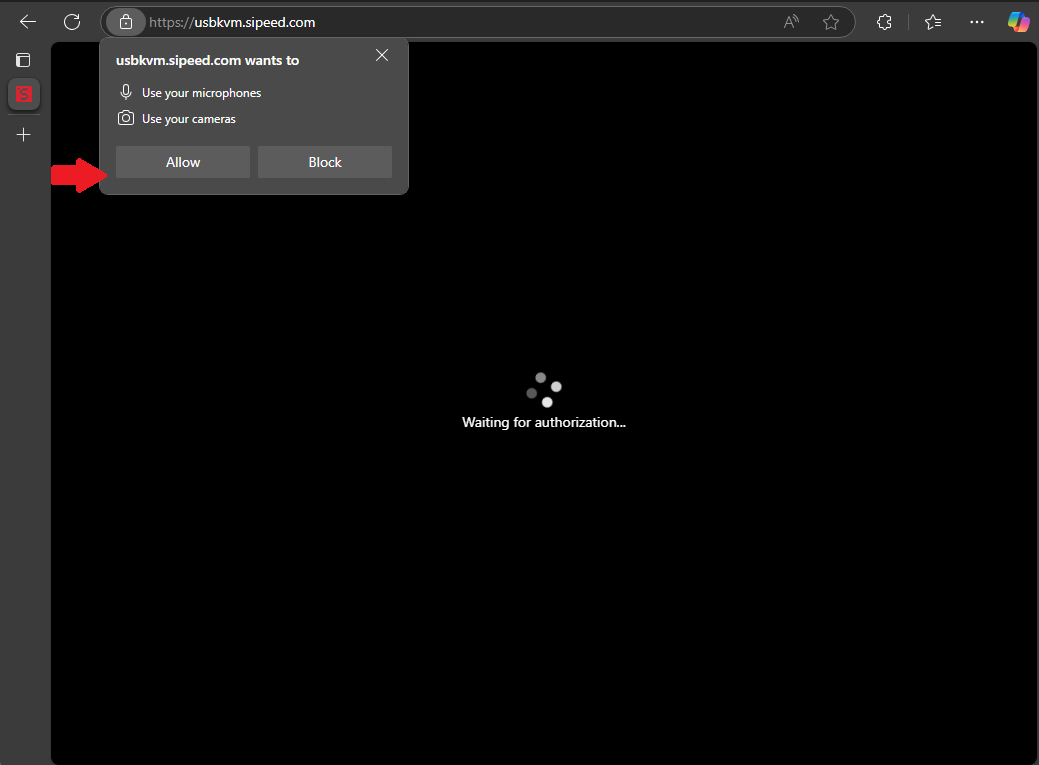 With the ISO installation complete, we can switch the NanoKVM-USB’s selector switch to the (T) position, preparing the device for the later steps. To access the NanoKVM-USB, open a browser and navigate to usbkvm.sipeed.com. Upon loading, the site will prompt for microphone and camera permissions — both must be allowed, as the device registers as a USB2 Video device. Granting these permissions is essential; without them, the connection to the NanoKVM-USB will not be established.
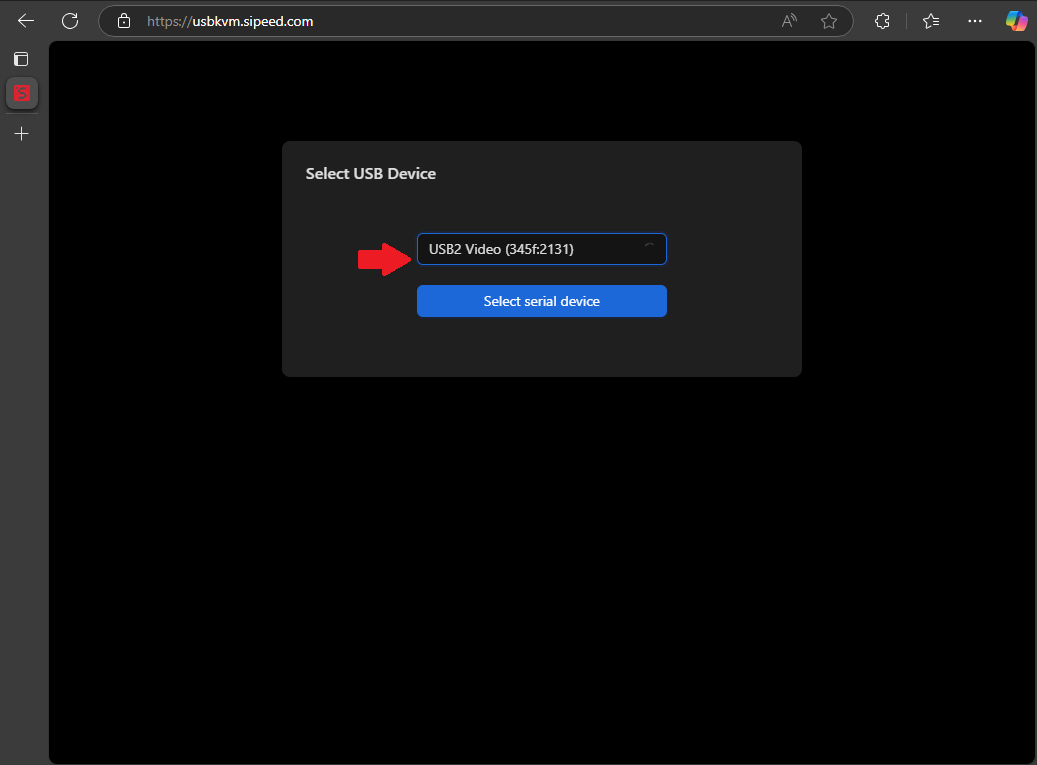
Once permissions are granted, the page will fully load, prompting us to select a USB device. Choose the USB2 Video source from the pop-up menu and then click Select Serial Device to proceed with the connection.
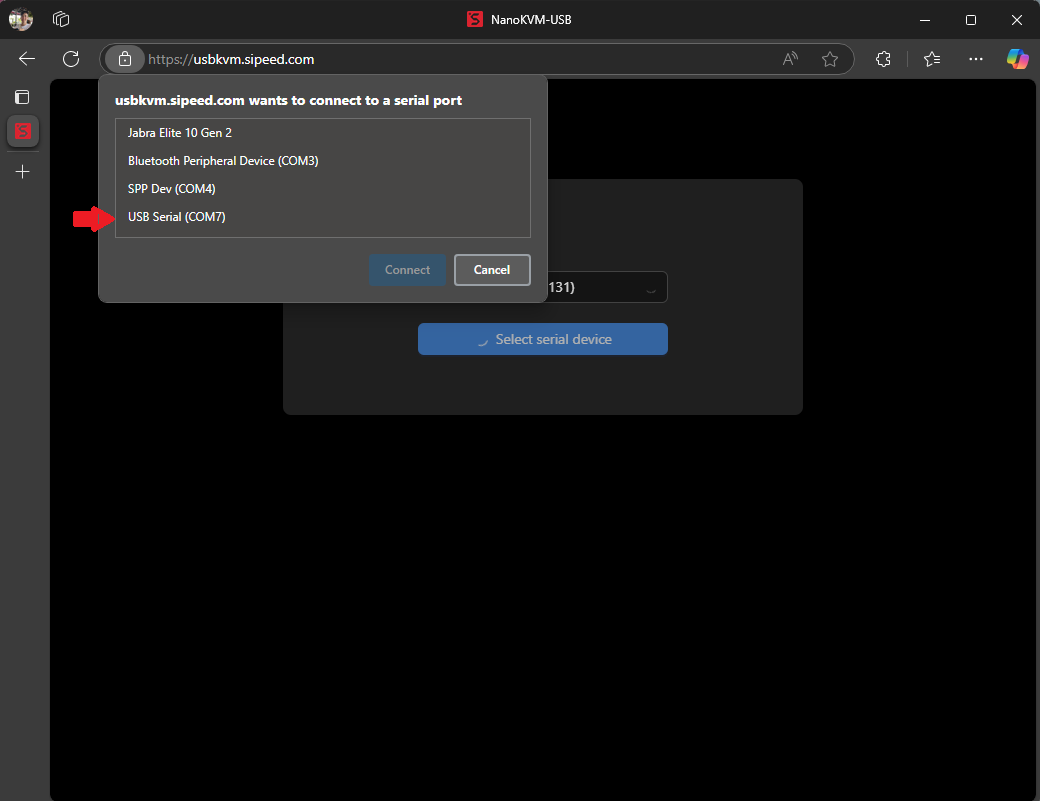 Next, select the serial device from the available options and hit connect. These devices typically follow the standard naming convention USB Serial (COM7). However, the COM number may vary depending on the USB port used on the host machine and how the system assigns it during each connection.
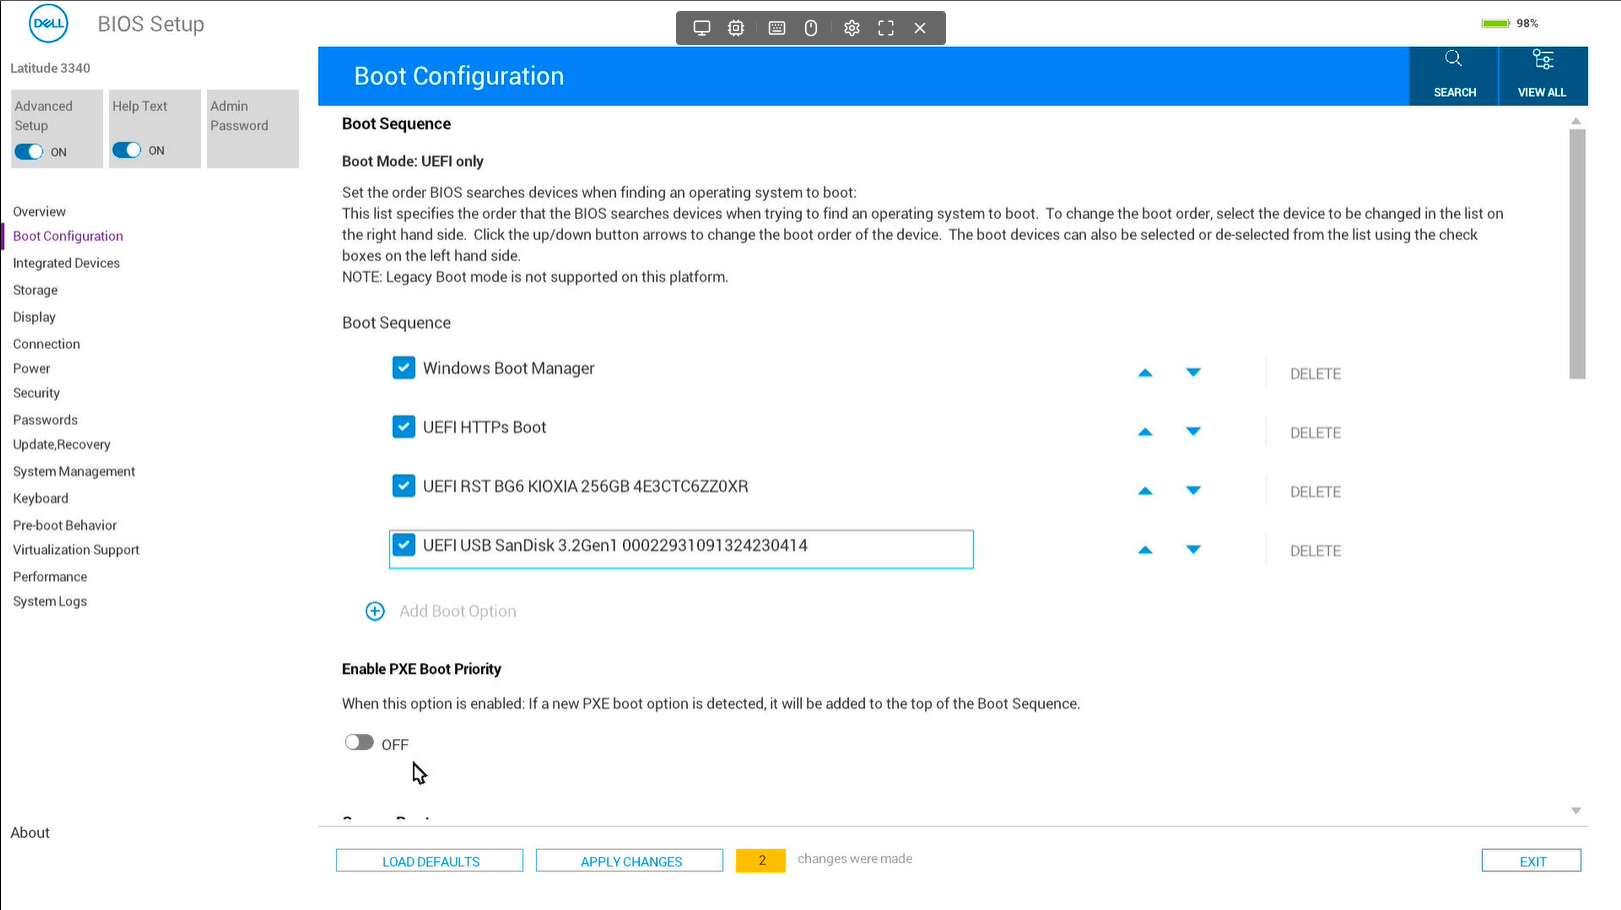 After selecting the serial device, power up the laptop and press F2 to access the BIOS. This confirmed that we could successfully boot into the BIOS of the Dell Latitude 3340 from the host machine remotely, taking us directly to the BIOS screen.
We also see a change with a list of controls appearing at the top middle of the screen. These controls include:
- Video Tab: Allows you to select different resolutions and choose the connected device.
- Serial Connection Tab: This option allows you to reconnect if the connection is lost.
- Keyboard Section: Displays an on-screen keyboard with shortcuts and a paste function.
- Mouse Tab: Offers different cursor types, including default pointer, grab, cell, or hide it. Mouse modes include absolute and relative, as well as scroll direction settings.
- Settings Tab: Includes options for language, documentation, and firmware downloads.
- Full Screen and Exit Buttons: These controls toggle full-screen mode and exit the interface.
These controls offer convenient access for remote configuration and interaction with the device. They proved helpful, especially when the initial cursor setting didn’t work well with the Dell BIOS. The default absolute mode was not ideal for navigating the BIOS, so switching it to relative mode resolved the issue. Additionally, we can confirm the success of changing the USB to the target (T) position, as the boot options now display the connected USB drive with Ubuntu loaded.
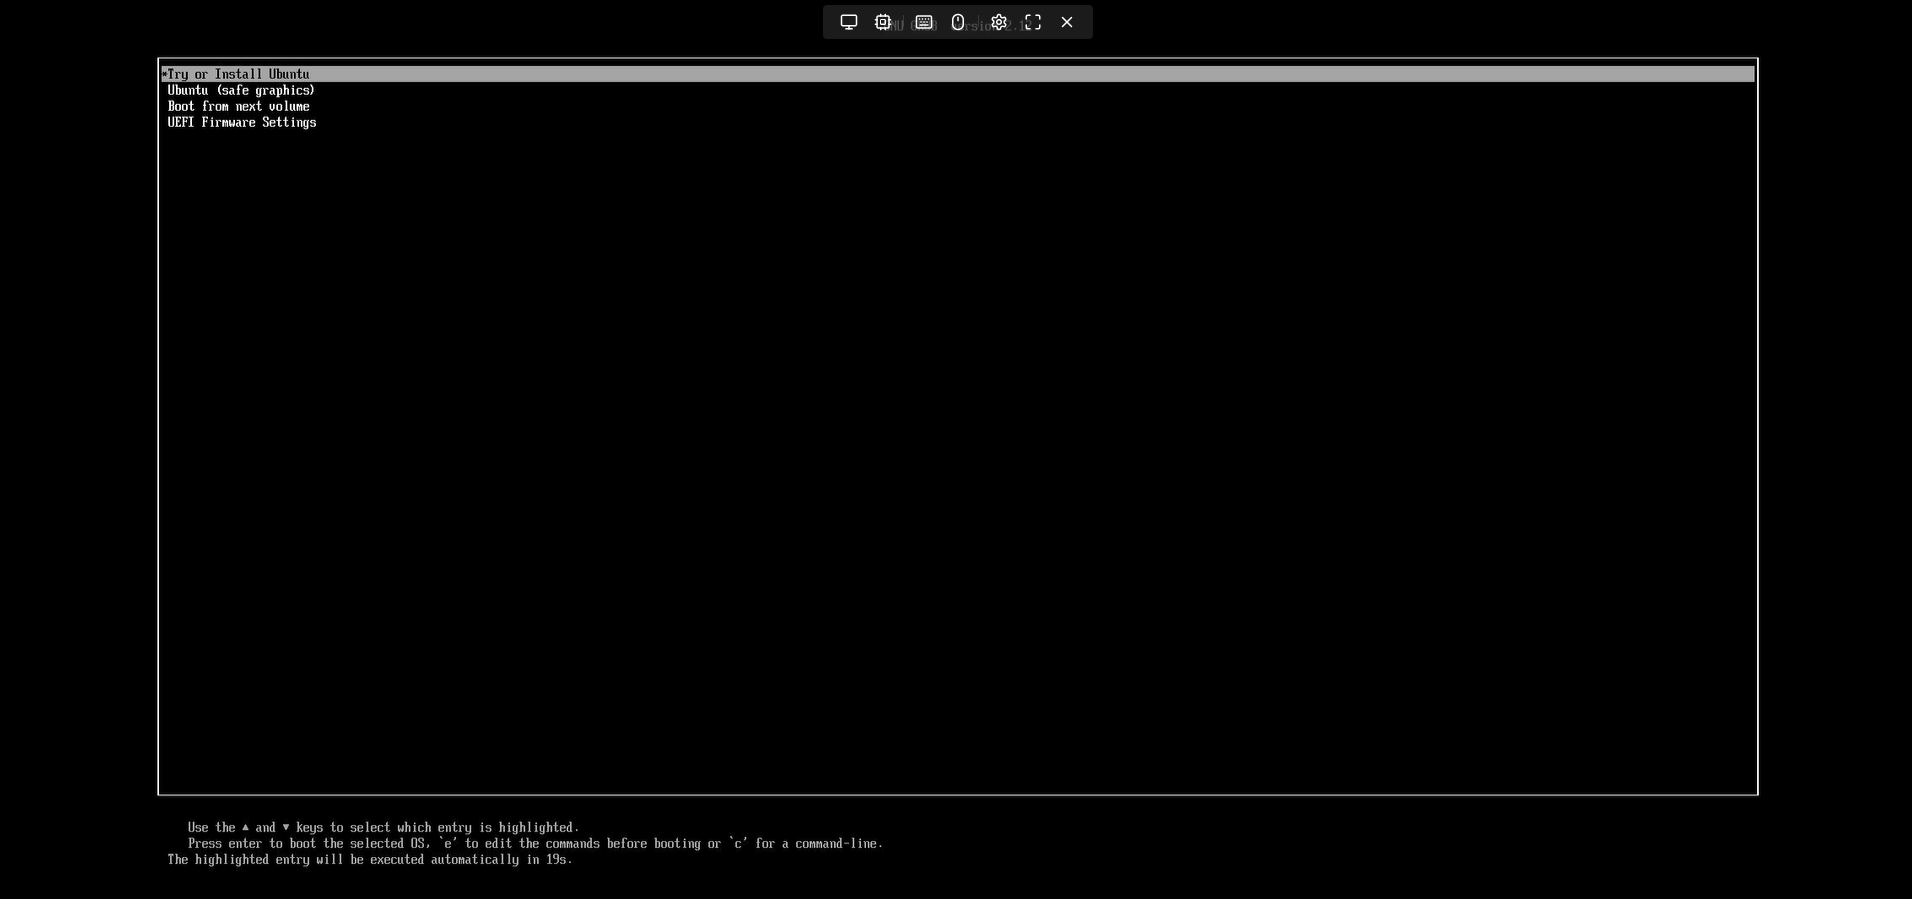
After adjusting the boot order to prioritize the USB drive plugged into the unit, we saved and exited the BIOS. Upon reboot, we observed that Ubuntu was loading as intended from the USB drive and prompted us for the installation process.
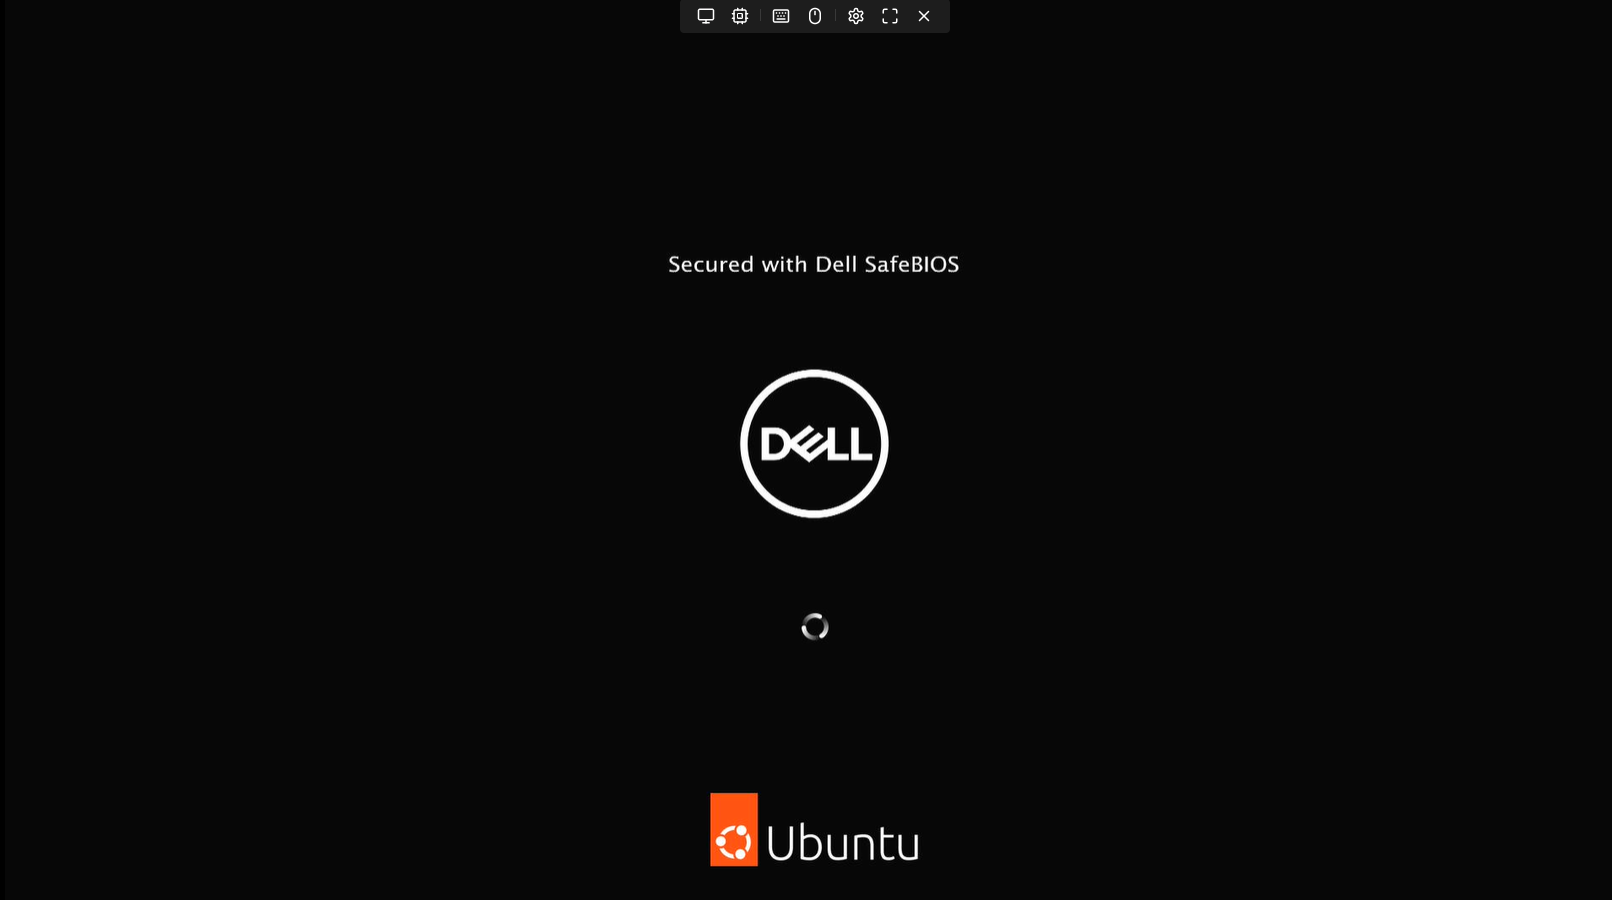
Furthermore, it’s worth noting that the device handled the display throughout this process without incurring resolution issues. There were no problems with the display going in and out while loading the initial OS for startup, ensuring a smooth and stable experience.
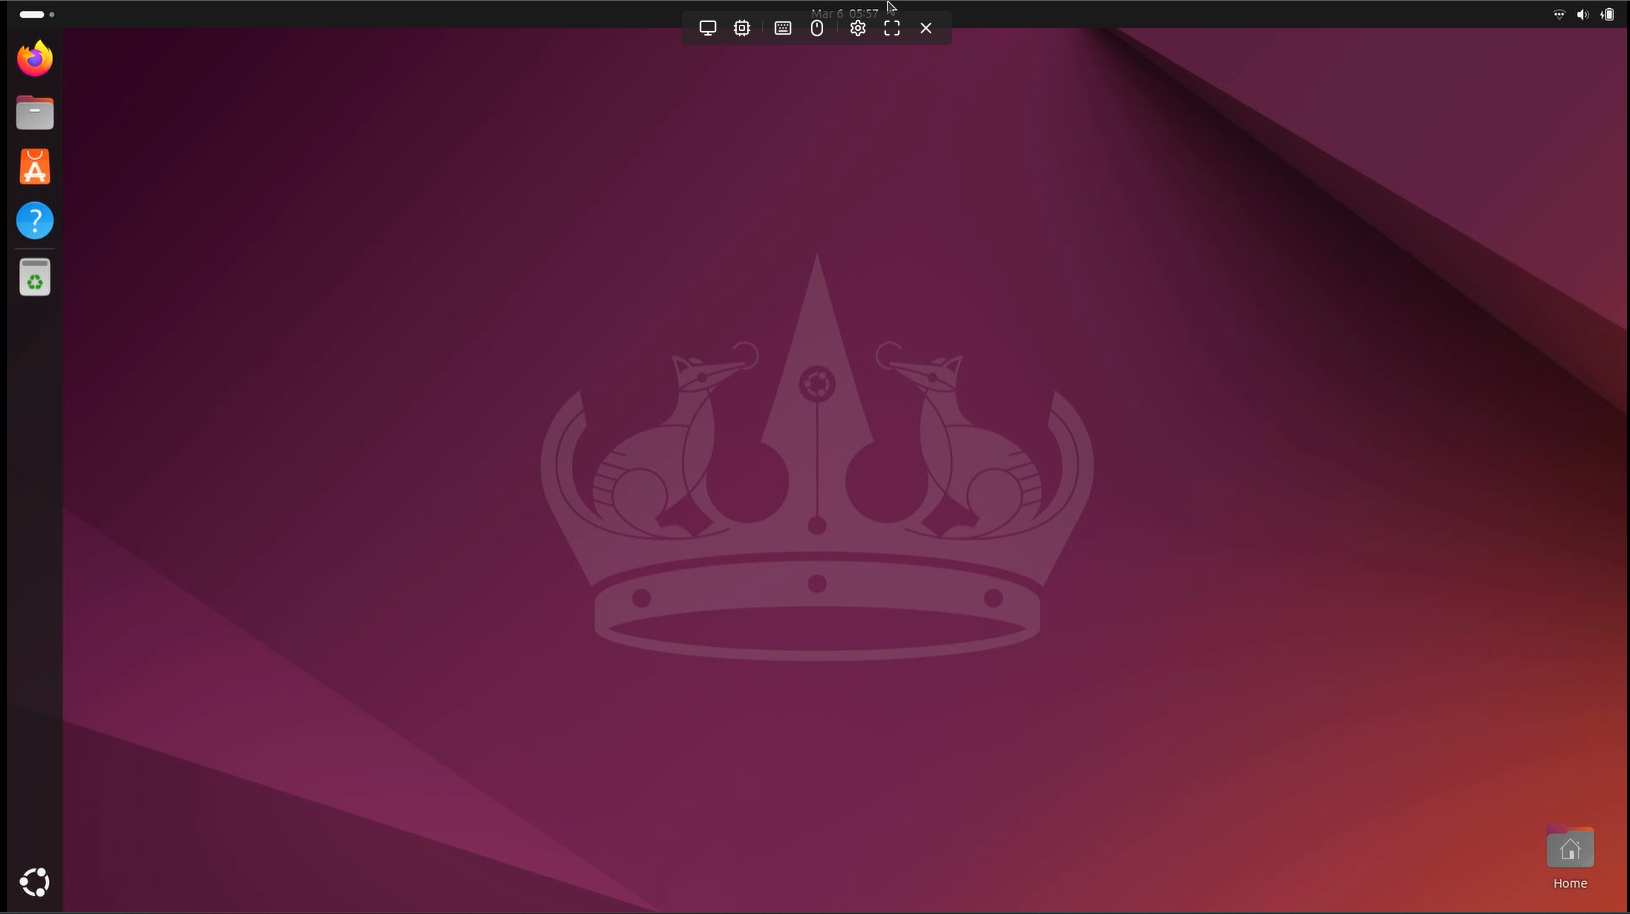
In the end, the entire installation of Ubuntu Desktop was a success. There were no issues with clicking or navigating through the setup process, and typing was smooth without any noticeable delays. The entire process went seamlessly.
Conclusion
The Sipeed NanoKVM-USB is an ideal compact tool for users who deploy SBCs or need to connect to headless computers without requiring additional devices like monitors, keyboards, or mice. Its small size, robust design, and ease of use make it an ideal solution for field technicians, system administrators, and developers working with embedded systems or headless servers. The browser-based interface eliminates additional software, making the device highly versatile across various operating systems and hardware setups.
While the NanoKVM-USB does have some limitations, such as the lack of Wake On LAN, ATX power control, and IPMI functionality, its performance, simplicity, and price point make it a favorable option for those needing basic KVM functionality without the bulk of traditional solutions. The ability to virtualize USB media and provide remote keyboard and mouse input in such a compact form factor is a game-changer for anyone managing multiple systems or troubleshooting hardware.
For those searching for an affordable, portable, and reliable KVM solution, the Sipeed NanoKVM-USB is a standout choice that effortlessly bridges the gap between host and target devices. Whether used for server maintenance, SBC deployments, or remote system management, it streamlines the entire process, offering an intuitive and straightforward solution for modern workflows.
Engage with StorageReview
Newsletter | YouTube | Podcast iTunes/Spotify | Instagram | Twitter | TikTok | RSS Feed