
Nobody likes running out of free cloud storage. Seeing that notification from Google Photos or iCloud warning you that you’ve run out of space can put a damper on your exotic sloth-seeing trip to South America. However, for us DIY types and homelabbers, there is a solution if you’re willing to get your hands dirty.
Introducing Nextcloud
Nextcloud is a free and open-source cloud storage platform that puts the power and flexibility of the cloud into your hands. It supports several popular Linux distributions, such as Red Hat Enterprise Linux 9 and Ubuntu 24.04 LTS. In this article, we’ll use Ubuntu Server 24.04.1 and Nextcloud Hub 9 (30.0.0) to build a high-performance, completely customizable cloud storage server. Some of the steps shown here might require some background knowledge of Linux server administration and the command line interface, so put your thinking cap on and get ready to get technical!
Setting Up the Server
To start setting up a Nextcloud server, you’ll need a fresh installation of Ubuntu Server on a system of your choosing. A virtual machine on your main computer or whatever spare hardware you’ve got lying around will probably do the trick! We recommend a computer with at least 2-4 CPU cores, 8 gigabytes of RAM, and 500 GB of storage. When you’ve got your system ready, get Ubuntu Server by visiting this link: https://ubuntu.com/download/server .
If you’ve never installed Ubuntu Server before, check out their guide before getting started: https://ubuntu.com/tutorials/install-ubuntu-server . Be careful not to select the option to pre-install Nextcloud on the recommended software page, as we’ll take care of that ourselves.
After you’ve got your server on the network, given it a hostname, and logged in with the username and password you created during the initial setup, get the latest software updates for Ubuntu Server by typing “sudo apt update && sudo apt upgrade -y” in the console and hit enter. Reboot the server after the updates have completed by using “sudo reboot”.
Note: You may have to enter your password again to execute sudo commands.
Installing the Software
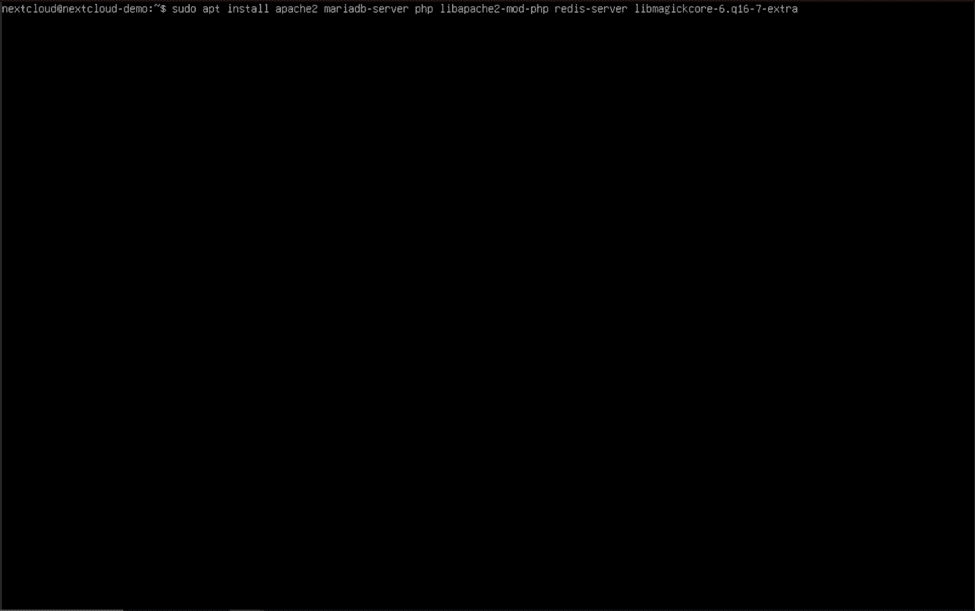
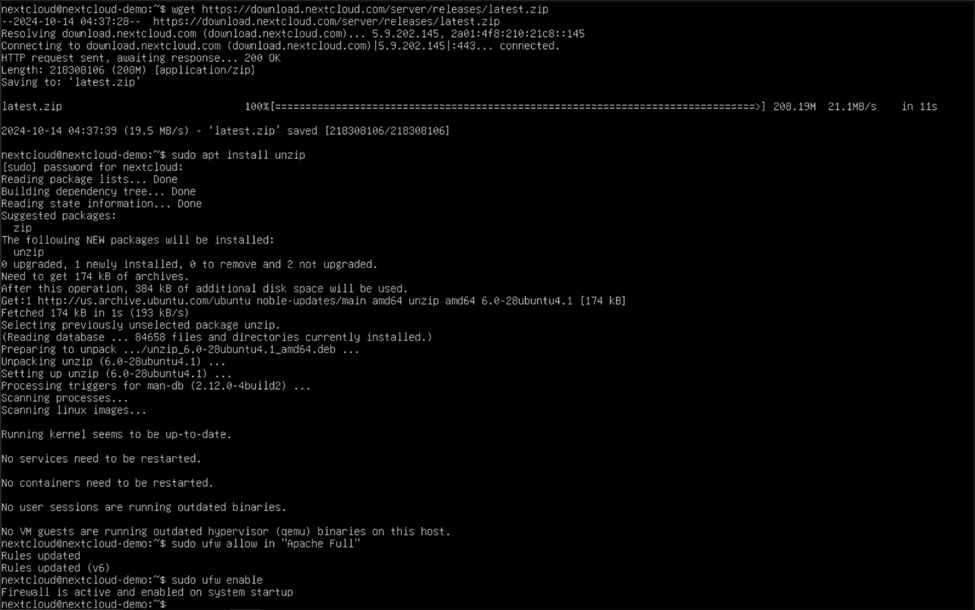
Next, we must grab some of the prerequisite software on which our Nextcloud instance depends. Type (or preferably copy and paste) the following commands into your command line interface to download and install the Apache web server and a few packages you’ll need later for more advanced Nextcloud setups:
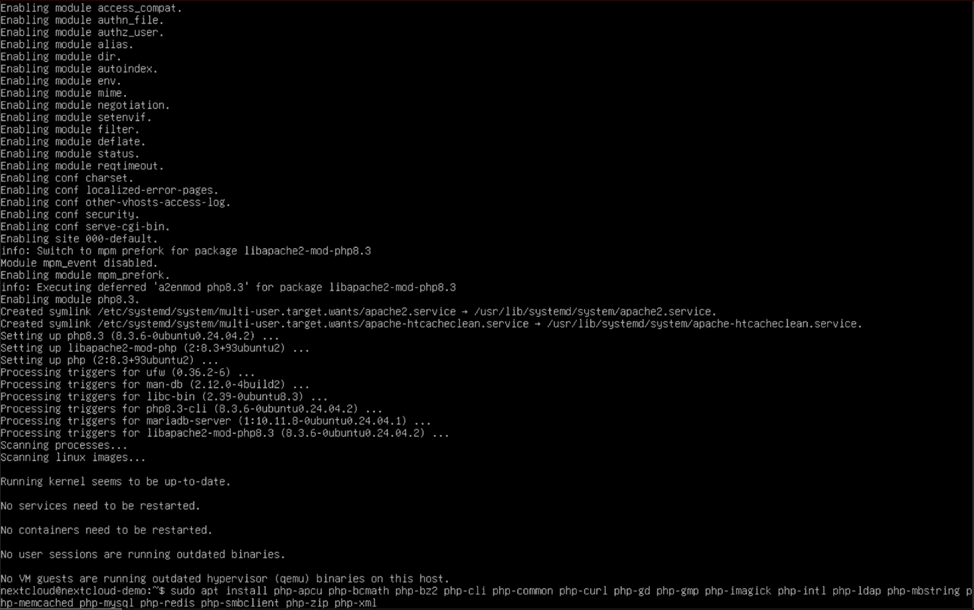
sudo apt install apache2 mariadb-server php libapache2-mod-php redis-server libmagickcore-6.q16-7-extra
sudo apt install php-apcu php-bcmath php-bz2 php-cli php-common php-curl php-gd php-gmp php-imagick php-intl php-ldap php-mbstring php-memcached php-mysql php-redis php-smbclient php-zip php-xml
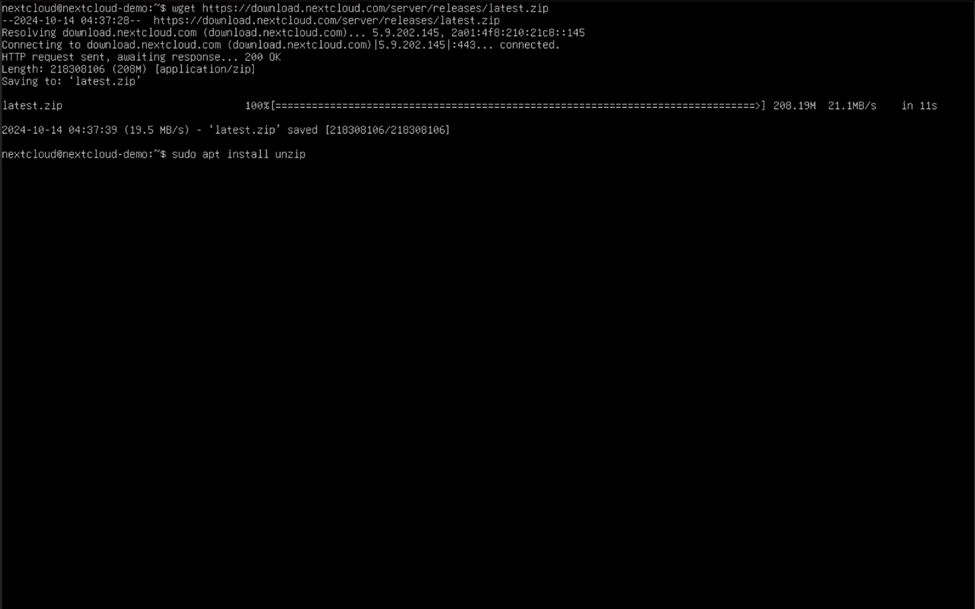
 If prompts ask you to type Y or N to continue or stop the installation, type Y and hit enter. Finally, type “wget https://download.nextcloud.com/server/releases/latest.zip” to get the latest version of Nextcloud and use “sudo apt install unzip” to install the unzipping tool we’ll need to extract those files.
 Now that we have all the necessary software to set up our Nextcloud instance let’s examine the web server we installed.
Configuring the Apache Web Server – Part 1
Before we start messing with Apache, we’ll need to ensure we can properly connect to the server first. To allow web browser (HTTP and HTTPS) connections to the Nextcloud instance, use the following commands:
sudo ufw allow in "Apache Full"
sudo ufw enable
 You should now have a running and accessible web server on your Ubuntu Server! On another computer connected to the same network as your Nextcloud machine, type in the IP address of your server in a browser window and hit enter. If you can’t remember what the IP address of the server is, use the “hostname -I” command on your server to display it. If your installation was successful, you should see the default Apache2 page displayed in all its glory!
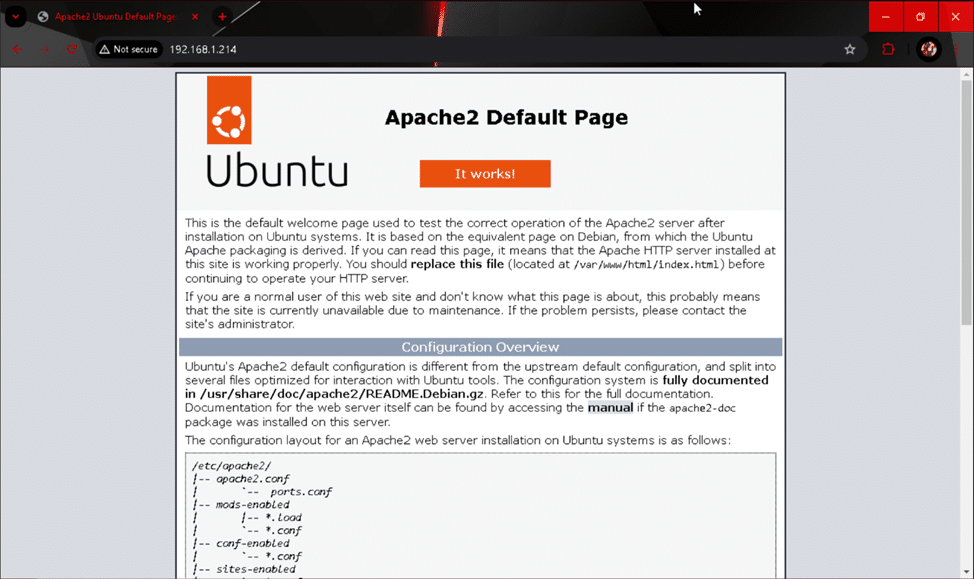 Although some may say this default web server page is pretty neat, we will replace it with something even better in part two. Let’s take a quick detour and set up MariaDB now!
Configuring MariaDB
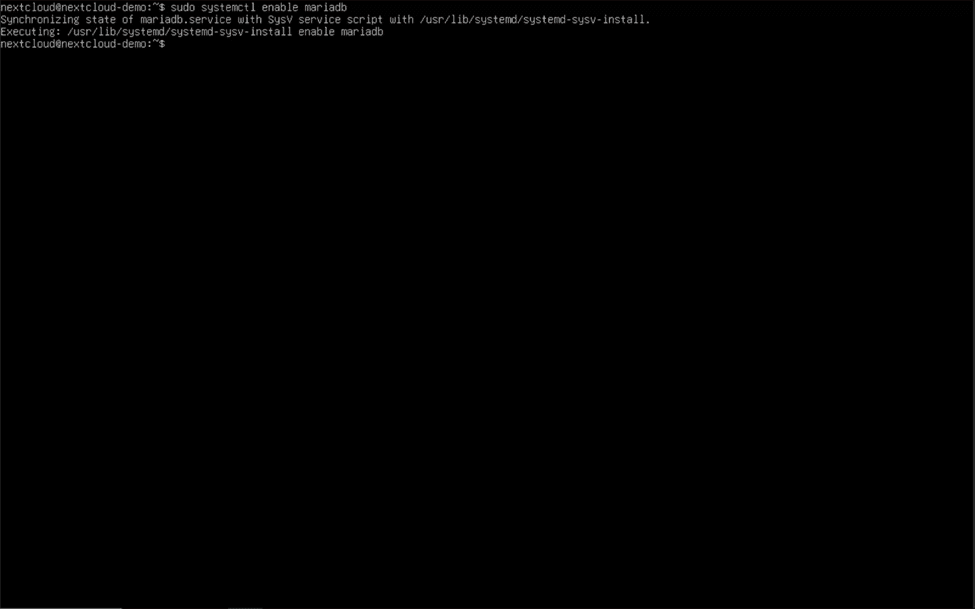
Our Nextcloud server will need an always-online database to store server configuration and user profile information. To configure MariaDB to run after the system reboots, type “sudo systemctl enable mariadb” and hit enter. Now, we’re ready to prepare the database for our Nextcloud installation!
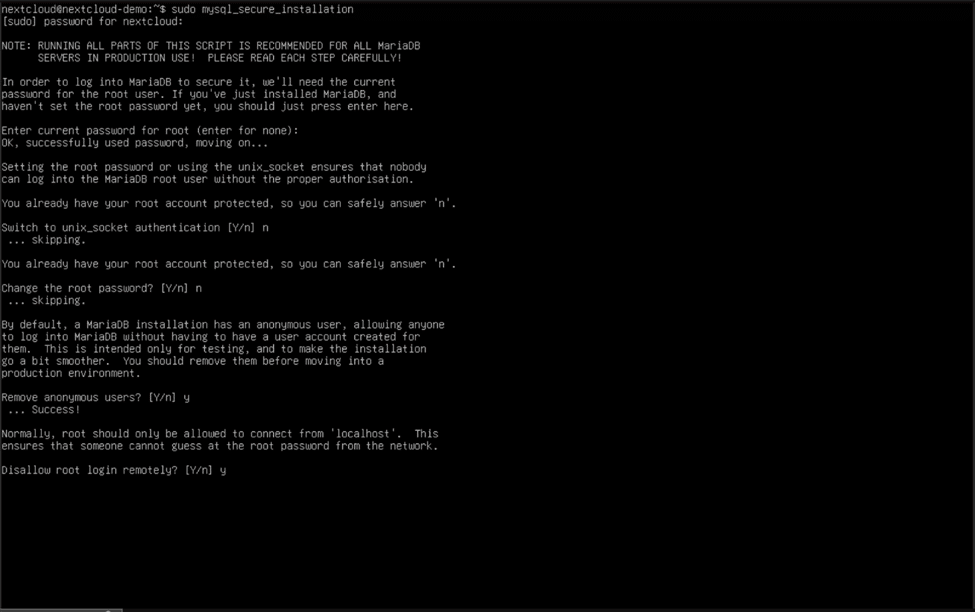
 Luckily, MariaDB comes pre-packaged with a secure setup utility, so we don’t have to do much heavy lifting. Use “sudo mysql_secure_installation” to start it, and answer the questions asked by the wizard.
- Enter current password for root (enter for none): click enter
- Switch to unix_socket authentication [Y/n] n
- Change the root password? n
- Remove anonymous users? [Y/n] y
- Disallow root login remotely? [Y/n] y
- Remove test database and access to it? [Y/n] y
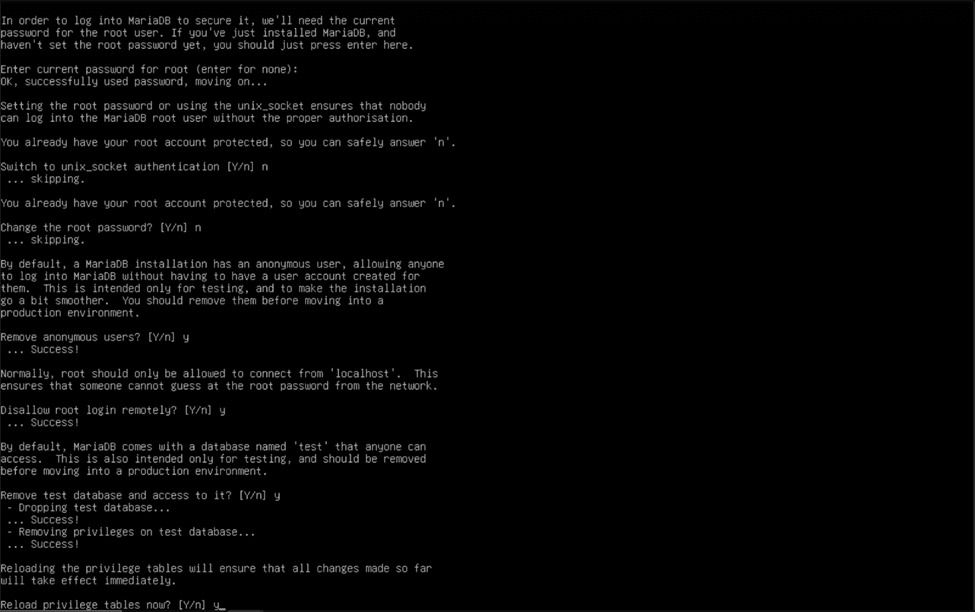 MariaDB is now secure, and we can start creating a database to serve our Nextcloud instance.
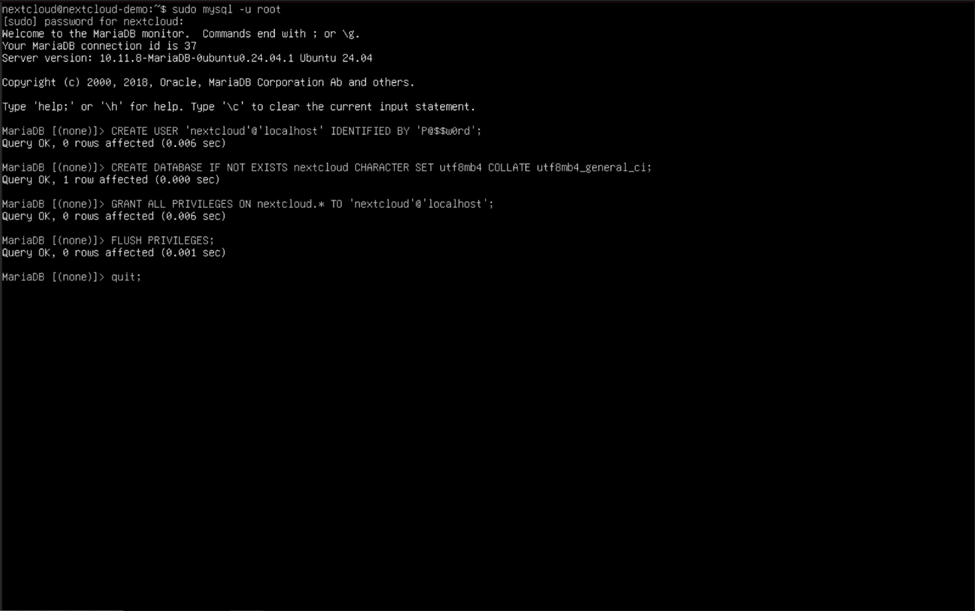
Type “sudo mysql -u root” and enter these commands when the MySQL command line interface appears (and be sure to use “;” at the end of each line!):
CREATE USER 'nextcloud'@'localhost' IDENTIFIED BY 'P@$$w0rd';
Note: Replace “nextcloud” and “P@$$w0rd” with a username and password of your choosing.
CREATE DATABASE IF NOT EXISTS nextcloud CHARACTER SET utf8mb4 COLLATE utf8mb4_general_ci;
GRANT ALL PRIVILEGES ON nextcloud.* TO 'nextcloud'@'localhost';
Note: Again, replace the “nextcloud” before the @ symbol with the username you previously used.
FLUSH PRIVILEGES;
quit;
 We’re getting closer! We now have a functional (but not finished) web server and database.
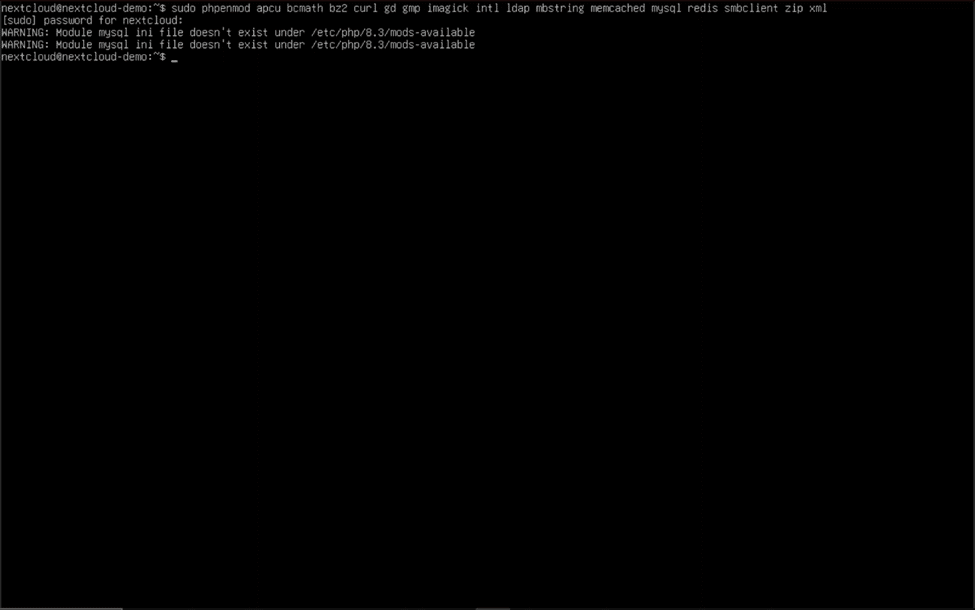
Enabling the PHP Extensions and Improving PHP Performance
Remember all those PHP extensions we installed? We need to enable them to ensure that Nextcloud can use them properly. Use this command to enable the required PHP extensions:
sudo phpenmod apcu bcmath bz2 curl gd gmp imagick intl ldap mbstring memcached mysql redis smbclient zip xml
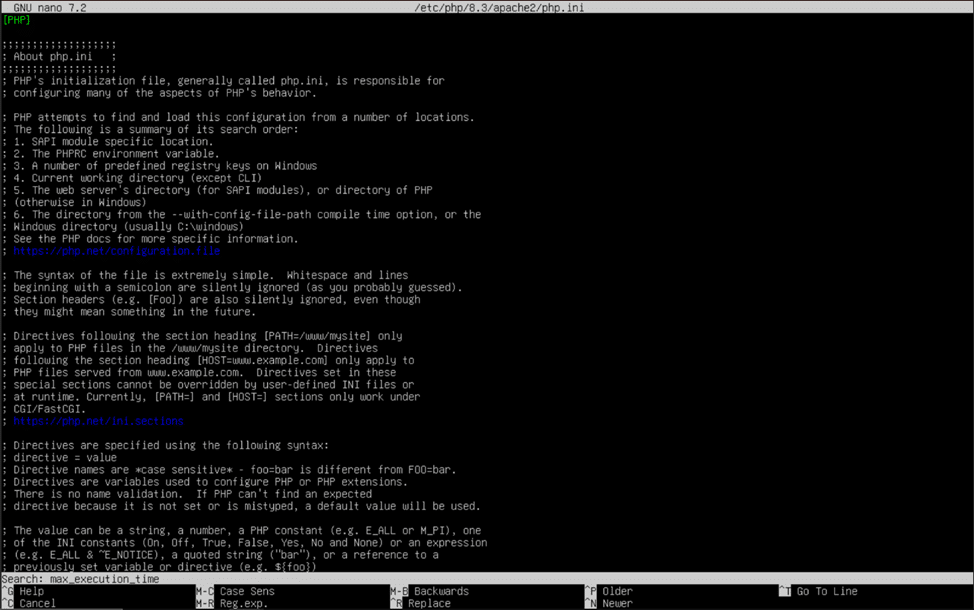
 Now that the correct extensions have been enabled, we need to adjust some PHP settings to better suit our needs. The PHP configuration file we are going to edit is located at “/etc/php/8.3/apache2/php.ini” and can be modified by placing “sudo nano” in front of the path and hitting enter. If you have installed a different version of PHP, change the “8.3” to the major release number of your installed version, which can be obtained by putting “php -v” in the console.
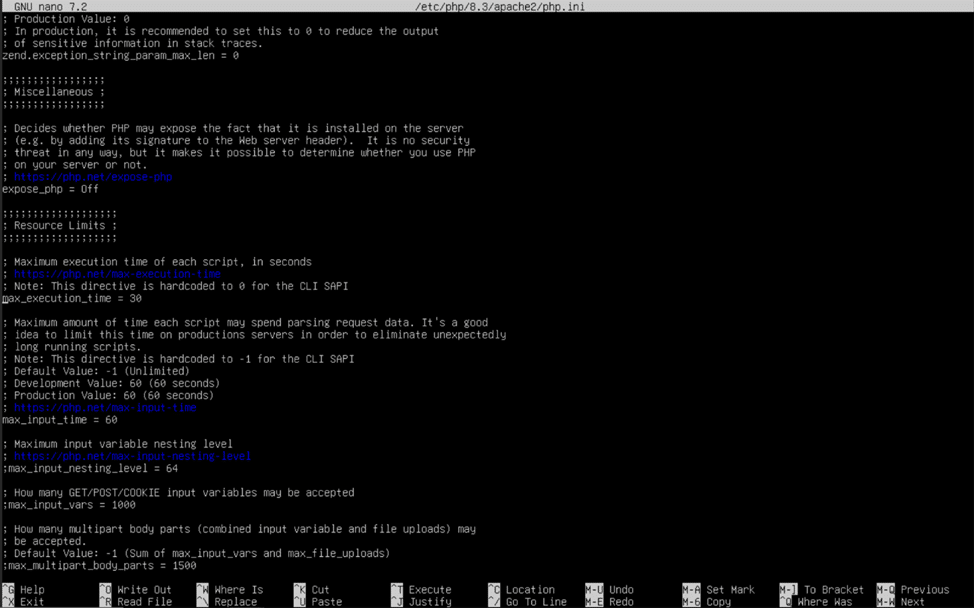
 Once you have opened the “php.ini” file using nano, Ubuntu’s built in text editor, hold the control (ctrl) key and tap the “W” key on your keyboard. When the search bar appears, type in “max_execution_time”, and hit enter. Nano will then skip to the first match it finds with the value you entered. Using the arrow keys to navigate and the backspace key to remove characters, change the “30” to “360”. Repeat this trick to change the values for the following PHP settings:
memory_limit = 512M
- Can be optionally increased to give PHP more memory if needed (1024M, 2048M, etc.)
post_max_size = 100G
upload_max_filesize = 100G
- This value and the previous value represent the maximum file size you can upload to your Nextcloud server. Change them to your desired maximum file size. (1G = 1 gigabyte, 10G = 10 gigabytes, 100G = 100 gigabytes, etc.) Be careful to only put sizes in K (kilobytes), M (megabytes), and G (gigabytes).
date.timezone = America/New_York
- Remove “;” before line, and use this guide to help determine your correct timezone: https://www.php.net/manual/en/timezones.php
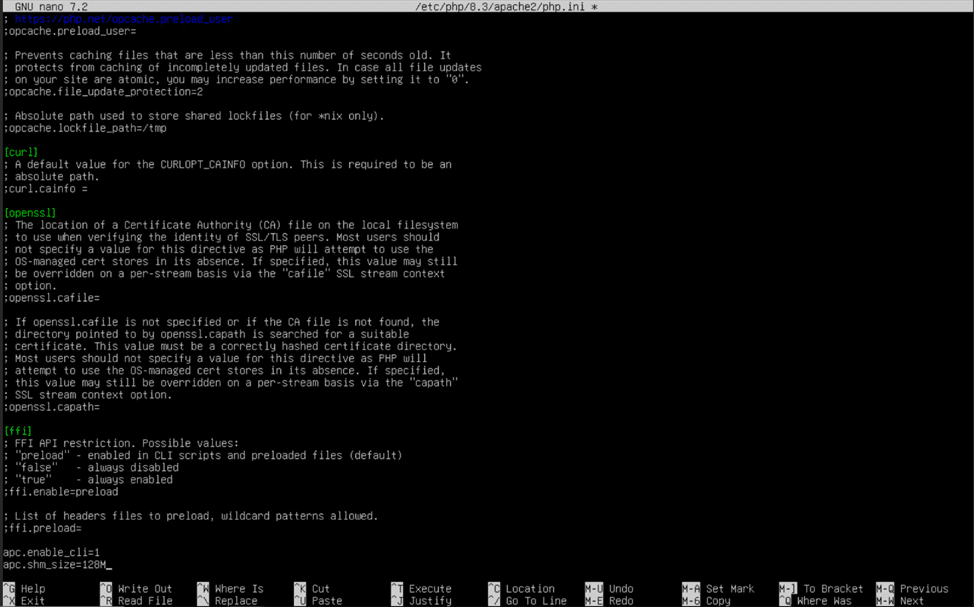
opcache.enable=1
- Remove “;” before line.
opcache.memory_consumption=128
- Remove “;” before line. This value, in megabytes, can be customized to suit the amount of memory you have in your Nextcloud server (128 = 128 megabytes, 1024 = 1024 megabytes/1 gigabyte, 2048 = 2048 megabytes/2 gigabytes).
opcache.interned_stringers_buffer=16
- Remove “;” before line. Represents amount of memory allocated for interned strings in megabytes, recommended value is 16.
opcache.max_accelerated_files=10000
- Remove “;” before line. This value can be adjusted to any number between 200 and 1000000 to fit your system’s caching and memory capabilities.
opcache.revalidate_freq=1
- Remove “;” before line and change to 1.
opcache.save_comments=1
- Remove “;” before line and validate that value is set to 1.
After you have completed all of the necessary changes to the php.ini file, save the file by holding the control (ctrl) key and pressing the “O” key. Hit enter to confirm, and hold control (ctrl) again and tap the “X” key to exit nano.
 Next, enable more required Apache modules by entering “sudo a2enmod dir env headers mime rewrite ssl” in the console. You do not need to restart Apache using the command suggested by the console message at this point.
Configuring the Apache Web Server – Part 2
Although we have downloaded Nextcloud and set up many of its software prerequisites, we still need to replace the default Apache webpage with Nextcloud. Type “cd ~” in the console and hit enter, returning us to our user’s home directory. This is where the Nextcloud ZIP file was downloaded. Now, type “unzip latest.zip” hit enter, and watch the unzip utility roar!
 The “latest.zip” ZIP file is now extracted to a folder called “nextcloud” in the same directory from which it was downloaded. This new folder contains all of the necessary materials needed for the Nextcloud site. Now we’ll start moving this folder to its proper home, “/var/www/html”.
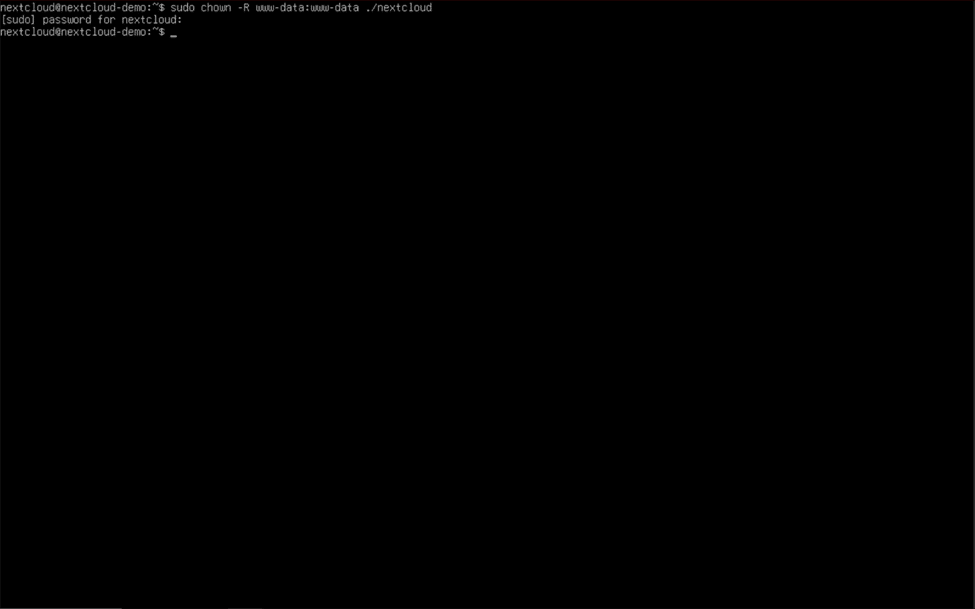
Before the folder can be transported, we must make sure that the built in “www-data” user is the owner of the new directory. This is extremely important since the “www-data” user handles all web server operations carried out by the Apache web server and Nextcloud itself. Type “sudo chown -R www-data:www-data ./nextcloud” in the console and hit enter.
 Now that the “www-data” user owns the folder, we can move it without delay. Use “sudo mv ./nextcloud /var/www/html” to move the folder into the correct directory.
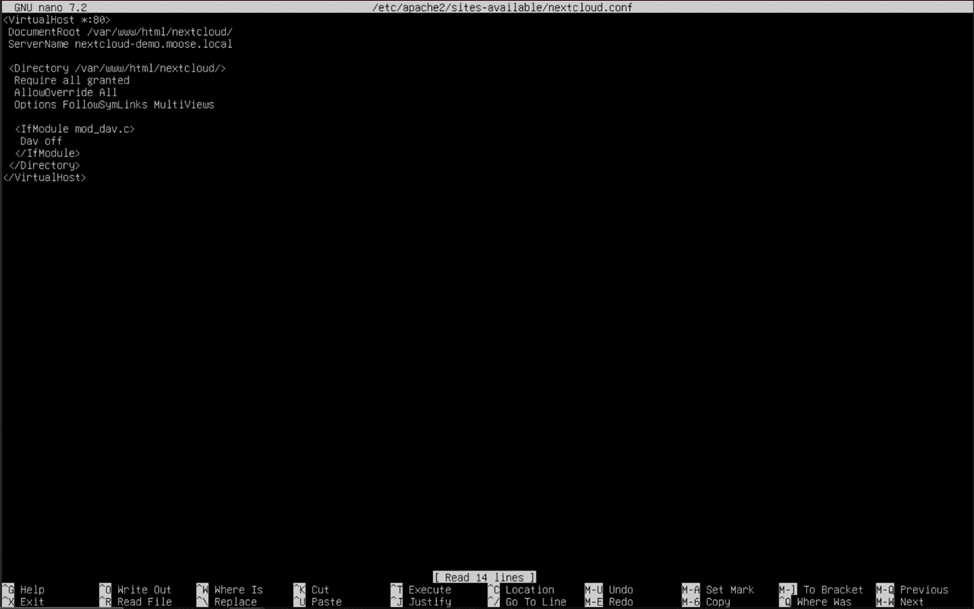
 We can now disable the default Apache web server page by entering “sudo a2dissite 000-default.conf” into the console. Ignore the warning to reload the Apache server again and create a virtual host file for the new site by typing “sudo nano /etc/apache2/sites-available/nextcloud.conf” and hitting enter. The contents of the virtual host file should be typed exactly as follows:
<VirtualHost *:80>
  DocumentRoot /var/www/html/nextcloud/
  ServerName nextcloud-demo.moose.local

  <Directory /var/www/html/nextcloud/>
    Require all granted
    AllowOverride All
    Options FollowSymLinks MultiViews

    <IfModule mod_dav.c>
      Dav off
    </IfModule>
  </Directory>
</VirtualHost>
 Replace “nextcloud-demo.moose.local” with the fully qualified domain name (FQDN) of the server you installed Nextcloud on. The first portion of the FQDN is the server’s hostname you created earlier, which can be shown using the “hostname” command in the console. The second and third portions of the name are the domain and the top-level domain, respectively. For example, if your domain was “storagereview.com” and your server’s hostname was “nextcloud”, then your server’s FQDN would be “nextcloud.storagereview.com”.
If you don’t own a domain, you can purchase one from a registrar such as Cloudflare using https://www.cloudflare.com/products/registrar/ or use a free publicly-available hostname from websites like https://www.noip.com/ . If you would not like to purchase a domain or use a free hostname, you may place a fictitious FQDN in this field, with the caveat being that you can only use the server’s IP address (public and private) to connect to the Nextcloud instance.
Note: To use the FQDN of the server to locally access your Nextcloud instance, you must have a properly configured DNS server running on your home network. Otherwise, you must use the server’s local IP address when accessing it from your home network.
When you have finished writing the virtual host file and replaced the example FQDN with your server’s FQDN (legitimate or otherwise), you can finally enable the Nextcloud site by using “sudo a2ensite nextcloud.conf” and “sudo systemctl restart apache2” to restart the web server with the new site. Navigate to your Nextcloud instance using a web browser on another computer residing on the same network via the server’s FQDN or its local IP address.
Nextcloud Initial Setup
If you’ve followed the previous steps correctly, you will be greeted with a page asking you to create an admin user for the site and fill in some details about your Nextcloud server. Give the admin user your desired name, such as Administrator or Superadmin, and a strong password.
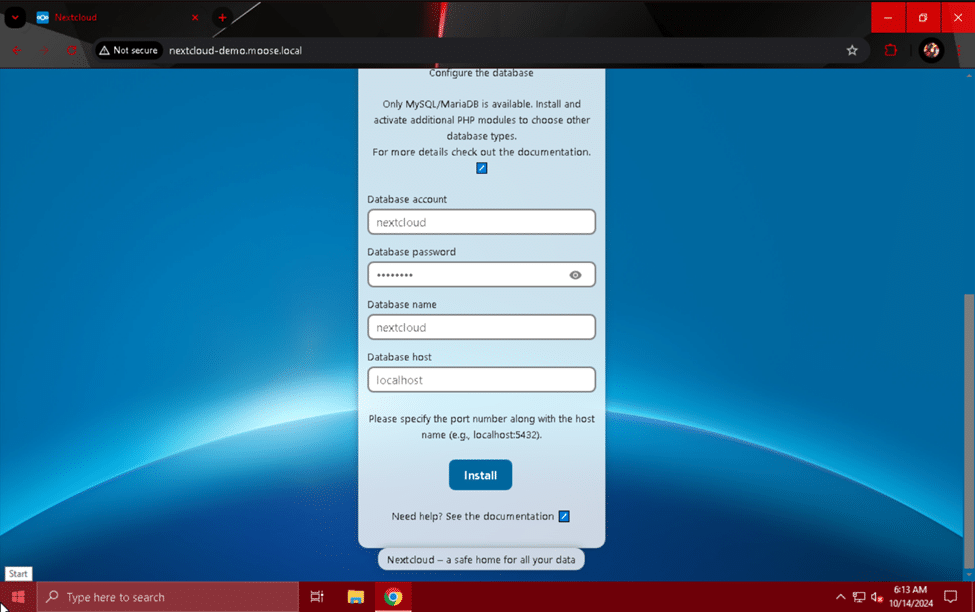
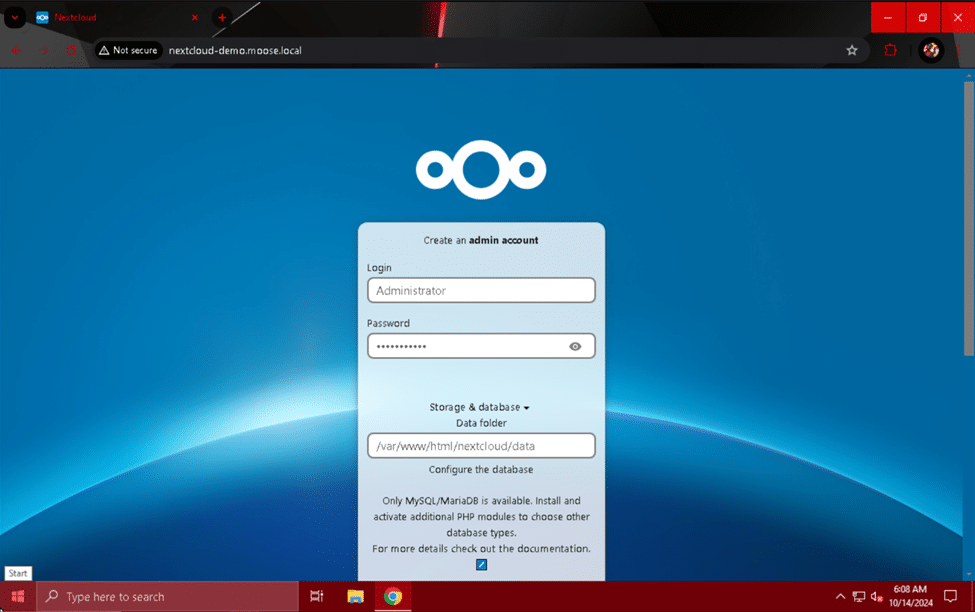 In the “Storage & database” section of the setup page, enter “/var/www/html/nextcloud/data” in the “Data folder” field, and the account username, password, and database name you used when creating the MariaDB database. For the “Database host” field, enter “localhost” and click the install button when finished.
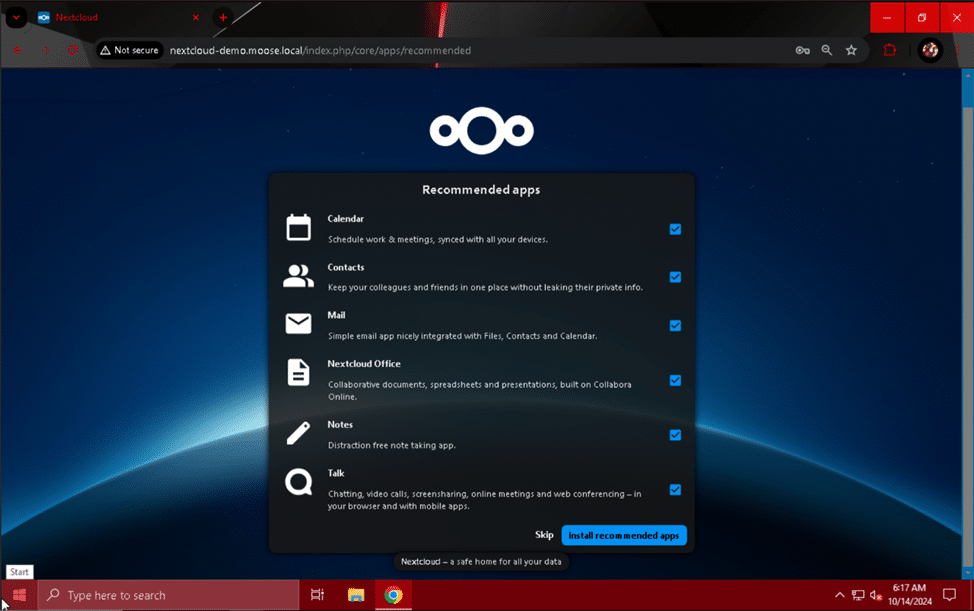
The site will load for a short while and then present you with the option to install several recommended apps for your Nextcloud server. Be aware that adding more apps to your Nextcloud instance will increase the server’s processing load, memory usage, and total disk usage. Choose whether to install the recommended apps or optionally skip this step.
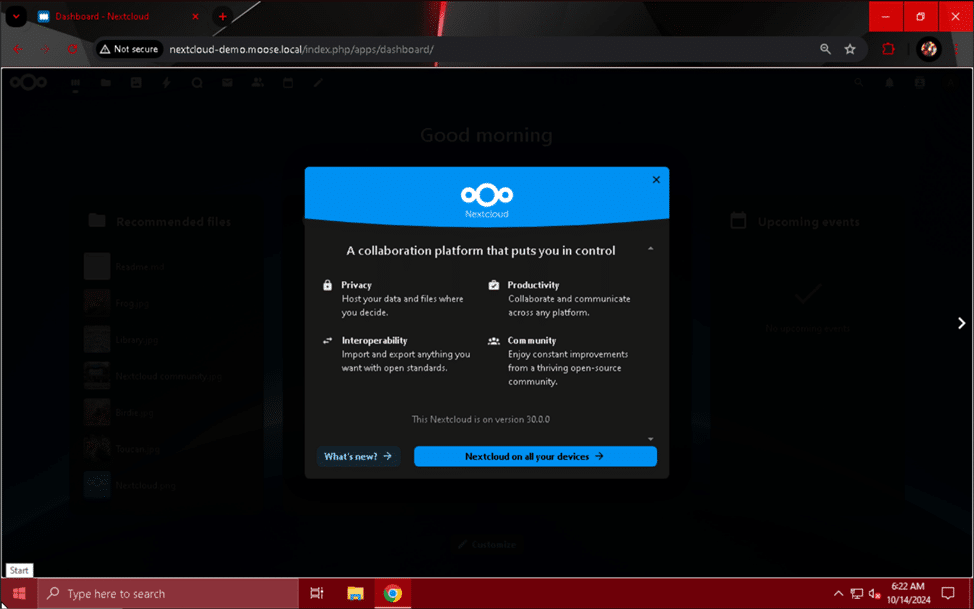
 After the apps have finished installing or the next page has appeared, you can read through the introductory menu if you wish.
 It looks like the Nextcloud server is finished, but we have one more step to make the server work: setting up a cron job to execute regularly scheduled tasks on the server.
Creating a Cron Job
A cron job is a command executed regularly without user intervention. Our Nextcloud server needs a cron job to call the server’s “cron.php” script every 5 minutes for optimal performance and functionality.
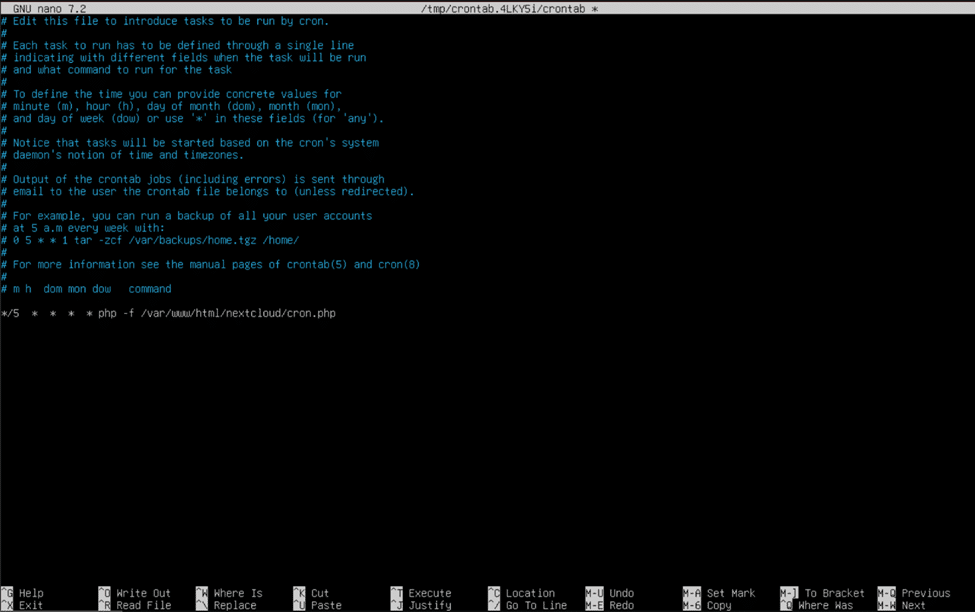
To set up this cron job, enter the command “sudo crontab -u www-data -e” in the server’s console.
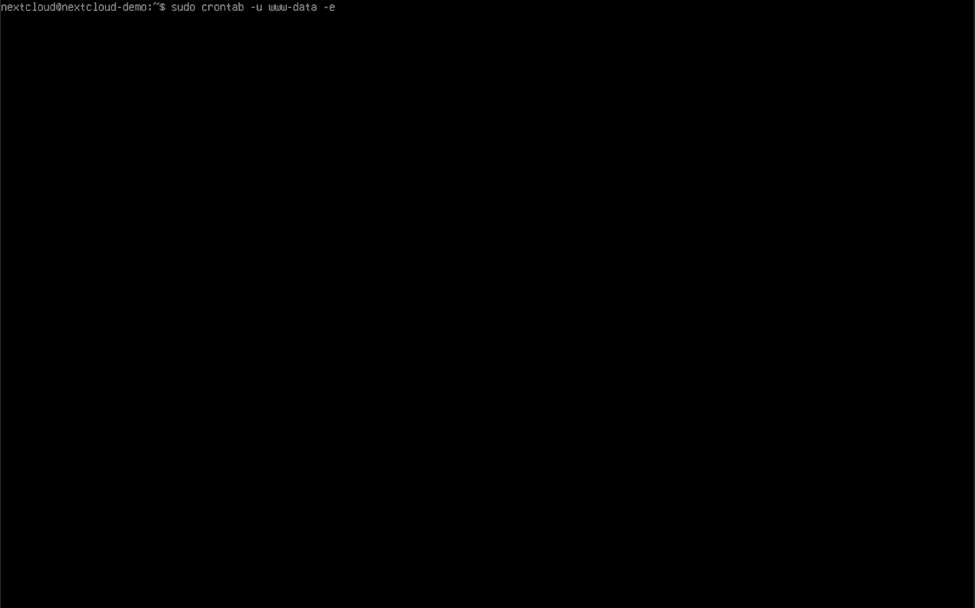 When the “www-data” user’s crontab is opened, add the following line to the bottom of the file:
*/5 * * * * php -f /var/www/nextcloud/cron.php
 When finished, hold the control (ctrl) key and press the “O” key to save the file, and hold control (ctrl) and press the “X” key to exit. Congratulations! You now have a working Nextcloud server available on your local network! You can start uploading and downloading files to and from your Nextcloud server on your home network now, but to make it shine we need to improve its security, add a few homelab-favorite apps, set up a blazing fast memory caching system, and make it accessible from the public internet.
Improving Your Nextcloud Server’s Security
One of the best ways to increase your web server’s security posture is to upgrade to HTTPS over unencrypted and insecure HTTP. When enabled, requests will be served over TLS 1.3, the newest and most secure encryption standard for web connections. This is a necessary step whenever you plan to expose a website to the public Internet and is an excellent first step when protecting sensitive information.
Once you have decided to encrypt your Nextcloud traffic, there are two options for setting up HTTPS to choose from: using a self-signed certificate or using a certificate from a valid certificate authority. If you do not currently own a domain or do not intend to set one up for a temporary Nextcloud instance, we recommend using a self-signed certificate or one from a hostname provider. If you are planning to have a more permanent Nextcloud setup, we strongly recommend obtaining a publicly trusted certificate from a certificate authority like Let’s Encrypt.
HTTPS with a Self-Signed Certificate
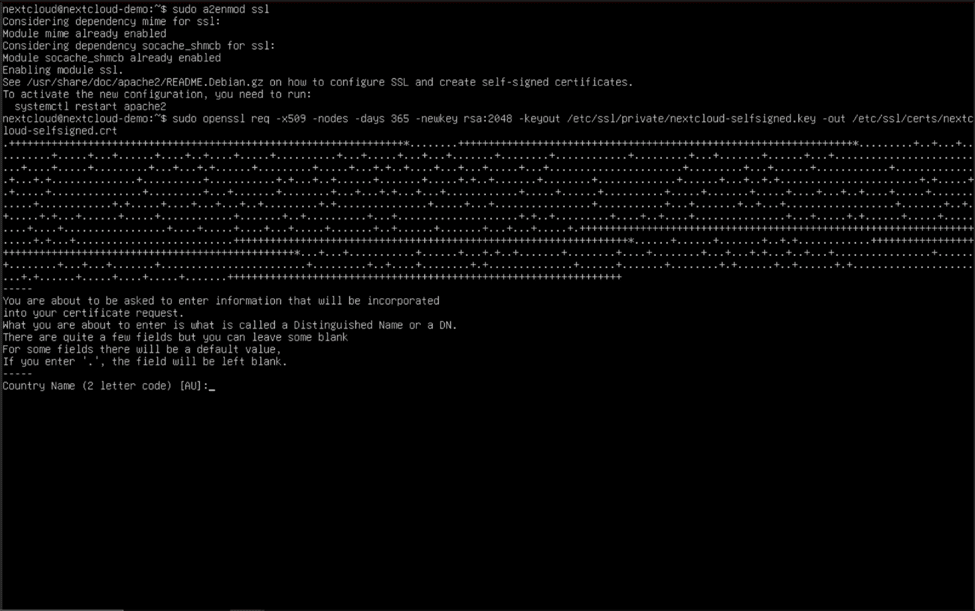
To enable and create a self-signed certificate, you need to issue a few simple commands:
sudo a2enmod ssl
sudo openssl req -x509 -nodes -days 365 -newkey rsa:2048 -keyout /etc/ssl/private/nextcloud-selfsigned.key -out /etc/ssl/certs/nextcloud-selfsigned.crt
 Now that we have enabled the Apache SSL (also known as TLS) module and created the self-signed certificate, we need to instruct the site to turn on TLS and use the certificate. Type “sudo nano /etc/apache2/sites-available/nextcloud.conf” and hit enter to begin editing the virtual host file once more.
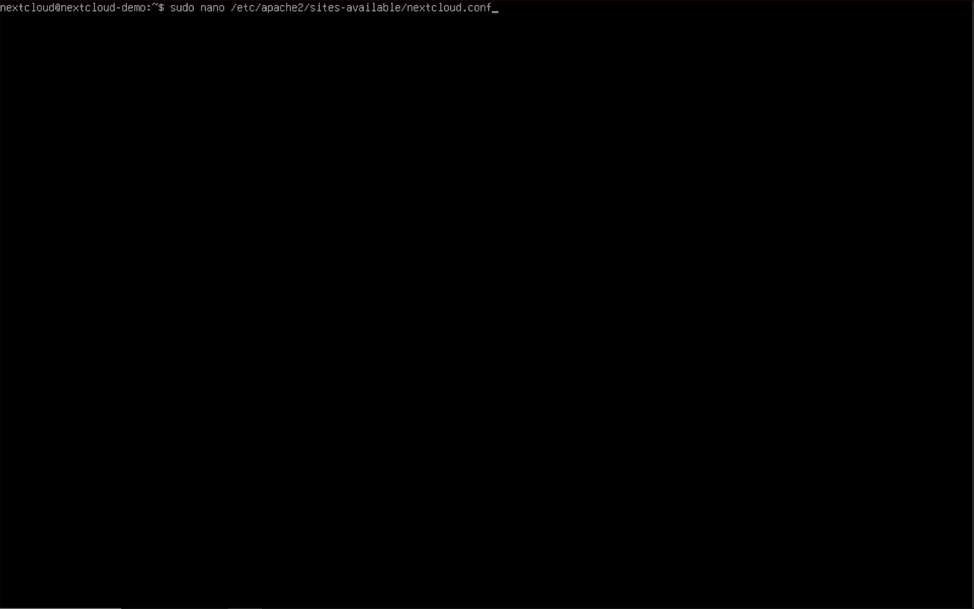 Add the following lines to the bottom of your virtual host file exactly as follows, but replace the “ServerName” field with the fully qualified domain name of your server:
<VirtualHost *:443>
  DocumentRoot /var/www/html/nextcloud/
  ServerName nextcloud-demo.moose.local

  SSLEngine on
  SSLCertificateFile /etc/ssl/certs/nextcloud-selfsigned.crt
  SSLCertificateKeyFile /etc/ssl/private/nextcloud-selfsigned.key

  <Directory /var/www/html/nextcloud/>
    Require all granted
    AllowOverride All
    Options FollowSymLinks MultiViews

    <IfModule mod_dav.c>
      Dav off
    </IfModule>
  </Directory>
</VirtualHost>
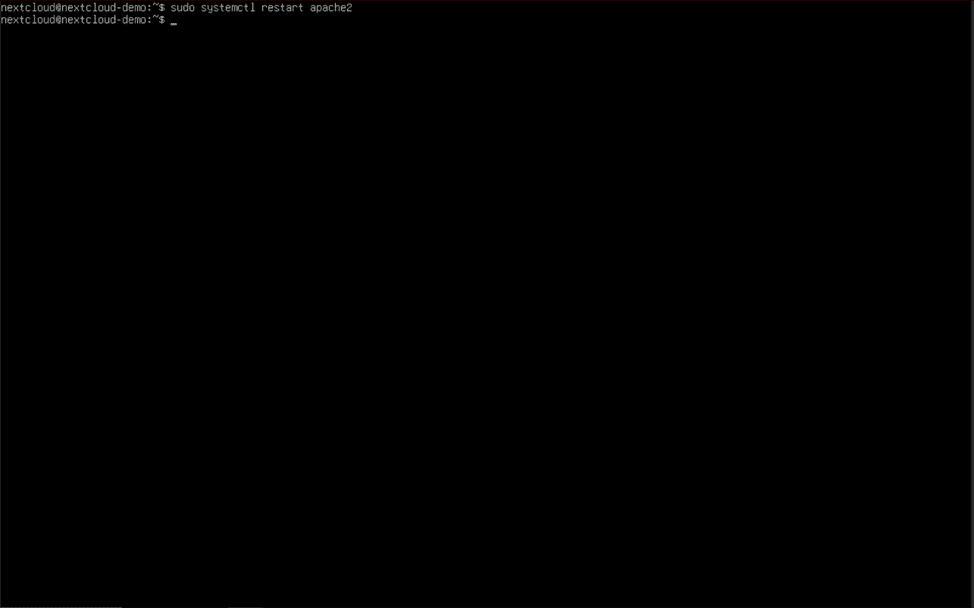
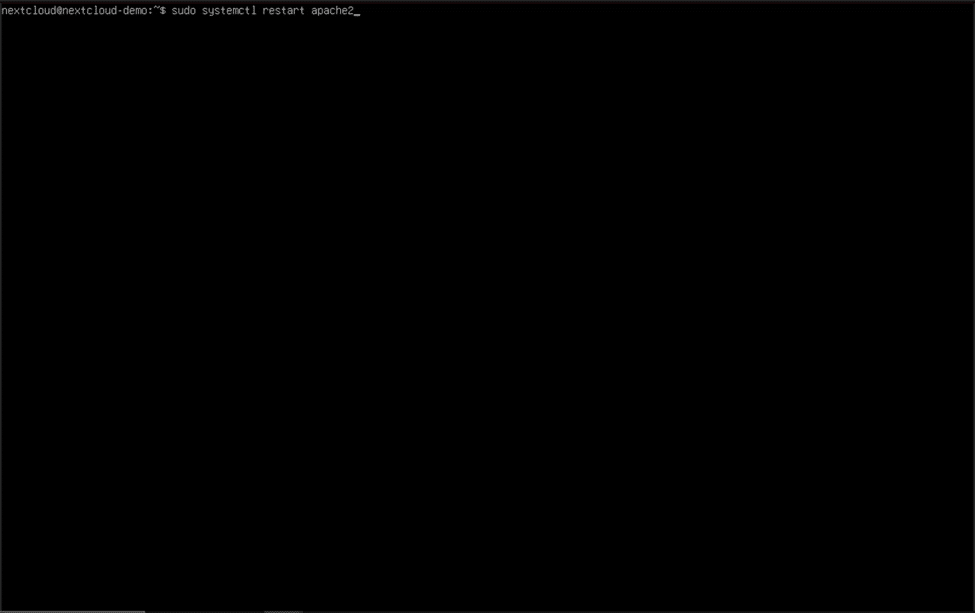
 Hold control (ctrl) and press the “O” key to save the file, and hold control (ctrl) and press the “X” key to exit nano. To apply these changes to the Apache web server, use the “sudo systemctl restart apache2” command. You should now have enabled HTTPS using a self-signed certificate!
 The next time you visit your site by typing in the server’s fully qualified domain name or IP address you should see a warning informing you that the site’s certificate authority is not valid. Continue past this error (method will vary depending on your web browser) and view the site. The web browser has automatically connected using HTTPS, and will send data using TLS encryption.
HTTPS with a Trusted Certificate
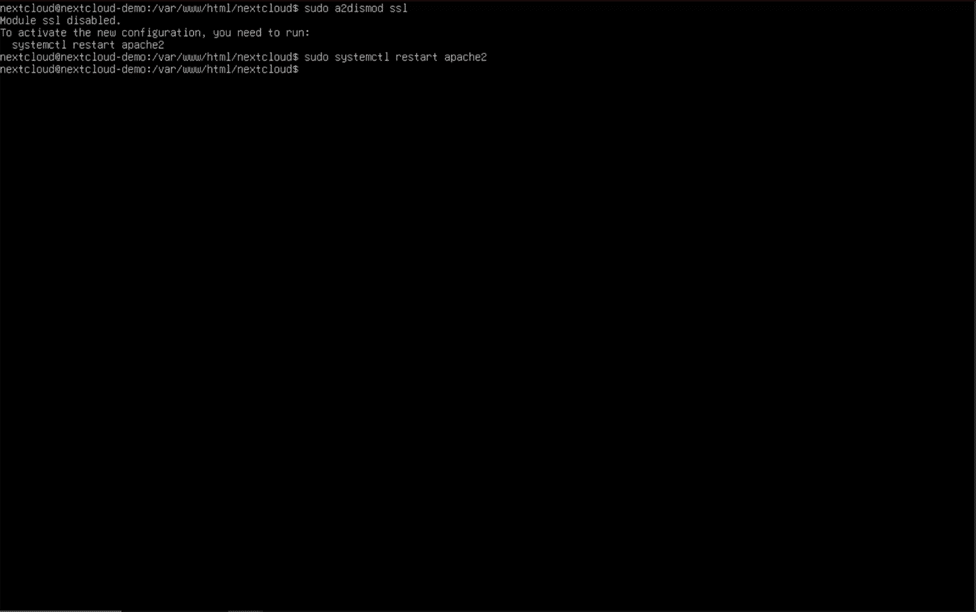
In order to use a trusted certificate for Nextcloud, you must first own a domain or have a signed certificate from a hostname provider. If you were previously using a self-signed certificate and followed the steps in the previous section to enable HTTPS, remove the portion of text added to the bottom of the file and run the commands “sudo a2dismod ssl” and “sudo systemctl restart apache2”. Remember to use control + “O” and control + “X” to save and exit nano when finished.
HTTPS Setup for Domain Owners (via Certbot)
Now that the virtual host file is back to a standard HTTP configuration, we can begin preparations to use a trusted certificate from a certificate authority. If you own a domain, follow these steps to acquire and implement a certificate. If not, skip to the next section, which will detail using a certificate acquired from a hostname provider. To acquire a certificate used with your own domain, we will use Certbot from Let’s Encrypt, a nonprofit organization that provides free certificates for use in web servers.
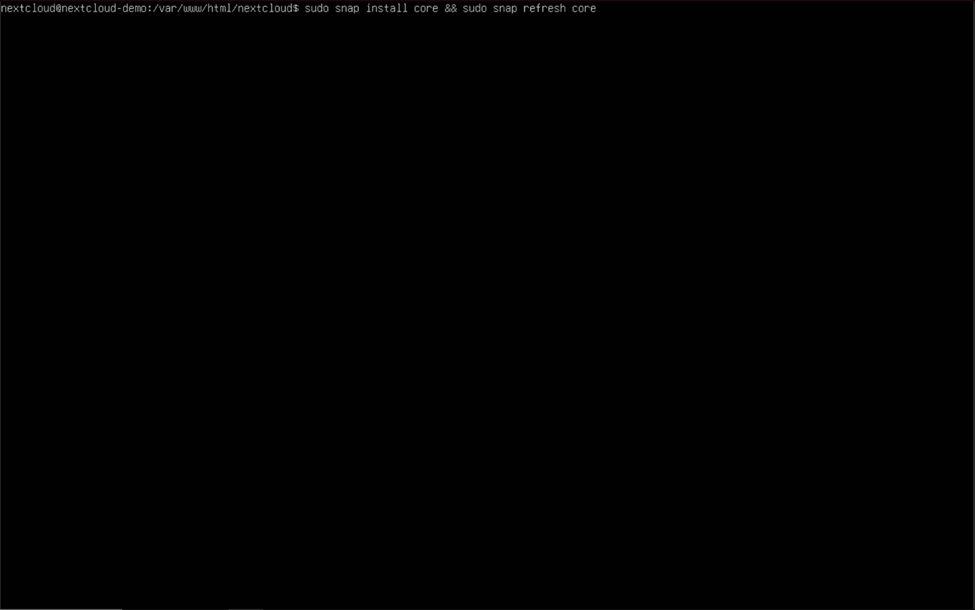
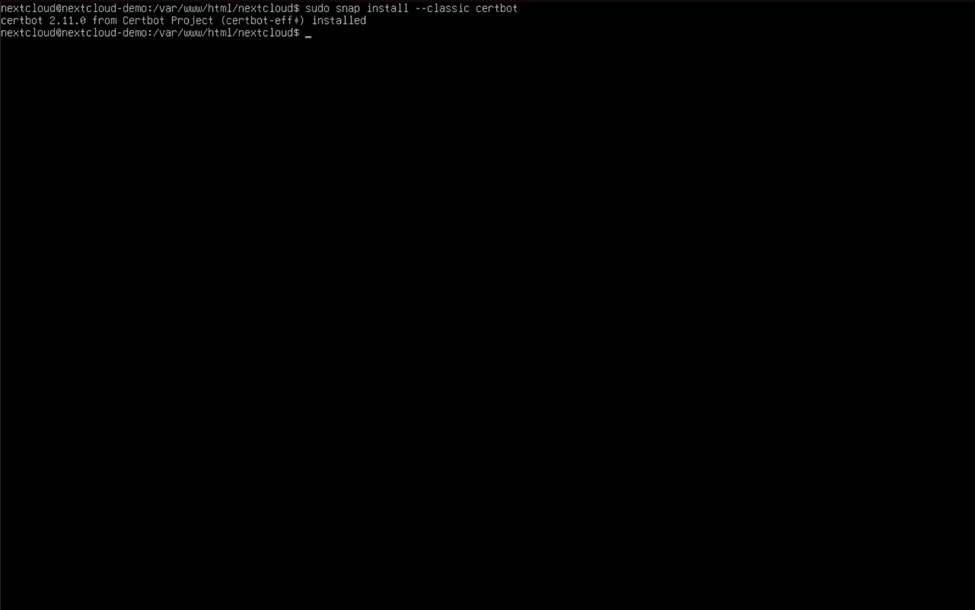
To download Certbot, first install and update Snap using “sudo snap install core && sudo snap refresh core”. Then, type “sudo snap install –classic certbot” (two hypens in a row before “classic”) to install the package.
 Run the command “sudo certbot –apache” (again, two hypens before “apache”) to launch certbot, and follow all prompts to create and download your web certificate.
 The certificate creation process will require information such as an email address used to contact the domain owner, and ask you to agree to the terms and conditions required by Let’s Encrypt. Enter or select the domain name for which you are acquiring a certificate when prompted to, and finish the interactive process. If you encounter errors while using Certbot, you may have to enable port forwarding on your router for ports 80 and 443 to your Nextcloud server’s private IP address or configure your domain’s DNS records to point to your router’s public IP address. The process for port forwarding and DNS record setup are highly dependent on your router, domain registrar, and internet service provider and thus are not covered by this guide.
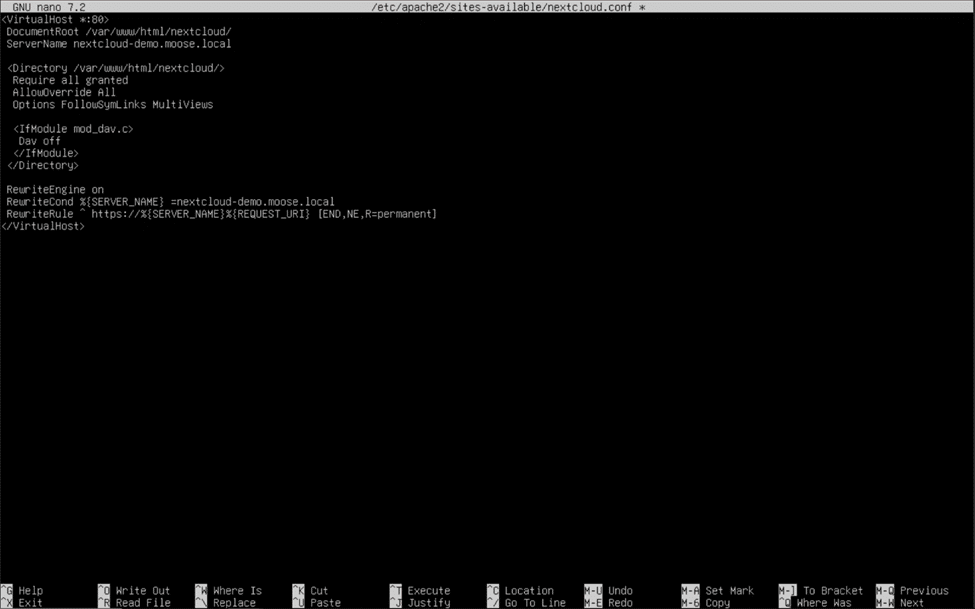
After Certbot is done, reopen the virtual host file by typing “sudo nano /etc/apache2/sites-available/nextcloud.conf” and hitting enter. Add the following lines right above the </VirtualHost> header to enable rewriting HTTP URLs as HTTPS, and replace “nextcloud-demo.moose.local” with your server’s fully qualified domain name:
RewriteEngine on
RewriteCond %{SERVER_NAME} = nextcloud-demo.moose.local
RewriteRule ^ https://%{SERVER_NAME}%{REQUEST_URI} [END,NE,R=permanent]
The completed virtual host file should look like this when finished:
 You should now be set up with a trusted certificate from a valid certificate authority and HTTPS encryption ready for the web!
HTTPS Setup Using a Certificate from a Hostname Provider
The steps for using a certificate from a hostname provider to enable HTTPS on your Nextcloud server are identical to those covered in the section “HTTPS with a Self-Signed Certificate” found in this article, with the only exception being that you must replace the path to the self-signed keys with a path to the keys from your hostname provider. Commands like “wget” and “mv” may be used to download and move the certificate files to the proper directories (/etc/ssl/certs for the certificate file and /etc/ssl/private for the key file). Be sure to enable the Apache SSL module with the “sudo a2enmod ssl” command and use “sudo systemctl restart apache2” when finished to apply your changes. The completed virtual host file for using certificate files should look similar to this (with the SSLCertificateFile and SSLCertificateKeyFile fields replaced with paths to your custom certificate and key files):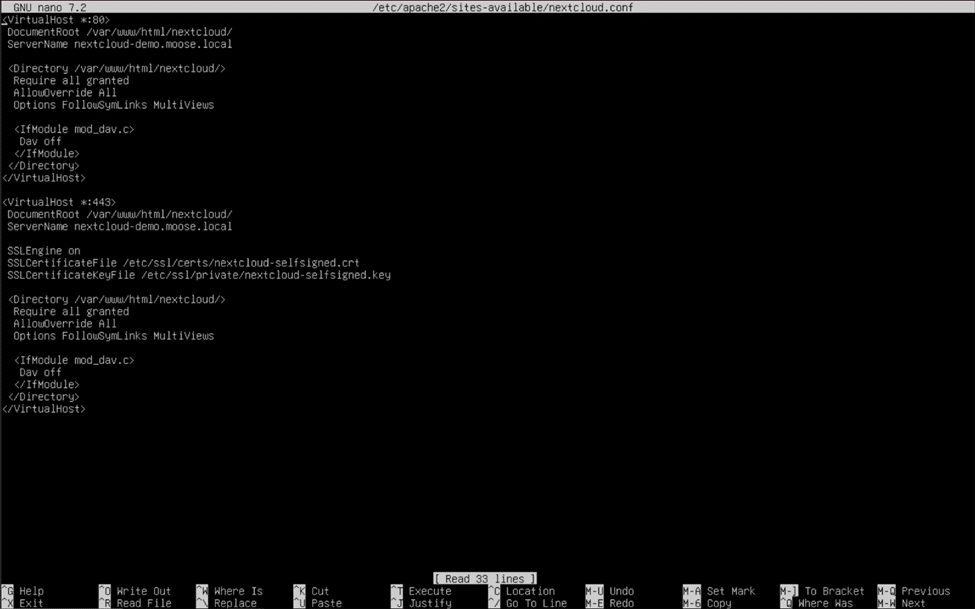
Installing the Antivirus for Files App
Even though Nextcloud can transmit data securely over HTTPS, that doesn’t mean that everything you or your users upload is safe. Whether intentional or unintentional, malware infections on web servers can cause massive damage and spread like wildfire to other systems if not taken care of quickly. For another layer of protection against bad actors on the internet, an antivirus program is a must-have for servers accessible from the internet.
ClamAV is a free and open-source antivirus suite that can be integrated with Nextcloud to scan files uploaded by users for malware. The Nextcloud app store features an app called “Antivirus for files” that uses ClamAV as a backend to scan user files and protect your server. This app can be downloaded by navigating to the “Apps” tab by clicking on your admin account’s profile picture and selecting the “Security” category.
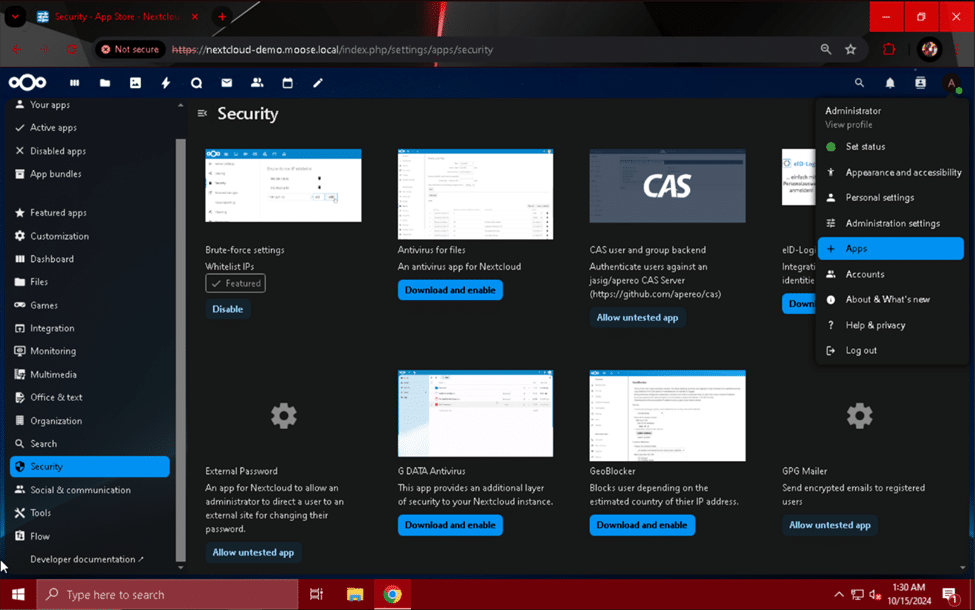 Click the “Download and enable” button on the “Antivirus for files” section to install it on your Nextcloud instance. Next, we need to install ClamAV and enable the scanner and malware signature update system. Use “sudo apt install clamav clamav-daemon” to get all of the necessary ClamAV packages.
 When the packages have been installed, run “sudo dpkg-reconfigure clamav-daemon” in the console to bring up an interactive configuration menu. We will use this to customize the scanning behavior of our ClamAV setup.
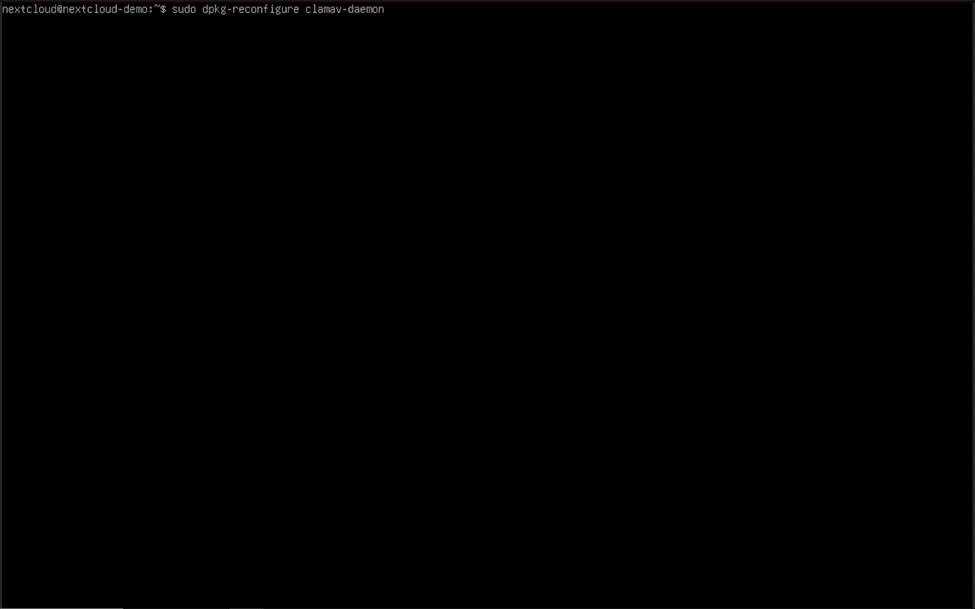 Enter the following responses to the questions listed below:
- Handle the configuration file automatically? Yes
- Socket type: UNIX
- Local (UNIX) socket clamd will listen on: /var/run/clamav/clamd.ctl
- Group owner of clamd local (UNIX) socket: clamav
- Creation mode for clamd local (UNIX) socket: 666
- Gracefully handle left-over UNIX socket files? Yes
- Do you want to enable mail scanning? No
- Do you want to enable archive scanning? No
- You may select “Yes” for this prompt, but additional configuration is required if you choose to do so. See the ClamAV documentation for more information: https://docs.clamav.net/manual/Installing/Packages.html#the-packages
- Maximum directory depth that will be allowed: 15
- Do you want the daemon to follow regular file symlinks? Yes
- Timeout for stopping the thread-scanner (seconds): 180
- Number of threads for the daemon: 2
- Subtract 2 from the number of cores/vCPUs your Nextcloud server has, and enter that number in this field.
- Number of pending connections allowed: 15
- Do you want to use the system logger? No
- Log file for clamav-daemon (enter none to disable): /var/log/clamav.log
- Do you want to log time information with each message? No
- If a high amount of drive writes is not detrimental to your system, choose “Yes” instead.
- Do you want to enable log rotation? Yes
- Delay in seconds between daemon self checks: 3600
- User to run clamav-daemon as: clamav
- Groups for clamav-daemon (space-separated): www-data
- Do you want to load bytecode from the database? Yes
- Security level to apply to the bytecode: TrustSigned
- Bytecode execution timeout in milliseconds: 60000
Whew! That was a lot of configuring! Luckily for us, we only have to do it once. Use “systemctl enable clamav-freshclam” and “systemctl enable clamav-daemon” to allow ClamAV to start after the system has booted, and we can start configuring the Nextcloud “Antivirus for files” app.
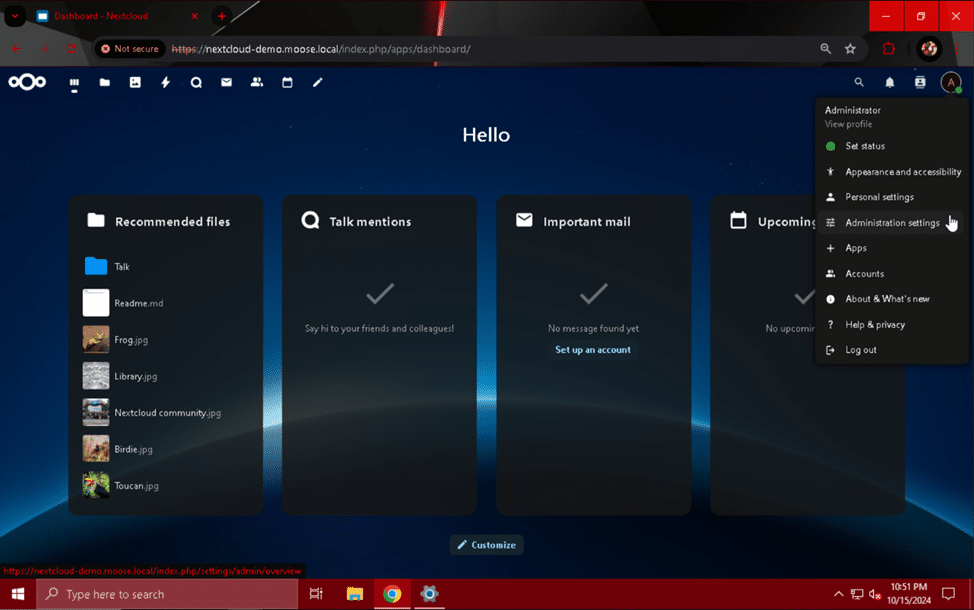
Using a web browser on another computer connected to the same network and subnet as your Nextcloud server, log into Nextcloud and click on your admin user’s profile picture. Click the “Administration settings” option from the drop-down menu, and select the “Security” section after the page has finished loading.
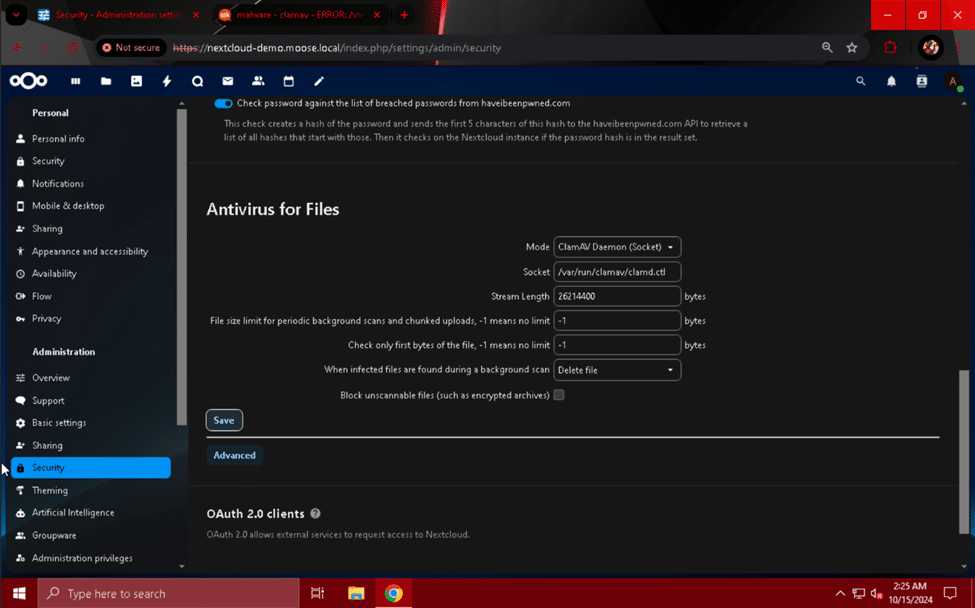
 Scroll down to the “Antivirus for Files” section, and change the “Mode” field to “ClamAV Daemon (Socket)”. Change the “When infected files are found during a background scan” field to “Delete file”, and hit the “Save” button. ClamAV will periodically scan files uploaded to Nextcloud for malware and delete files that match known malware signatures.
Nextcloud Integrations and General Improvements
Now that we have built a functional and secure cloud server for storing data, we can expand its capabilities and add new features. Let’s start by taking care of some low-hanging fruit: connecting Nextcloud to an email server and setting the default phone region.
Connecting an Email Server
To send email notifications, activity alerts, and password reset links (for non-LDAP users), Nextcloud needs to be connected to a working email server. If you self-host your email server, setup is as easy as entering the correct server addressing and authentication information. You can also use a third-party email server with an email address you already have, such as Gmail’s SMTP server.
Navigate to your Nextcloud server’s fully qualified domain name or IP address using a web browser on a computer on the same network and subnet as your server. Click on your admin user’s profile picture and select “Administration settings” from the drop-down menu.
 On the “Administration settings” page, select the “Basic settings” section from the left side and scroll down to the “Email server” module.
From this page, you can configure your email server’s encryption, addressing, and authentication settings. You can choose a few encryption and authentication methods to fit your security or compatibility needs.
To use Gmail’s SMTP server with a Google account you already own, first navigate to https://myaccount.google.com/apppasswords and create an app password by following the instructions on the site. Give your app password a name associated with your Nextcloud server, and store your password in a secure location. Note that the password is displayed with spaces every four characters, but does not actually contain these spaces. App passwords are strings of sixteen continuous letters.
Fill out the following email server fields as listed below:
- Send mode: SMTP
- Encryption: None/STARTTLS
- From address: johndoe @ storagereview.com
- Enter your Gmail account address here.
- Server address: smtp.gmail.com : 587
- Authentication: Yes (Check box)
- Credentials: [email protected] apppasswordhere
- Enter your Gmail account address and the app password you created here.
When finished, click the “Save” button and use the “Send email” button to verify your configuration is valid.
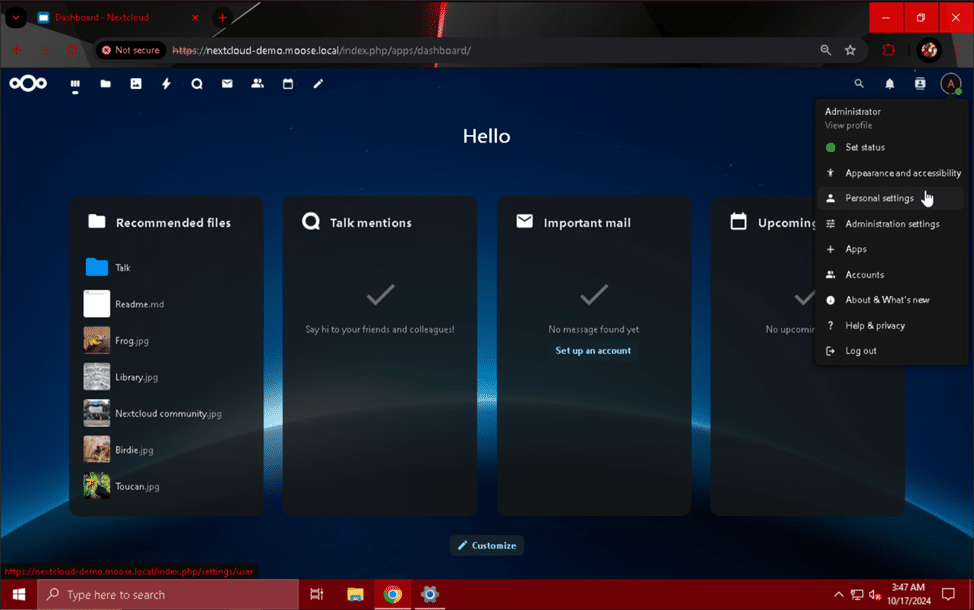
If you have not already set an email address for the admin user account you are using, you will receive a warning asking you to do so. This can be easily solved by clicking on your admin user’s profile picture, selecting “Personal settings” from the drop-down menu, and typing your email address in the “Email” field. Once you have finished, return to the “Email server” module under “Basic settings” in the “Administration settings” page and re-enter the configuration if necessary.
Setting the Default Phone Region
A very quick but rather helpful change we can make to make Nextcloud handle phone numbers better is setting a default phone region for the instance. When users fill out their profile in the “Personal info” settings found under “Personal settings”, they are asked to optionally include a phone number for contact purposes. Without a default phone region, Nextcloud forces users to enter a country code with this number. Setting the default phone region allows users to exclude this prefix.
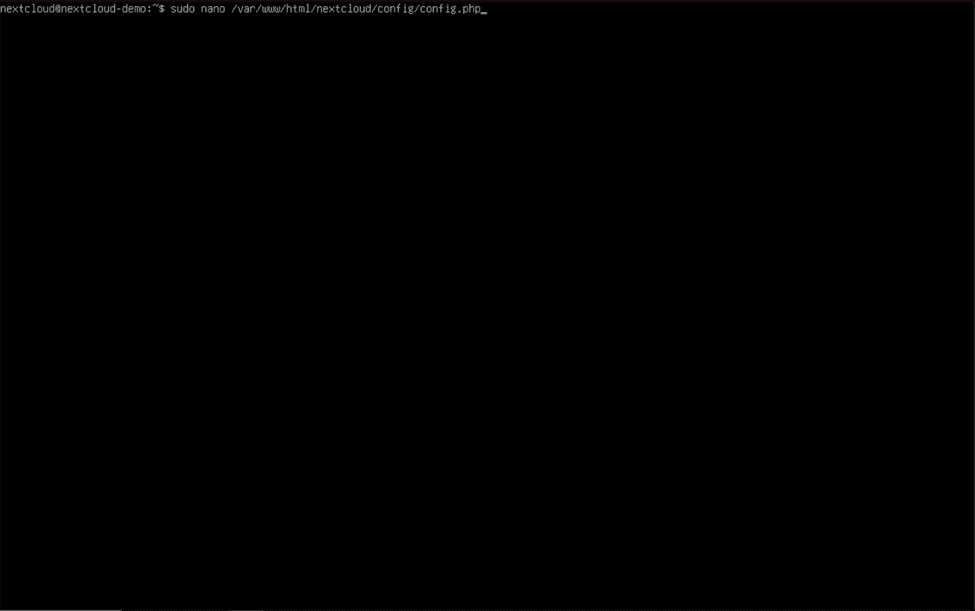
In the Nextcloud server console, use “sudo nano /var/www/html/nextcloud/config/config.php” to edit the Nextcloud site PHP configuration file.
 Add the following line to your PHP configuration file, keeping consistent with the spacing pattern created by previous lines and inserting before the ending “);” bracket:
'default_phone_region' => 'US',
-
- Your country’s unique ISO 3166-1 code used for this field can be found on the following Wikipedia page: https://en.wikipedia.org/wiki/ISO_3166-1_alpha-2
For security reasons, you should not show anyone the contents of your Nextcloud instance’s “config.php” file. It contains sensitive information such as passwords and system secrets that only you or your system administrator(s) should know. After you have finished adding the default phone region line to your configuration file, save the new contents by holding control (ctrl) and tapping “O”, and then holding control and tapping “X” to exit. To apply the changes, enter “sudo systemctl restart apache2” into the console and hit enter.

Setting Up a Maintenance Window
Another small improvement we can make to the Nextcloud site’s PHP configuration file is setting a maintenance window for the server to perform more intensive and possibly user-impacting tasks. The window is set using UTC time, so you will need to convert your desired maintenance window start time into an equivalent UTC time (expressed as an integer between 1 and 24). The maintenance window lasts for four hours, so a maintenance window that starts at 3:00 AM UTC will end at 7:00 AM UTC.
Use “sudo nano /var/www/html/nextcloud/config/config.php” to begin editing the PHP configuration file once more, and add this line before the ending “);” bracket, following spacing conventions used by the lines already in the file:
'maintenance_window_start' => 1,
-
- Remember to replace “1” with your desired maintenance window start time translated to UTC time.
 After saving the file using control (ctrl) + “O” and control (ctrl) + “X”, apply the maintenance window by using “sudo systemctl restart apache2”.
LDAP/Active Directory Server Integration
If you plan to give multiple users access to your Nextcloud instance, one of the most powerful features you can add to Nextcloud is the ability to connect to and authenticate an LDAP or Active Directory server. Many organizations and homelabbers use Active Directory or LDAP to organize and control user access to network resources in a centralized manner, and Nextcloud is no exception. With the “LDAP user and group backend” app, users from your Active Directory domain or LDAP server can be imported into your Nextcloud server and log in using their username or email address and their password. This feature becomes even more powerful when combined with external storage (like an SMB share on a NAS) providing individual ‘home’ folders for users with permissions specific to that user.
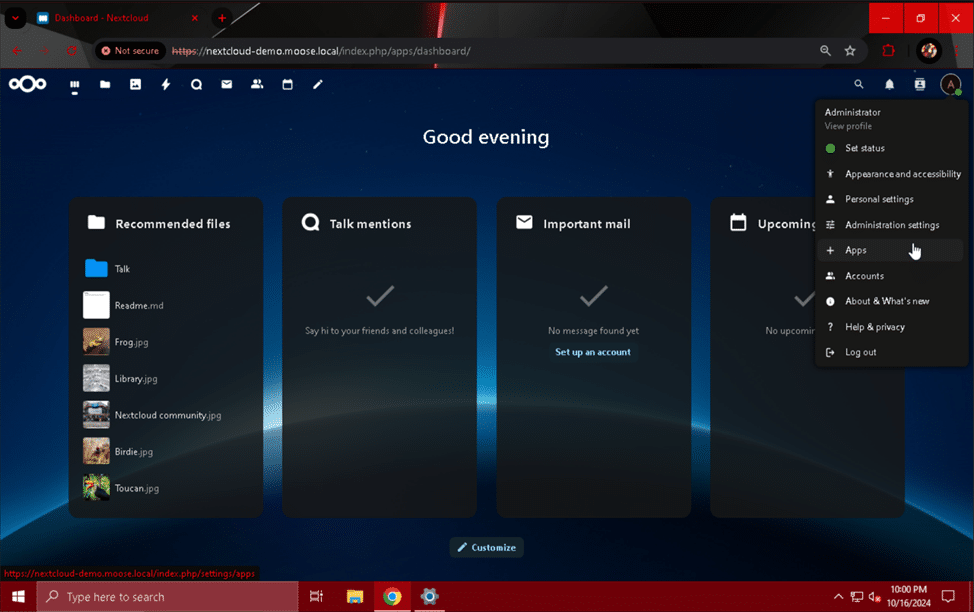
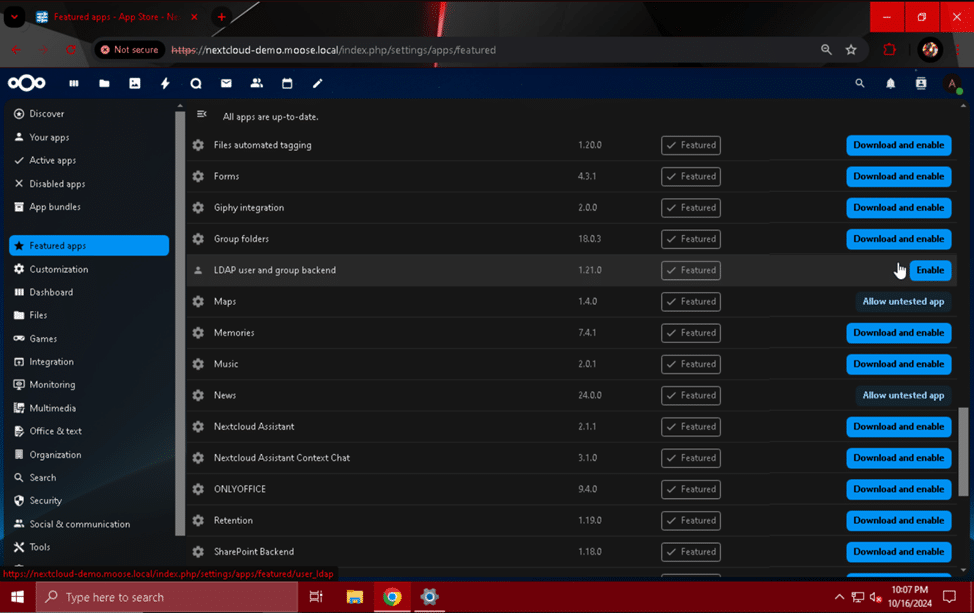
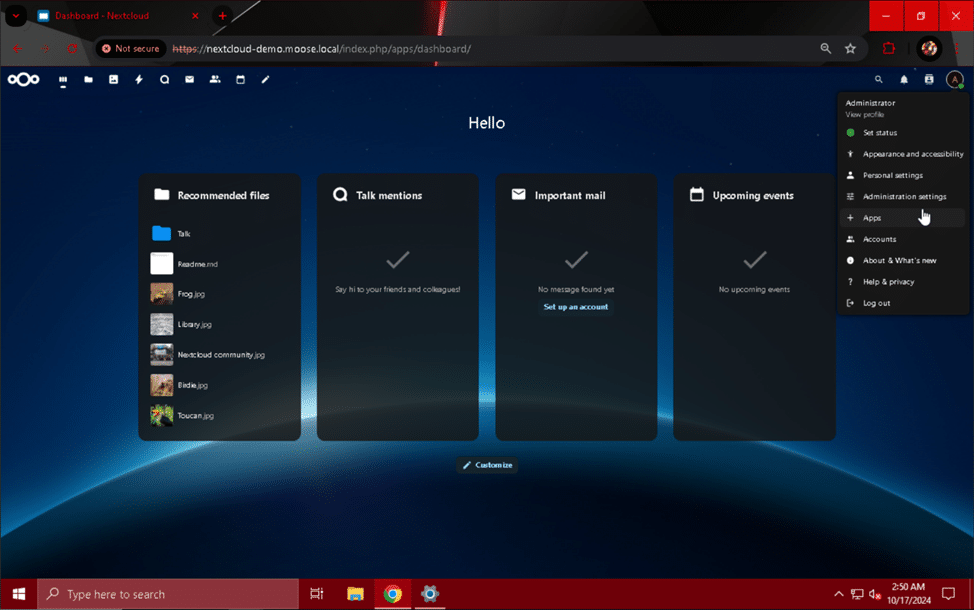
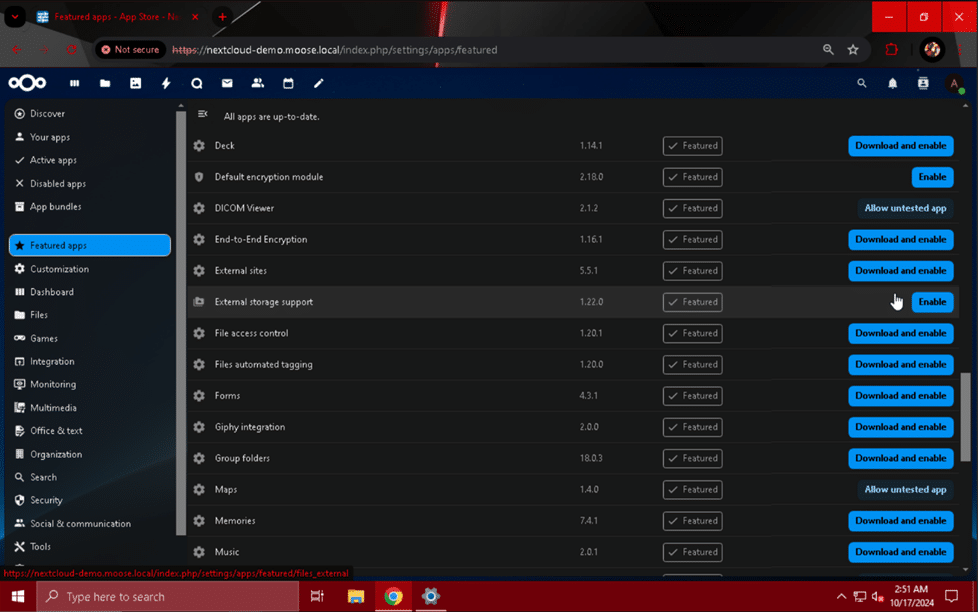
To install the “LDAP user and group backend” app, first click the profile picture when logged in to the Nextcloud web page with your admin user account. Select “Apps” from the drop-down menu that appears, and click on the “Featured apps” module. Scroll down until you find the “LDAP user and group backend” app, and click the “Enable” button.
 Now that the app has been enabled, we need to connect Nextcloud to an LDAP server. Make sure you have an account ready to authorize this connection. Typically a service account specifically created for this connection is recommended, but any Active Directory or LDAP account with the ability to search the directory can be used. Understand that although this example will use an the built in domain “Administrator” account on an Active Directory domain, this is not a safe practice. If the Nextcloud server is compromised and the credentials to the “Administrator” account are stolen, an attacker will have full permissions to read, modify, and even delete any object in the domain.
Navigate to the “Administration settings” page once more by clicking on your admin user’s profile picture and selecting it from the drop-down menu. Click on the “LDAP/AD integration module to get started.

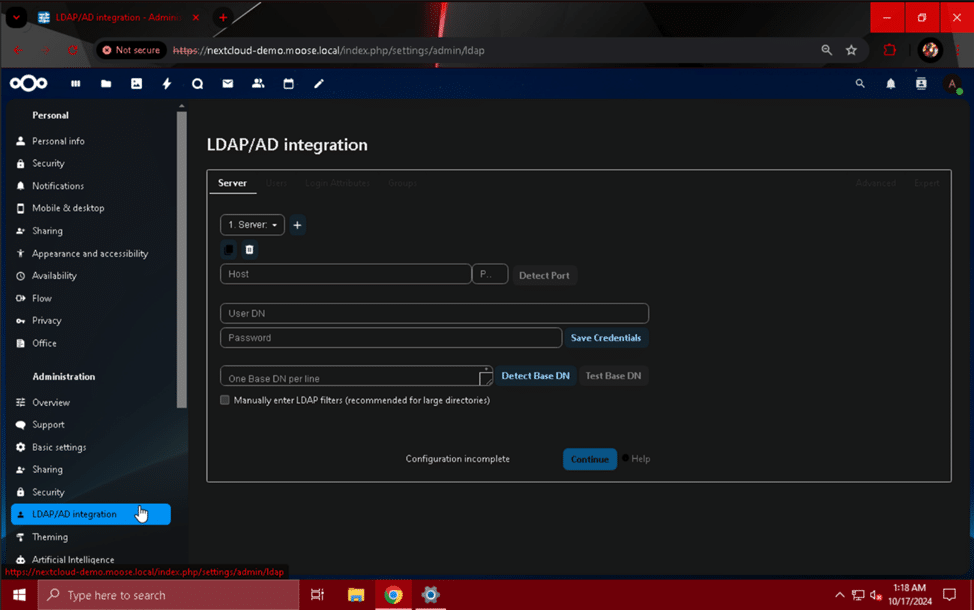 On this page, begin filling out the required information for your LDAP/Active Directory server:
- Host: 192.168.1.102
- Replace with the IP address/hostname of your LDAP server or Active Directory domain controller.
- Port: 389
- If you are using Active Directory, use port 389. If you are using another type of LDAP server or have customized the port your AD server listens to for LDAP requests, enter the specific number here.
- User DN: CN=Administrator,CN=Users,DC=moose,DC=local
- Enter the distinguished name for the account being used to connect Nextcloud to your LDAP/AD server. If using Active Directory, this can be easily found by running this command using a CMD window, with “Administrator” replaced with the username of the account you are using for the connection:
- dsquery user -name “Administrator”
- Click the “Save Credentials” button after filling out this field.
- Enter the distinguished name for the account being used to connect Nextcloud to your LDAP/AD server. If using Active Directory, this can be easily found by running this command using a CMD window, with “Administrator” replaced with the username of the account you are using for the connection:
- One Base DN per line: DC=moose,DC=local
- Click the “Detect Base DN” button after you have saved the previous credentials to automatically determine the base DN for the LDAP/AD server.
- Optionally, click the “Test Base DN” button to check if the configuration so far is valid.
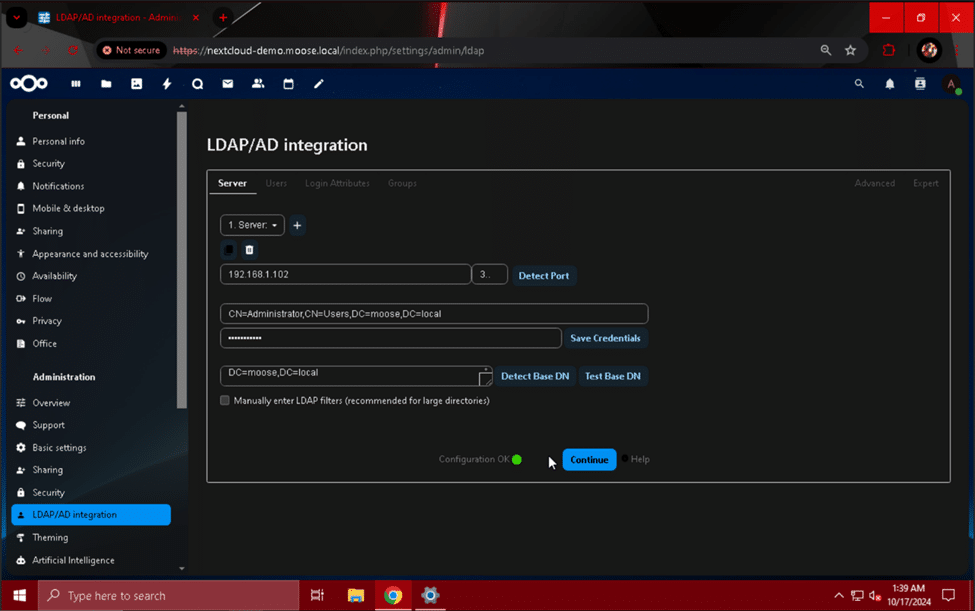 After completing the first page of the “LDAP/AD integration” module, hit the button labeled “Continue”, and take a second to view and study the “Users” section.
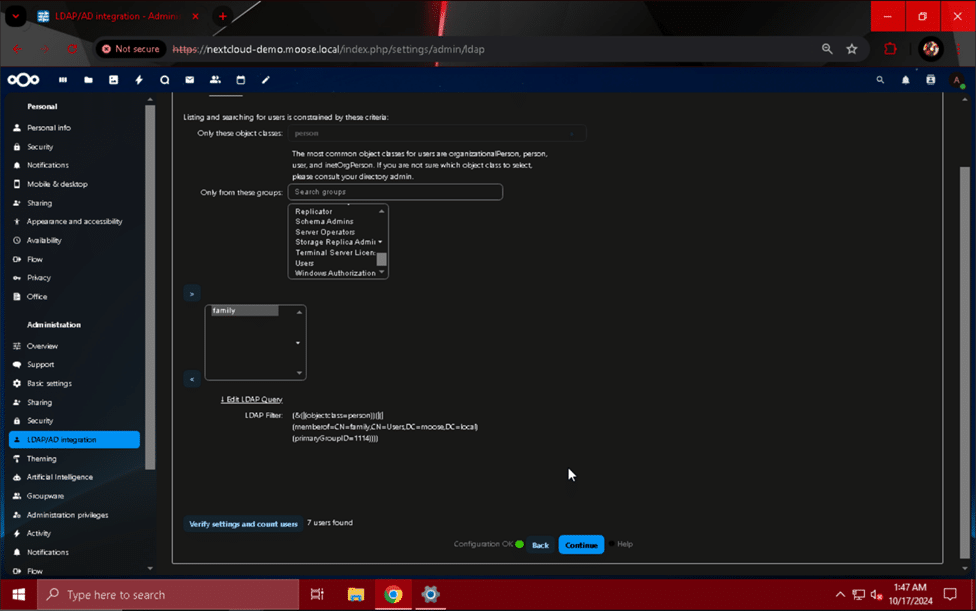
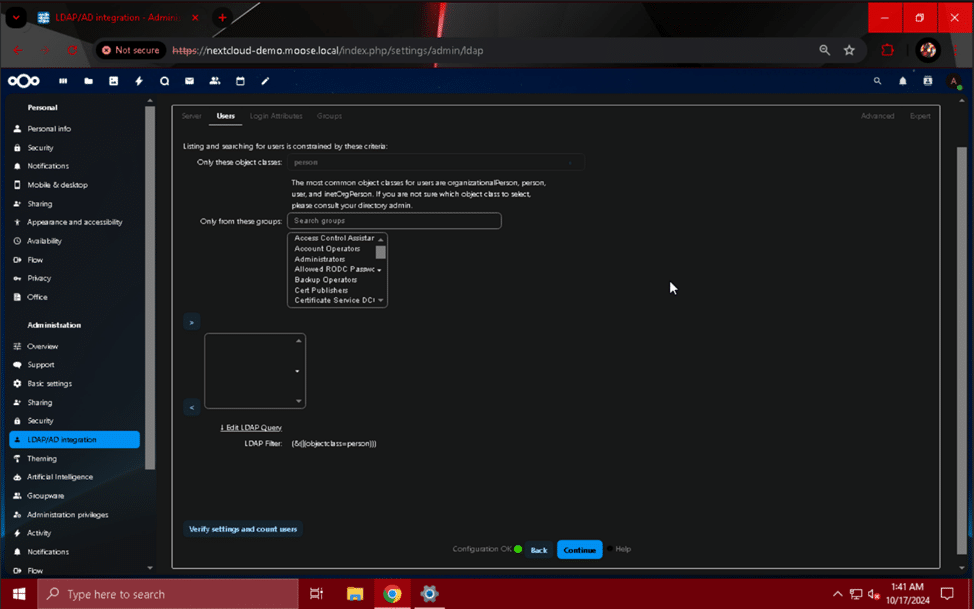 Although the layout of the page may seem confusing at first, its function is to filter the users available for login on the Nextcloud server by attributes like object classes and groups. We recommend creating a unique group for users who will log in to the Nextcloud server so that filtering can be done by that group’s membership. Select the desired object classes and/or groups you wish to give access, and click the “>” button to add the group to the filter. This example uses a group named “family”. Click the “Verify settings and count users” button to display a message showing how many users fit the description you have entered. If the count seems incorrect, double check your object class and group filters.
 Once you have the correct number of users, hit the “Continue” button to proceed to the “Login Attributes” section. Check the boxes for the “LDAP/AD Username:” and “LDAP/AD Email Address” fields, and verify that the login attribute is correct by entering a username and email address (if desired) into the “Test Loginname” box and clicking “Verify settings”.
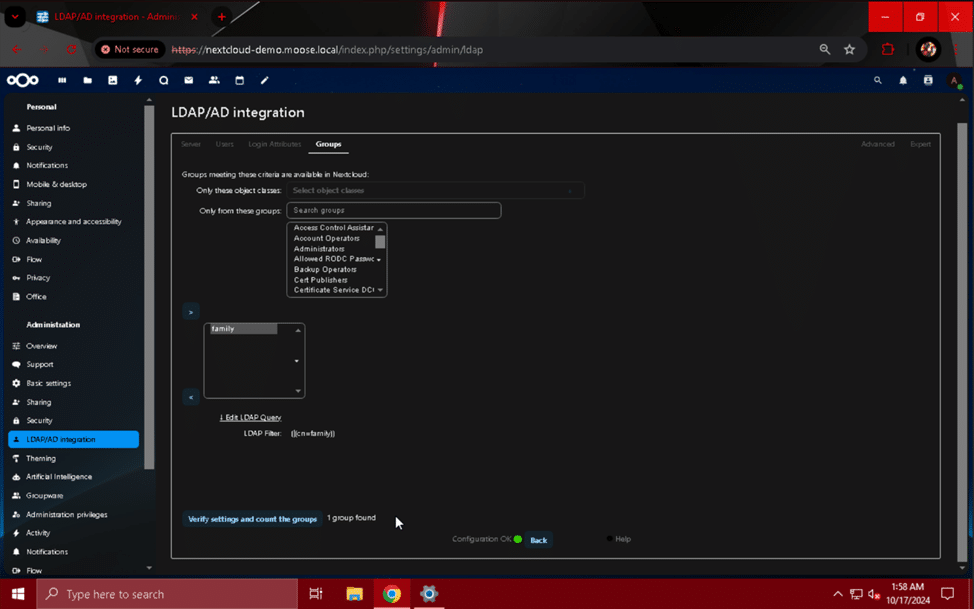
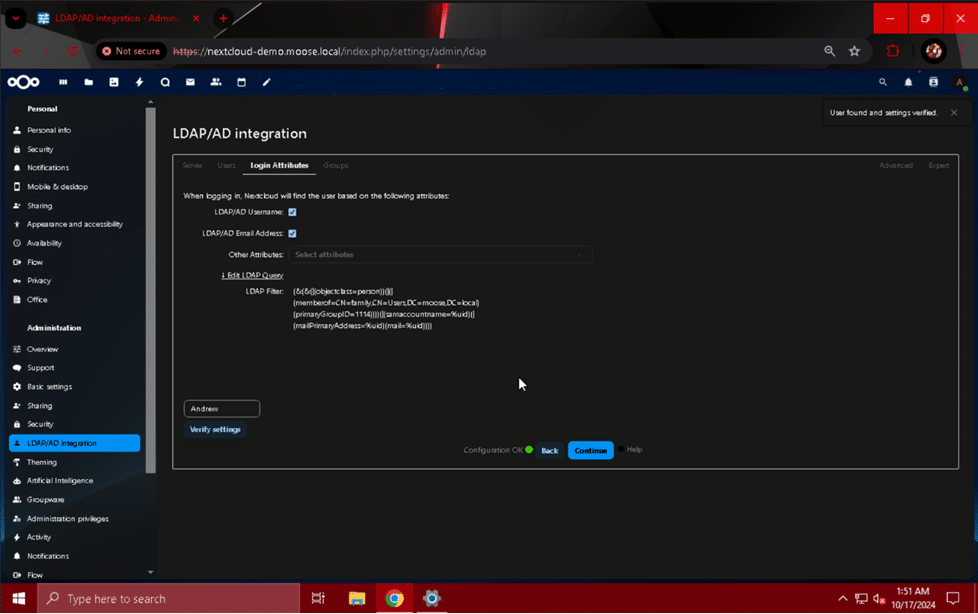 If the username/email address can be used to log in, a notification will appear stating “User found and settings verified”. Hit the “Continue” button one last time to move on to the final page, “Groups”. Similarly to the “Users” page, the “Groups” section narrows down who can log in to the Nextcloud server using object class and group criteria. Make the same selections you made on the “Users” page, or reduce the number of users that can log in by entering more specific criteria here in the “Search object classes” and “Search groups” field. This example selects the “family” group from the list on the page, and uses the “>” button to limit access to that group only. Finally, click “Verify settings and count the groups” to display the number of groups valid for login.
 You have now granted the ability to log in to the Nextcloud server for the LDAP or Active Directory groups selected in the previous steps. Click the profile picture of your admin user, and select “Log out”. When prompted for a username and password to log in again, test the login capability for one of the users you have given access. If the user is unable to log in, revisit the “Users” and “Groups” section of this page to review your criteria and troubleshoot the error.
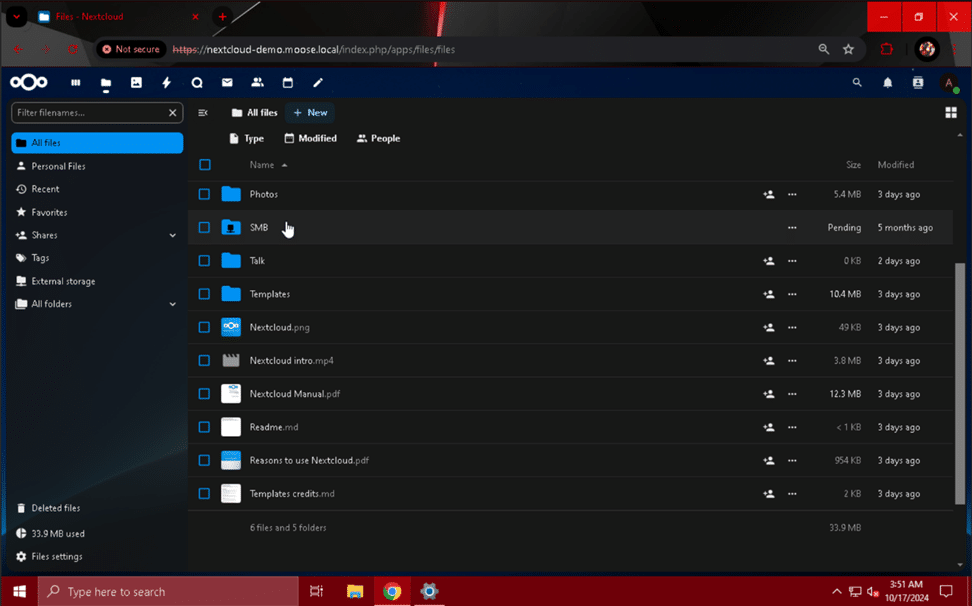
External Storage Integration
Another powerful addition to your Nextcloud server is the ability to connect to and use external storage pools. Placing user files directly on to the server itself can lead to problems related to managing the server’s storage and having to constantly increase capacity to meet user demand. If you are not constantly vigilant in enforcing quotas and removing unnecessary data created by users, it can lead to frustration and unexpected downtime. Separation of the web server and storage components of a Nextcloud setup is highly recommended and critical when aiming to create a scalable cloud storage system and pleasant user experience.
The “External storage support” app for Nextcloud enables you to mount folders from the following storage types:
- Amazon S3
- FTP
- Nextcloud
- Yes that’s right, you can connect to and use storage available on other Nextcloud servers!
- OpenStack Object Storage
- SFTP
- SMB/CIFS
- WebDAV
As you can see, there are several different choices for connecting Nextcloud to external storage arrays, clouds, and other systems. As an example, we will connect a Nextcloud instance to an SMB share that controls access to different folders using permissions granted to users imported from the Active Directory domain we connected to previously.
To enable the “External storage support” app, click on your admin user’s profile picture when logged in to the site, and select “Apps”. Navigate to “Featured apps” once more, and find the module labeled “External storage support”. Click the “Enable” button to make the application available.
 When the app has been enabled, you will be able to add external storage by going into “Administration settings” and clicking the “External storage” module. From this page, you can connect to external storage by selecting the type of storage from the drop-down menu and filling in the configuration details.
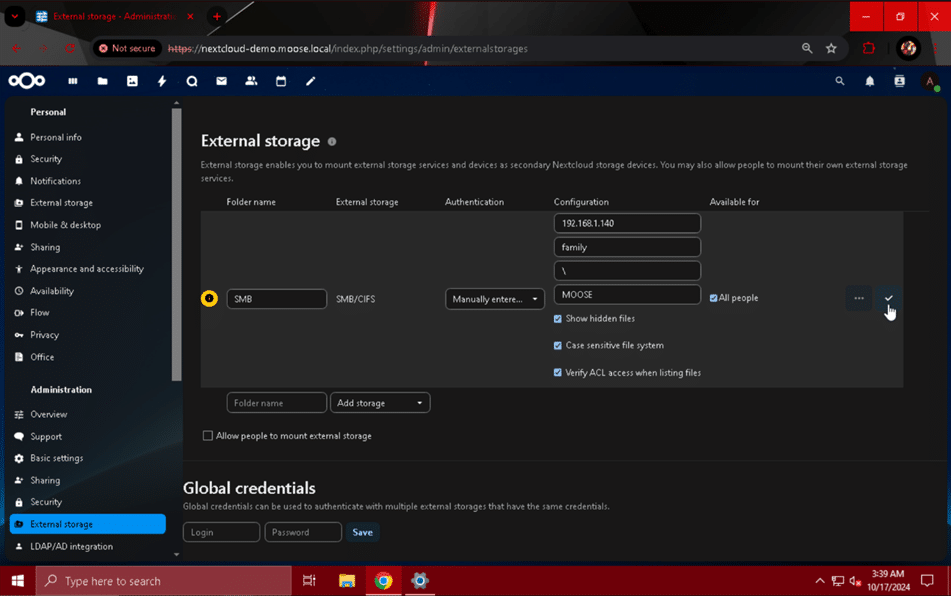
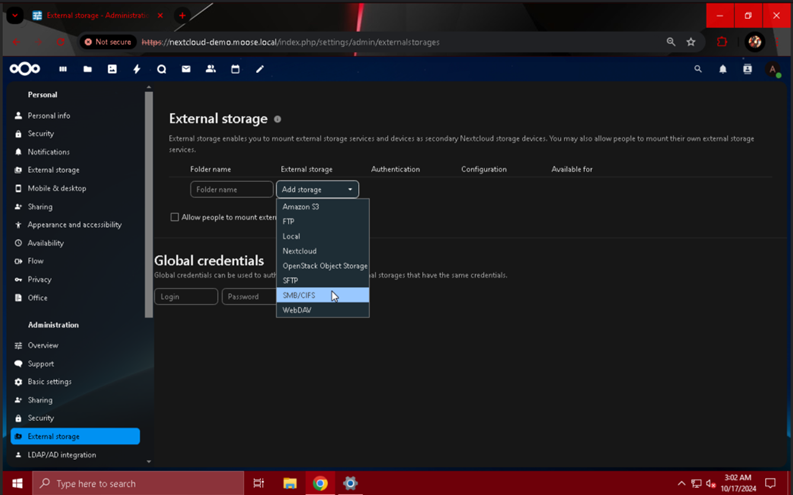 To add an SMB share, select the “SMB/CIFS” option from list, and fill out the configuration details as follows:
- Authentication: Manually entered, store in database
- To have users manually enter their own username and password for authentication, choose this option. To use a set of static credentials to give users access to an SMB share, choose “Login and password”. Otherwise, select the option that best meets your needs from the drop-down menu.
- Folder name: family
- This name can be set to whatever you would like to use to describe the storage you are mounting. Examples: “SMB” or the name of the share you are mounting.
- Host: 192.168.1.140
- Replace this value with the IP address or FQDN of the server hosting the SMB share you want to connect to.
- Share: family
- Replace this value with the name of the share you would like to mount that is present on the server entered into the “Host” field.
- Remote subfolder: \
- To mount the top level folder of the share (the shared folder itself), use “\”. Otherwise, enter the path to a subfolder inside of the desired share in this fashion:
- \subfolder\another_subfolder\yet_another_subfolder
- To mount the top level folder of the share (the shared folder itself), use “\”. Otherwise, enter the path to a subfolder inside of the desired share in this fashion:
- Domain: MOOSE
- Replace this value with the NetBIOS name for a domain if access to the share is controlled using LDAP or Active Directory. This field is not required if the share is not controlled by an LDAP/AD server.
- Show hidden files: Check
- Check this box if users should be able to view hidden files (those that begin with a “.” character.
- Case sensitive file system: Check
- Verify ACL access when listing files: Check
- This option is extremely important for access control to function properly. Otherwise, if two users have the same share mounted and have folders configured so that the other has no access, they will still be able to view each other’s files.
- All people: Check
- Check this option if you would like all Nextcloud users to be able to enter credentials for and connect to the SMB share, otherwise choose a local group on the Nextcloud instance to make the share available to using the field below.
- Unfortunately, at the time of writing, it is not possible to select an LDAP/Active Directory group using the field below this option when not selected.
- Check this option if you would like all Nextcloud users to be able to enter credentials for and connect to the SMB share, otherwise choose a local group on the Nextcloud instance to make the share available to using the field below.
After you have finished entering the SMB share configuration details specific to your setup, click the check mark button to save it and make it available to users.
 If you want users to be able to mount their own external storage, click the check mark underneath the storage mounting section of the page. If you choose to enable this option, you can additionally restrict the types of storage available for self-mounting.
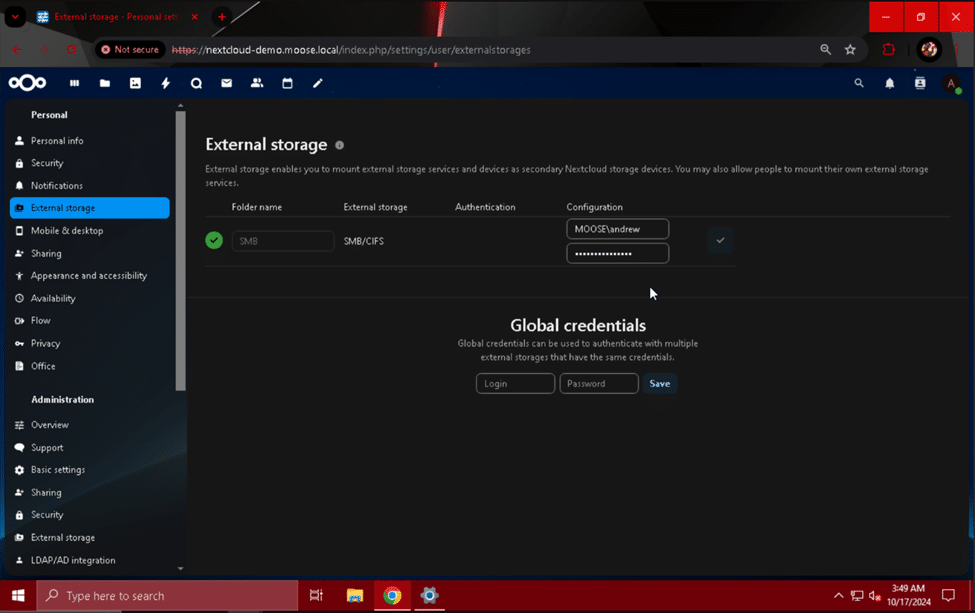
To finish setting up the SMB share, users must navigate to the “External storage” module under “Personal settings” after clicking on their profile picture and selecting it from the drop-down menu.
 On this page, users can enter their username and password and click the check mark button to unlock the SMB share for storing and retrieving files.
 Once the user has entered their credentials, the share can be accessed by clicking the folder icon at the top of the Nextcloud site menu and browsing through the list of user folders and files.
Making Nextcloud into a Real Web Server
Now your feature-rich Nextcloud instance is almost ready to become a publicly available and powerful web server! Before we open the floodgates, we need to make sure the server can handle intensive requests from multiple users accessing files. We’ve already increased performance by making several key edits to the system’s PHP configuration, and adding support for memory caching can amplify that.
Setting Up Memory Caching – APCu
ACPu is a PHP cache that helps speed up the access times of frequently used objects. We will use it as the first cache for our Nextcloud instance. Before enabling the APCu cache, we need to make a few changes to our system’s “php.ini” file.
Use “sudo nano /etc/php/8.3/apache2/php.ini” to begin editing the file. Scroll to the bottom of the file by holding the down arrow key for an extended period of time. In a new line at the bottom of the file, add the following lines:
apc.enable_cli=1
apc.shm_size=128M
 Adding these two lines will enable the system to use APCu as a cache, and set the cache size to 128 megabytes rather than the default value of 32. When finished, press control (ctrl) + “O” and control (ctrl) + “X” to save the file and exit nano.
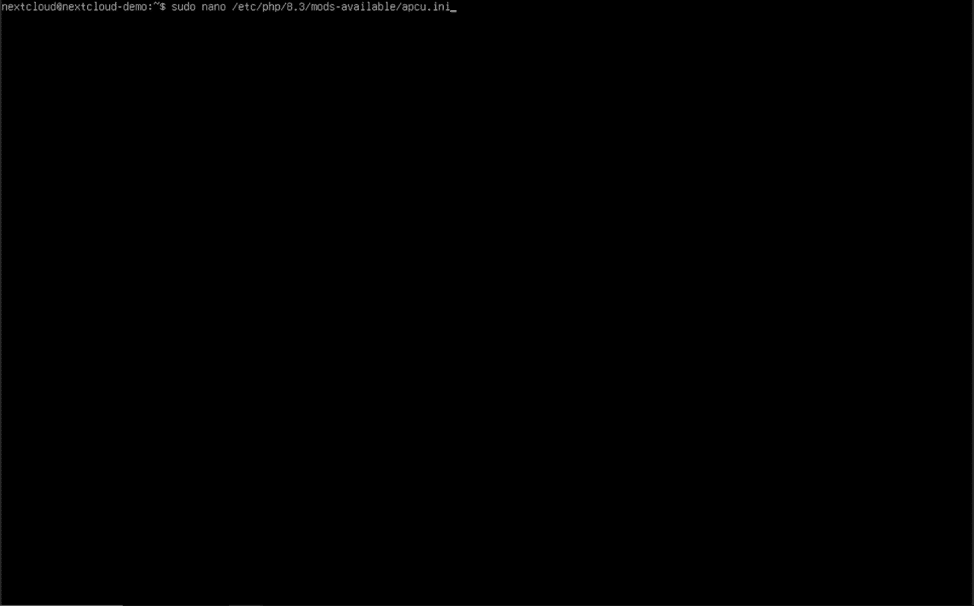
To finish turning on the APCu cache, use “sudo nano /etc/php/8.3/mods-available/apcu.ini” and add “apc.enable_cli=1” to the bottom of the configuration file like we did for the “php.ini” file. Use control (ctrl) + “O” and control (ctrl) + “X” again to save and exit the configuration file.
 We have enabled PHP to use APCu, but now we need to instruct Nextcloud to utilize it.
Type “sudo nano /var/www/html/nextcloud/config/config.php” in the console, and hit enter. In the Nextcloud PHP configuration file, we will add one line to make Nextcloud use APCu for local memory caching:
'memcache.local' => '\OC\Memcache\APCu',
Put this line before the ending “);” bracket, following the spacing conventions of the previous configuration file lines. Once again, hold control (ctrl) and press “O” and then control (ctrl) and “X” to save and exit.
 Once the PHP configuration file has been saved, use “sudo systemctl restart apache2” to restart the Apache web server and apply your changes.
 If you followed all of the steps to properly set up APCu for local memory caching, the performance of your Nextcloud server should be increased substantially! Let’s take things one step further and configure Redis for some more memory caching goodness.
Setting Up Memory Caching – Redis
You may be wondering, “Why does my web server need two different memory caches? Isn’t one enough?” The answer to this question is actually quite simple. Just like every tool in a shop has its own use, so do APCu and Redis. APCu is an excellent local memory cache, and significantly outperforms the latter in this category, while Redis shines in distributed caching and transactional file locking.
To get started with Redis, we will edit the system Redis configuration file by entering
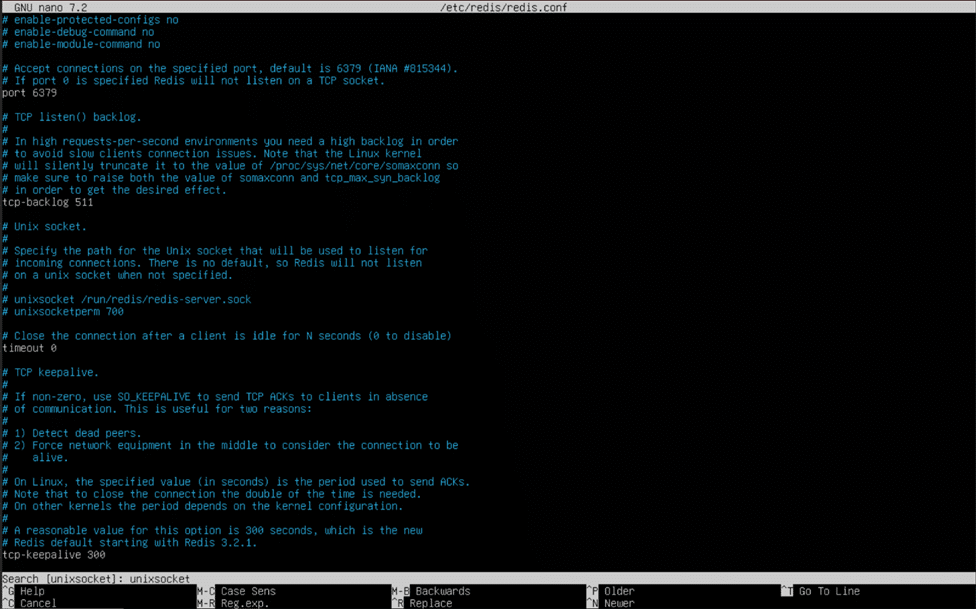
“sudo nano /etc/redis/redis.conf” into the console and hitting enter. By default, the Redis service listens to a TCP port for caching and transaction file locking traffic, but for a single server setup, a Unix socket is the preferred method of communication. Using a TCP port would make sense if we are providing the Redis service over a network, but a Unix socket is far more efficient for communications between the Redis and Nextcloud web server processes.

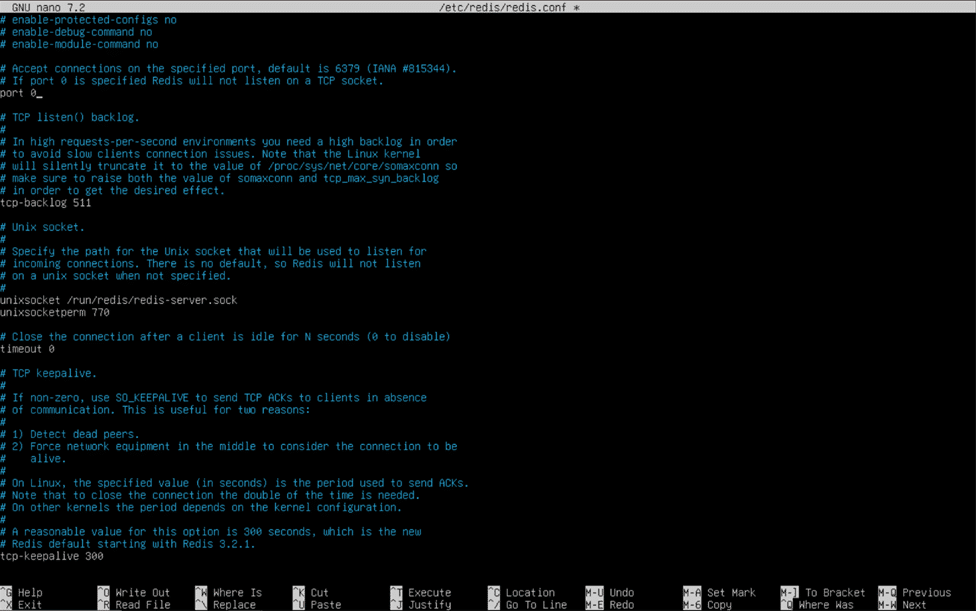
Once you have entered nano, hold the control (ctrl) key and press “W” to activate nano’s search function. Type “unixsocket” into the search bar and hit enter, and nano will jump to the “Unix socket” configuration section of the file. In the “Unix socket” section, remove the “#” characters and empty spaces in front of “unixsocket /run/redis/redis-server.sock” and “unixsocketperm 700”. Change the “700” to “770”, and scroll up until you find the line that reads “port 6379”. We will change this value to “0”, effectively telling the Redis server not to listen on a TCP port for connections. View the pictures below to validate your configuration file before using control (ctrl) + “O” and control (ctrl) + “X” to save and exit the file.
With these modifications made to the Redis system configuration file, we can now specify that we want to use Redis for distributed caching and transactional file locking in the Nextcloud PHP configuration file. Open this file in nano by using “sudo nano /var/www/html/nextcloud/config/config.php”.
 At the bottom of the Nextcloud PHP configuration file before the ending “);” bracket, add these lines, paying close attention to spacing and commas:
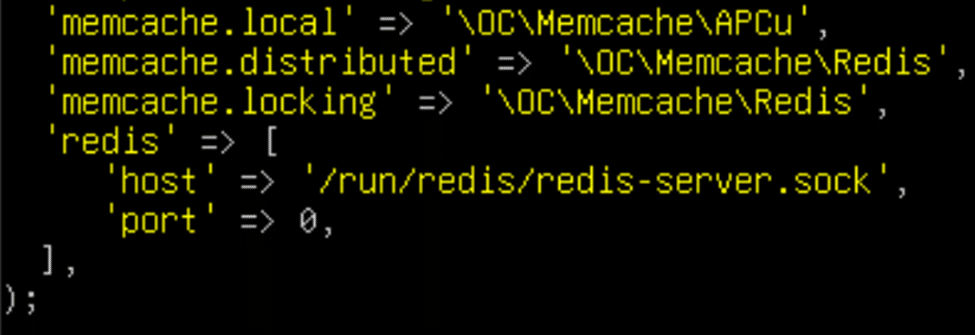
'memcache.distributed' => '\OC\Memcache\Redis',
'memcache.locking' => '\OC\Memcache\Redis',
'redis' => [
'host' => '/run/redis/redis-server.sock',
'port' => 0,
],
If you entered the lines correctly, the memory caching section of your PHP configuration file should look like this snippet:
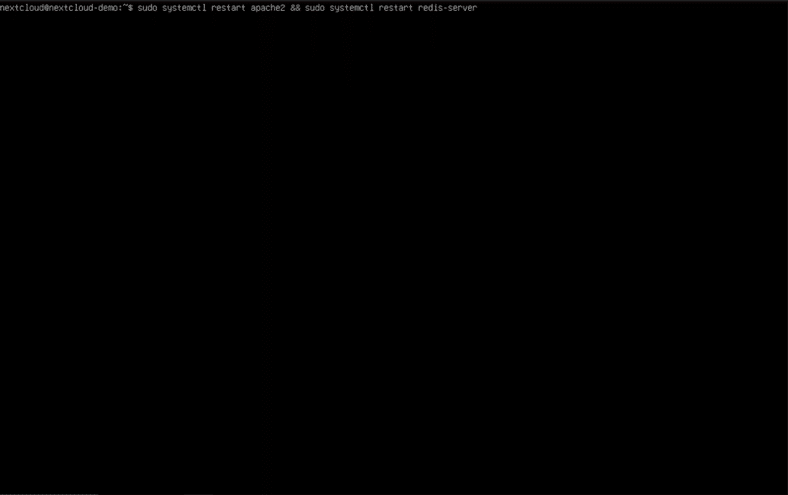
 Before restarting the Apache web server and Redis to apply the changes, use “sudo usermod -a -G redis www-data” to add the “www-data” user to the “redis” group, granting the web server access to the Redis Unix socket. Finally, type “sudo systemctl restart apache2 && sudo systemctl restart redis-server” into the console and hit enter to apply the changes and restart the affected services.

Exposing Nextcloud to the Internet
We are so close to being done! The last step in deploying your Nextcloud server is making it accessible to the public internet. This step requires you to configure port forwarding on your router, and might involve a bit of research on your part. Use the catalog of port forwarding guides at https://portforward.com/router.htm to try and find your router’s manufacturer and read through the solution. If you cannot find your router manufacturer on the list or are using an enterprise/homemade router, you may have to do some web searches until you find out the proper method.
When configuring port forwarding, forward ports 80 and 443 from the private IP address of your Nextcloud server (which can be found using the “hostname -I” command) to the router’s public IP address. If your internet service provider does not provide you with a public IP address, you have to use a service like Cloudflare’s Tunnels, which allow you create a secure tunnel between your web server and Cloudflare’s servers, which forward traffic from website visitors back to you.
If you own a domain or use a hostname from a hostname provider, make sure your DNS records are set to point to your server’s public IP address. Optionally, some service providers offer the ability to completely obfuscate your IP address from website visitors and securely transport that data from their servers back to yours.
Maintaining and Upgrading Nextcloud
Making sure that your Nextcloud server has the latest updates and security patches is an important part of keeping your cloud storage fast and secure. Before we’re done, let’s go over a few ways to keep your server running like new!
Post-Deployment Commands
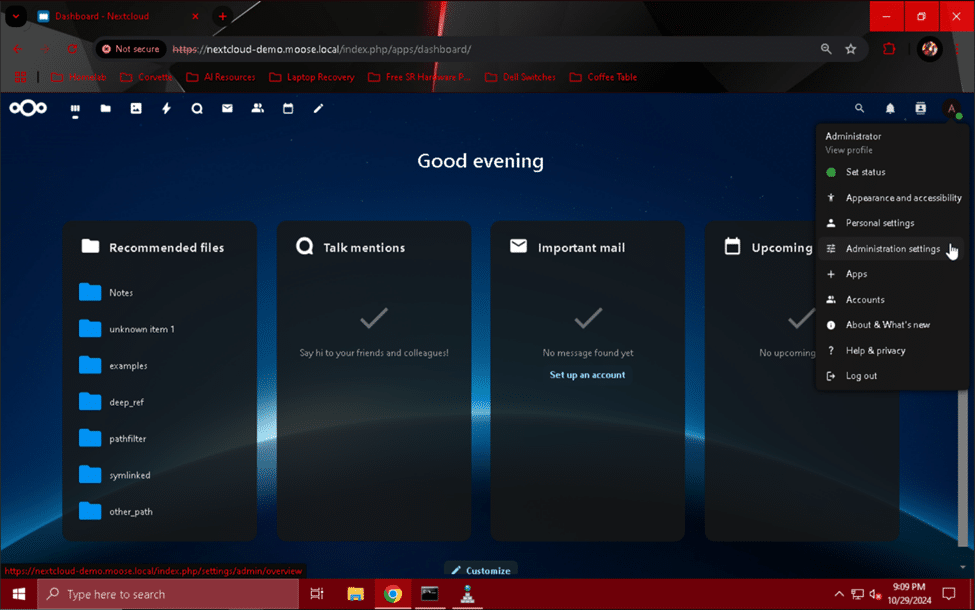
After deploying your Nextcloud server, you may have noticed some warnings on the “Overview” page after clicking on “Administration settings” in the profile picture menu. Occasionally, these warnings also include commands that can be run to immediately fix the problem the warning is about. Typically, the commands need to be run as the “www-data” user and run from the “/var/www/html/nextcloud” directory. Type “cd /var/www/html/nextcloud” and hit enter to change the current working directory to the appropriate folder, and insert “sudo -u www-data” before each of the commands.
We can run a few of these commands now to fix those warnings before they become problems:
sudo -u www-data php occ db:add-missing columns
sudo -u www-data php occ db:add-missing-indices
sudo -u www-data php occ db:add-missing-primary-keys
These commands will make sure that the database is set up correctly and isn’t missing any critical information. Happy database, happy life! Right?
Keeping Ubuntu Server Up-to-Date
Regularly updating your server’s operating system and software packages is important to keep it safe and speedy. Find a range of time when your server’s usage is low every week or two, and run the following commands:
sudo apt update && sudo apt upgrade -y
sudo reboot
These commands will upgrade the server’s operating system and software packages, and reboot the server so that the changes are applied when the it starts up again.
Upgrading Nextcloud
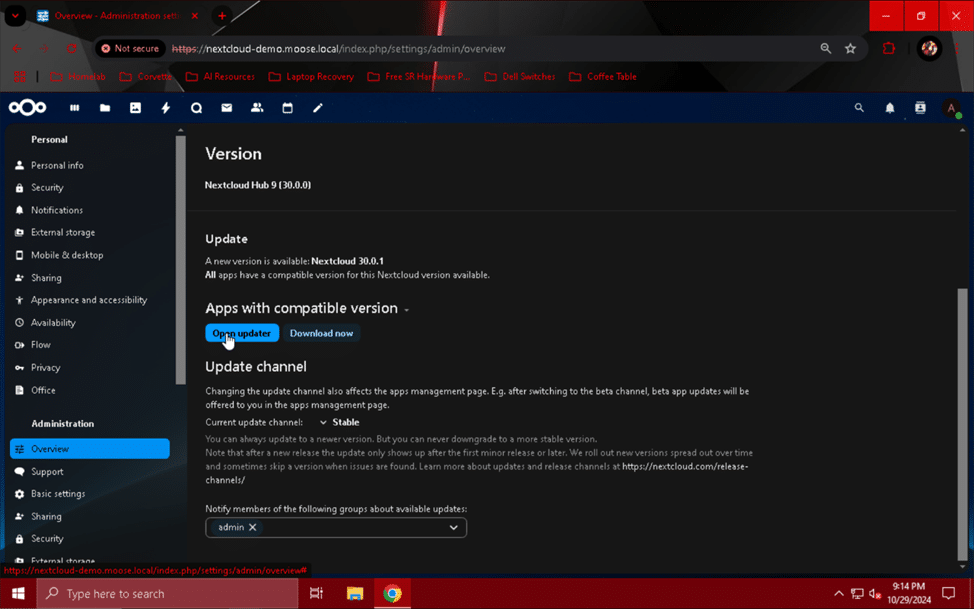
Since Nextcloud wasn’t installed using a package manager, updating the server’s software packages using “apt” won’t automatically push Nextcloud to the next version. To begin upgrading our Nextcloud server, we need to click on the admin user’s profile picture in the top right corner of the web page, and select “Administration settings” from the drop-down menu. On the “Overview” page, we can see an upgrade is available – in this case, version 30.0.1. If an update option doesn’t appear on the “Overview” page, don’t worry, you already have the latest version! Check back here every now and then to see when a new version becomes available.
Once you’ve determined an update is available and you’ve reached a suitable upgrade window, switch back to the server’s console and enter this command:
sudo chown -R www-data:www-data /var/www

This command will recursively set the “www-data” user as the owner of the “www” directory and all subdirectories and files, ensuring that the upgrade process can access and modify any file it needs to.
Once that command has completed, head back to the “Overview” page under the “Administration settings” menu, and click the button labeled “Open updater”. This will bring you to the “Updater” menu.
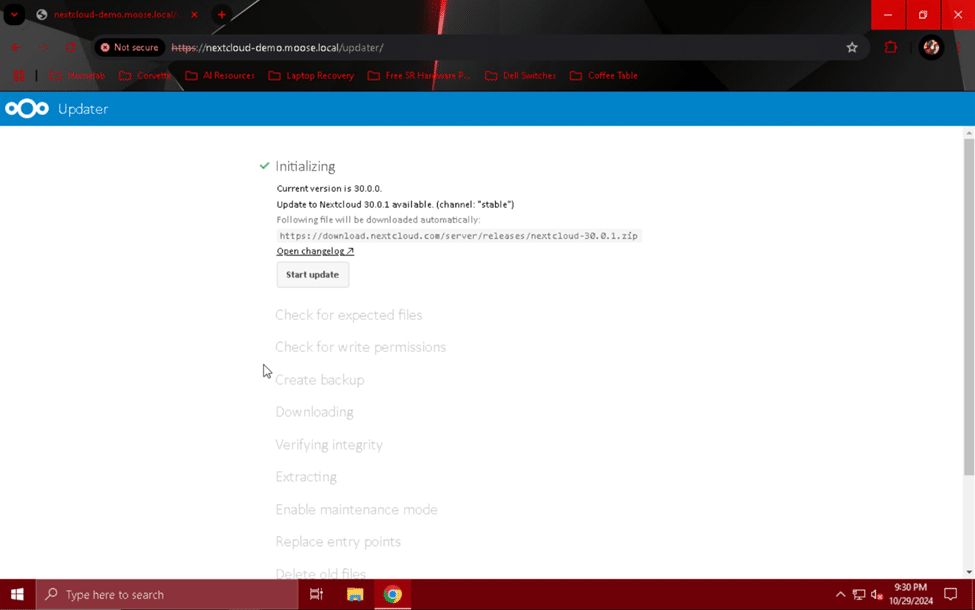
From here, you can click the “Start update” button to begin Nextcloud’s update verification and download process. If everything works correctly, you should see green check marks next to each step before “Continue with web based updater”.
Note: If the update process fails at the “Downloading” step, retry the download until it works. It may take several attempts.
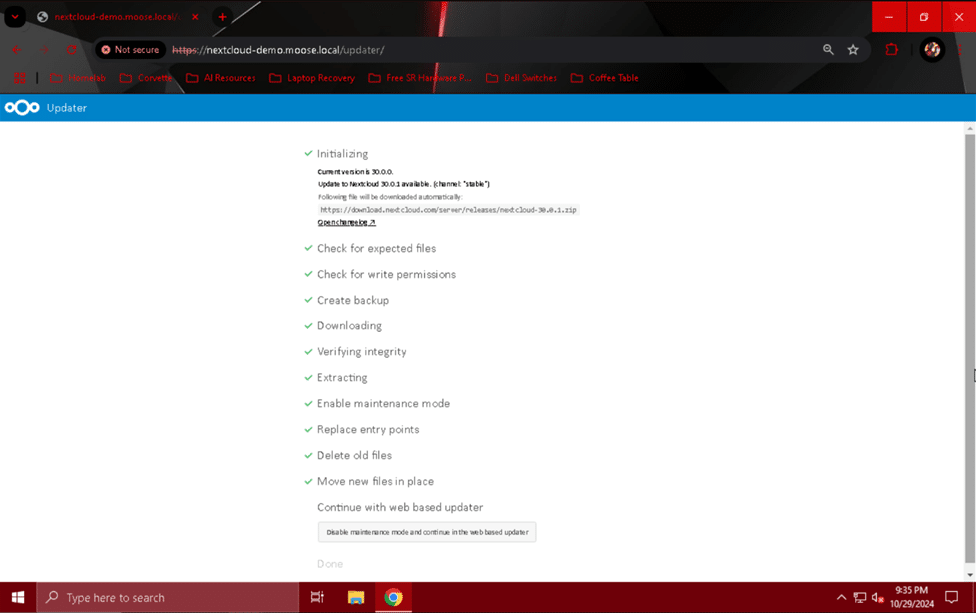
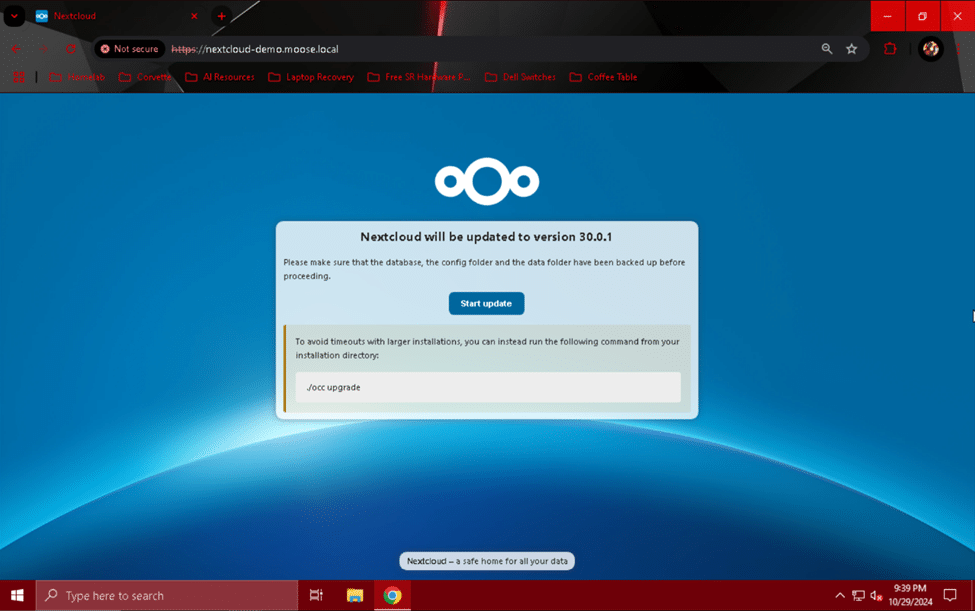
Once all of the green check marks have appeared in the “Updater” menu, click the button labeled “Disable maintenance mode and continue in the web based updater”. On the screen that appears after doing so, click “Start update” to finish the update process and begin applying it.
Alternatively, as suggested by the page for larger or slower servers, you can navigate to the “nextcloud” directory and run the upgrade there manually by using the following commands:
cd /var/www/html/nextcloud
sudo -u www-data php occ upgrade
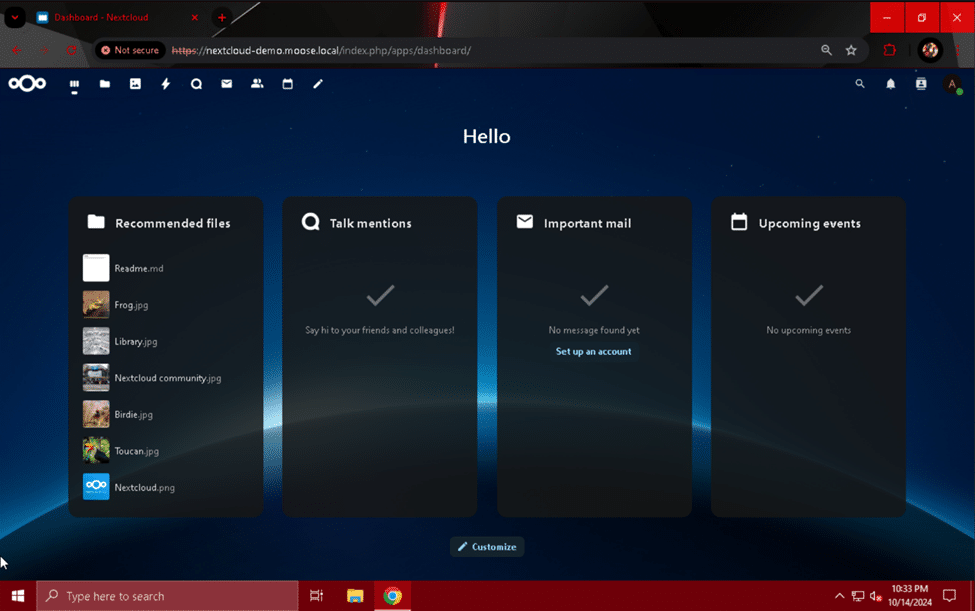
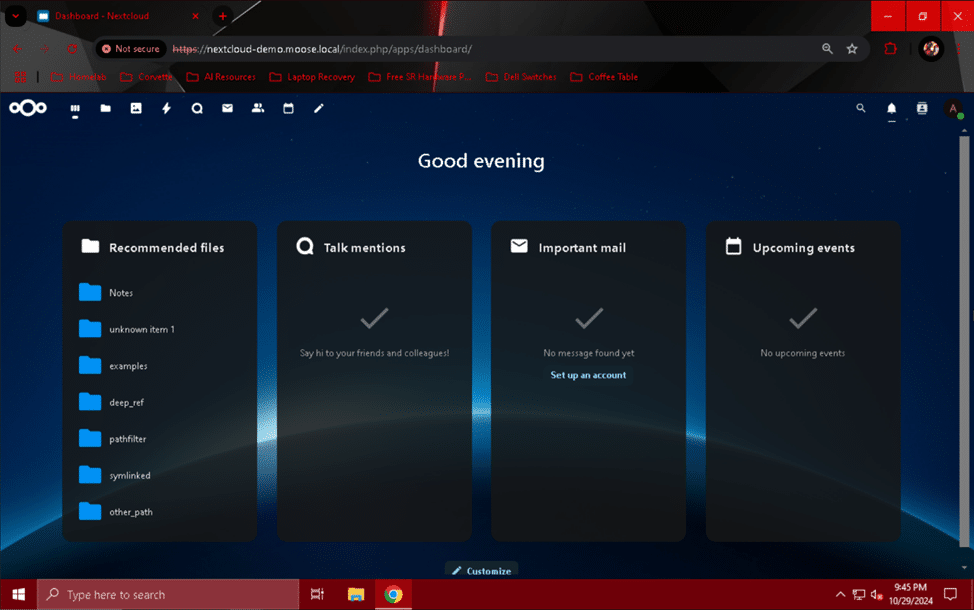
Once the upgrade has finished, you will be redirected to the “Dashboard” page on your Nextcloud server’s website. Your server is now running the latest and greatest version of Nextcloud!
Congratulations! You did it!
You are now the proud owner and operator of a fully functional, hardened, and high-performance Nextcloud server. You may now invite family members or friends to use your server for cloud storage if you wish. Remember, Nextcloud is a highly modular platform, so don’t be afraid to try new apps or change your configuration to meet your needs! Be sure to set up regular backups of the server as soon as possible, and keep an eye on things to make sure everything is working alright.
A Tour of the Author’s Nextcloud Setup
Wow you made it through all of that and you still want more to read? Consider us impressed! Here’s a quick tour and some pictures of the author’s Nextcloud setup if you’re looking for a bit of inspiration:
- Hardware:
- Virtualization server:
- OS: Proxmox Virtualization Environment
- Chassis: Supermicro SC216 w/ optional rear redundant boot drive cage
- CPU: Intel Xeon E5-2683
- RAM: 4x 32 GB DDR4 2400 MHz ECC RDIMMs
- Motherboard: Gigabyte MU70-SU0 (LGA 2011-3)
- HBA: Broadcom SAS 9305-24i
- NIC: Intel X520-DA2 2-port 10 GbE SFP+ adapter
- GPU: NVIDIA Quadro K1200
- Boot drives: 2x Samsung 850 EVO 120 GB SATA SSDs
- Data drives: 24x Samsung 860 EVO 250 GB SATA SSDs
- NAS:
- OS: TrueNAS SCALE
- Chassis: HPE ProLiant MicroServer Gen10 Plus
- CPU: Intel Xeon E-2224
- RAM: 2x 16 GB DDR4 2666 MHz ECC UDIMMs
- HBA: Built in HPE Smart Array E208i-p SR Gen10 Controller
- NIC: HPE Ethernet 560SFP+ 2-port 10 GbE SFP+ adapter
- Boot drive: Micron M600 256 GB SATA SSD (USB connected)
- Cache drives: 2x Samsung 860 EVO 250 GB SATA SSDs (USB connected)
- Data drives: 4x WD Red Plus 4 TB 5400 RPM HDDs
- Backup drive: WD Red Pro 14 TB 7200 RPM HDD (USB connected)
- Modem:
- Netgear CM1200
- DOCSIS 3.1
- 4x 1 GbE RJ45 WAN ports (2-port link aggregation compatible)
- Router:
- OS: pfSense
- Chassis: Dell OptiPlex 7040 SFF
- CPU: Intel Core i5 6500
- RAM: 8 GB DDR4
- NIC: Intel E1G44ET 4-port 1 GbE RJ45 adapter
- Boot drives: 2x Samsung 860 EVO 250 GB SATA SSDs
- Core switch:
- Dell Networking N4032F
- 24x 10 GbE SFP+ ports
- 2x 40 GbE QSFP+ ports
- 1 GbE management port
- Access switch:
- Dell Networking X1052
- 48x 1 GbE RJ45 ports
- 4x 10 GbE SFP+ ports
- Access points:
- OS: OpenWRT
- Linksys EA8300 Max-Stream
- AC2200
- MU-MIMO
- Wi-Fi 5 (802.11ac)
- 1x 1 GbE RJ45 LAN port
- 4x 1 GbE RJ45 LAN ports
- UPS:
- CyberPower CP1500AVRLCD3
- 1500VA
- 900W
- Virtualization server:
- Virtual Machines:
- Proxmox Virtualization Environment:
- 2x Windows Server 2022 Datacenter domain controllers
- Ubuntu Server 24.04.1 Nextcloud web server
- Windows Server 2022 game server
- TrueNAS SCALE:
- Proxmox Backup Server backup target
- Proxmox Virtualization Environment:
Andrew uses his Nextcloud server to host data storage services for his loved ones. Using a combination of an Active Directory domain with redundant domain controllers, a NAS to hold all that user data, and a virtualization server, Andrew has optimized his setup to provide high-performance storage services both at home and anywhere with an internet connection.
The backbone of his setup is the Dell Networking N4032F, which provides 10 gigabit-per-second connections between his Proxmox VE server and the TrueNAS SCALE storage array. Data, management, and storage traffic has been separated into three VLANs, which provide additional security in case of a breach. His access switch provides standard 1 gigabit per second connections to his gaming PC, access points, and other various devices. All servers and virtual machines are monitored by a Raspberry Pi Model 3B+ running Ubuntu Server and an Uptime Kuma instance. As soon as a server/VM goes down, Andrew is notified by email, and in the case of a power outage, the servers are gracefully shut down as soon as the UPS reports a low charge level.
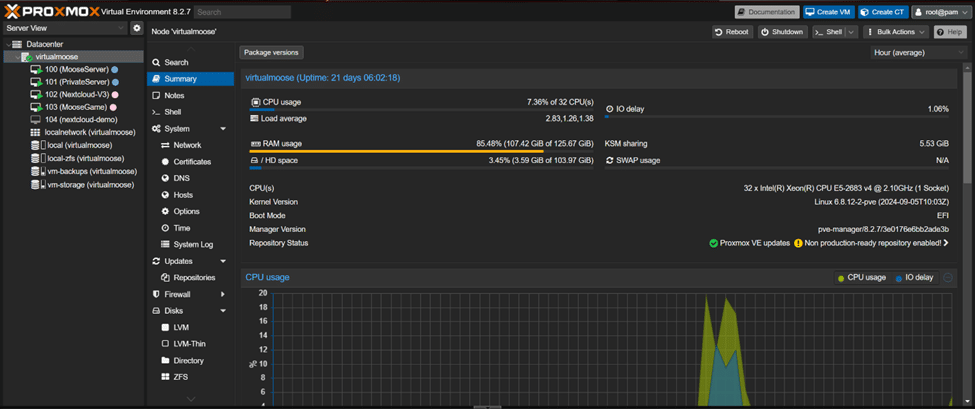
Andrew also custom-built his virtualization server using a Supermicro 24-bay 2U chassis and parts obtained from eBay and other ‘dubious’ sources. In a ZFS RAIDZ2 arrangement, this 24 SSD array of mere consumer-level drives can provide a throughput of approximately 8.2 gigabytes per second for read operations and 2.7 gigabytes per second for write operations to virtual machines, as measured here on a Windows Server 2022 VM:

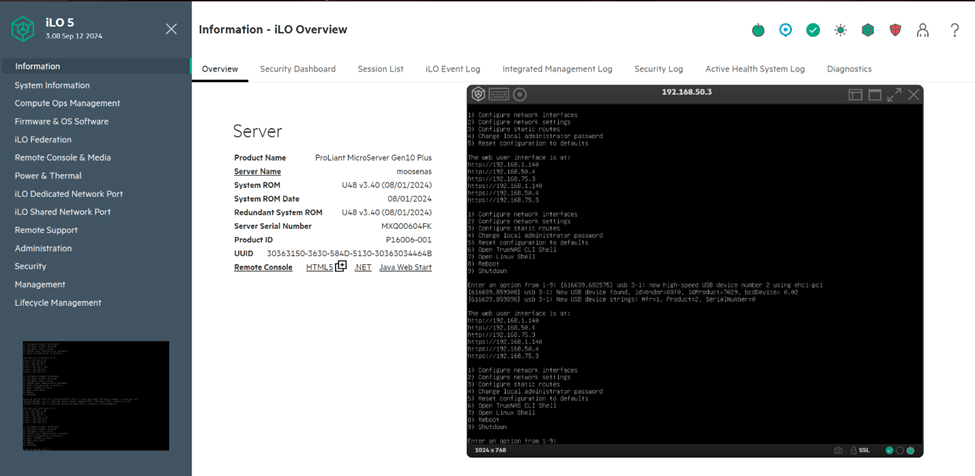
 The real star of the data storage show is Andrew’s HPE ProLiant MicroServer Gen10 Plus, which holds four WD Red Plus 4 TB hard drives, and is haphazardly connected via USB 3.2 Gen2 (10 Gbps) and Gen1 (5 Gbps) to a Micron SSD for booting TrueNAS, a WD Red Pro 14 TB drive for backup storage, and two more Samsung 860 EVO SSDs for caching. To be clear, Andrew does not recommend doing that, but likes to push what’s possible with the hardware he owns. Five nines of reliability are absolutely not guaranteed here under any circumstances, folks.
 Other notable devices include a repurposed Dell OptiPlex 7040 SFF PC, which runs pfSense to provide routing services for his homelab’s various subnets, and the Netgear CM1200 modem, which surprisingly supports link aggregation for some reason. Did we mention that every server data connection, 1 or 10 GBps, is fault redundant? This would allow Andrew’s storage system to theoretically share data at a rate of 20 Gbps bidirectionally, under particular conditions, with multiple connections occurring simultaneously. If only he had the right drives to get anywhere close to that!
 Conclusion
We hope you found some value in this long-winded but detailed Nextcloud setup guide. Doing things the hard way often has benefits, and knowing more about your cloud storage works is always good. If you haven’t done so already, subscribe to the StorageReview newsletter to get more server, storage system, and homelab articles, and check us out on YouTube, TikTok, X (formerly Twitter), or Instagram!
References/Sources:
- https://www.linode.com/docs/guides/how-to-install-nextcloud-on-ubuntu-22-04/
- https://docs.nextcloud.com/server/latest/admin_manual/installation/example_ubuntu.html
- https://docs.nextcloud.com/server/latest/admin_manual/contents.html
- Various pages
- https://www.php.net/manual/en/ini.core.php
- https://nextcloud.com/
- https://ubuntu.com/download/server
- https://www.digitalocean.com/community/tutorials/how-to-create-a-self-signed-ssl-certificate-for-apache-in-ubuntu-16-04
- https://snapcraft.io/install/core/ubuntu
- https://docs.clamav.net/manual/Usage
- Various pages
- https://docs.nextcloud.com/server/latest/admin_manual/configuration_user/user_auth_ldap.html
- https://docs.nextcloud.com/server/30/admin_manual/configuration_files/external_storage/smb.html
- https://docs.nextcloud.com/server/latest/admin_manual/configuration_server/caching_configuration.html
- https://www.php.net/manual/en/intro.apcu.php
- https://www.php.net/manual/en/apcu.configuration.php
- https://developers.cloudflare.com/cloudflare-one/connections/connect-networks/
Engage with StorageReview
Newsletter | YouTube | Podcast iTunes/Spotify | Instagram | Twitter | TikTok | RSS Feed